Once your report or Dashboard is done, we can publish the work done in Power BI Service. In this way, we can share the report or Dashboard created with other people who are or are not Power BI users, and we can schedule the reports to be updated as often as we need, connecting to the data source so that our report is always updated..
One of the advantages that Power BI Service offers, as a data management and modeling tool, is being able to work collaboratively, so that working as a team simultaneously, and using the same report, is not a problem. A system with which we can share and access the work of other people, a work model that also allows us to propose changes, edit the data, or add comments on the work that another person has done. In this sense, it is essential that our reports, on which we, and perhaps other people, are going to work, always reflect the updated data regarding our data source or database. As you already know, we refer to the data that we use to import into Power BI.
Power BI Service is the Power BI Desktop add-on to be able to work online, collaboratively, to share the work done in Power BI Desktop, and to be able to work in a more automated way as well, as we will see below and we are going to explain..
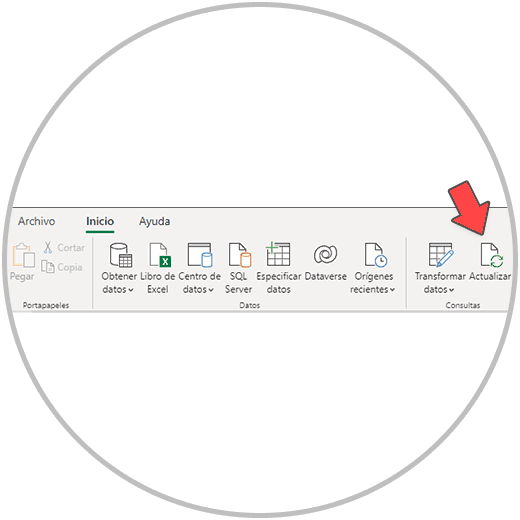
Although it is true that we can update the reports from Power BI Desktop, from the "Update" button on Start, there is a way to update the data automatically in Power BI. Not from Power BI Desktop, but from Power BI Service.
In order to update our reports automatically, with the frequency that we decide, we must have a Power BI Service license . There is also a free version from which we can start working to start seeing the advantages of connecting Power BI Desktop with Power BI Service..
As we already explained in differences between Power BI licenses, with the free version you will also be able to publish your reports in the "Power BI Service workspace". You can even share the report through a link, although we must take into account that there is no security in this sense since anyone with the link could access the report. And that therefore if there is confidential information, a method must be established that is more secure. (using a Pro or Premium license)
The free version is not designed to be able to work collaboratively. If working as a team, in a collaborative way, is a sine qua non requirement in your case, then you will end up using a Pro license or a Premium license.
However, going from a free license to a paid one (Pro and Premium) is something you can do at any time. To get started, we recommend you start with the free version and explore the limits, if they exist in your case. We are going to explain below how to publish the report, and as you can see below, we will do it from the free version.
1 How to refresh data in Power BI
Updating the data manually so that your tables, reports and Dashboards work with the same information as the source data is a simple task.
The first thing we must understand is that in Power BI it is not necessary to re-import the data every time the source data changes .
Every time the source data changes, or every time we want to send or share the report, we need to make sure that the source data is up to date, and that the source data is correct, and that we are still working with the same data structure. Same order, columns, etc.
Once we know that the source data is up to date, that new records have been created or the data that we already had updated, in Power BI all we have to do is open Power BI Desktop, open our report, and from the menu Start by clicking “Update”. With these simple steps, we can have updated data from our report or Dashboard every day, week, or month depending on the frequency with which you make the amount. It is not necessary to have to re-import the data, or make the reports from scratch. It is one of the advantages of Power BI, that as we already explained in how to make a Dashboard in Power BI, when we create a report or Dashboard we are creating a template; A template that we can use as often as we want, or as the situation requires, with minimal effort.
Important
Do not change the source of the folder data, nor change the structure of the report. It always tries to feed the data source, which is the data origin, under the same conditions, updating the data on the structure that we already have, and adding new records. If, for example, we add new columns to our source data, and we want to report this information on our Dashboard, or use it to calculate a new measure, or calculated field, it is something that we will have to update in Power BI Desktop.
If the changes are only updates in terms of numerical values, or new records (rows) that have been created, then all we would have to do is, as we have explained, click on "Update".
Each case will be different, and therefore you must understand how the source data is updated to understand how it affects your project in Power BI.
Therefore, it is always advisable to work the depth of the data by adding new rows . As we have already seen Power BI works at the table and column level, the new rows that, for example, are generated in Excel, will be imported into Power BI just by clicking on the update button. As we will see below in the example. If, as we say, the data in the source tables is updated by adding new columns, for example, adding one more attribute to sales, we must understand that this data will also be imported into Power BI. But that we will have to incorporate into our report manually as it is a new column that we had not contemplated.
The usual thing is to work in Excel with columns, where new rows are created to collect the data that changes with a certain periodicity. So, for example, if we have a table where the sales that occur each week are collected, the normal thing would be to have that table with several columns where both the number of sales that have occurred are collected, as well as other attributes of the sale in other columns, like who has sold them, where they have been sold, what has been sold, and at what price.
Steps to update reports in Power BI
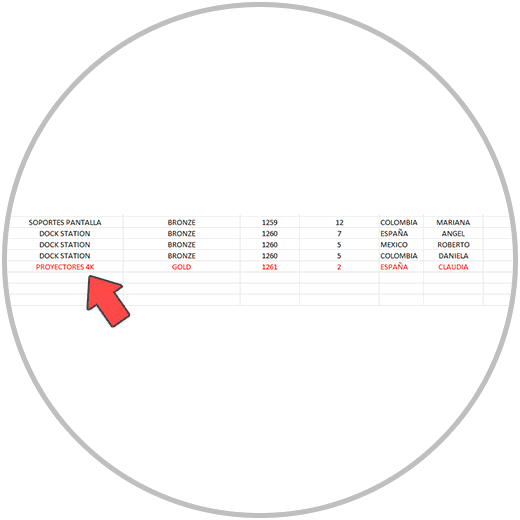
Thus, in the example we are working with, we are going to put a new record in a new row, in Excel, which is the source of the data.
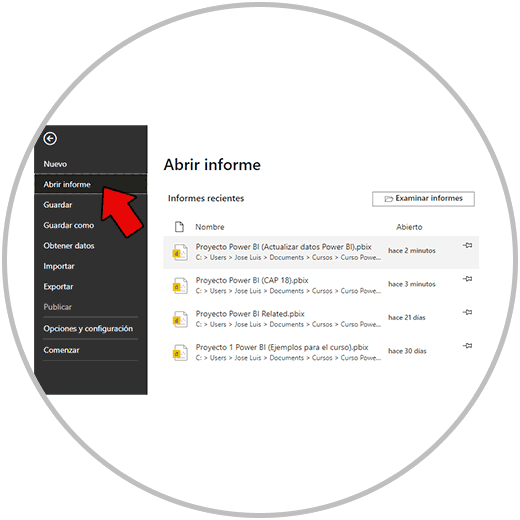
Now we open Power BI, and from the "File" menu, we are going to click on "Open Report" and open the report on which we want to work, where we are going to update the data.
When the report opens, from the taskbar we will look for the option to update.
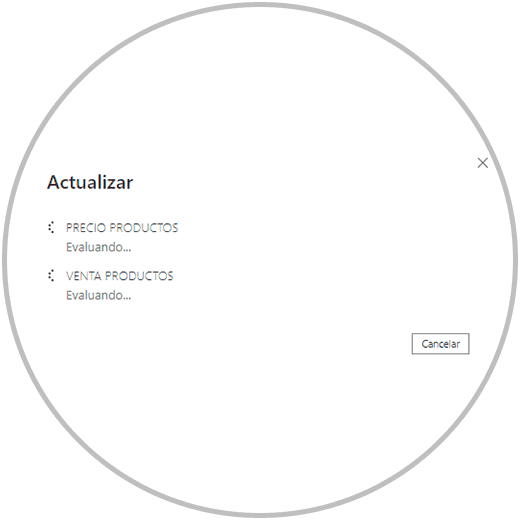
When clicked, it will take a few seconds, the time that the tool will use to make a "call" to the data source, and to update all the information, both in the table view and in the data model, and of course in the reports created.
After a few seconds, we can review how the information has been updated. In the example we had included in the Excel data source, a new row referring to the sale of a new product (4K PROJECTOR), made by a new person who works as a salesperson (Claudia).
We can in any Power BI view, that the data has been updated. In our case, we are going to see how the tables, graphs and visualizations created in our Dashboard have been updated and now reflect the new sales that have been made. As well as the rest of the information that are attributes of the sale have been updated. Who made the sales (Claudia), from where, and what income the sale generated.
Since we already included the data segmentation in the Dashboard to be able to filter the information by salesperson, we are going to see if the new person appears in the data segmentation, which we select and we can see the rest of the updated report and check how everything has been collected. information.
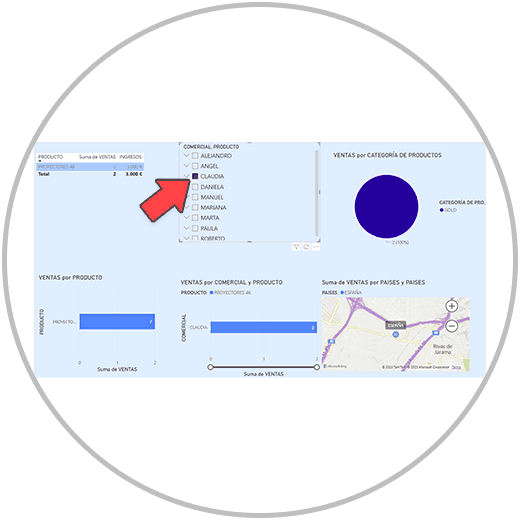
It's that easy, we can update our report in Power BI. As you have seen without the need to import all the data again. This is a task that Power BI performs when we click on the update button.
2 How to publish report in Power BI Service
But there is still an easier way to be able to update our report automatically, and with the periodicity that we are going to establish. It's possible? It is possible, and we will explain how to do it.
The first thing we recommend is to create a Power BI license, if we haven't already created one. Remember that you can consult how to create a Power BI license if any questions arise.
Once we have our license, we are going to open Power BI Desktop again, and we are going to click on the "Publish" button (In the start menu, on the taskbar, as we can see in the image below).
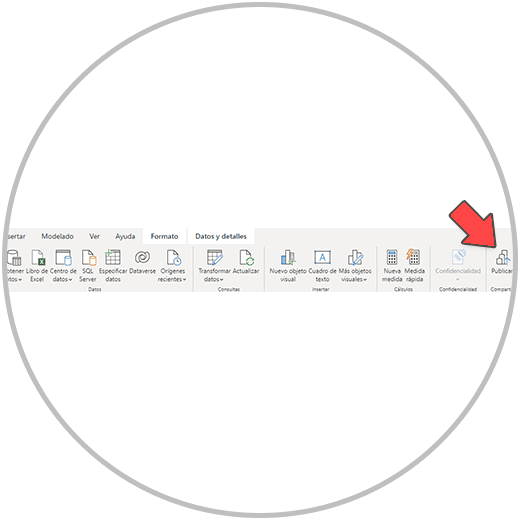
Once we click Publish, it will ask us for changes, if we have not yet saved the latest changes made to the project. Later, it will ask us for the email if we have not yet connected Power BI Desktop with our email account, the same one that we used to create the license.
Next, we will see how we have to select the destination where we want to publish it, which will be in "My work area". We click on “My work area, and click on the “Publish” button.
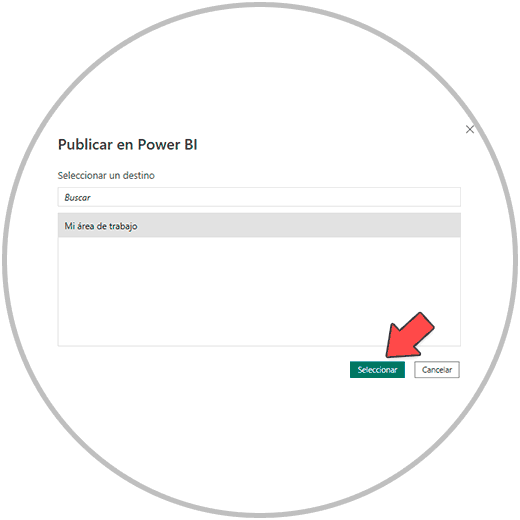
After this process, we can access Power BI Service, from the following link
' class='bbc_url' title='External Link' rel='nofollow external'> Power BI Service
From here, we will see our work published in "My work area", a Power BI Service menu option that we will find in the vertical menu on the left of our screen.
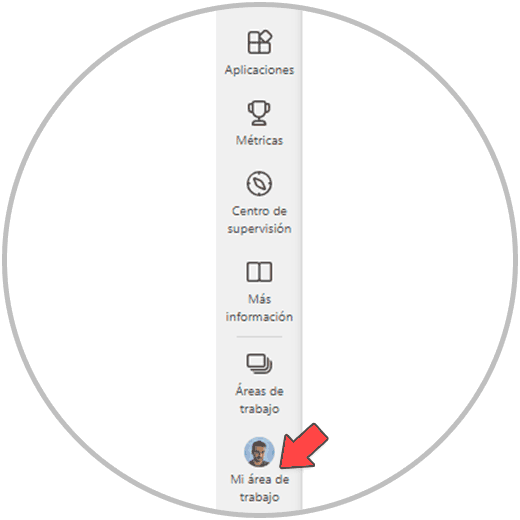
When you enter your work area, you will be able to see the jobs that you have published from Power BI Desktop.
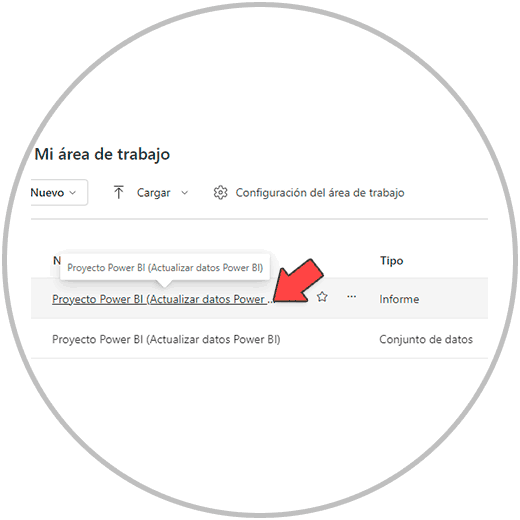
3 How to automatically update reports in Power BI: Schedule updates in Power BI
As we explained to you, there is a way to have your Dashboards updated automatically, without having to press the update button. As we have already learned, our job should be to keep the source of the data updated.
The automatic updating of the data is a task carried out by Power BI Service, that is, we need to have a Power BI license, so that when we have the Dashboard or report finished in Power BI Desktop, it can be published in Power BI Service .
In order to update the data in Power BI automatically, we are going to carry out these steps that we are going to explain to you:
Steps to automate reports in Power BI
The first thing, from "My work area", we are going to go to the right side of the screen, and above we will see several icons. We are going to enter "Settings", which is an icon that has the shape of a nut.

After clicking on "Settings", we look in the "Resources and Extensions" section for the "Power BI Settings" option.
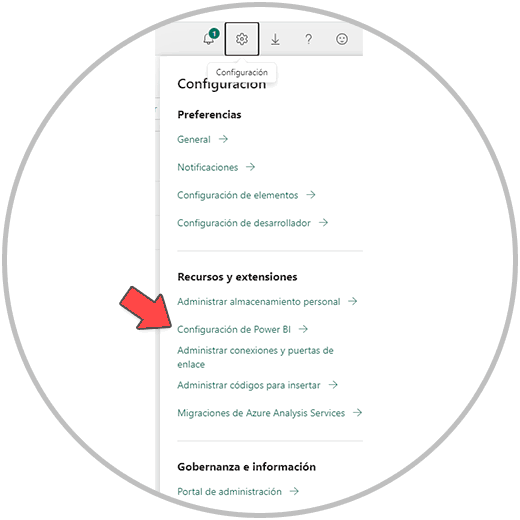
Of the options that we will see in the menu, we are going to enter "Data set", as we see in the image below:
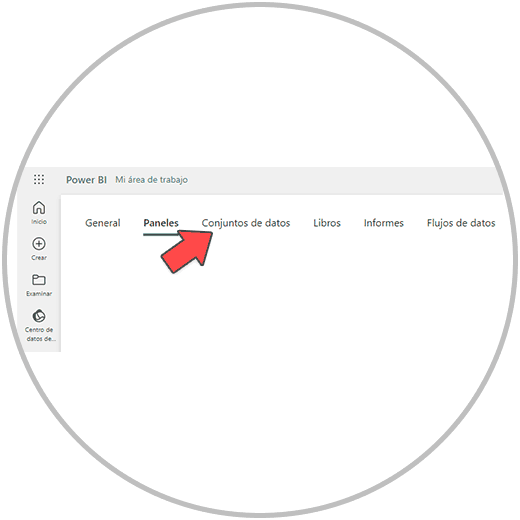
Now we are going to choose the first thing, on which data set we want to make the configuration. We will click on the data set we want to be able to select it.
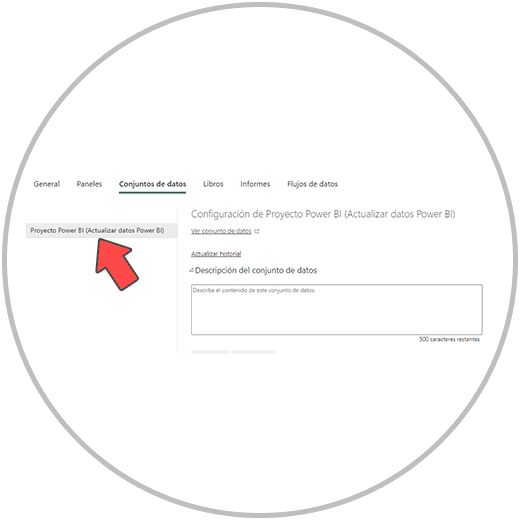
Next, from the options that we are going to see, we are going to click on “Gateway connection”. Here we will see when clicking that a window is displayed, where we will see the gateway disabled. In order to enable the gateway, we are going to click on the green button that says "Install now".
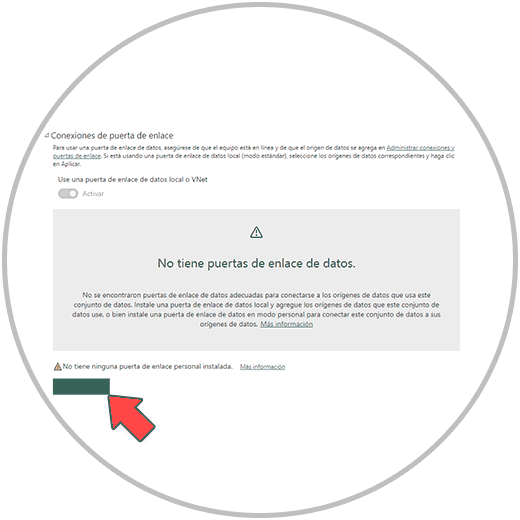
We will see how the download of an executable begins that we will see in the lower left part of our screen. When the download is finished, we will click on the sale and start the installation.
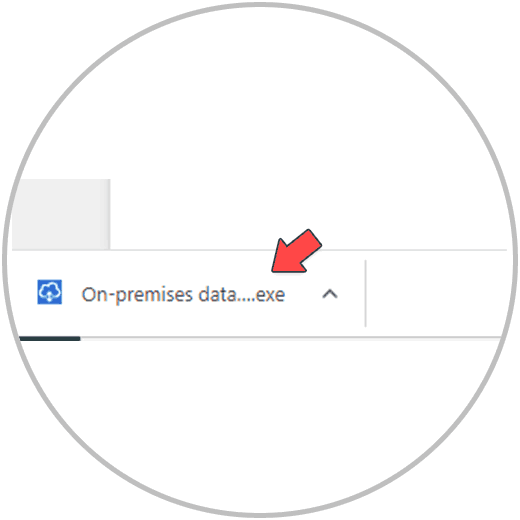
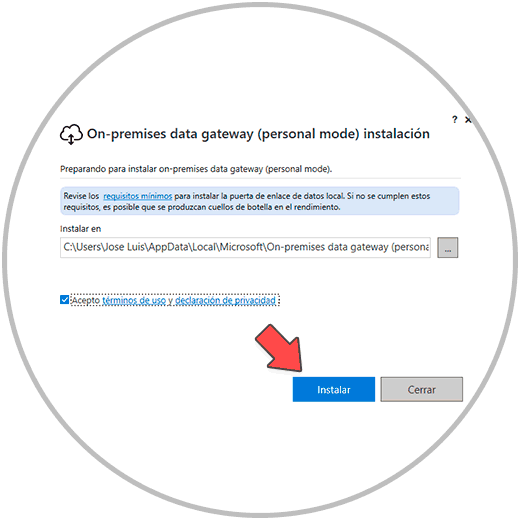
We will click on open, and we will have to accept terms and conditions of use in order to continue with the process. We will click on “Install”.
The process can take several minutes. When it's finished, another sale will jump to us where we have to enter an email, the same one with which you created the Power BI Service account.
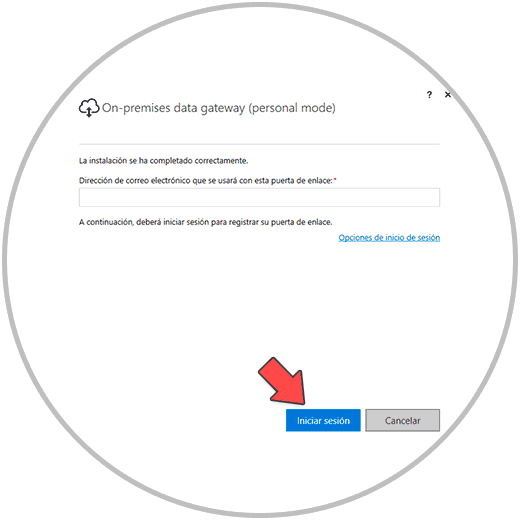
Next, it will ask us for the Microsoft account that we want to use. Once we have selected the account, we will see a window with the confirmation that the gateway is enabled and can be used.
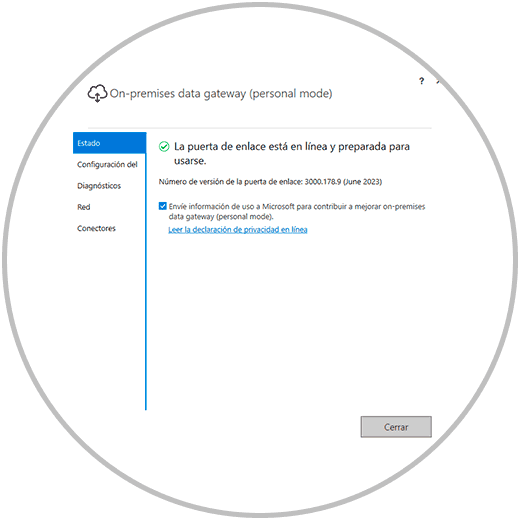
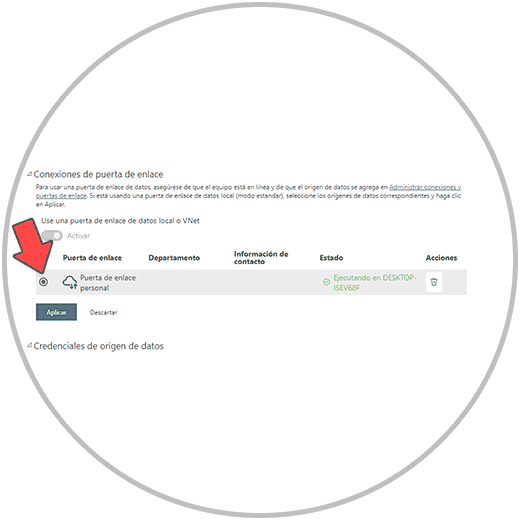
Now we can close the window, and return to Power BI Service. If we go back to "Gateway" now we will see how the new gateway that we have just created appears, which is linked to our email account.
We select the gateway, clicking on the circle that appears inside the gateway, and we will click on the "Apply" button
Now we can see a message like the one we can see below in the image:
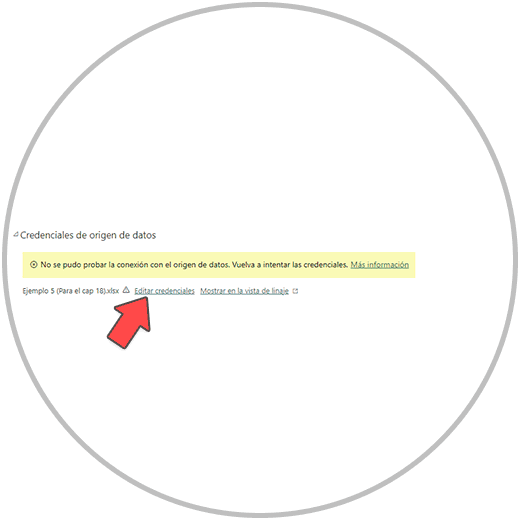
To solve it we are going to configure "data source credentials", by clicking on "edit credentials".
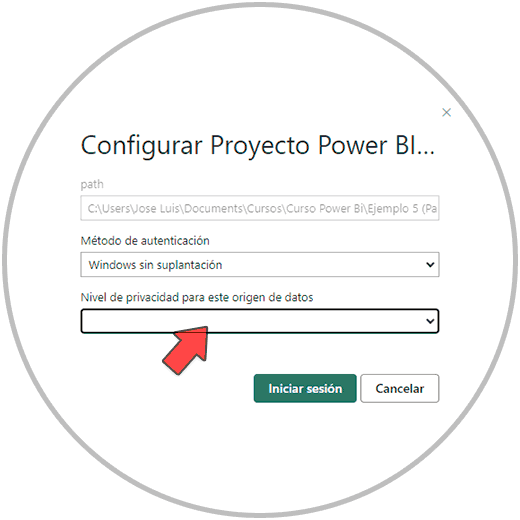
Now in the window that we are going to see, we choose the privacy level of the origin, and click on “Login”.
Next, we look within the configuration menu, where we have configured the gateway, an option that says "Update". When clicked, we will see that several options are displayed, where we have to, first, enable the update, and then set the update frequency.
We therefore choose the desired frequency. We can establish more than 1 hour of updating per day if we wish.
Once we have chosen the frequency with which we want our report to be updated, and we have applied the configuration, we will already have a report that will be updated automatically with respect to the origin of the data. It is very important, as we have told you, that the folder file where it is located is not changed, and it is very important that we maintain the structure of the data source, always thinking that if there is a structural change, or new columns have been added to our report, we will have to review the data model in Power BI Desktop, and the reports in order to understand if any changes need to be made that affect the report visualizations, or if a new measurement or calculation needs to be made, and then represent it in our Data Dashboard.
Understanding what role Power BI Service plays in our project will help you get the most out of the link between Power BI Service and Power BI Desktop, to be able to save reports, update them as often as we decide, and also to be able to share them.