The Google Chrome browser is positioned as one of the best current browsers for its features, configuration and compatibility to be used in various operating systems without problem..
One of the most outstanding features of Google Chrome is the ability to perform reverse searches with which it is possible to use an image as search content to find all the associated images on the web with details such as the location of the origin of that image and other sites where that image was used.
When you perform a search with an image in Google Chrome , the search results may include the following items:
- Sites that contain the image.
- Other sizes of the image that was searched.
In another tutorial we saw how to perform reverse search from our mobile devices such as Android or iPhone , or PC..
To keep up, remember to subscribe to our YouTube channel! SUBSCRIBE
Today we focus on how to do it directly from Windows File Explorer 10, 8, 7.
To make use of this reverse search directly in Windows Explorer we will use the GoogleImageShell utility. Those who are often using this type of reverse photo search, you will like this extra to streamline this process with your local images..
GoogleImageShell will not be installed as a program and you should keep in mind that it makes some changes to the operating system registry , it is not crazy to make a backup of the Windows Registry first.
Remember that if you move the application to a different folder, the application will not work.
GoogleImageShell can be downloaded from the following link:
GoogleImageShell
Note
GoogleImageShell will require Windows 7 or higher and .NET 4.6.1 .
1. How to install GoogleImageShell on Windows 10, 8, 7
Step 1
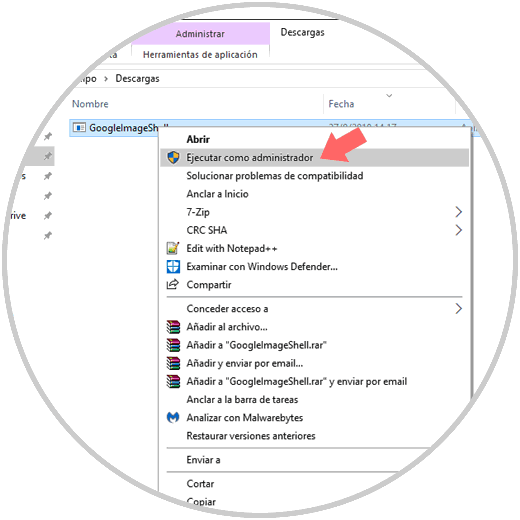
To install GoogleImageShell only for the current user of the system, we must run the .exe file. and if you want to install GoogleImageShell for all users, we must right click on the .exe file and select the option "Run as administrator":
Step 2
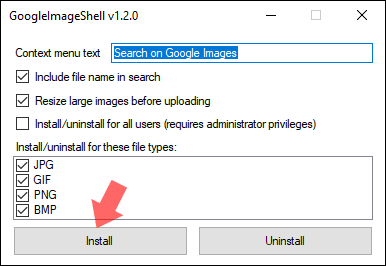
Once executed, it will be possible to change the default context menu text.
Note
As an extra, it will be possible to select if you want to include the file name in the search or resize large images before they are loaded.
GoogleImageShell works with PNG, JPG, GIF and BMP formats so that there we can select with which of these formats the reverse searches that we want to perform every day should be used.
Click on the "Install" button
Step 3
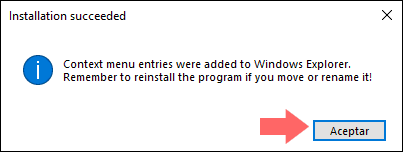
The following message will be displayed. Click on "Accept" to exit the wizard and we can exit the tool installer.
2. How to perform reverse image search with Google on Windows 10, 8, 7
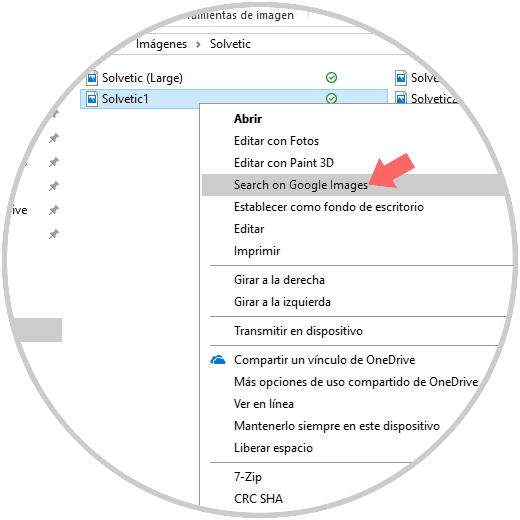
To carry out the search process for an image stored locally, we will open the File Explorer and go to the image to be used in the reverse image search process.
Once located, we will right click on it and select the name that we have given it in the initial process, in case of not having established any name, we will see the text "Search on Google Images":
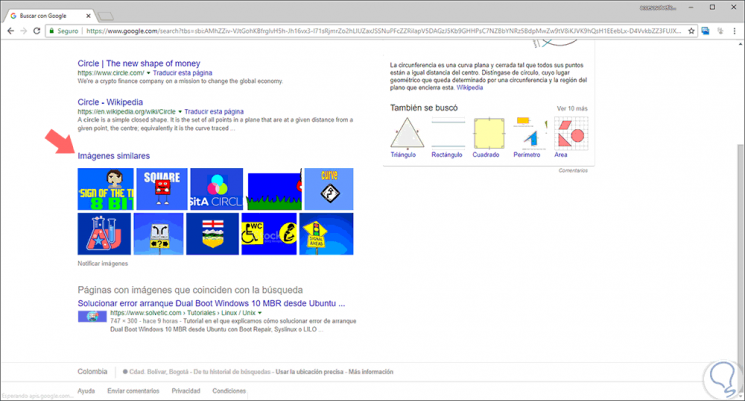
This will make the default browser open with the results which may include similar images, sites that include that image and other sizes of the selected image:
3. How to uninstall GoogleImageShell utility in Windows 10, 8, 7
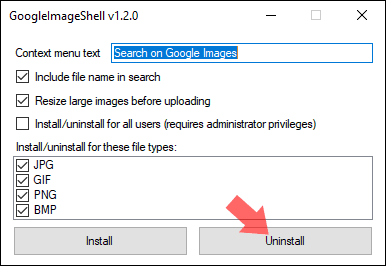
To uninstall this utility, just run the downloaded file again where we will see the following. There we click on the "Uninstall" button
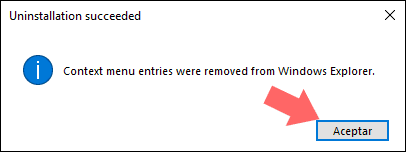
The following message will be displayed indicating that it has been successfully removed from the system:
Thus, this practical tool allows us to carry out the reverse search process simply on Windows systems from File Explorer directly .