The File Explorer in Windows 10 has been around for years in Windows being the central point from where we can access documents, libraries of the system and storage units, therefore the File Explorer has some features to better manage items there saved and item boxes are one of them. These boxes have been present since Windows Vista and allow you to clearly see which object has been selected..
This is useful if we manage Windows 10 on portable devices, but it can be somewhat annoying on our PC if we select several files and those checkboxes are appearing. TechnoWikis will explain to you how to deactivate the File Explorer check boxes completely in Windows 10.

We also leave you the video tutorial with the necessary steps to remove Windows 10 File Explorer boxes or File Explorer check boxes..
To stay up to date, remember to subscribe to our YouTube channel! SUBSCRIBE
Remove boxes from Windows 10 File Explorer
Step 1
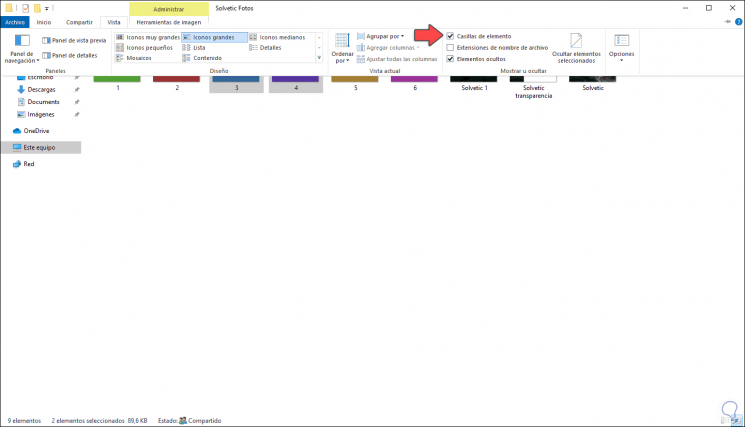
This process can be carried out directly from the File Explorer in the View menu and there by deactivating the option "Element boxes":

Step 2
As a result we will see the following:

Step 3
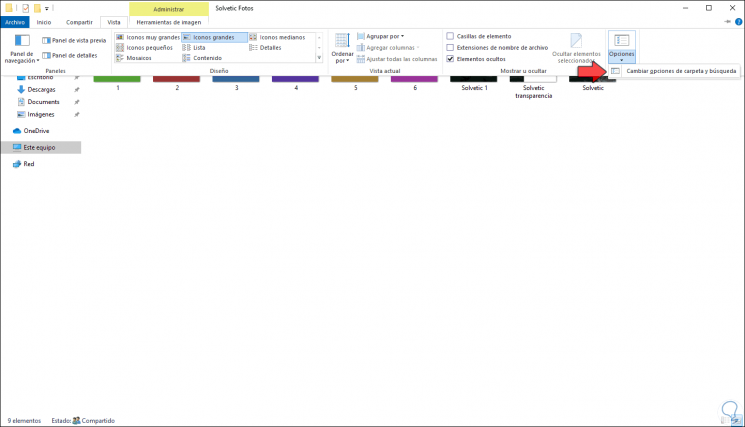
Another way to achieve this is in the same Explorer go to the menu View - Options - Folder options:

Step 4
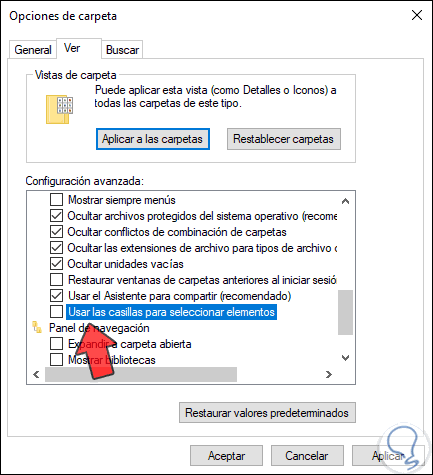
In the displayed window we will go to the View menu and there we deactivate the box "Use the boxes to select elements". We click OK and Apply to save the changes.

With any of these methods it will be possible to deactivate the item selection boxes in Windows 10 Explorer and have better control over the elements.