To stay up to date, remember to subscribe to our YouTube channel!
SUBSCRIBE ON YOUTUBE
As Windows 11 users we connect to the computer (PC or laptop) practically daily to carry out our personal or work activities, this is something that millions of people do, but for health and well-being it is ideal to reduce a little the time we spend in front of to the screen and also the team will thank us..
Excessive use of the battery, a greater increase in bills and a reduction in the useful life of the components are some of the things that can be affected by using the equipment for long periods of time, TechnoWikis will explain in this tutorial various ways to see the battery life. screen activity in Windows 11 and thus take proper control over it.
1 View screen time Windows 11 from Settings
This is one of the simplest and much more dynamic methods to use to see the time on the screen, it applies to portable equipment or laptops since its focus is directly on the battery.
Step 1
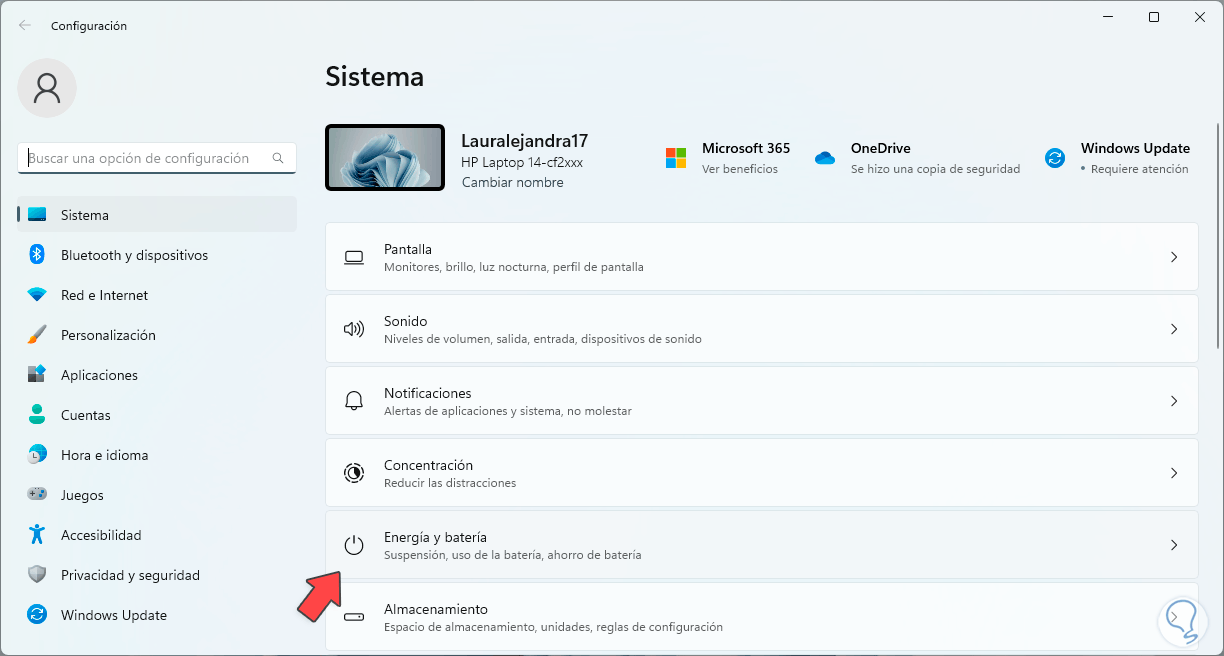
For this step we are going to click on the Start menu and then click on "Settings", there we go to the "System" section and then click on the "Power and battery" option:
Step 2
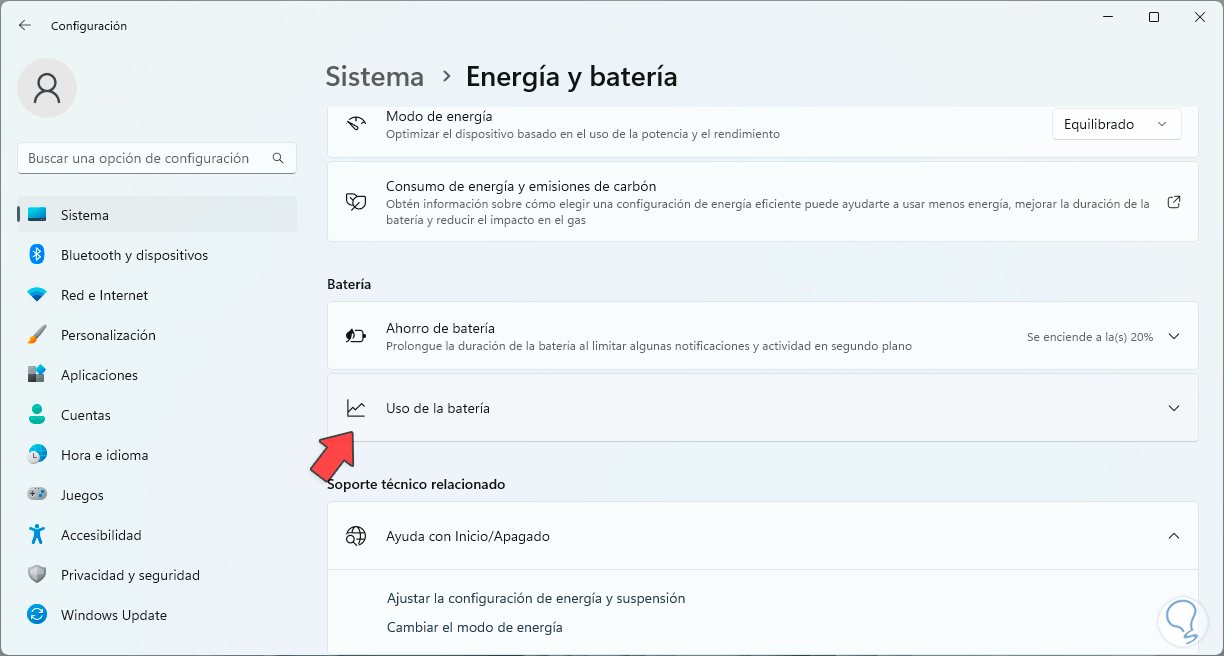
By clicking there we go to the bottom to click on the "Battery use" option:
Step 3
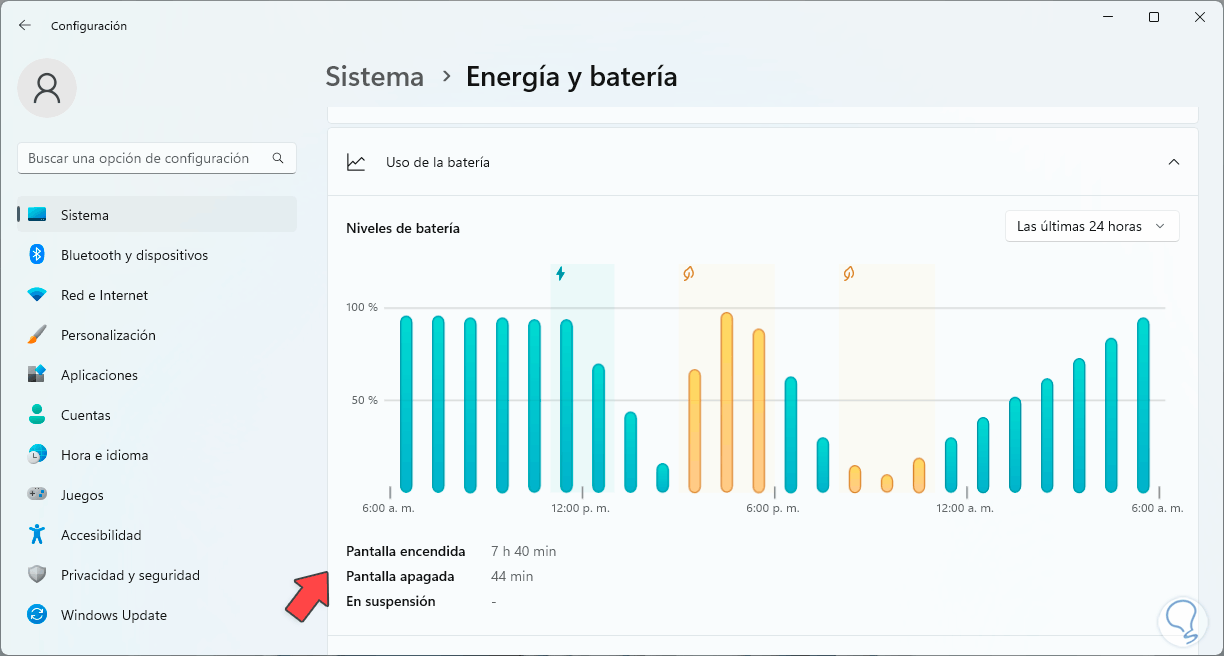
We will see by default the values of the last 24 hours of use:
Step 4
The bars indicate the hours where there were the highest usage peaks, we will see the screen on and off time at the bottom in the “Screen on” and “Screen off” options respectively.
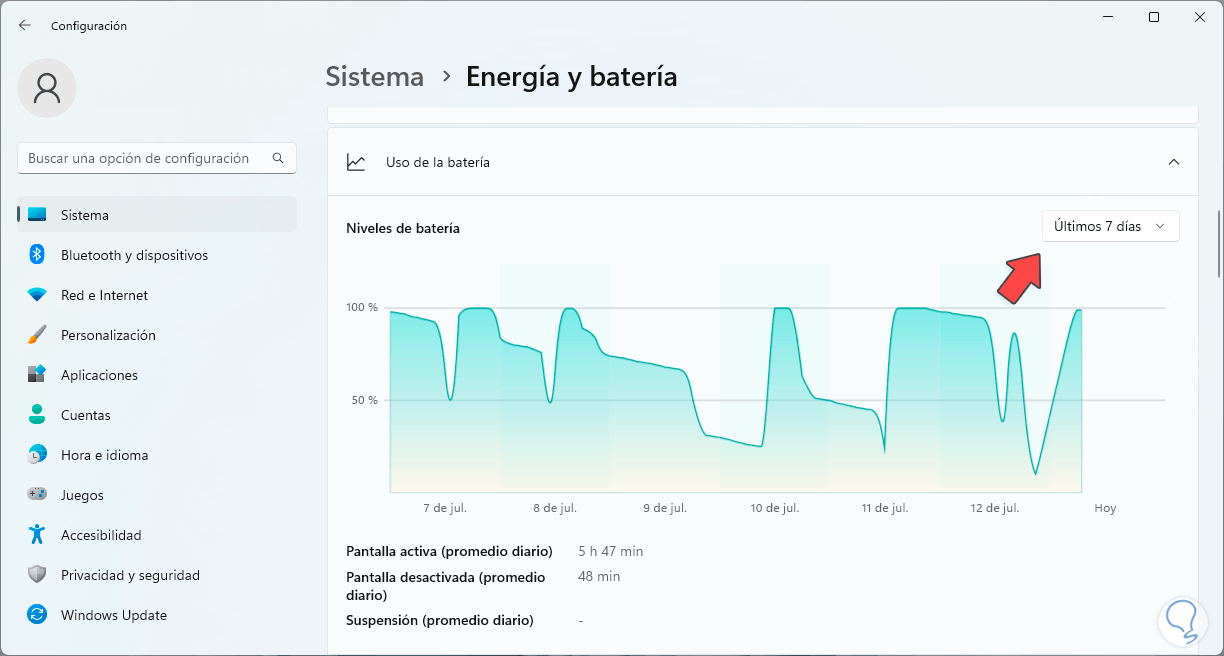
We can see the values in the range of the last 7 days:
2 See Windows 11 screen time from PowerShell
Through the PowerShell console we can resort to a command to access this information.
Step 1
Let's open the PowerShell console from the Start menu:
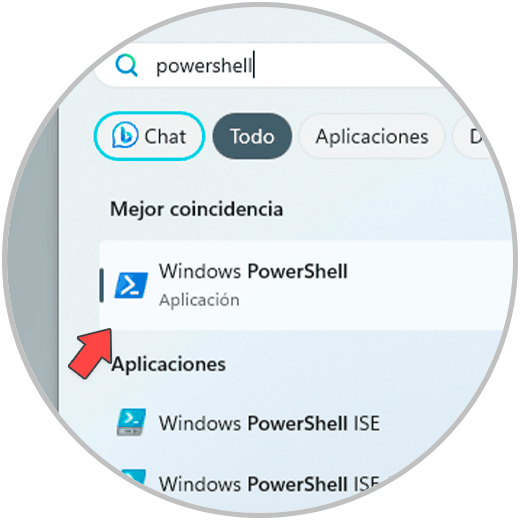
Step 2
Now we execute the following command to access the screen activity information in different measures:
(get-date) – (gcim Win32_OperatingSystem).LastBootUpTime
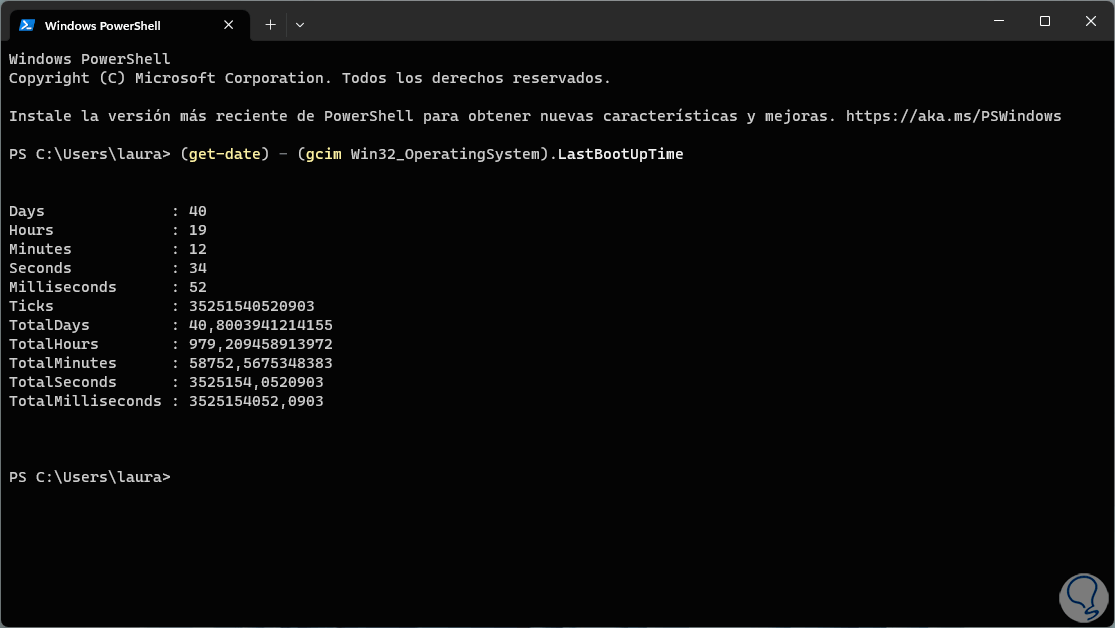
We see the options from days to milliseconds of active screen use in Windows 11..
3 View Windows 11 screen time from Task Manager
Step 1
Through the Task Manager it is possible to see the screen activity time, we are going to right click on the Start menu and in the list we click on the "Task Manager":
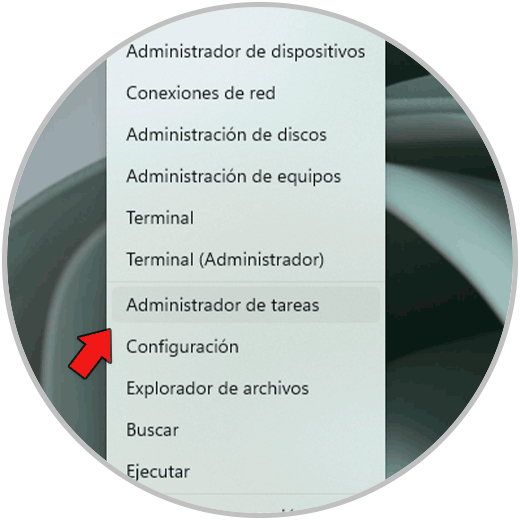
Step 2
In the Task Manager we go to the "Performance" section. There we click on "CPU" and at the bottom we will see the activity time of the screen in the line "Active time", this is represented in hours, minutes, seconds and milliseconds.
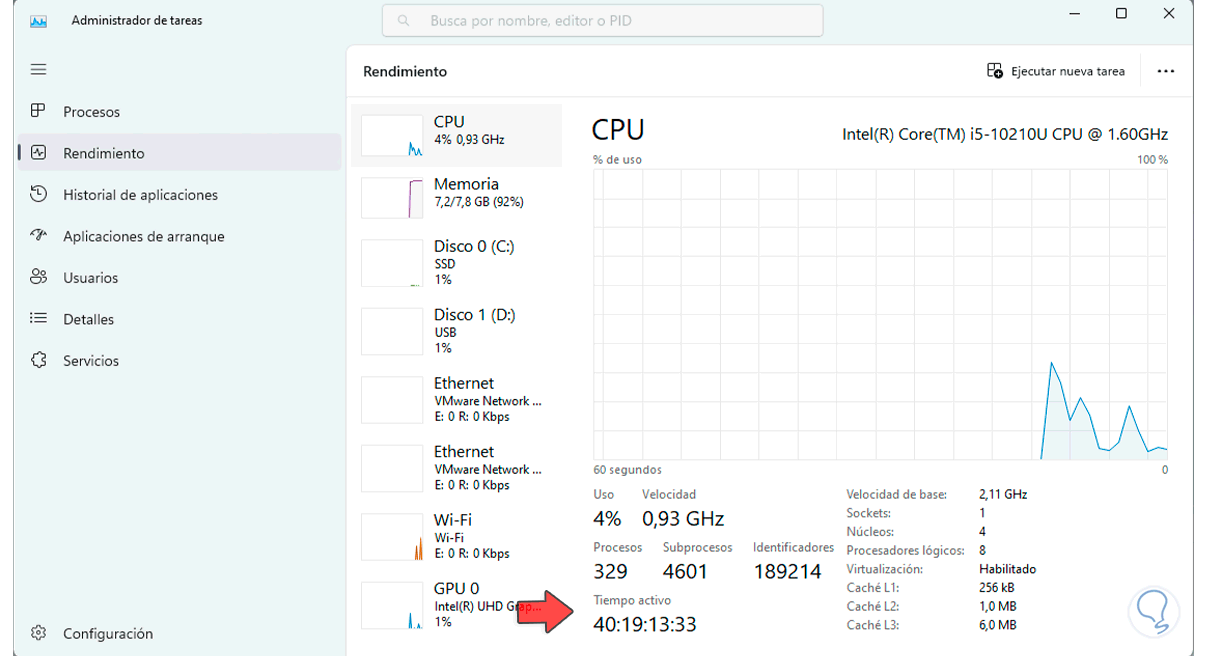
4 View Windows 11 screen time from Control Panel
Finally we have the possibility of seeing the screen activity time from our network, this since at the moment the screen is activated and the system as such will activate the network adapter to establish the connection.
Step 1
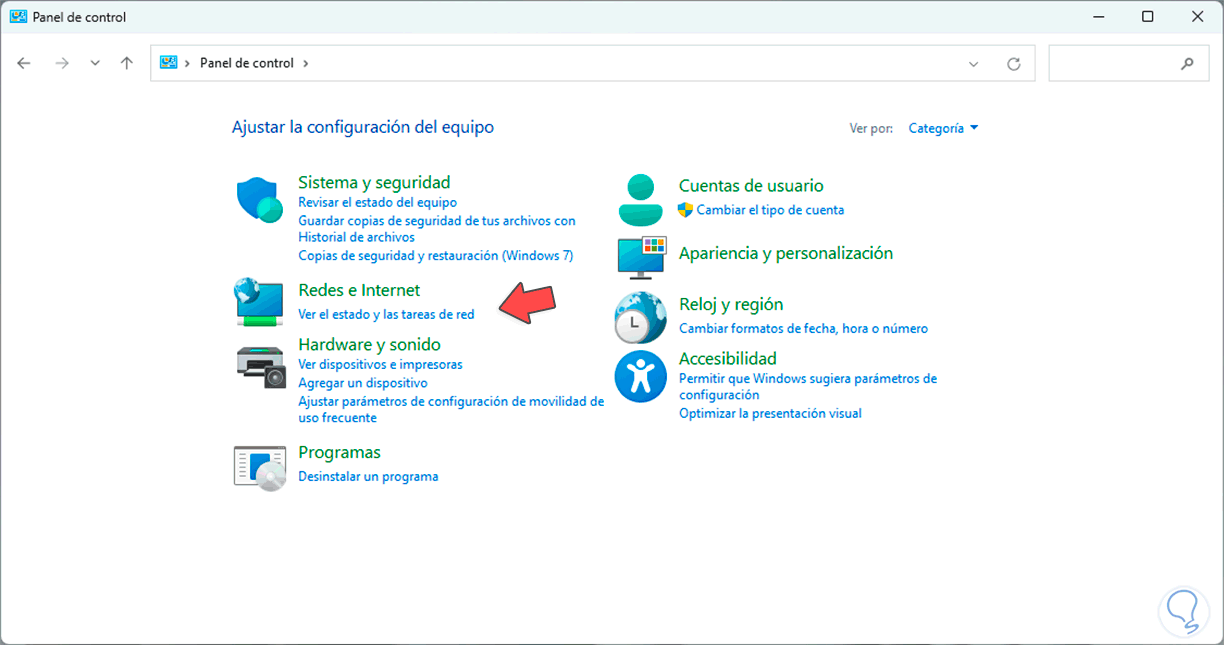
To start we open the Control Panel from the Start menu and we will see the following:
Step 2
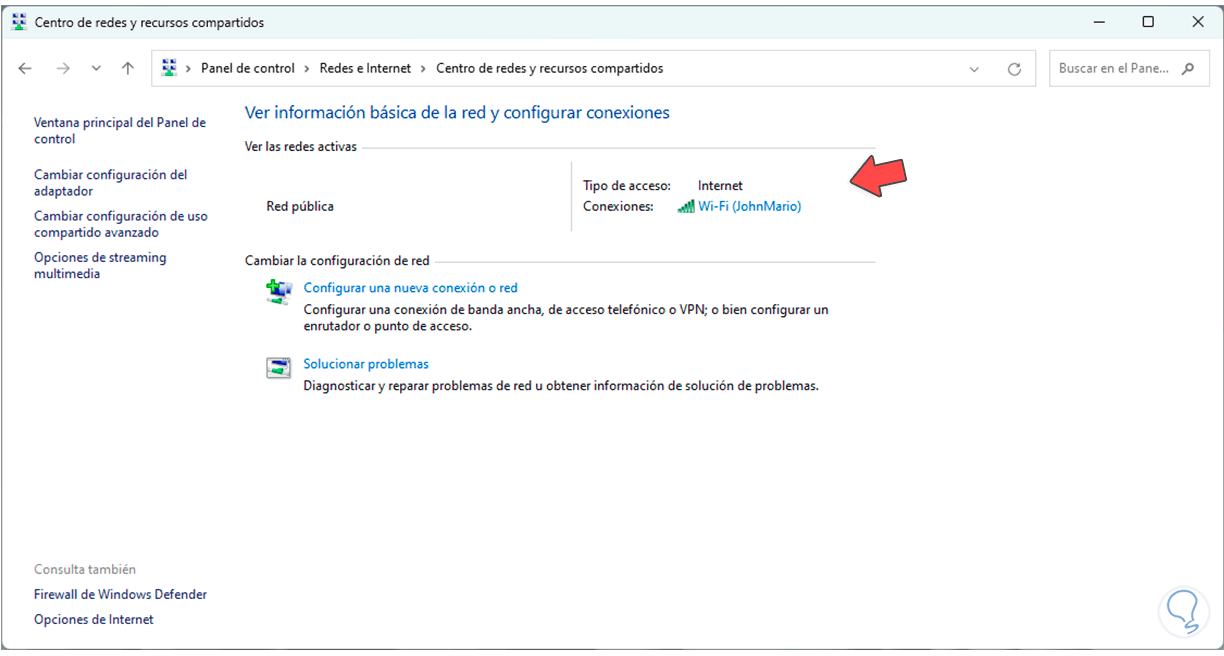
There we are going to click on the line "View the status and network tasks" to display the following:
Step 3
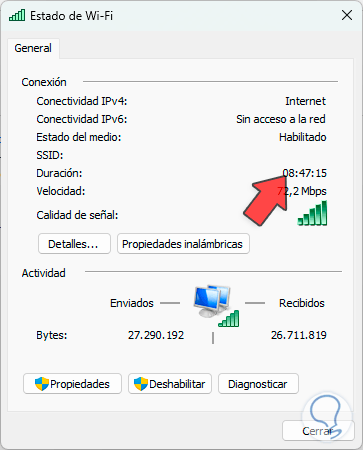
Then we click on the name of the current network and in the "Duration" line it is possible to see the activity time of the screen:
Step 4
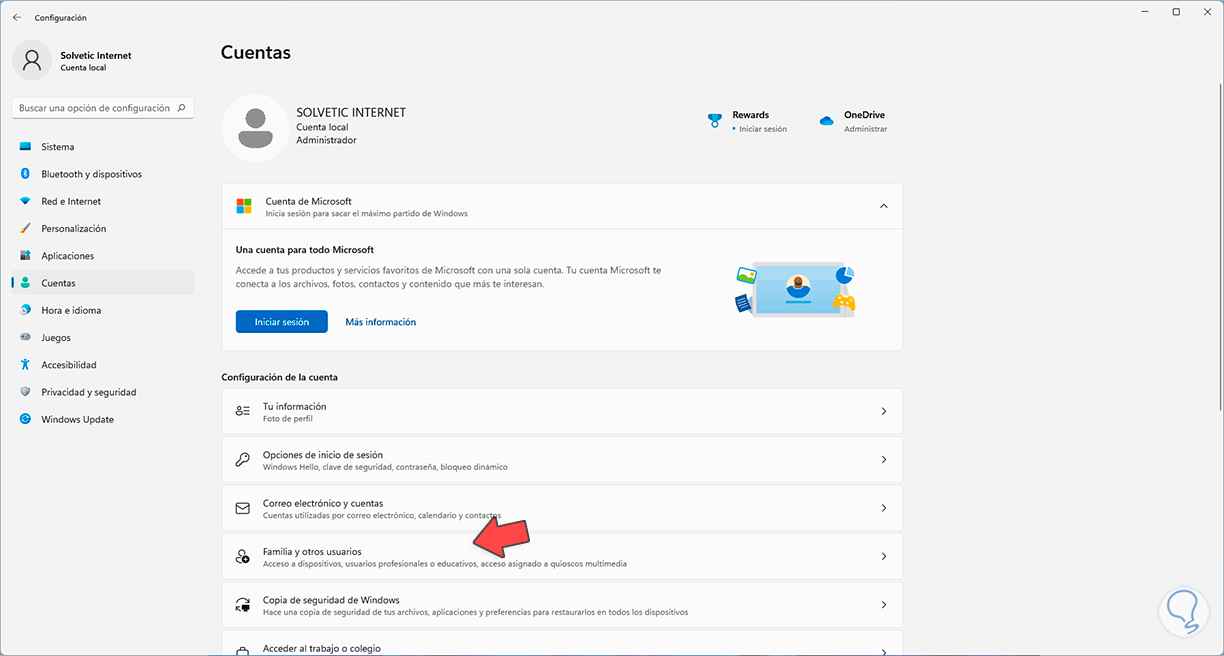
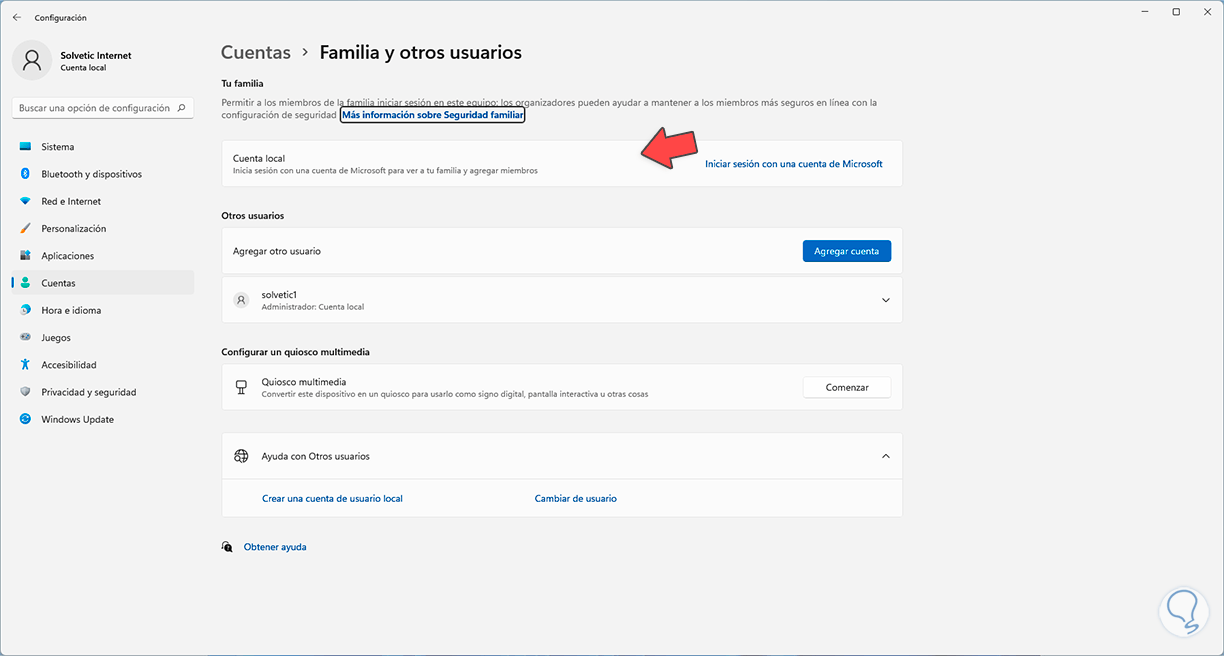
In addition to this, TechnoWikis tells you that you have some ways to see the time on the screen, one of these is using the family mode which allows you to add a family member and keep track of their activities including the time on the screen.
If you want to use it you must go to
step 5
Then in the "Your family" section add the person to monitor:
step 6
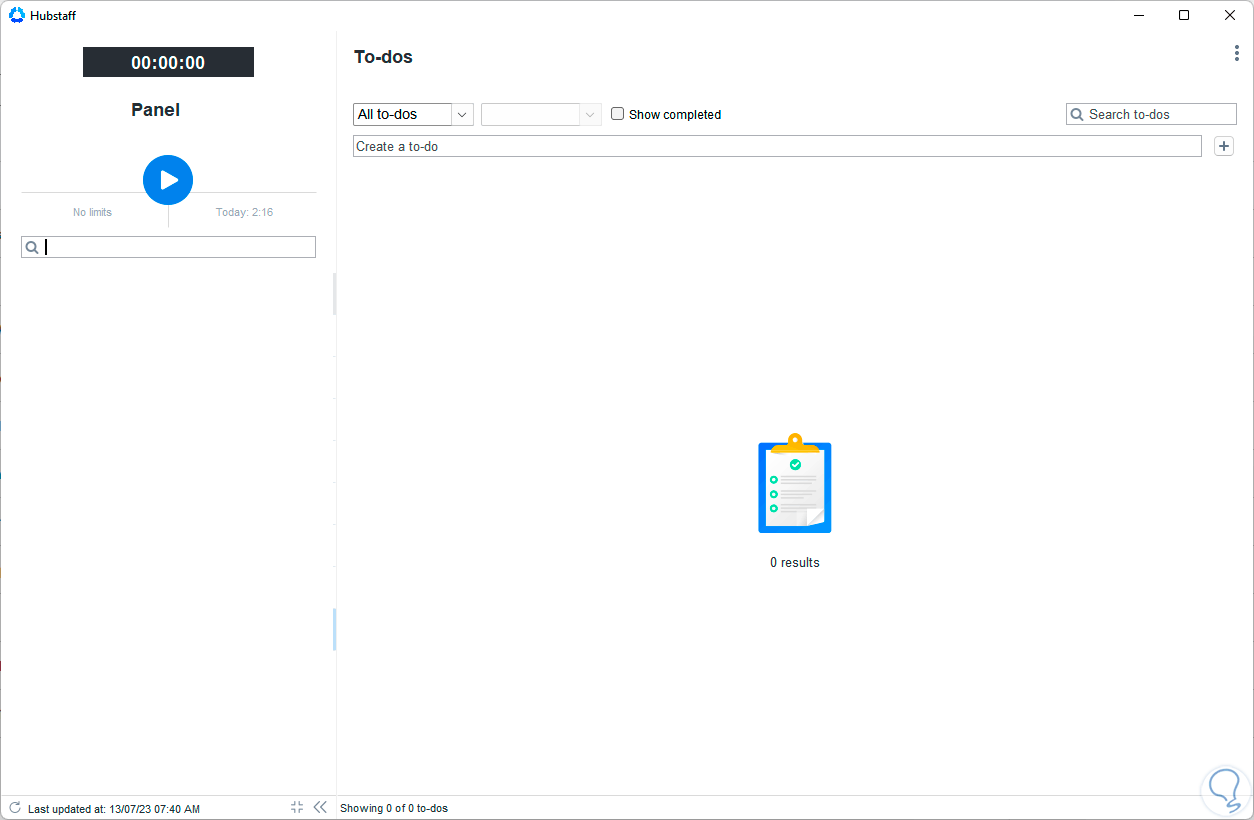
In addition to this, you can make use of applications such as Hubstaff that monitor screen time for administrative and control tasks:
It's that simple to check screen uptime in Windows 11.