The updates of the Windows 10 operating system are one of the basic security tasks that we must keep in mind since they include improvements at the system and application level , news, new system versions and many other functions that aim to optimize the use of Windows 10..
Now, an error is currently being presented at the time of applying the updates, we know well that Windows 10 prepares the installation, then downloads the available updates , installs them locally and then the system restart is required so that these updates are applied worse during the process we find the error "We could not complete the updates" and we proceed to undo the changes and do not apply any updates:

This alert will be displayed when the computer restarts and simply undoes all the actions or generates the typical blue screen with an error code. TechnoWikis brings a series of practical solutions to allow Windows 10 to download and install correctly the updates available for the system.
1. How to access the system in Safe Mode in Windows 10
By accessing Windows 10 in Safe Mode we are accessing without drivers and services so that we can carry out support and management tasks in a much more complete way.
To access this secure mode in Windows 10 we have the following options:
Option 1
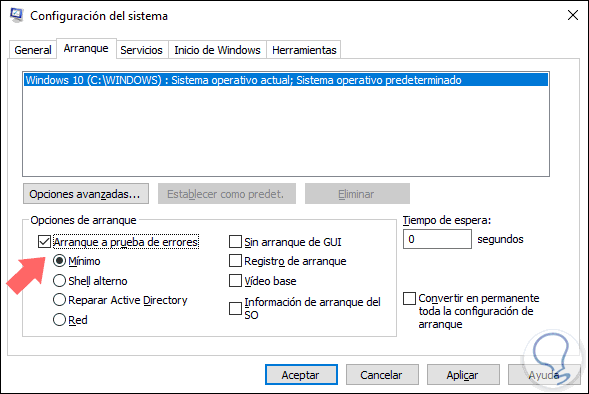
First of all, we can use the Windows + R key combination and execute the msconfig command, we press Enter and in the displayed window we go to the Startup tab and there we activate the Safe start box and activate the Minimum box. and Accept to save the changes.
+ R
Option 2
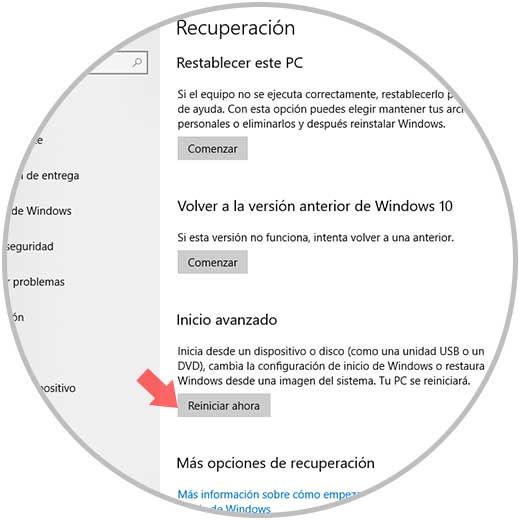
The second option is to go to the Start menu / Settings / Update and security and there, in the Recovery section, we click on the Restart now button located in the Advanced Start section:
Option 3
The third option is to press the Shift key and click on the Restart button in the Start menu and in this way execute the advanced restart.
Step 1
When restarting in this mode we will see the following:
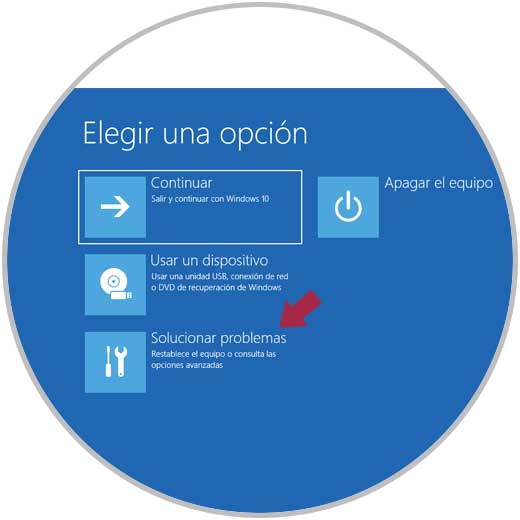
Step 2
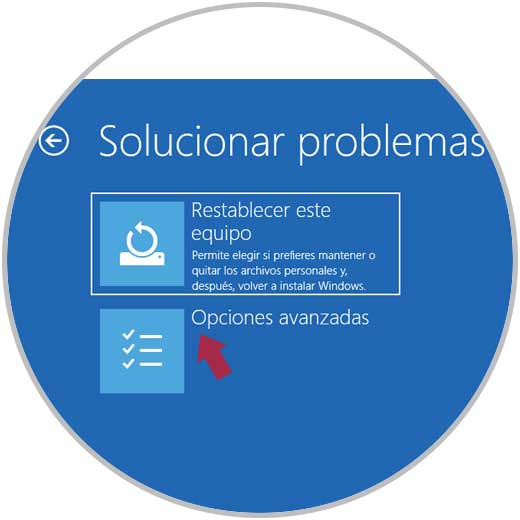
We click on the Troubleshoot section and the following will be displayed:
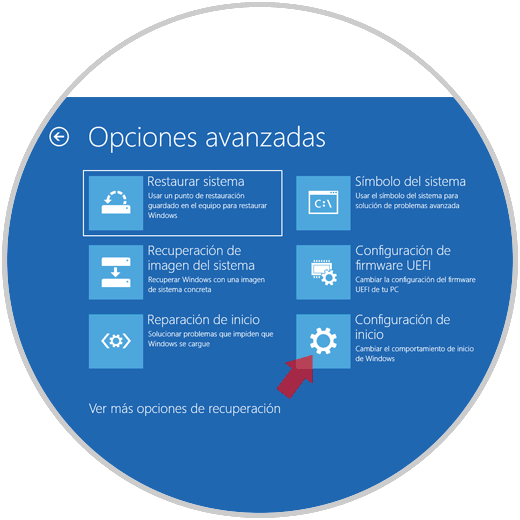
Step 3
We go to Advanced Options and we will have the following:
Step 4
We go to the Startup Settings section and the following will be displayed:
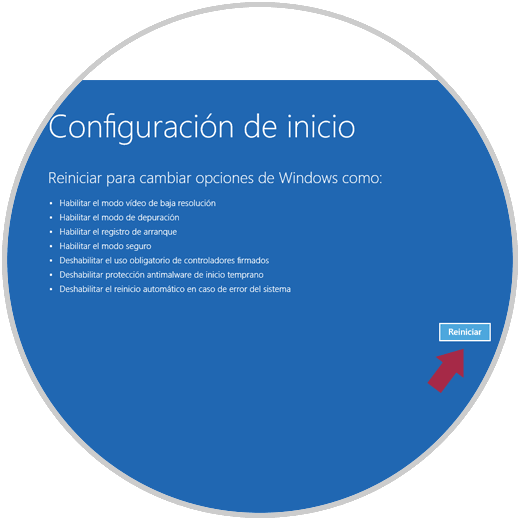
Step 5
There we click on the Restart button and then define what kind of safe mode to execute, normal or with network functions:
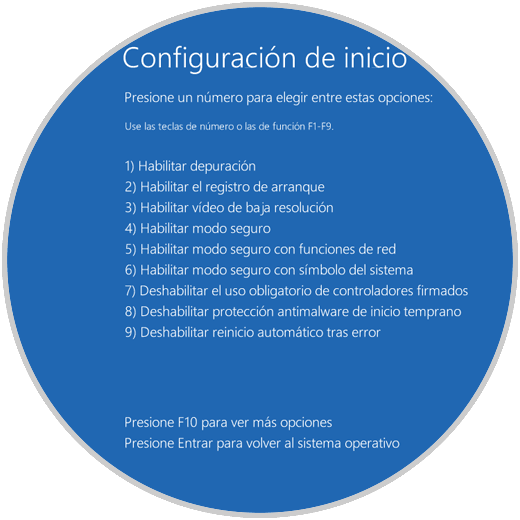
Step 6
After this we access Windows 10 in Safe Mode and from there we will execute all the necessary support tasks:
2. How to run the Windows 10 troubleshooter
Windows 10 has an integrated tool that has been developed to analyze errors and proceed with their respective solution automatically, it is known as Troubleshooting and covers a wide range of parameters of the equipment where system updates are obviously included.
To access this functionality of Windows 10 we go to the following route:
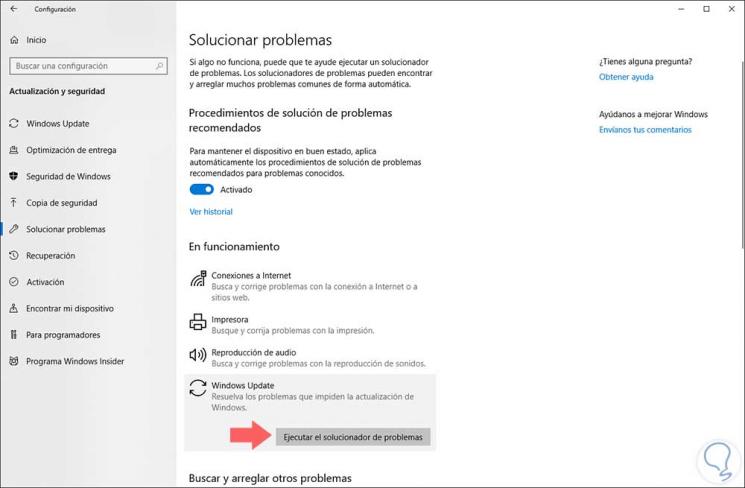
There we locate the Windows Update section and clicking on it will display the button Execute the troubleshooter, click on it and start the analysis process:
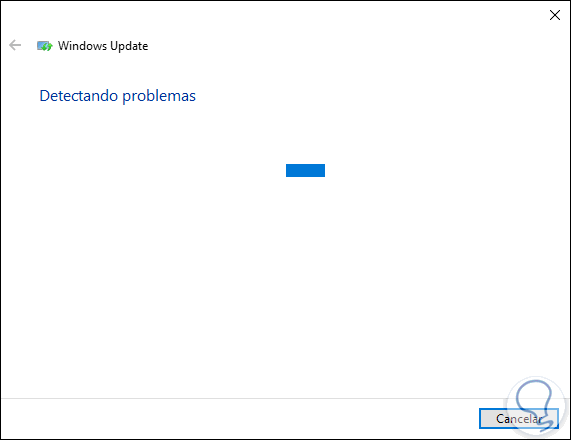
After that, the assistant will look for pending reboots, records and so on and if an anomaly is detected, we will report it with their respective solution..
3. How to uninstall recent updates Windows 10
Although the objective of the updates is to offer the best security, compatibility and performance options for the system, sometimes they are a factor of errors that trigger different general errors.
One option to use is to uninstall some recent updates in order to validate that everything works as expected.
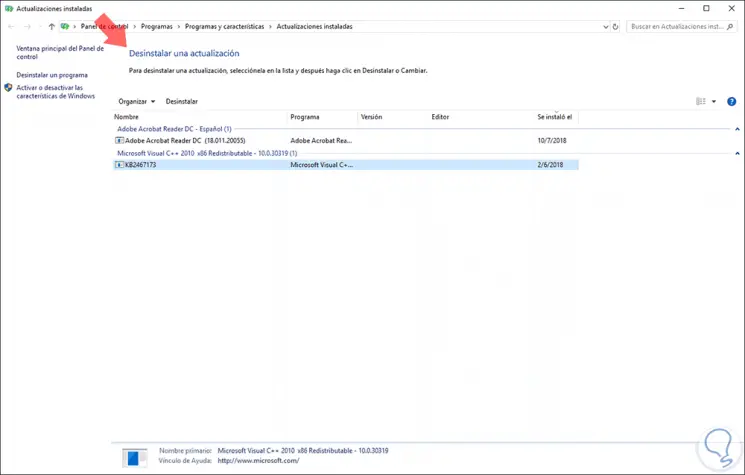
Step 1
To do this, we go to the following route:
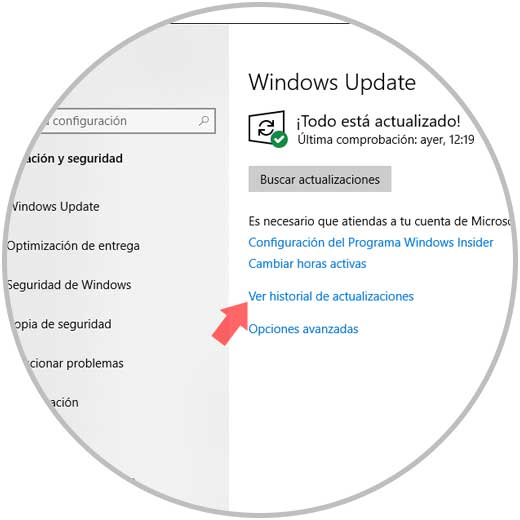
Step 2
There we click on the View update history line and we will see the following:
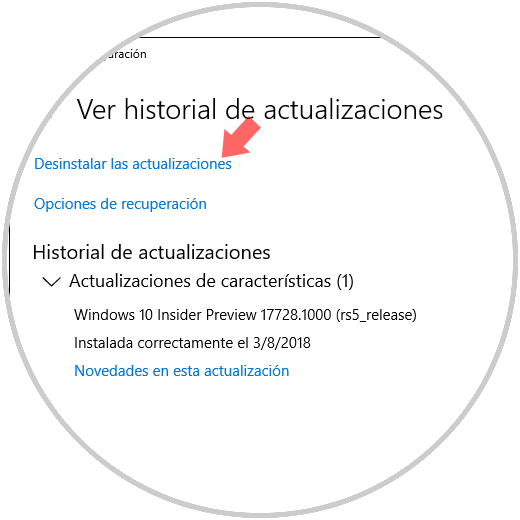
Step 3
We click on the Uninstall updates line and we will be redirected to the following window where we will select the desired updates and click on the Uninstall button at the top:
4 . How to rename the Windows 10 software distribution folder
The Software Distribution folder is a folder that is located in the Windows directory and is intended to store temporary files that can then be used to install Windows updates locally.
This folder is located on the path
C: \ Windows \ SoftwareDistribution
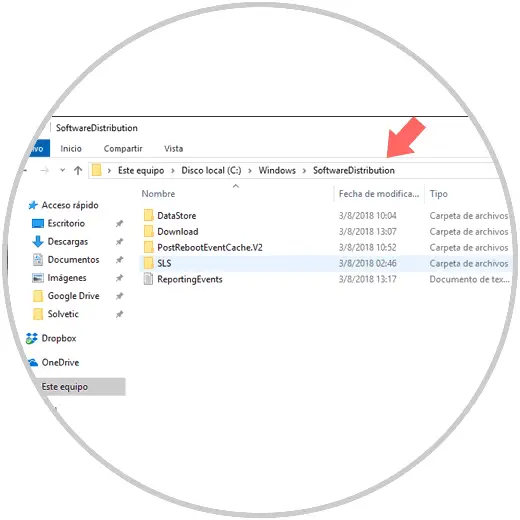
When any of the files hosted there is corrupted, we may experience the error mentioned, in this case it is prudent to change the name of the SoftwareDistribution folder. In this way Windows 10 is forced to create a new folder and thus the error in question is corrected..
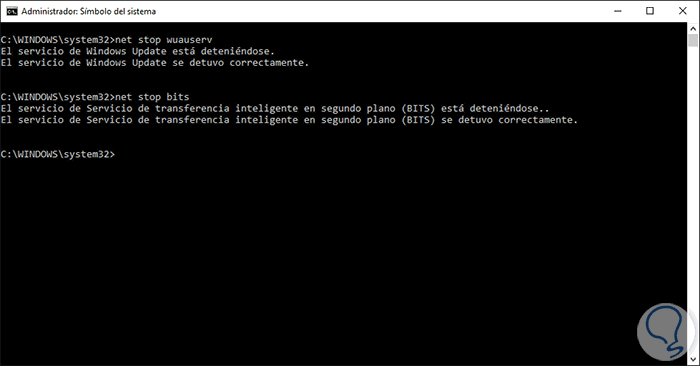
To achieve this we must access the command prompt as administrators and there execute the following commands in their order:
net stop wuauserv net stop bits rename c: windowsSoftwareDistribution SoftwareDistribution.bak net start wuauserv net start bits
5. How to run the DISM Window 10 utility
Windows 10 has a system image analysis tool called DISM (Deployment Image Servicing and Management) which has the function of running a comprehensive system analysis and correcting any errors in the image to optimize its operation.
To execute this analysis, we access the command prompt as administrators and execute the following line:
DISM.exe / Online / Cleanup-image / Restorehealth
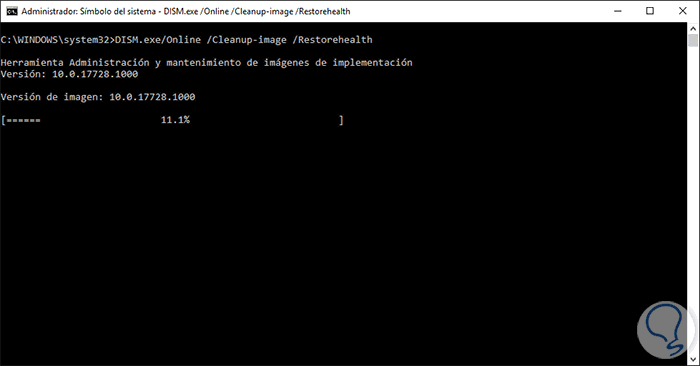
In this way, the deployment image management and maintenance (DISM) tool will connect to the Internet to obtain some files and in case you cannot obtain these files, it will be necessary to use the Windows 10 installation media, either DVD or USB boot, and run the following:
DISM.exe / Online / Cleanup-Image / RestoreHealth / Source: C: RepairSourceWindows / LimitAccess
Note
The C: RepairSourceWindows field must be replaced with the correct drive letter of the DV or USB.
6. How to enable the Windows 10 Application Preparation service
This is a service that is responsible for preparing the applications that are used for the first time on the computer and enabling it can help solve the error mentioned.
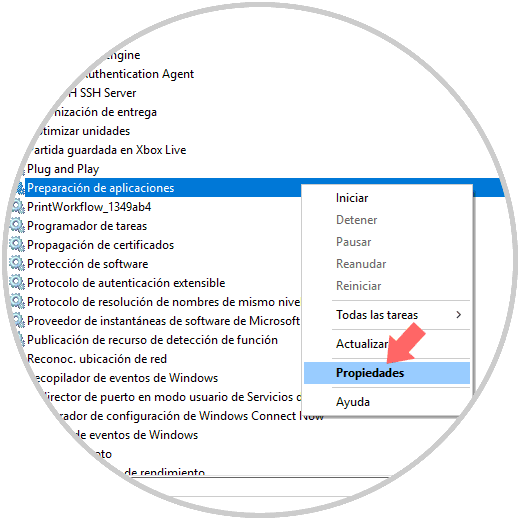
Step 1
For this, we use the Windows + R key combination and execute the services.msc command and there we will locate the Application Preparation service, right click on it and select Properties:
+ R
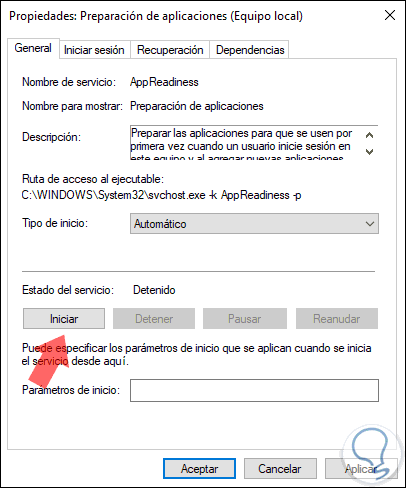
Step 2
In the displayed window, we assign the value Automatic in the Start type field and click on the Start button to activate it. Click on Apply and Accept to save the changes.
Thus, we have comprehensive solutions to correct this error in Windows 10 and allow all updates to be installed correctly.