To stay up to date, remember to subscribe to our YouTube channel!
SUBSCRIBE ON YOUTUBE
Working in environments where it is required to create and manage web applications is a vital point in the modern world where everything works online but for a correct and optimal use of these functions, stable, secure, dynamic and versatile applications are required for centralized work. and Nginx is one of the most complete options..
Nginx has been developed as a reverse proxy and HTTP server, a configured mail proxy server and a generic TCP/UDP proxy server to centralize in one place the most common tasks that developers carry out in this segment, it can be used as a web server to serve static content such as HTML, CSS and multimedia files, but also allows us to load balance the traffic of various servers on the local network.
One of the advantages of Nginx is its ability to handle concurrent connections, less use of resources and the ability to scale horizontally allowing the use of large amounts of information without being affected..
Characteristics
Some of its most outstanding features are:
- HTTP/3 support
- FastCGI, uwsgi, SCGI, and memcached server caching support; load balancing and fault tolerance
- HTTP/2 support
- modular architecture
- Static and index file service
- Automatic indexing functions
- It has a reverse proxy with caching, balancing and load management and full fault tolerance
- SSL and TLS support WITHOUT
- Can redirect error codes 3xx-5xx
- You can limit the number of simultaneous connections
- It is in the ability to execute different functions based on the client
- Supports PUT, DELETE, MKCOL, COPY, and MOVE methods
- embedded perl
- IP-based geolocation function
- Access control based on client IP address or password (basic HTTP authentication)
- User authentication using your own authentication server
- STARTTLS and STLS support
Now let's see how to install Nginx on Windows and thus have this powerful management tool at hand.
How to install Nginx on Windows
Step 1
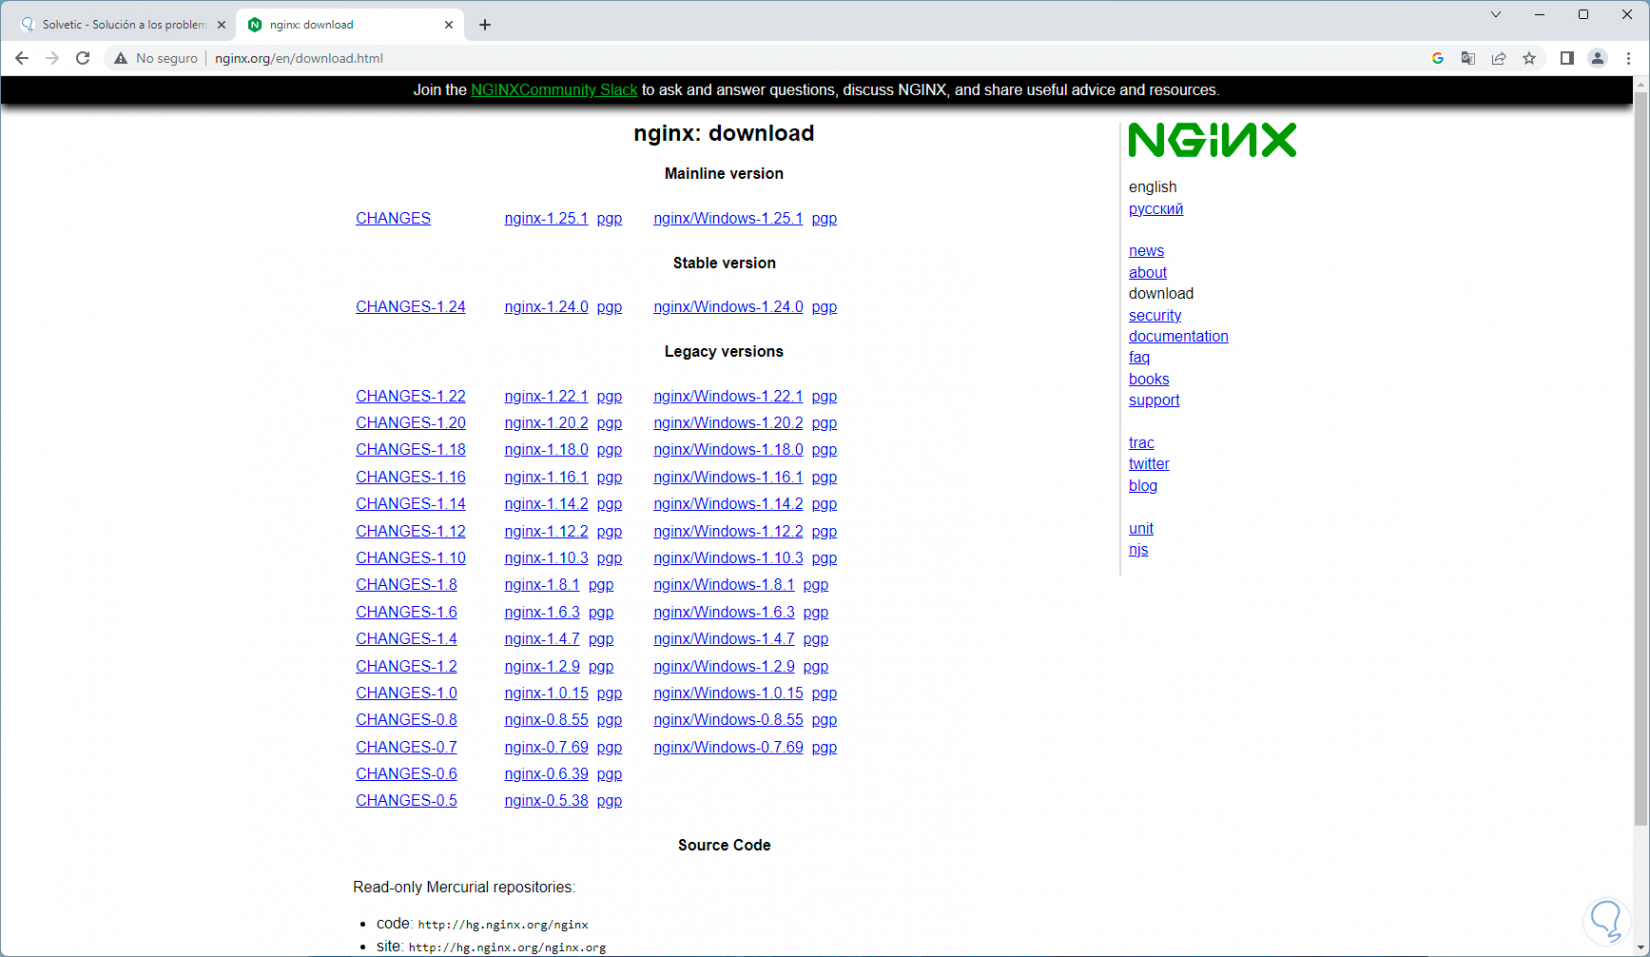
The first thing will be to go to the following official link to download the latest version of the Nginx application:
Nginx
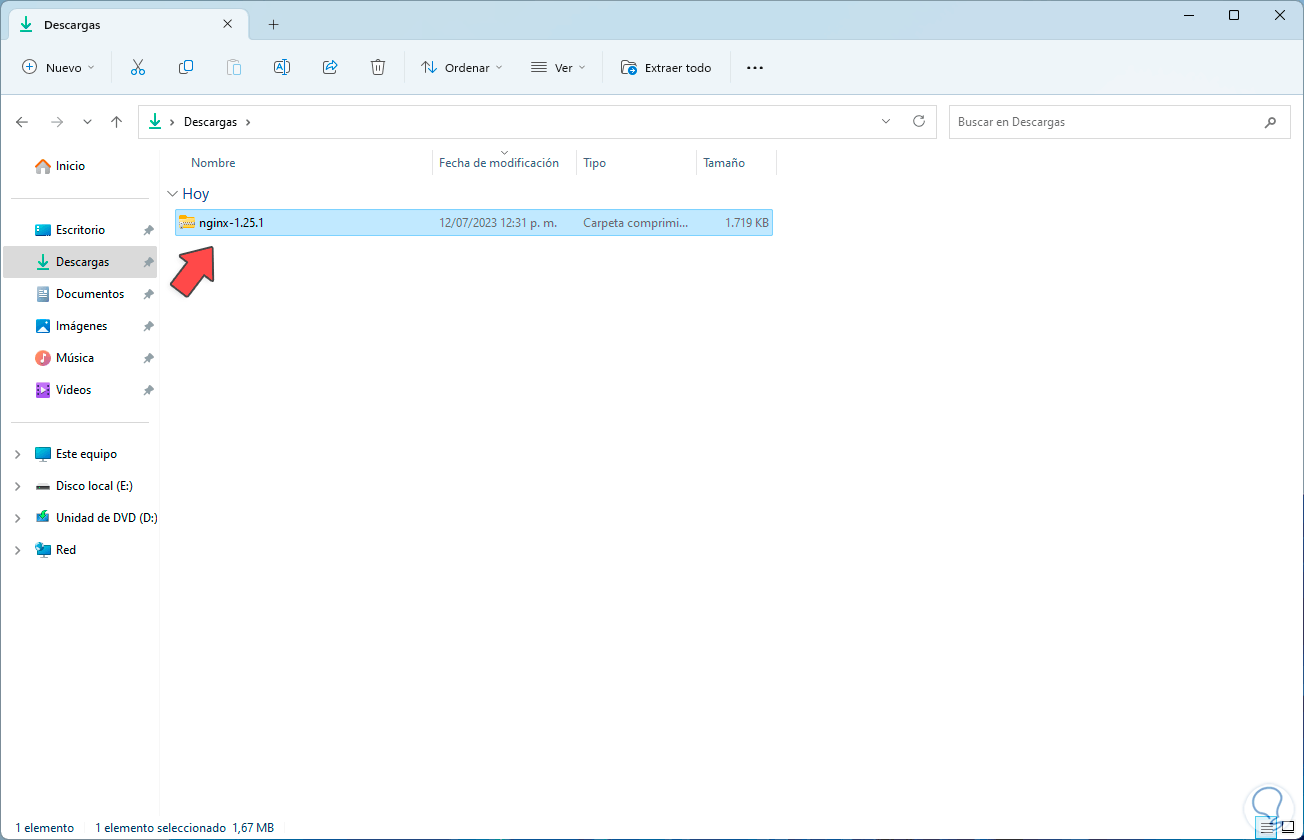
Step 2
Once downloaded, we are going to go to the download folder and there we click on "Extract all":
Step 3
In the pop-up window we define where the extraction will be carried out:
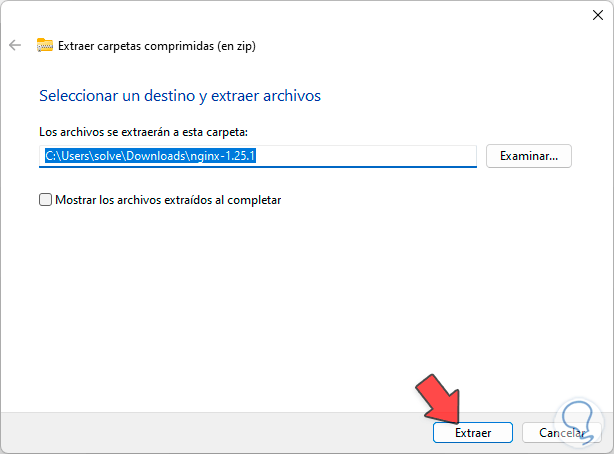
Step 4
We click on "Extract" to apply the process:
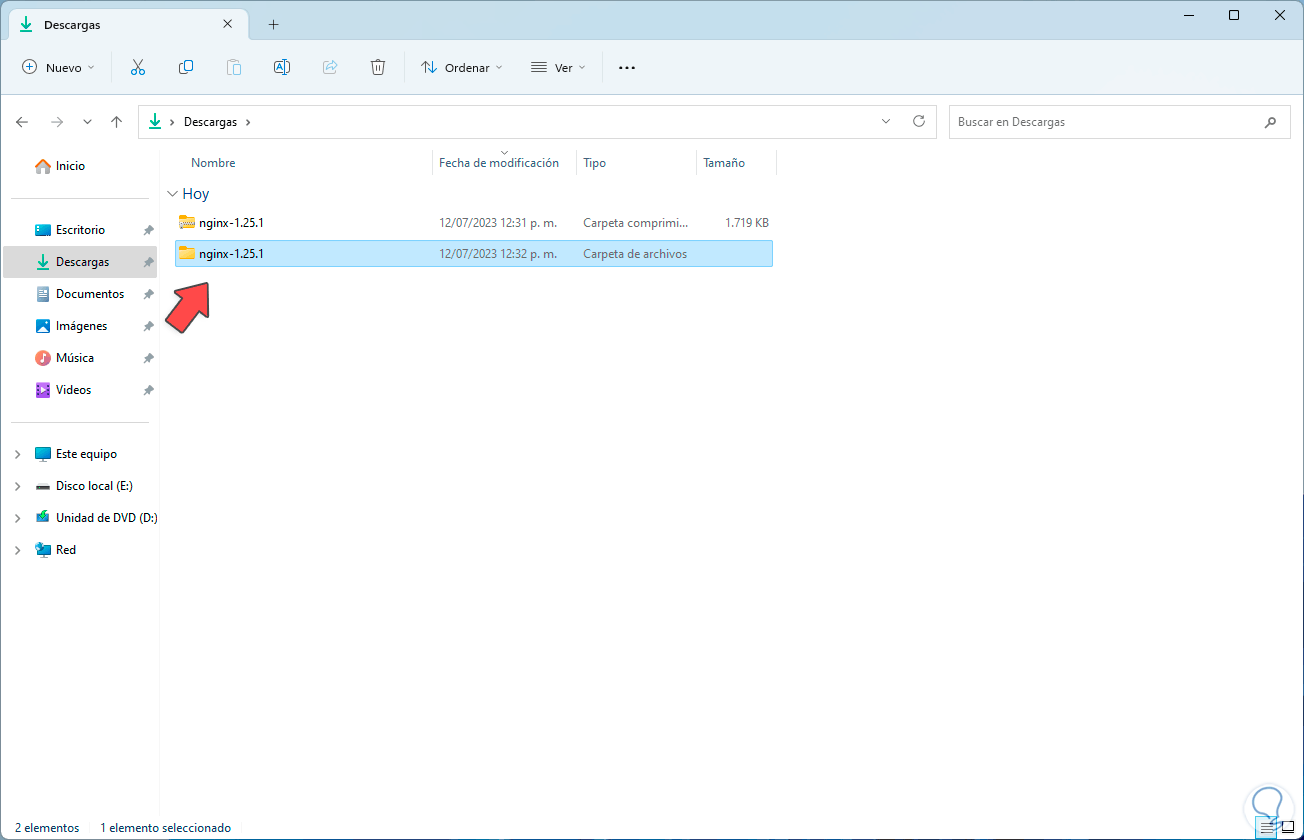
step 5
Now TechnoWikis recommends you to copy this folder on drive C in one of the local folders:

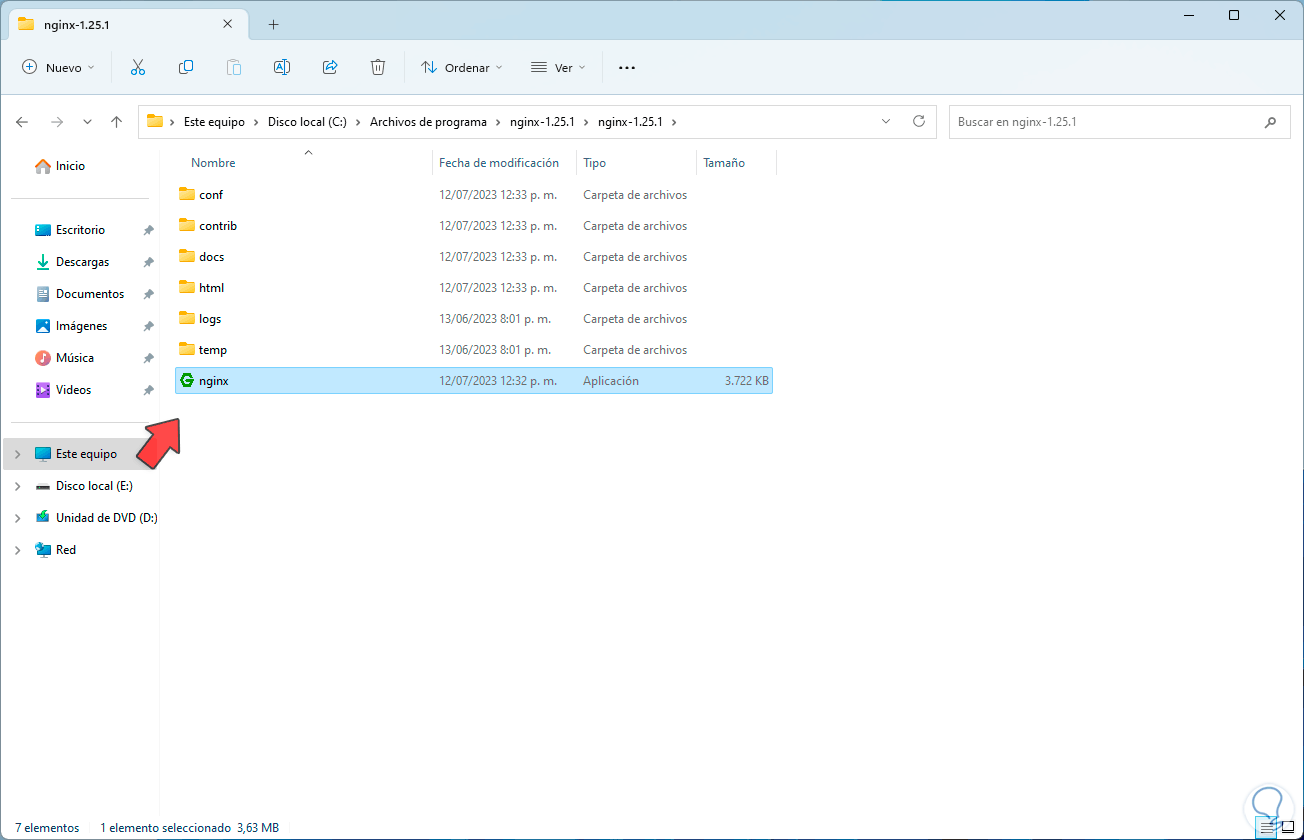
step 6
We access this folder and double click on the executable file:
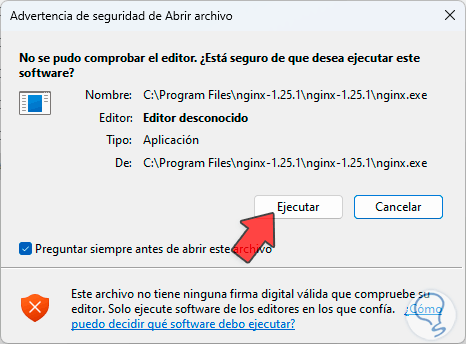
step 7
We will see the following message: We click on Execute to start the utility and now we will see the following:
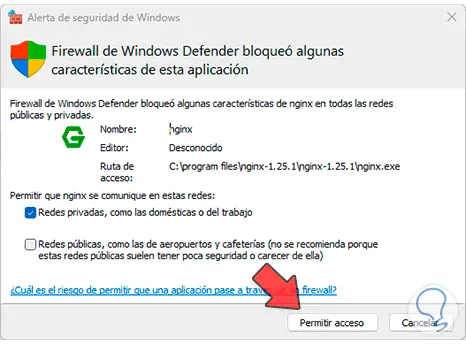
step 8
We must accept the firewall permissions.
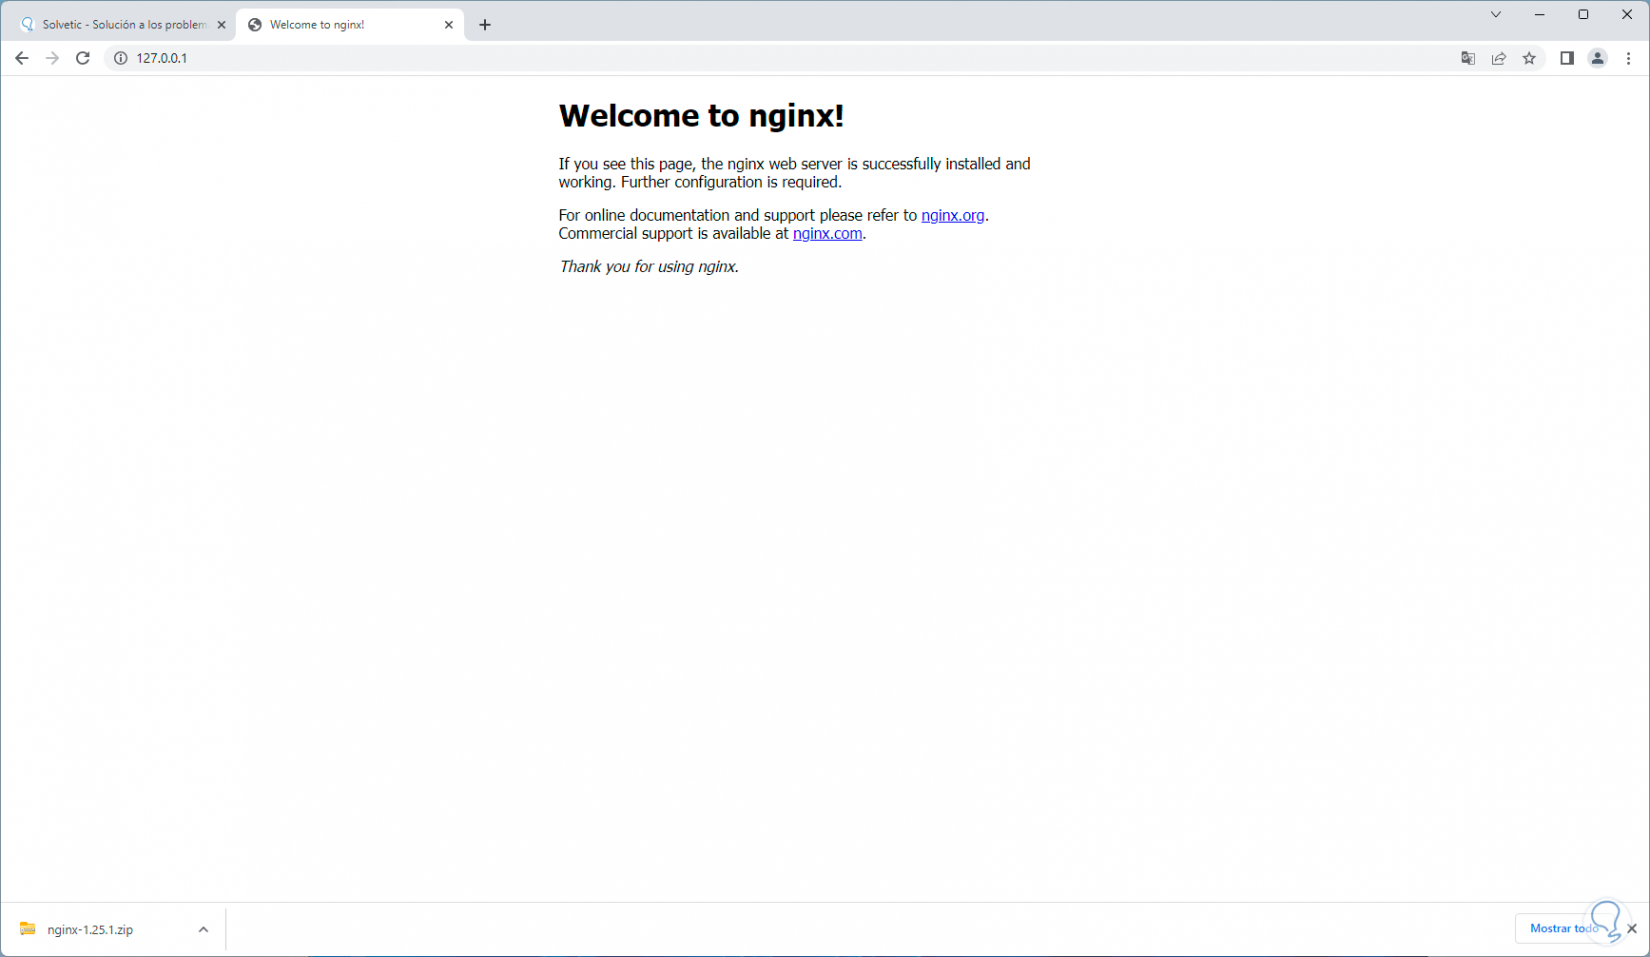
step 9
It is time to validate that it has been installed, we open a browser and enter the address 127.0.0.1 or the word localhost, when we press Enter we should see the Nginx message:
step 10
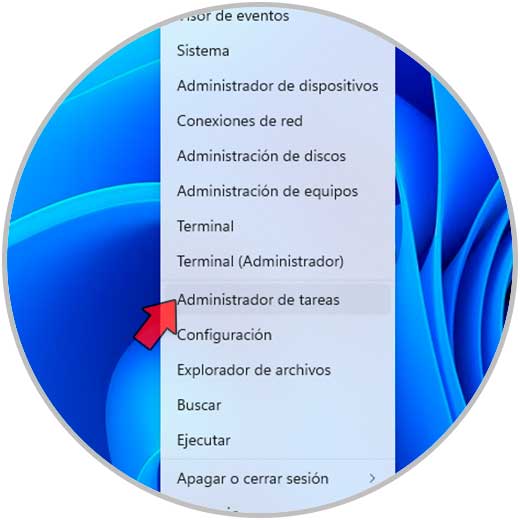
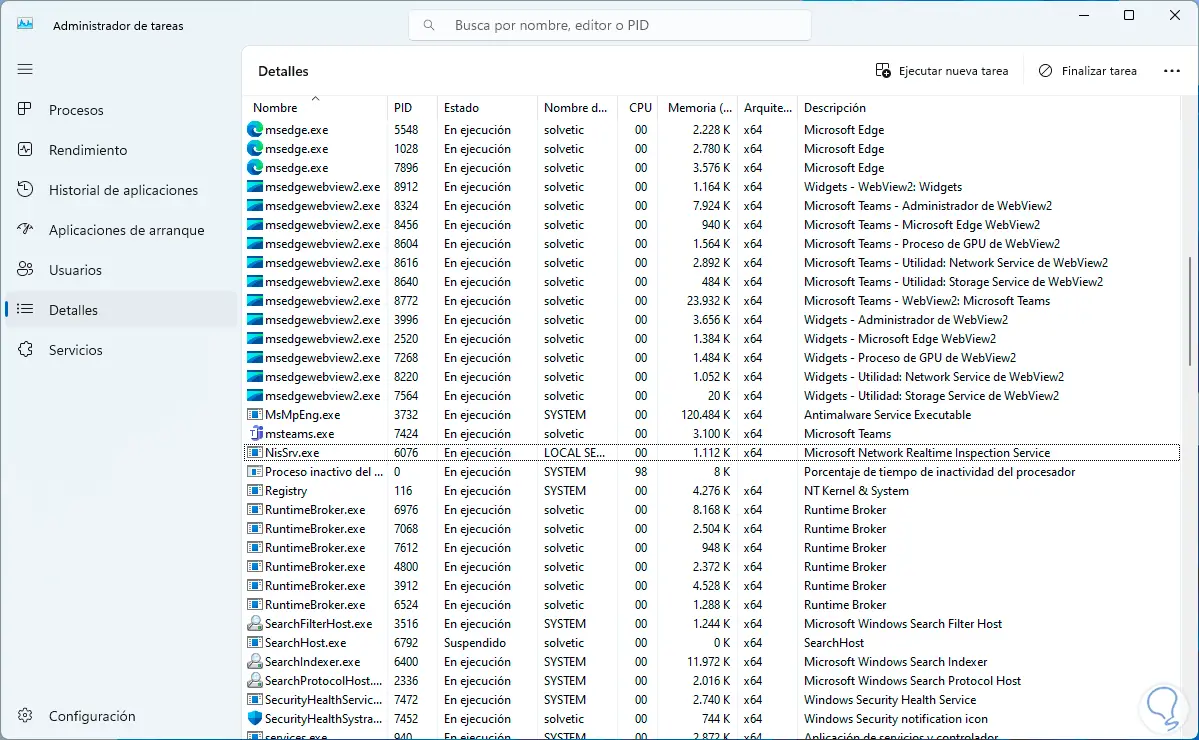
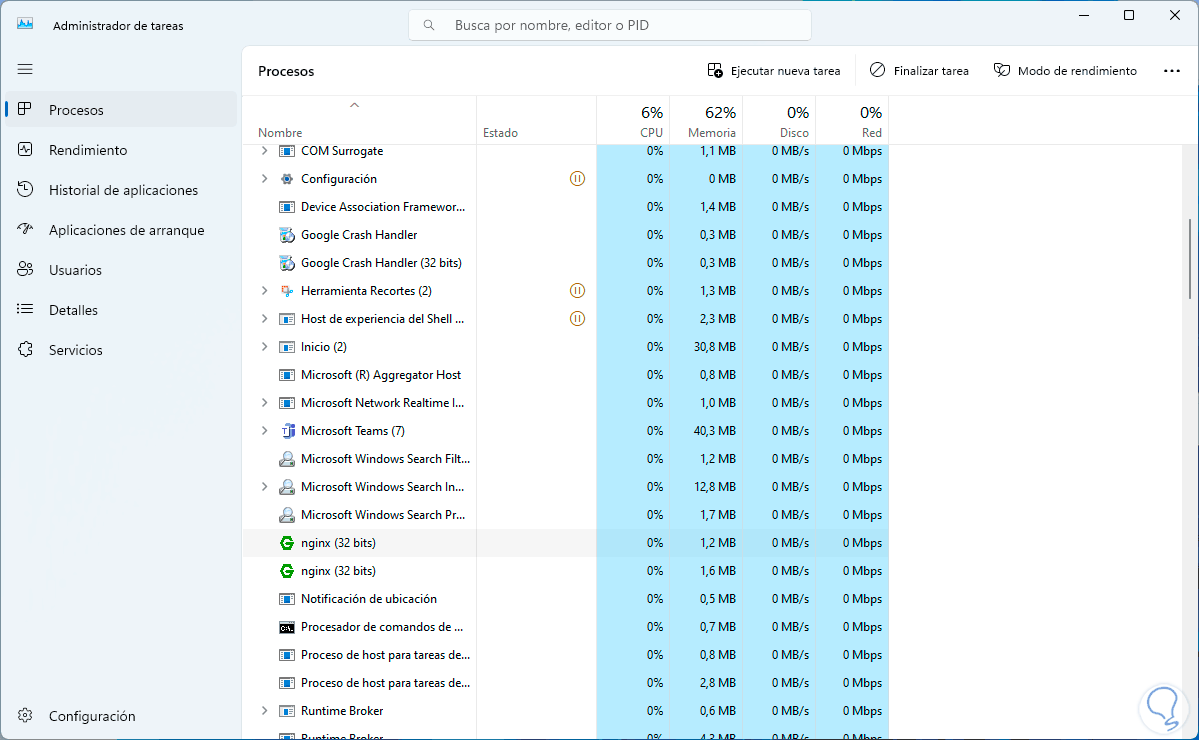
In case we need to end the Nginx service, we are going to open the Task Manager from the Start menu:
step 11
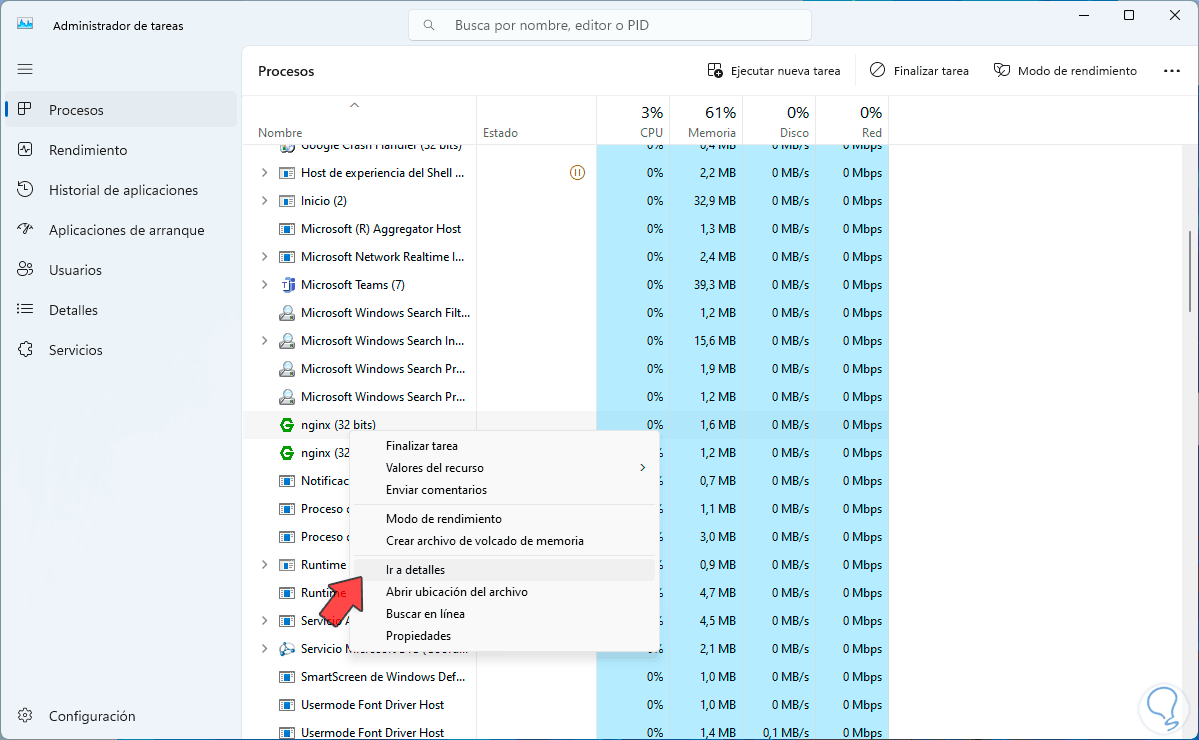
There we are going to locate the service called Nginx, right click on it and select the "Go to details" option:
step 12
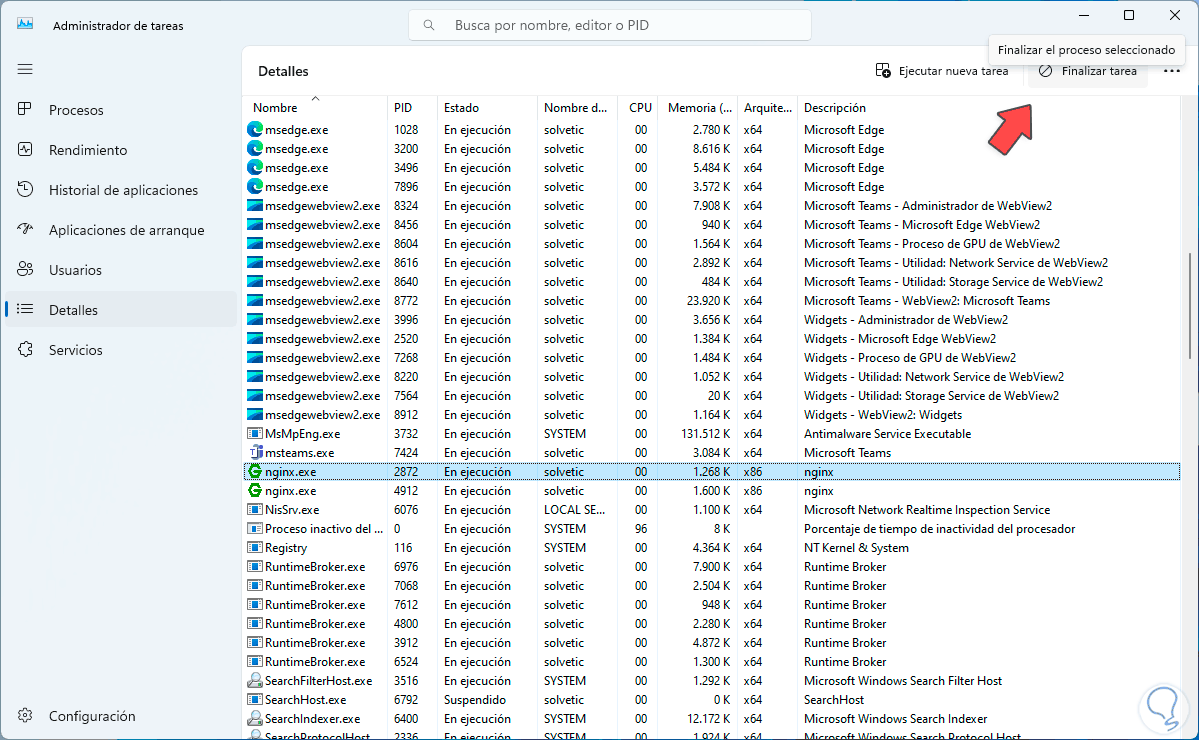
Now we select each Nginx dependency:
step 13
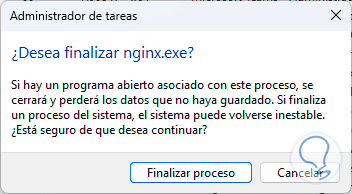
We click on "End task" and confirm the process:
step 14
We see that there is no Nginx dependency left:
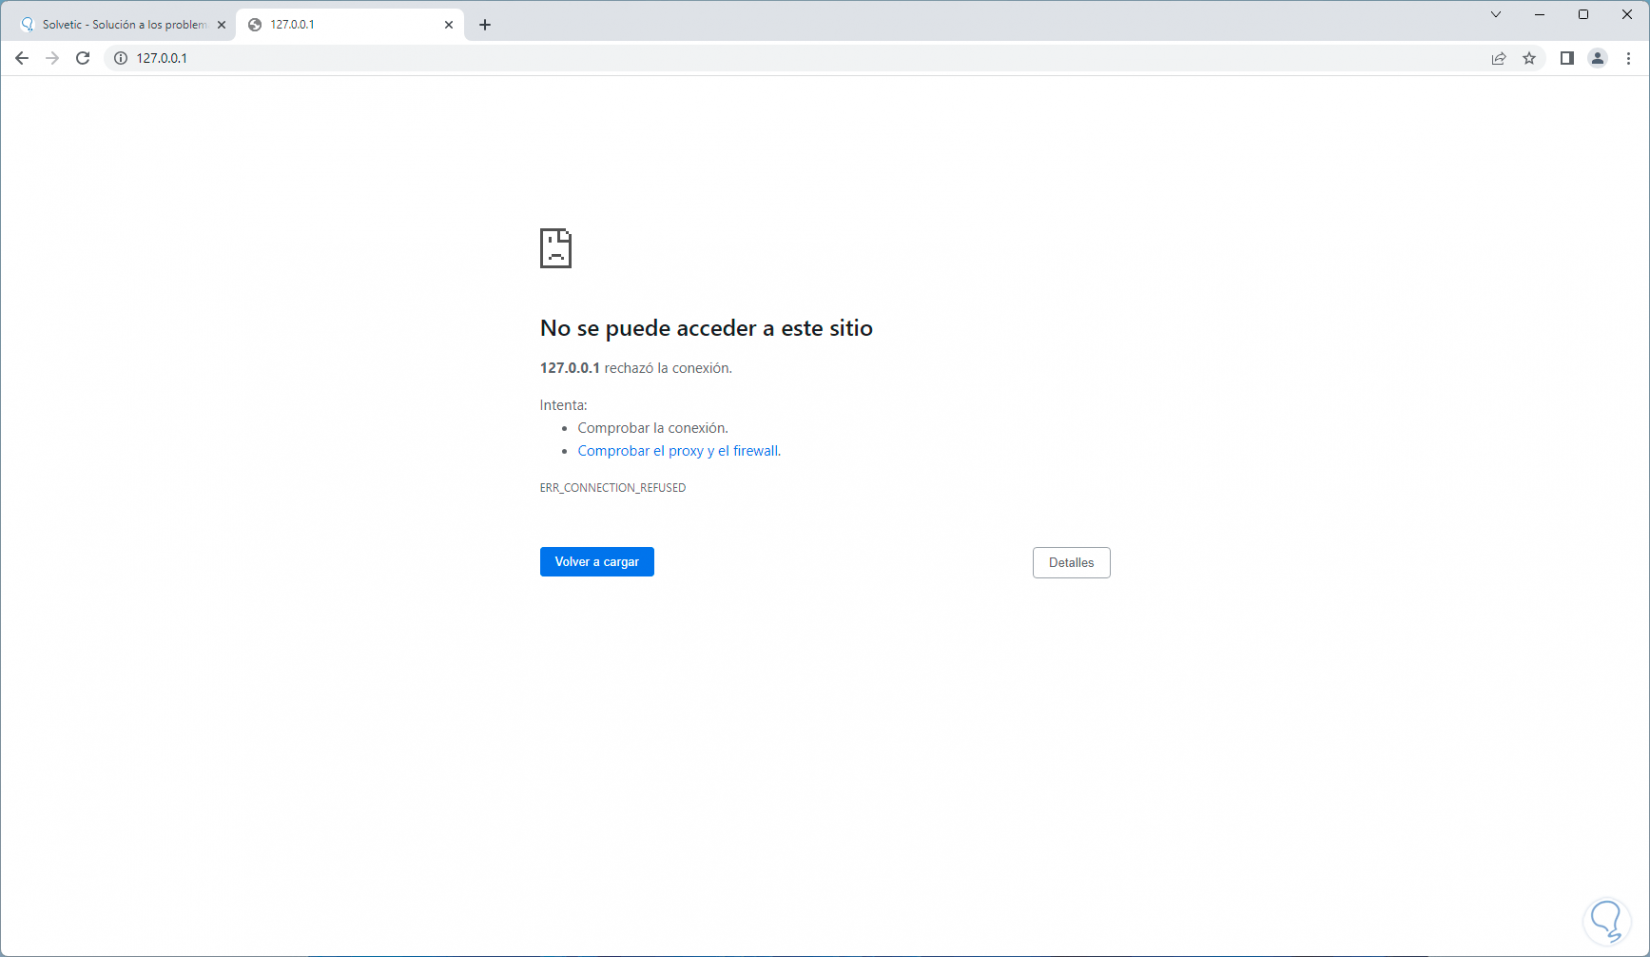
step 15
If we go to the browser and refresh the page we can see the connection error:
step 16
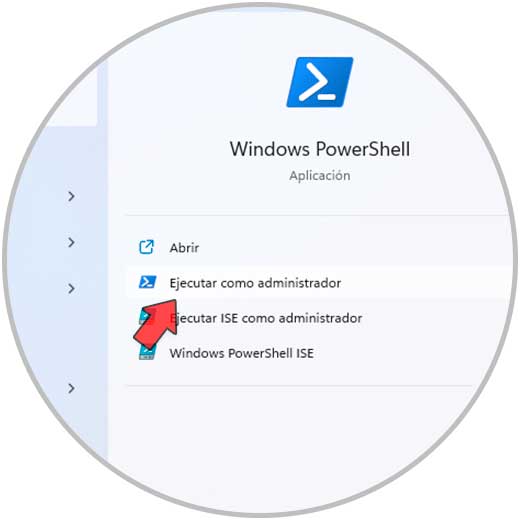
To start the Nginx service, we open PowerShell as administrator:
step 17
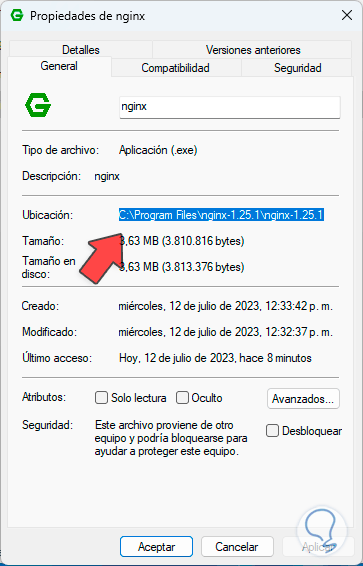
Before, we are going to right click on the Nginx file and select "Properties":
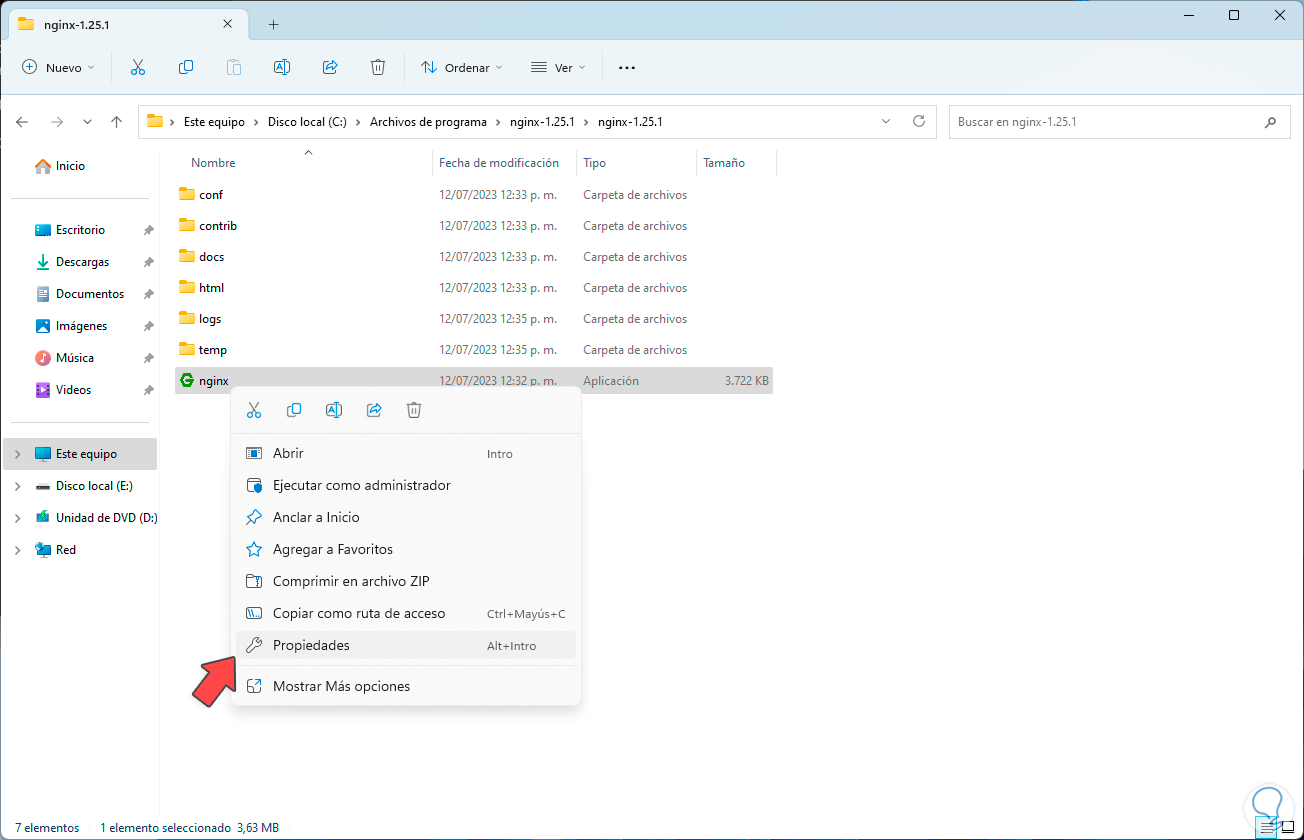
step 18
In the pop-up window we copy the file path:
step 19
In the PowerShell console we go to that path using the "cd" command but it is possible to see the following:
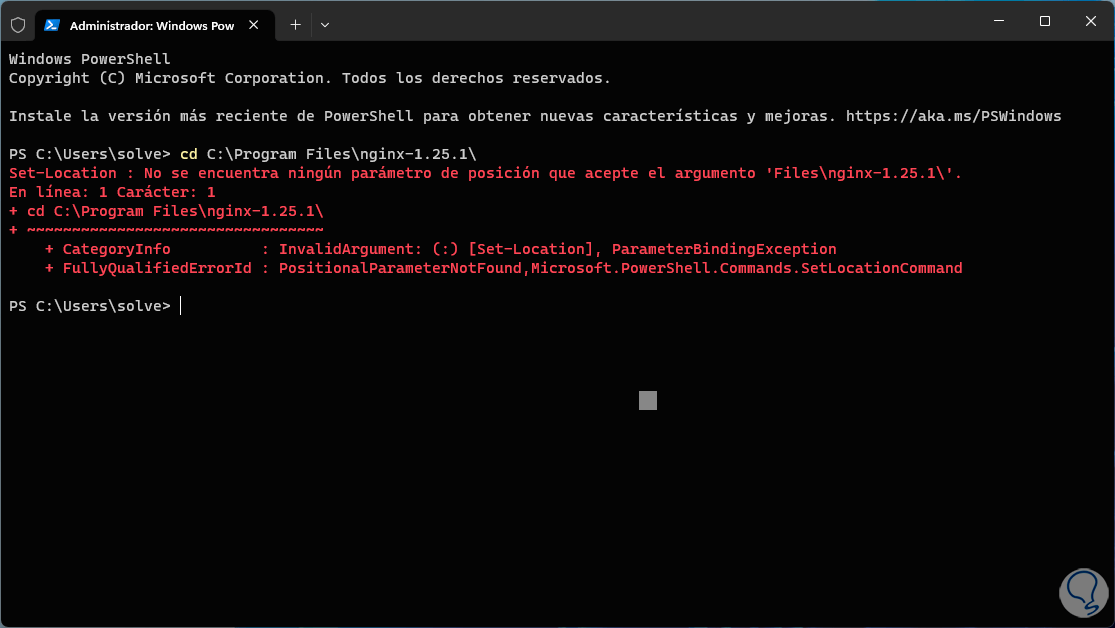
step 20
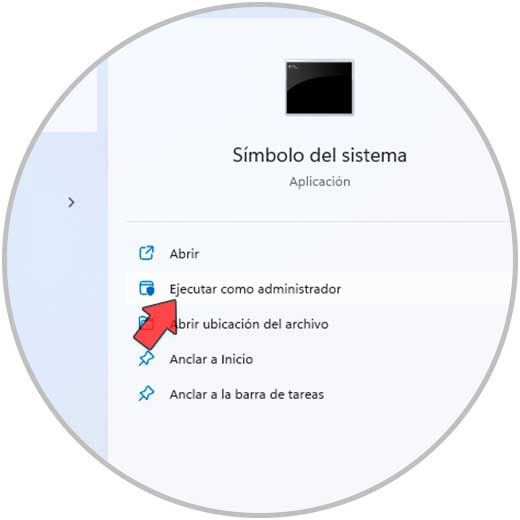
If so, we open the CMD console as administrators:
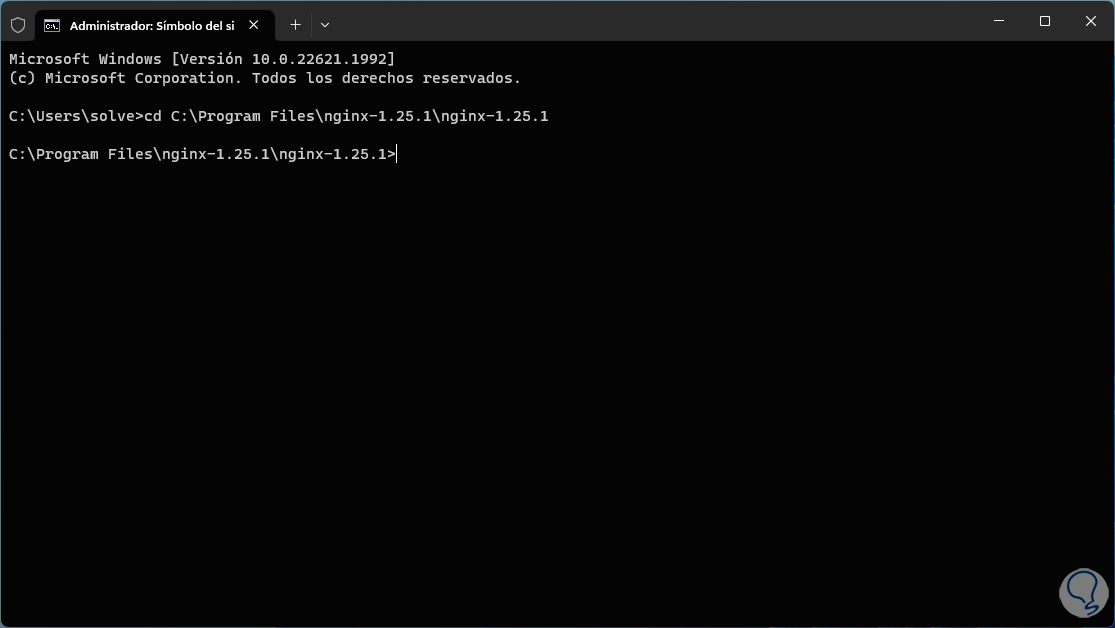
step 21
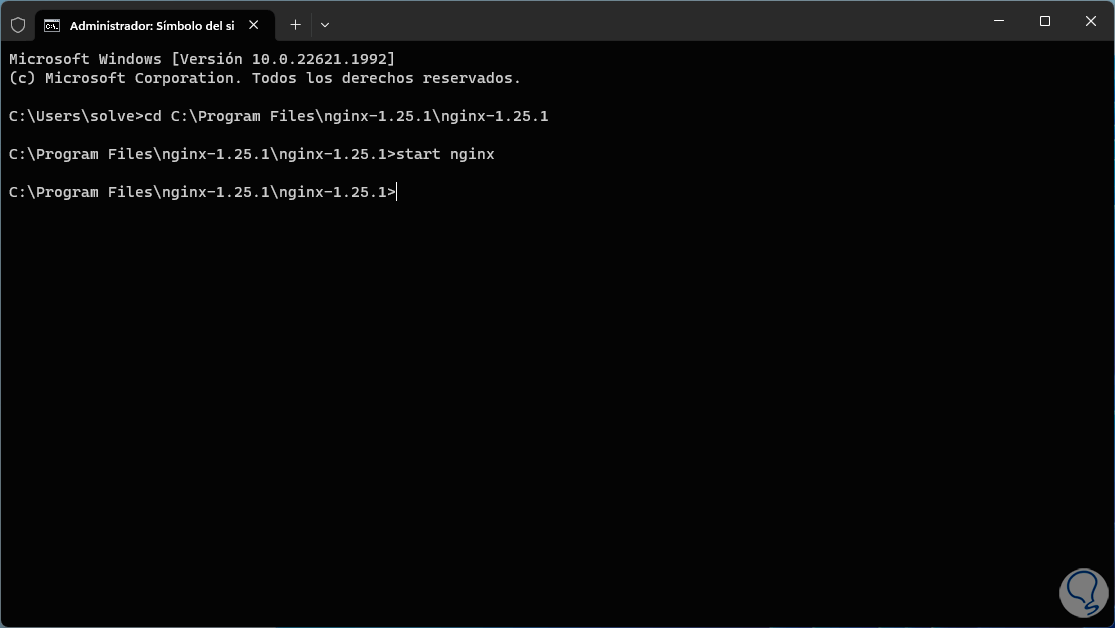
We go to the route where Nginx is:
step 22
Now we start Nginx by running:
start nginx
Step 23
We can check in the Task Manager that the service is available again:
step 24
Some commands that we can use in the terminal are:
- nginx -s stop: perform a fast shutdown
- nginx -s quit: close Nginx
- nginx -s reload: start new worker processes with new configuration if edited
- nginx -s reopen: reopen log files
step 25
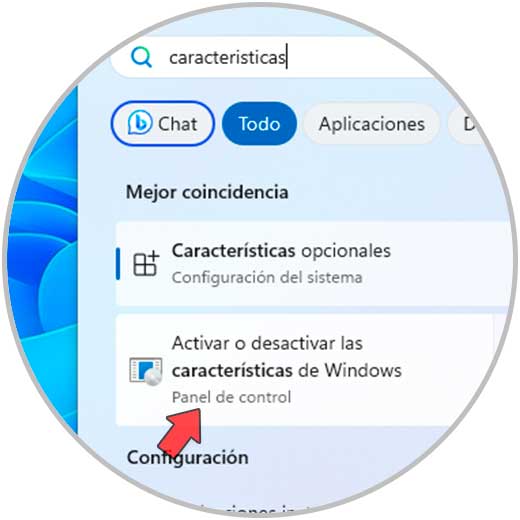
After this, in the search engine we enter the word "features" and click on the option "Activate or deactivate Windows features":
step 26
We will locate the line “Internet Information Services”:
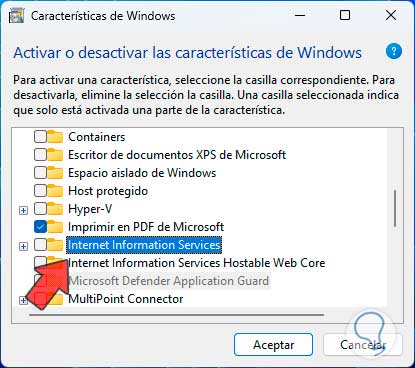
step 27
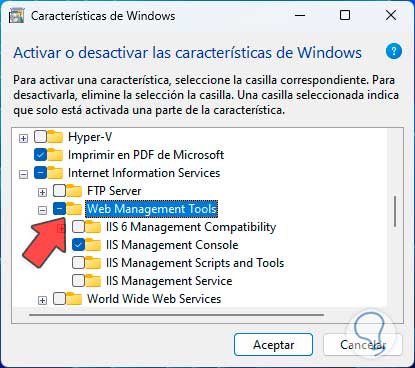
We click on the + sign and activate its box and the necessary boxes in "Web Management Tools":
Step 28
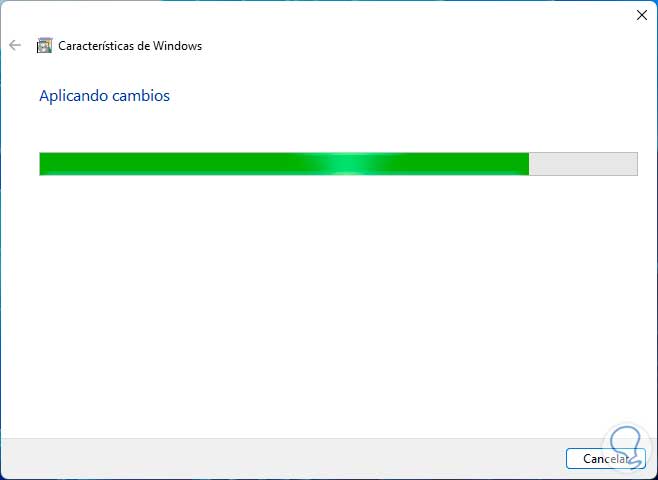
We click "OK" to start the process:

Step 29
The changes will be applied:
step 30
At the end we will see the following:

step 31
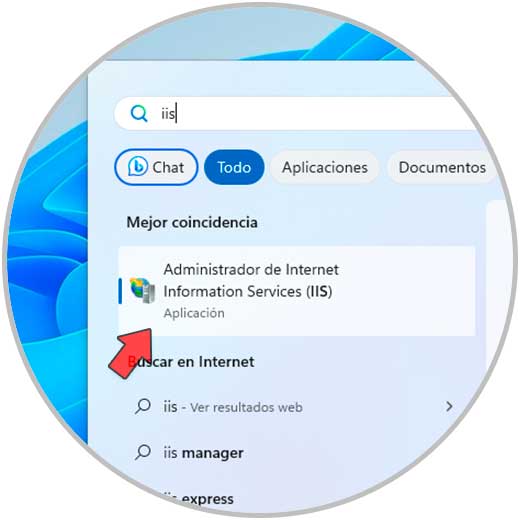
We close the wizard and open IIS from the start browser:
step 32
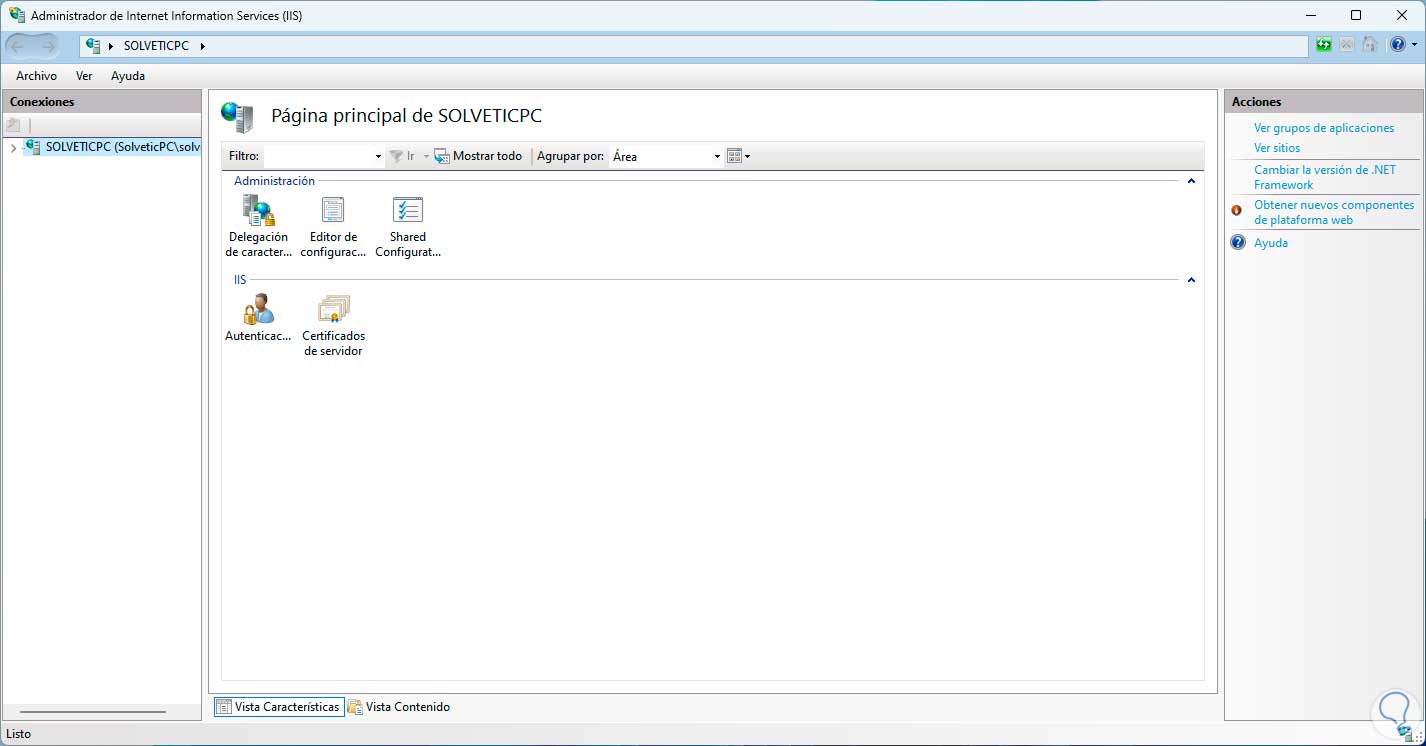
We click on "Internet Information Services Manager" to open the console:
Step 33
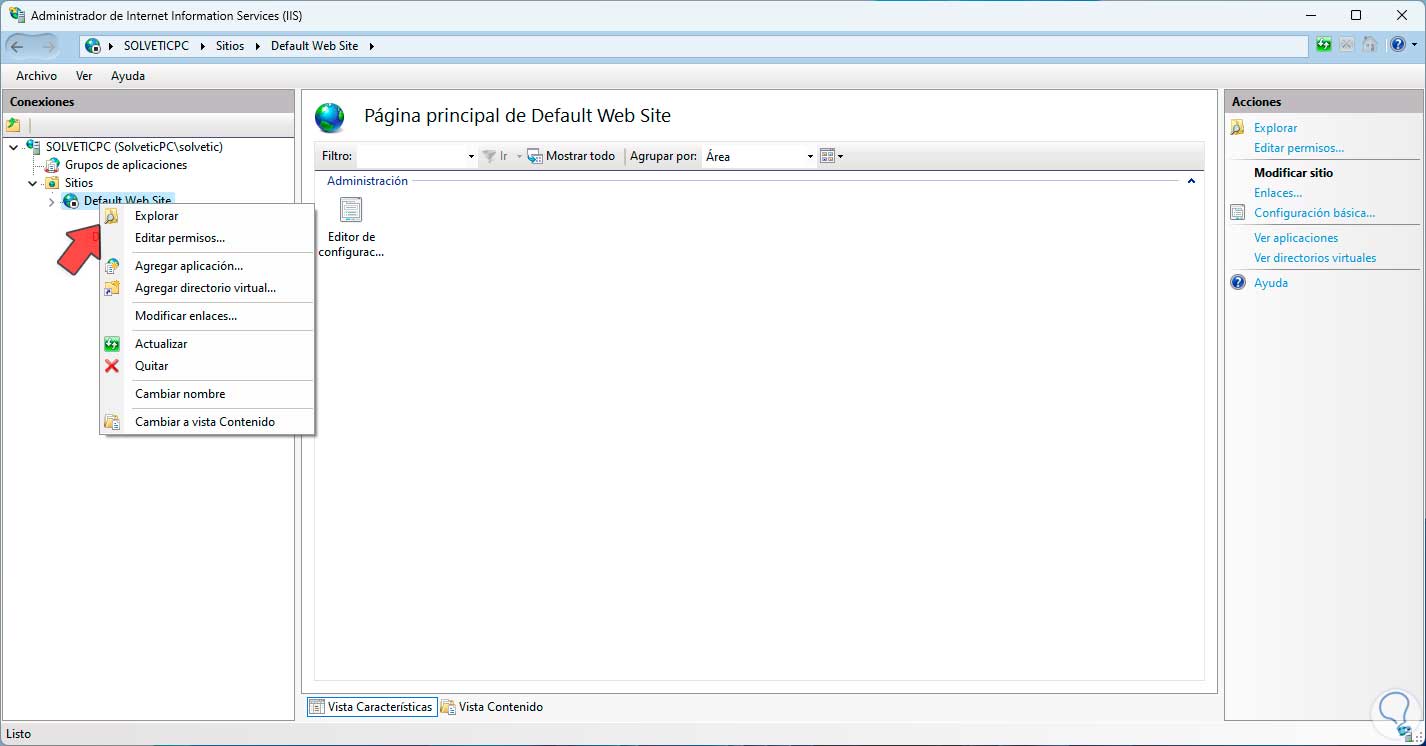
Now we click on the name of the connection, we go to the option "Default Web Site" and there we right click and select "Explore":
Step 34
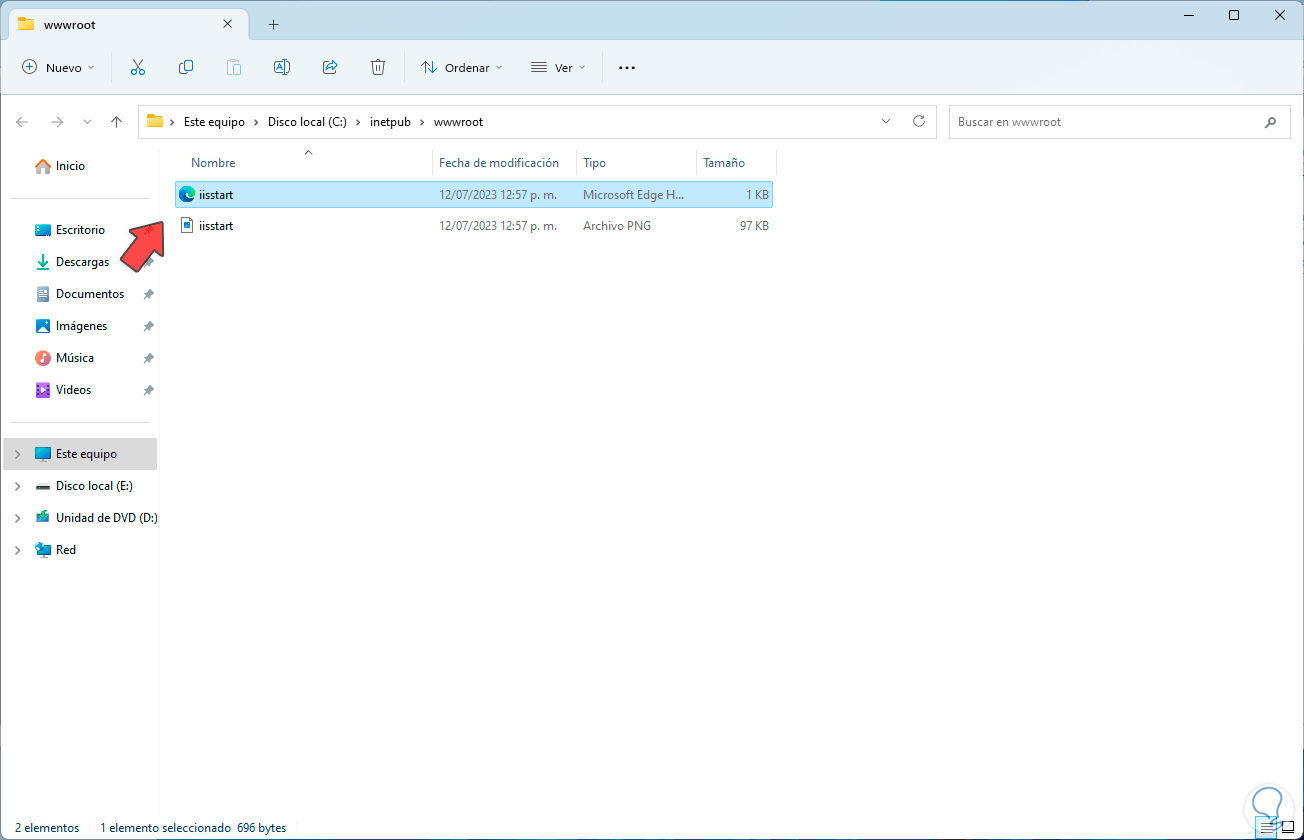
You can see the files associated with the console:
step 35
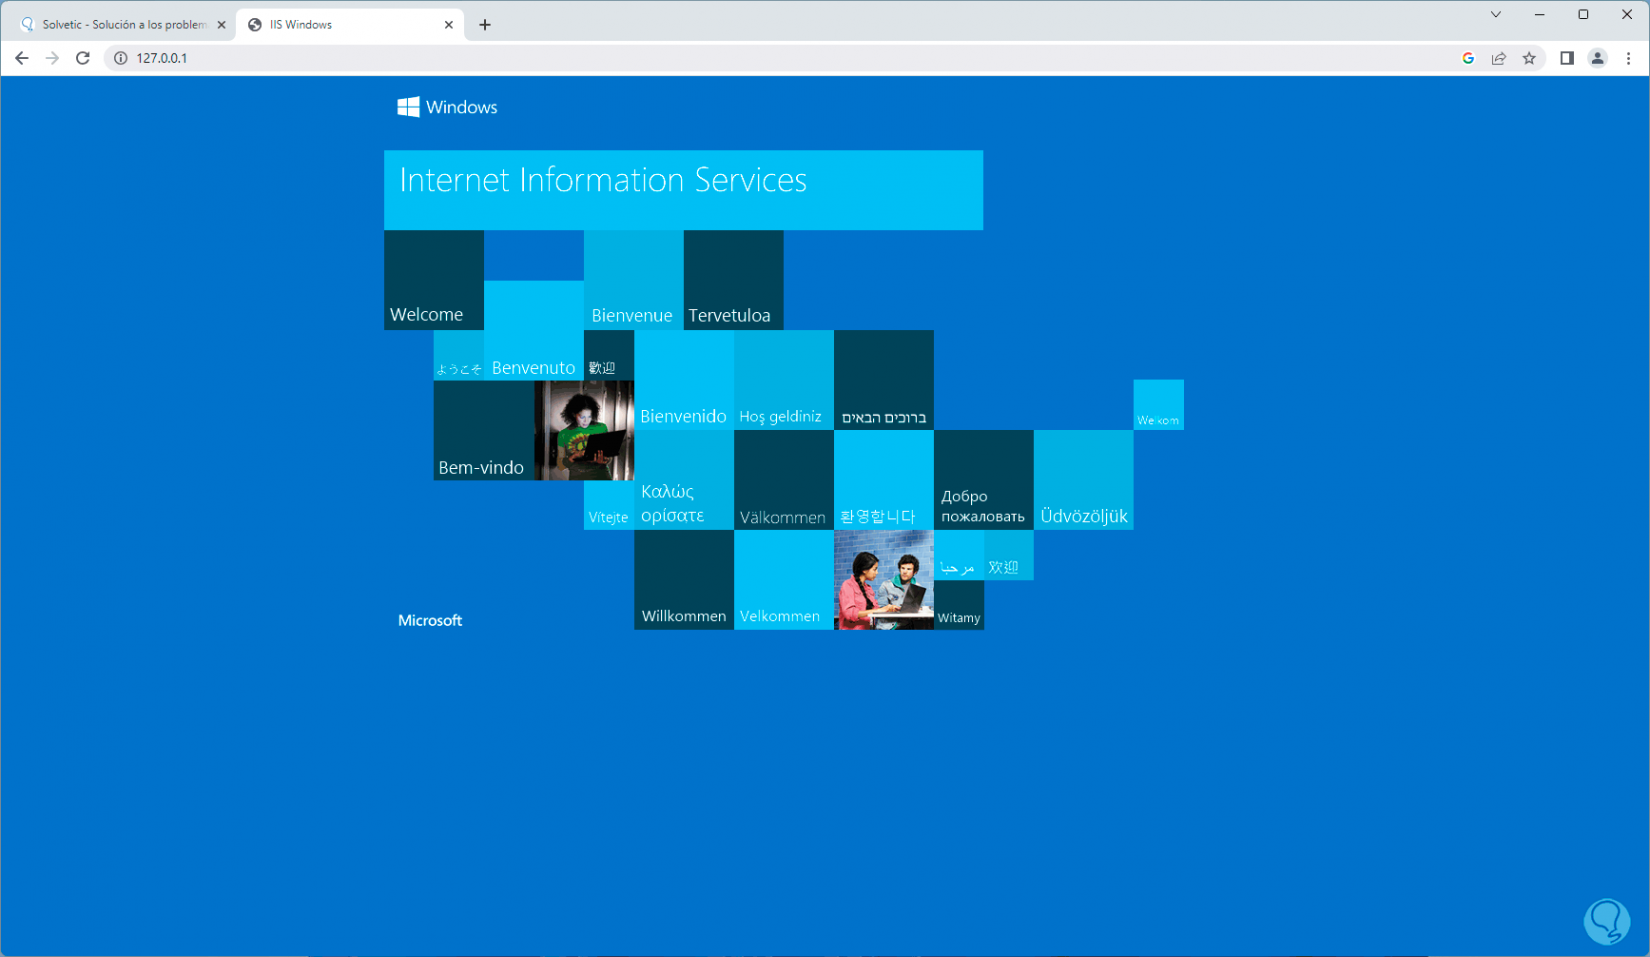
We open the browser and when we refresh the page we can see the IIS window:
Step 36
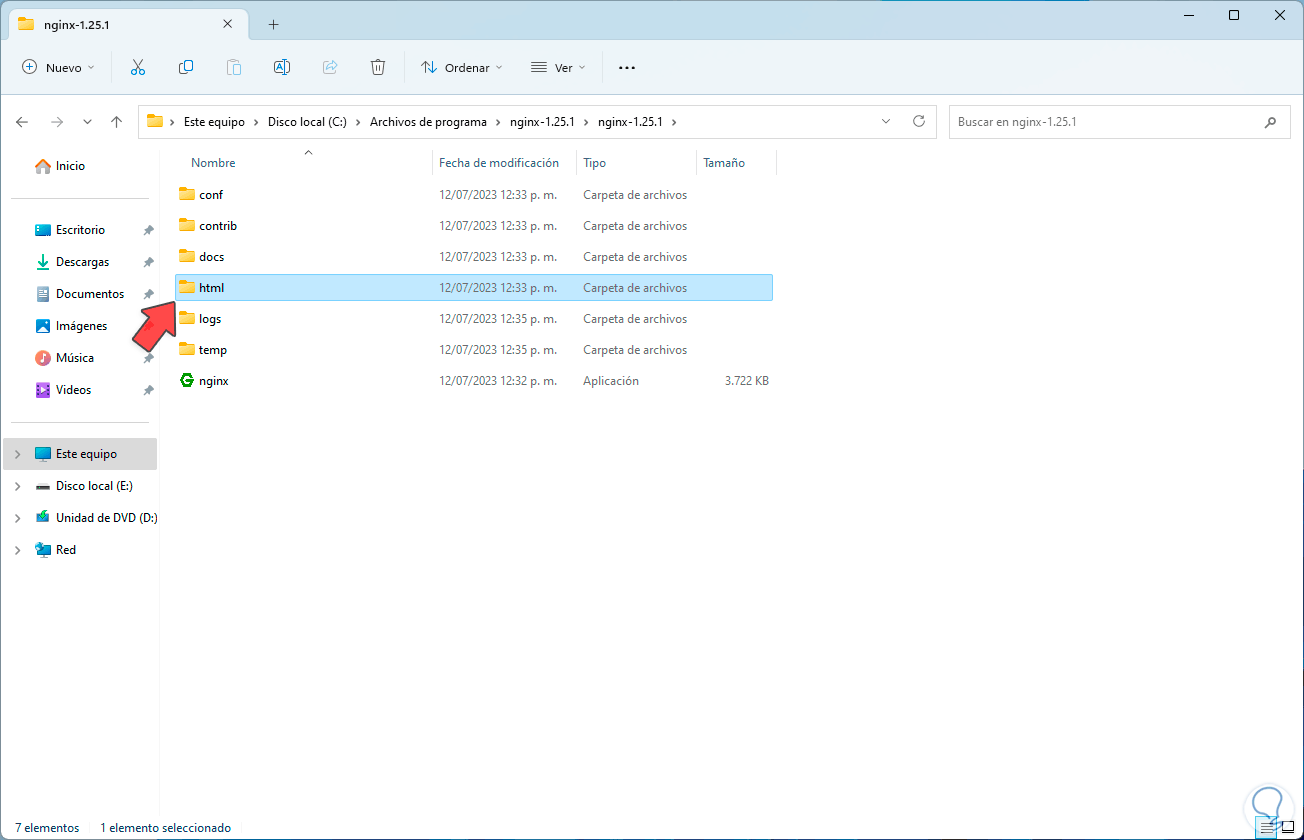
To make any changes to the Nginx file, we go to the path where it is installed and locate the "html" folder:
Step 37
We open the folder, right click on the "index" file and select "Open with - Choose another application":
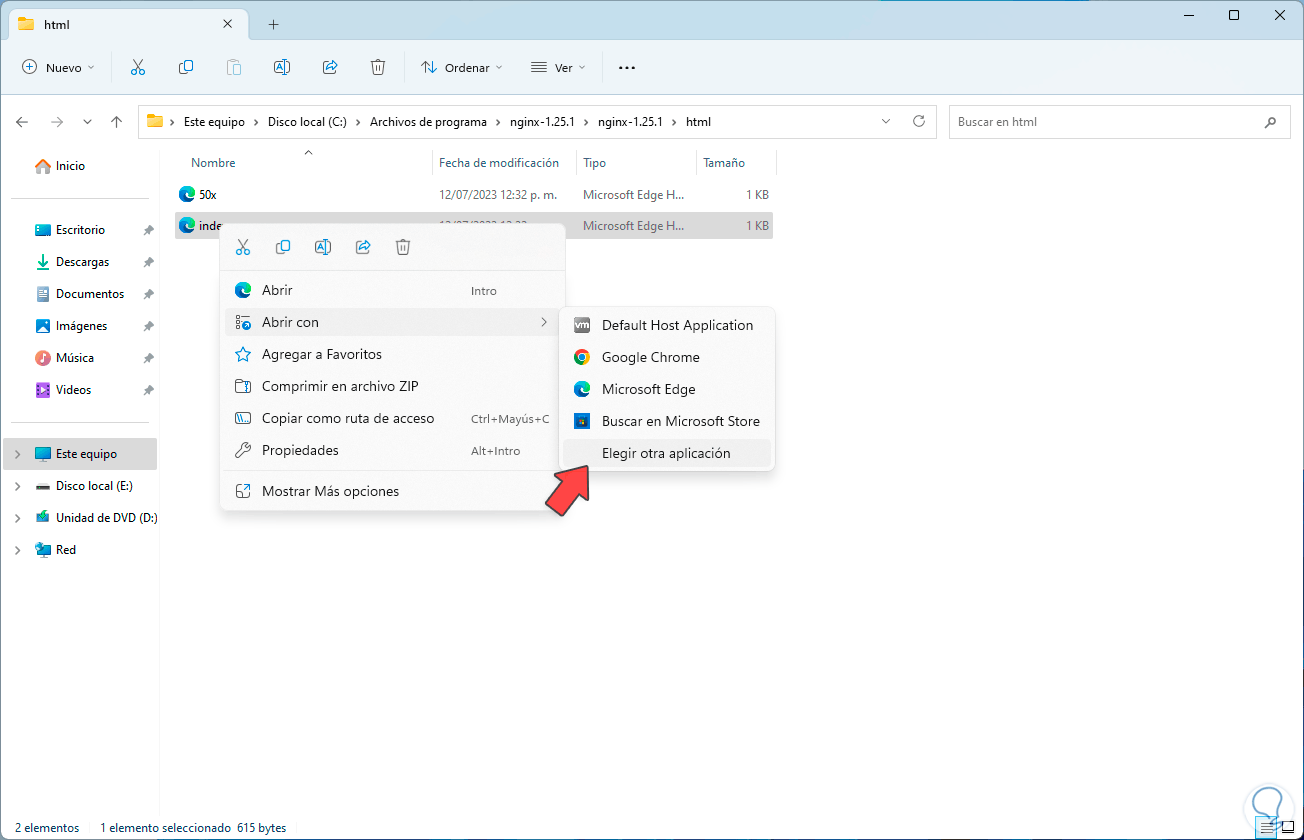
Step 38
We select the notepad:

Step 39
We will see the structure of the file:
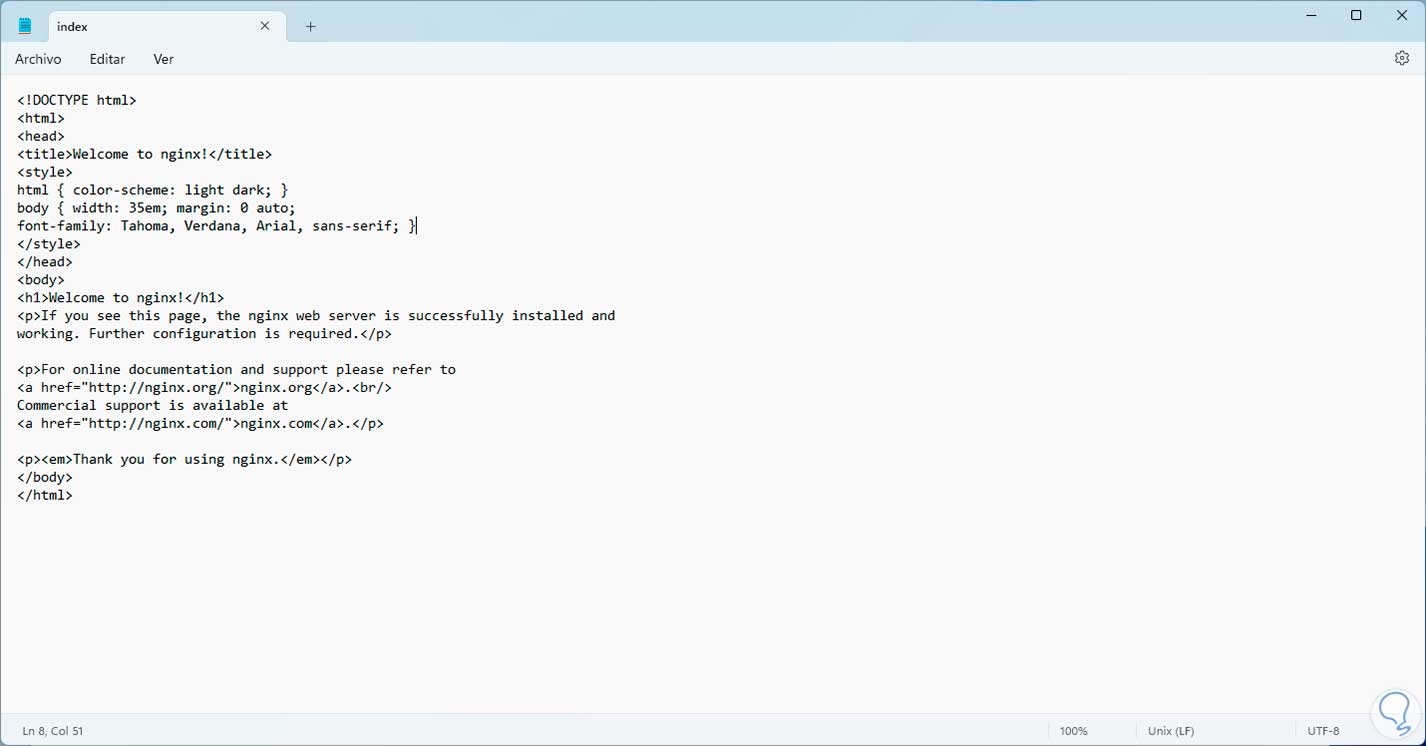
step 40
We make the desired changes in the <title> fields:
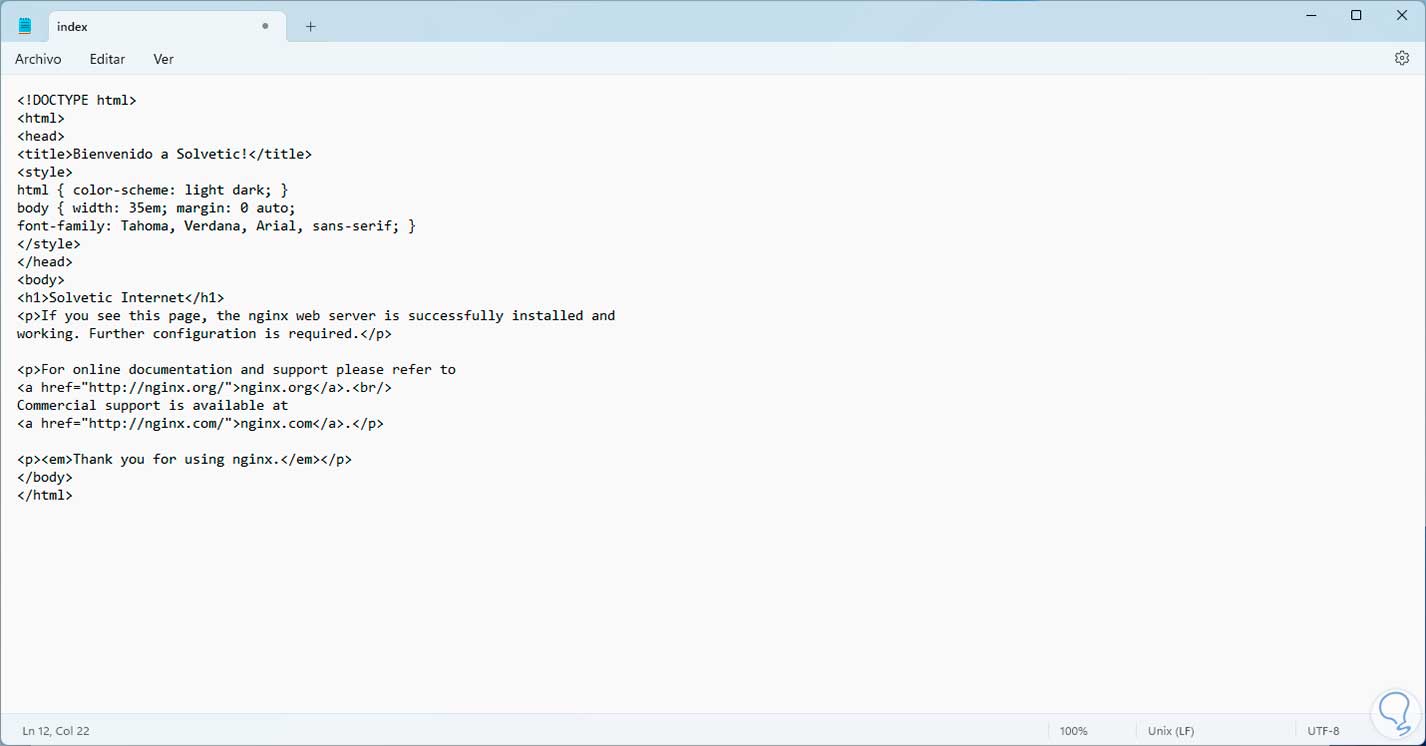
Step 41
We save the changes and in the browser we will see this update:
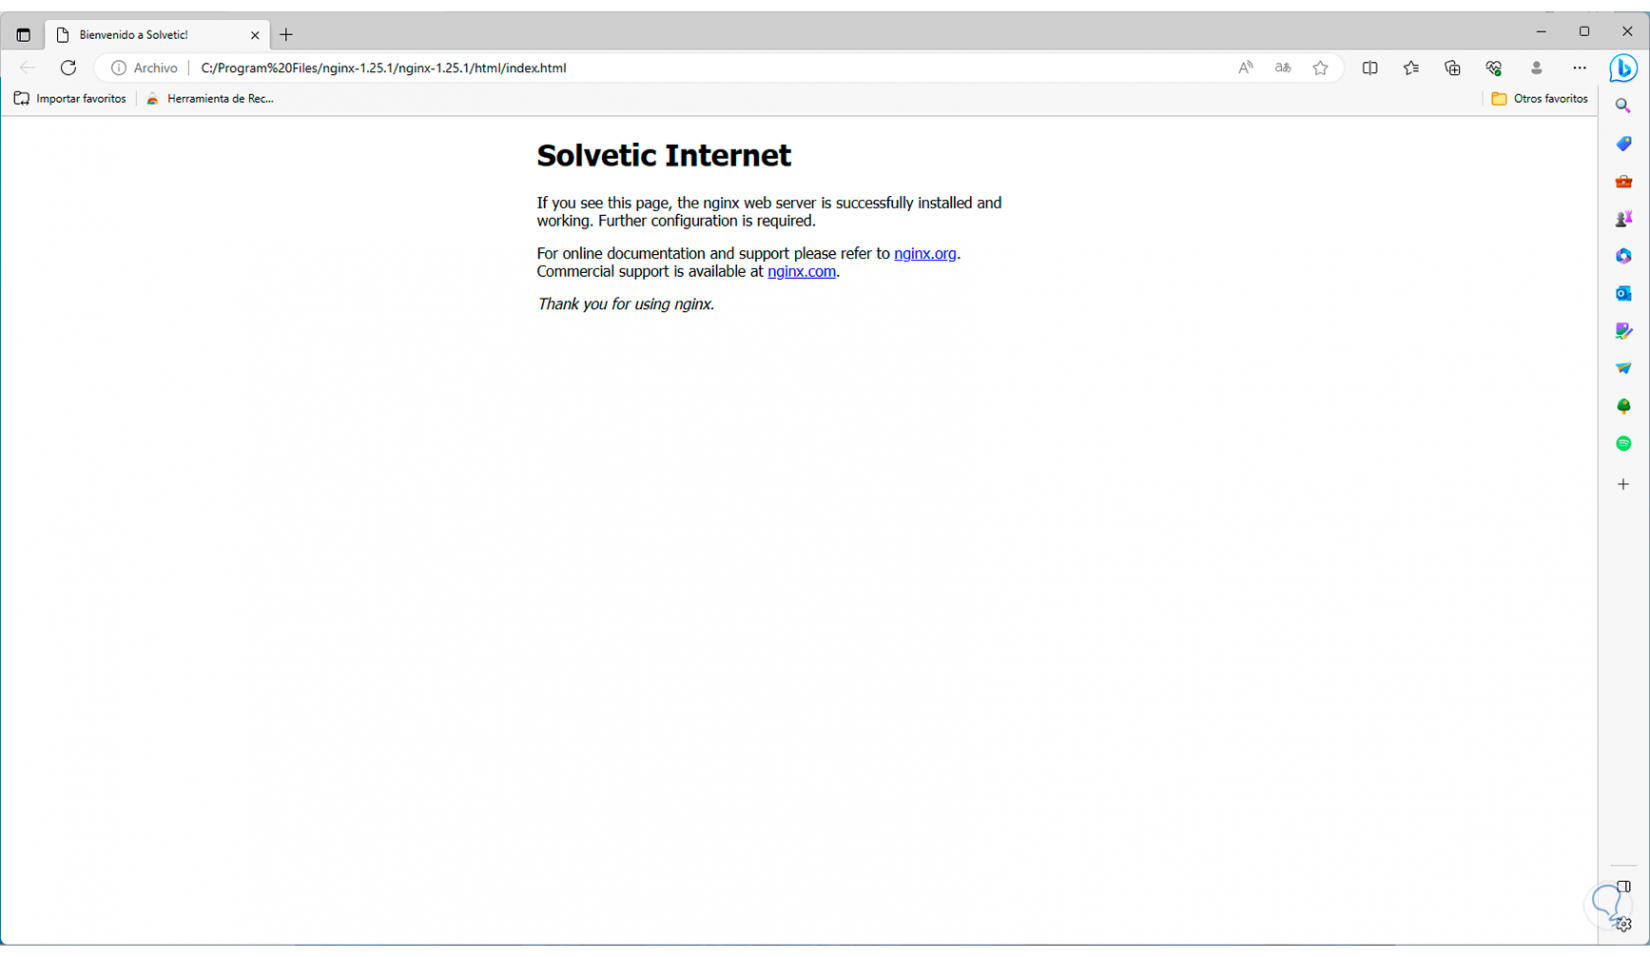
With this form Nginx has been installed in Windows and we are ready for its full use..