To stay up to date, remember to subscribe to our YouTube channel!
SUBSCRIBE ON YOUTUBE
As Linux system administrators or users who want to know more about the system and its components, Linux integrates some essential commands to know in detail every aspect of the system, both at the hardware level and the system itself, and this is ideal for tasks such as:
Tasks
- Possibility of upgrading the hardware (RAM, disks, etc)
- System or Component Warranties
Each of these commands is focused on an aspect of the system and will provide us with precise information on what is required to be consulted. TechnoWikis will explain in a simple way how to access this information in Linux..
1 Commands to View general information Linux
We will start with the basic part of the query and it is viewing general details of our system, in this case we will use the uname command, this command allows access to information about the system name, system type, and kernel version number , hardware architecture, hostname and domain and some other essential options for your knowledge.
The syntax for using the uname command is as follows:
join me [options]
Options
The usage options are:
- -a: display all available information
- -s: generates the system name
- -r : show the kernel version number
- -m : allows to see the architecture of the hardware
- -n : show the host name
- -d: display the domain name if we are in one
- -v: displays the version of the kernel or kernel
- -p: print the type of processor on the screen
- -i : allows to see the hardware platform
- -o: generates the name of the operating system
Step 1
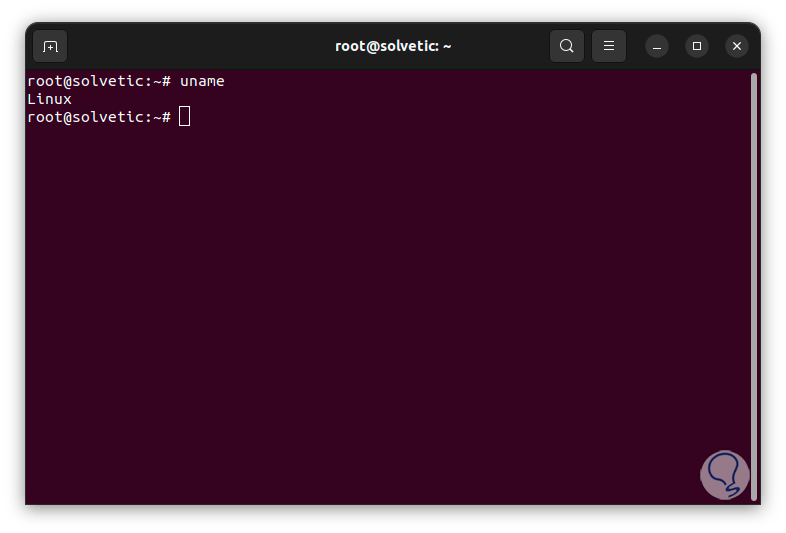
To start we are going to open the terminal and we will execute “uname” without arguments to see the name of the system:
Step 2
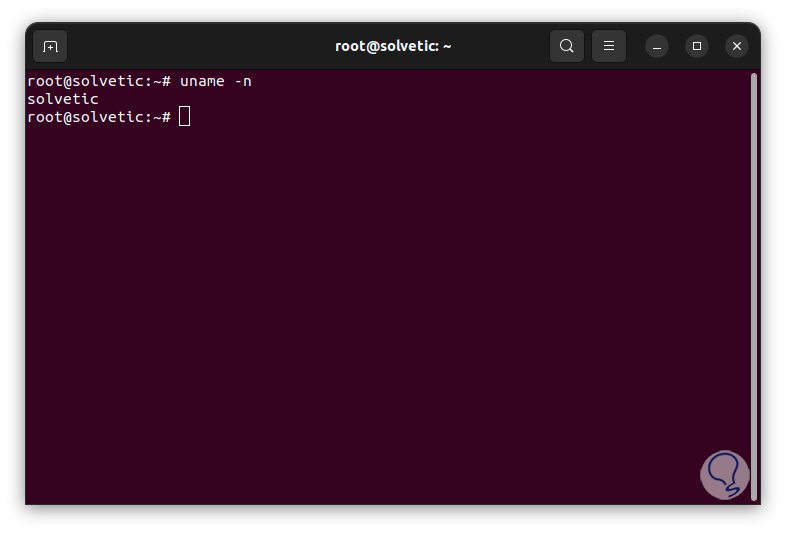
Now to see the host name we are going to execute the following:
join me -n
Step 3
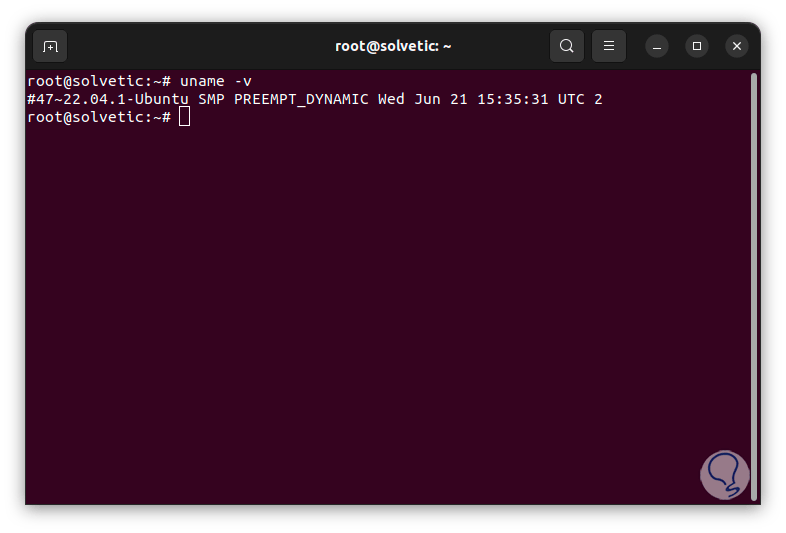
To see the version of the kernel or kernel we will execute:
join me -v
Step 4
If we want to have access to kernel details we will execute the following:
join me -r

step 5
To see the architecture of the equipment, if it is 32 or 64 bits we will execute:
join me -m

step 6
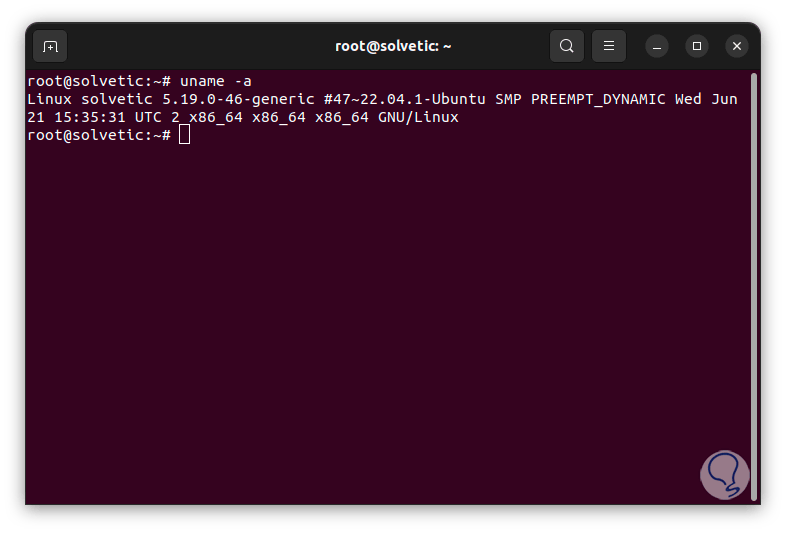
If you want to see all these details in a single line, we will execute the following command:
join me -a
2 Commands to View Information on Linux Disk Blocks
Another option that we have in Linux is to see details of the block devices and in this case we will use the lsblk command which gives us details of the block devices allowing us to see all the Linux block devices including hard drives, flash drives , partitions and volumes that are created, some of its actions include:
- Identify block devices by details like name, tag, or UUID.
- have access to the list of all block devices in your system.
- Access details such as size, capacity, and status of block devices in the system.
Options
The usage parameters of this command are:
- -I, --include (list) : show only devices with the largest numbers that we indicate
- -J, --json: use the JSON output format
- -O, --output-all: remove all columns
- -S, --scsi: create SCSI device information
- -T, --tree[=<column>]: use tree format on the result
- -a, --all: print all Linux devices
- -b, --btyes: display the size in bytes to make it more readable
- -f, --fs: generate file system details
- -i, --ascii: use ascii characters only
- -l, --list: output the result in list format
- -m, --perms – View details about permissions
- -p: print the full path of the device
- -t, --topology: allows us to see the topology used
- -x, --sort <column>: Sort the output by the column value
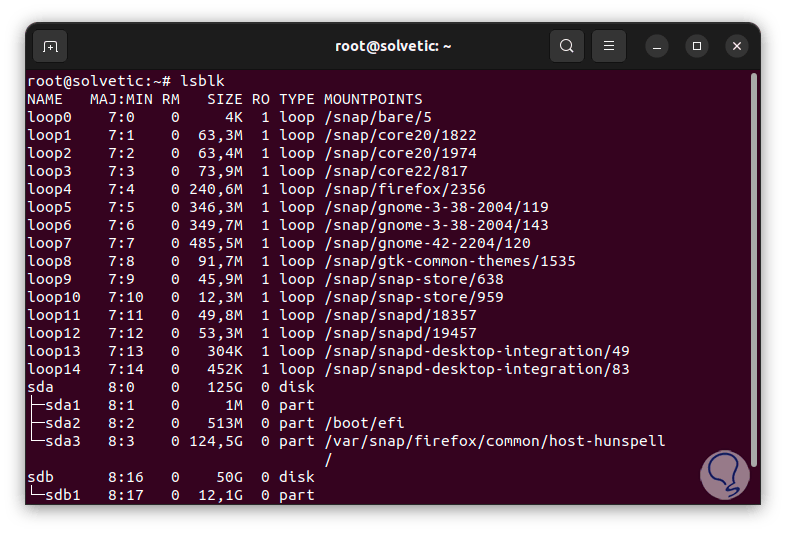
Step 1
For its use we open the terminal and execute the following:
lsblk
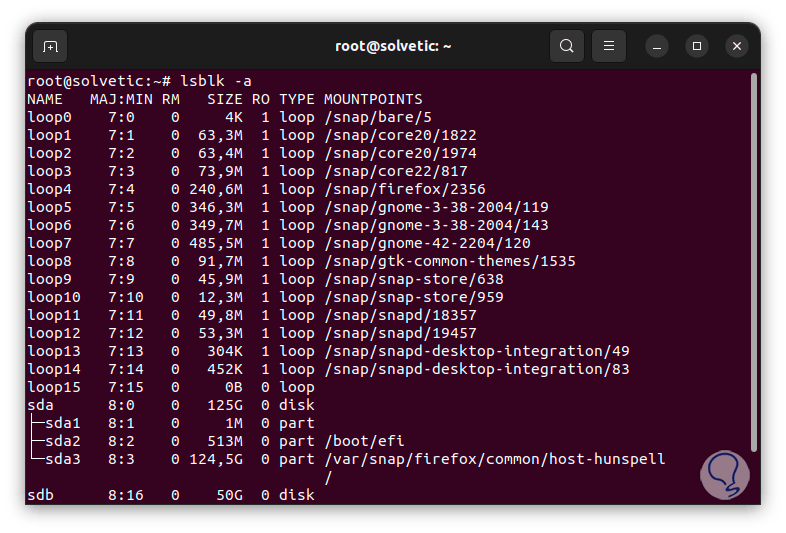
Step 2
To see all the devices we execute the command “lsblk -a”:
Step 3
Some of the values we see in the columns are:
- NAME: is the device name
- KNAME: is the internal name of the kernel device
- PATH: is the path of the node
- FSSIZE: indicates the size of the file system
- FSTYPE: shows the type of the file system
- FSVER: shows the version of the file system
- FSUSE%: is the percentage of use of the file system
- MOUNTPOINT: is where the device is mounted
- FSUSED: show the size of the used filesystem
- UUID: is the UUID of the file system
- LABEL: is the label of the file system
3 Commands to View Linux Hardware Information
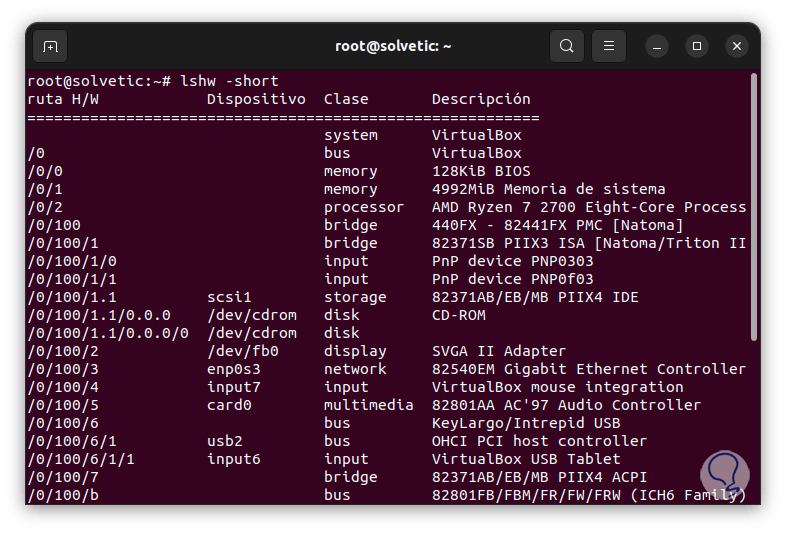
This is a fundamental command since it displays all the hardware details of the equipment, the command to use will be lshw. The lshw command gives us details of the equipment's hardware with all its specifications, this result can not only be seen on the screen but we can also export it in HTML, XML, JSON and more.
Options
Some of its usage parameters are:
- -class (type): only shows the hardware that we indicate
- -disable TEST: disable a use test
- -enable TEST: activate an extra test in the results
- -quiet: do not show the status of the command
- -numeric: display numeric results in the IDs
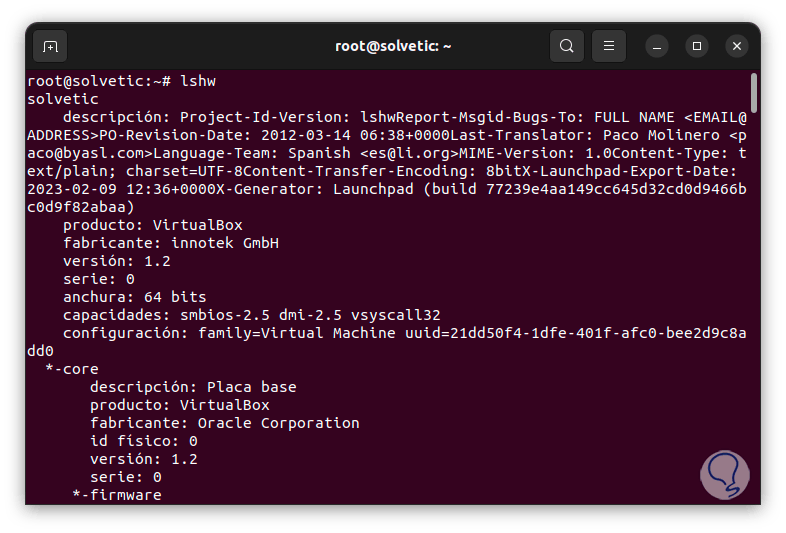
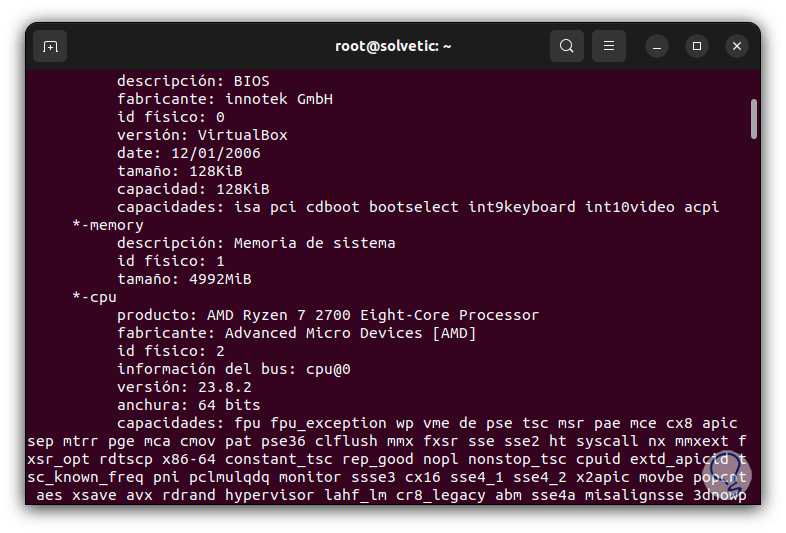
Step 1
In the terminal we execute the "lshw" command to see these details:
Step 2
We can find each detail with its attributes and compatibilities:
Step 3
To see this information in a summarized way, we execute the command:
lshw-short
Step 4
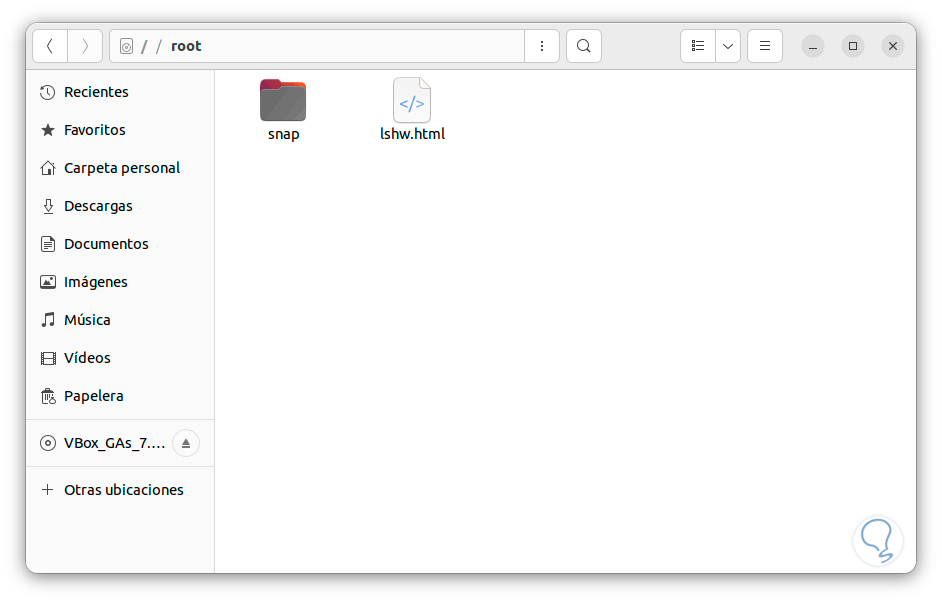
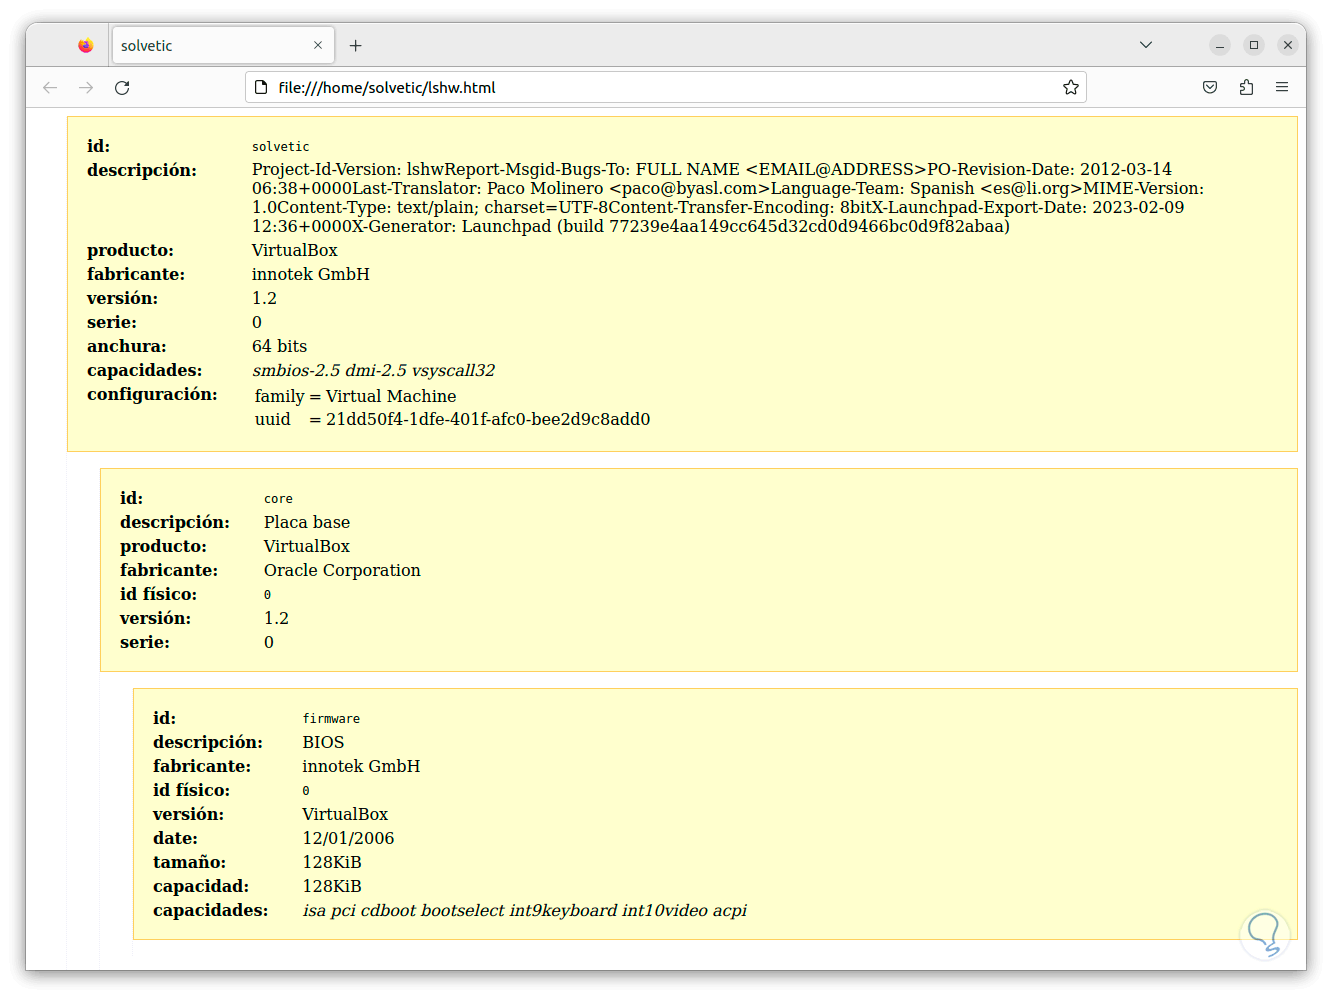
It is possible that this information is redirected to a file, for this we are going to use the following syntax:
lshw -html > lshw.(type)

step 5
We can see that the file is created:
step 6
We double click on this file to see its content:
4 Commands to View Linux USB Information
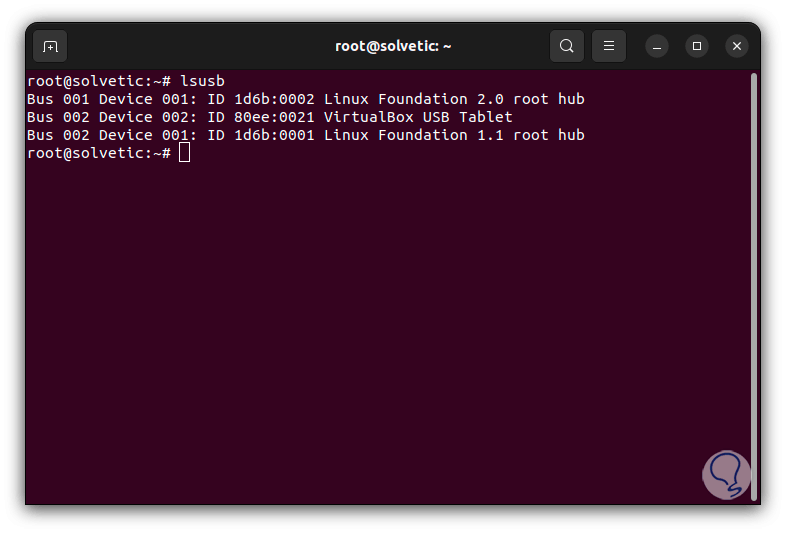
USB devices are widely used in Linux and thanks to the lsusb command, it is in charge of giving us all the details of the available USB ports, its use options are:
Options
- -v: generates a verbose summary
- -s (bus): display only devices on the indicated bus
- -d (vendor): generates the result based on the manufacturer that is indicated
- -D: defines which devices will be analyzed
- -t: create the output in tree format
Step 1
In the terminal we execute the "lsusb" command to see the Linux USB devices:
Step 2
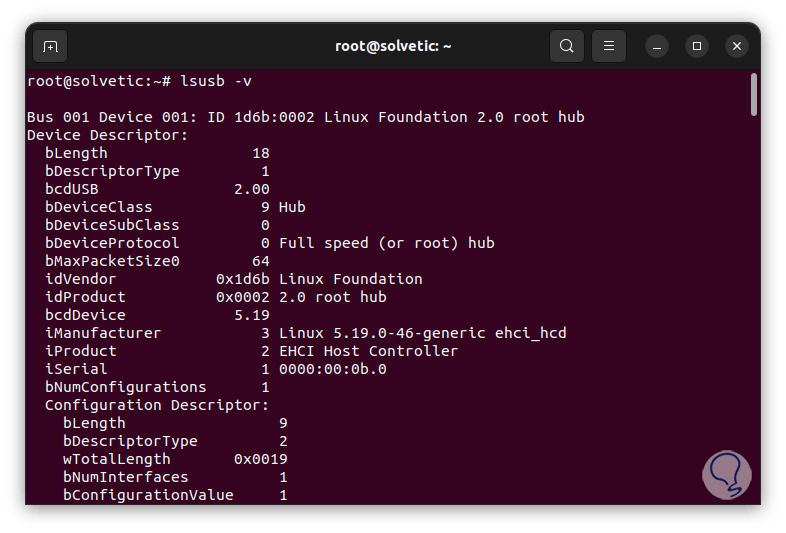
If we want to have more detailed information, we will execute the command:
lsusb -v
5 Commands to View Linux Processor Information
The CPU is one of the pillars of any system and thanks to the lscpu command we will have details about the architecture of the processor used in Linux, some of its usage parameters are:
Options
- -s : display concise output
- -p: display information about a specific processor
- -l – display command line information
- -o: specifies the output format
- -a: print the online and offline processors
- -b, --online: Only create output from online processors
- -c, --offline: only print offline processors
- -J, --json: use JSON as the default format
- -e, --extended: create output in extended readable format
- -s, --sysroot <directory>: make root the selected directory
- -y, --physical: print physical but not logical IDs
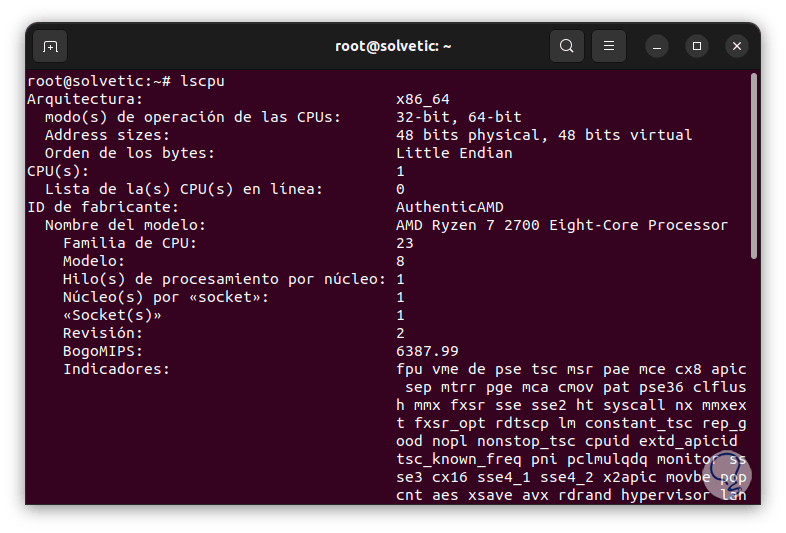
Step 1
In the terminal we execute "lscpu" to see the details of the CPU:
lscpu
Step 2
We see full details of each processor.
6 Commands to View SCSI Information Linux
In our system we use SCSI devices for storage and management issues, we can also access details of these with the lsscsi command, this command gives us information on the SCSI devices connected to the system.
Step 1
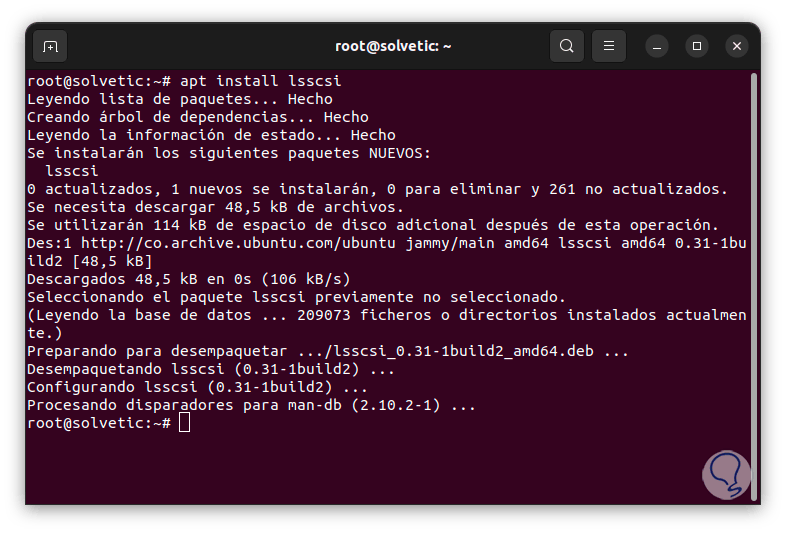
First in the terminal we are going to install the utility with the command:
sudo apt install lsscsi
Step 2
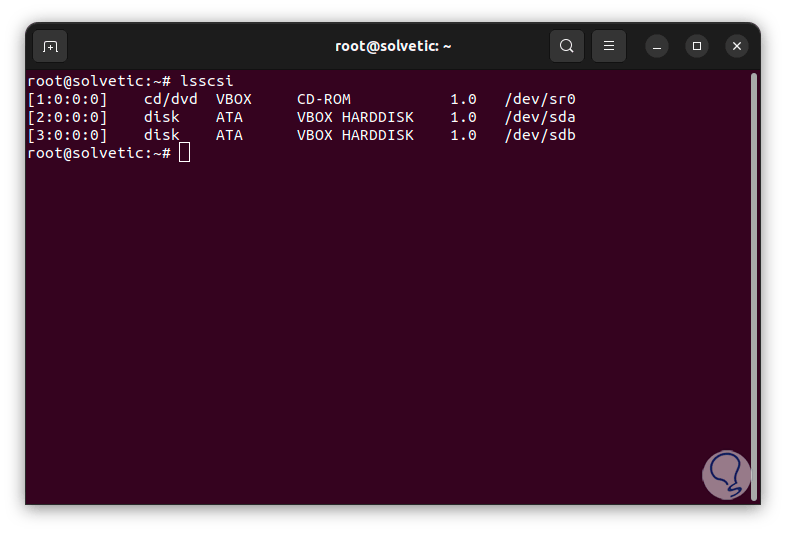
Now we execute the command without parameters to see the results:
lssci
Step 3
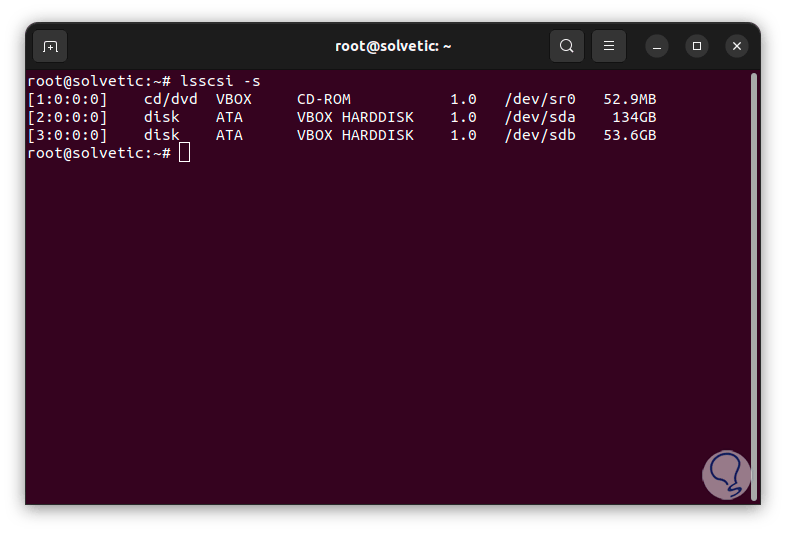
To see the size of the devices we execute the command "lsscsi -s":
7 Commands to View PCI Linux Information
Linux also offers us a simple method to see the list of PCI peripherals, with lspci we will have access to the necessary details for its management, some of the parameters to use are:
Options
- -mm: creates machine-readable output
- -t : display the result in bus tree format
- -k: display kernel drivers for each device
- -n. display numeric IDs
- -i (file): use the data from the file /usr/share/misc/pci.ids.gz
- -G: makes use of debugging mode
Step 1
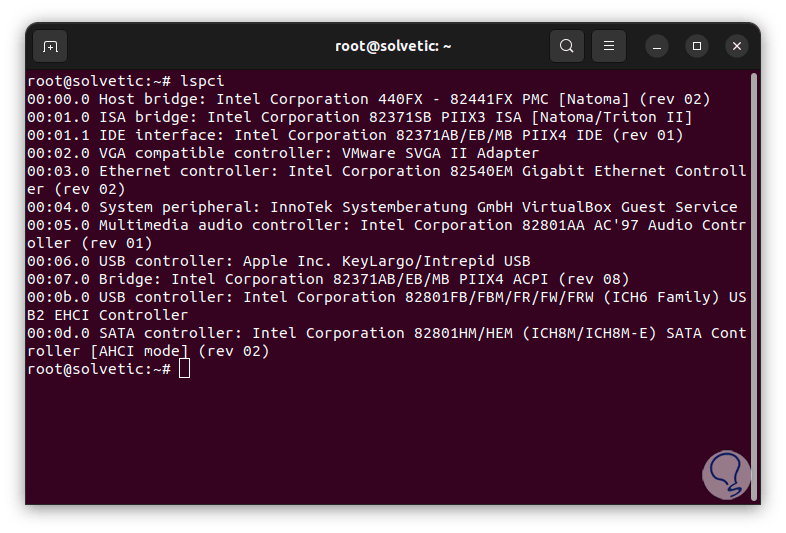
In the terminal we will see the PCI devices using the following command:
lspci
Step 2
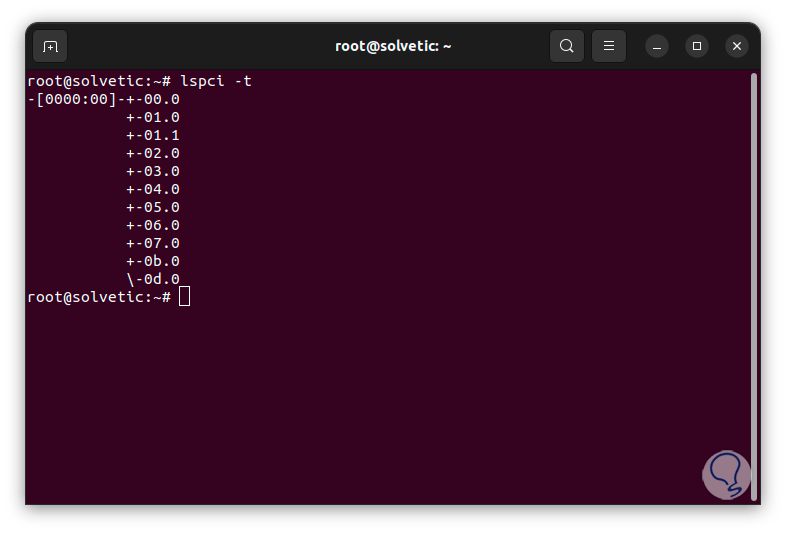
If we want to see the result in the form of a tree, we execute:
lspci -t
Step 3
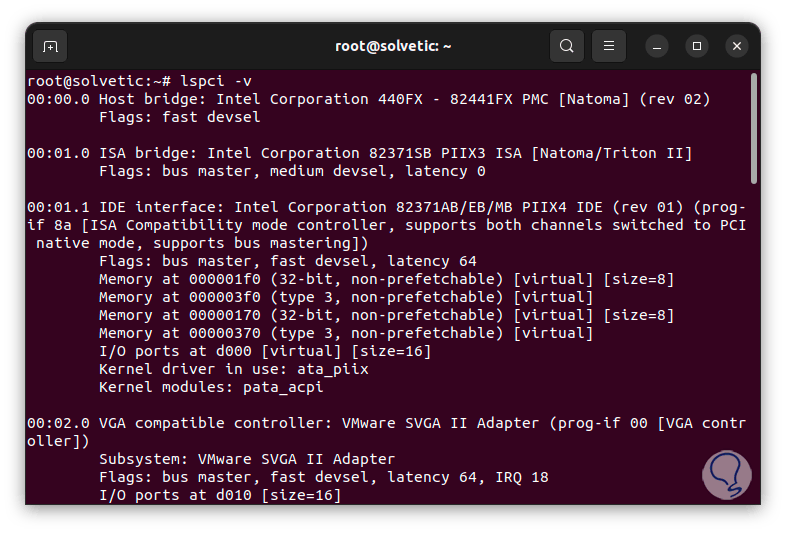
To see much more complete details we execute the command:
lspci -v
8 Commands to View Information on Linux Hardware Components
In Linux there is the dmidecode command which is a command line tool which allows you to decode the system management BIOS tables (SMBIOS), this SMBIOS is a standard where hardware information is stored using a readable format, it is ideal for access details such as system manufacturer, model and serial number, processor, memory and much more.
Step 1
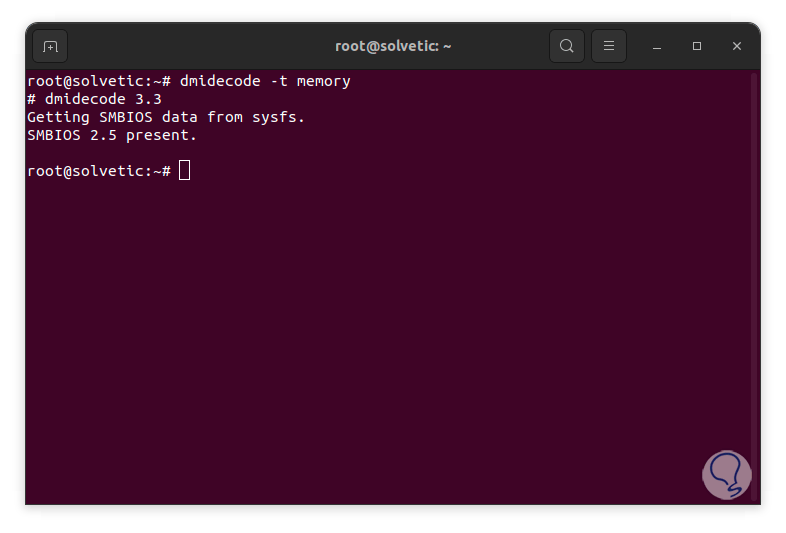
In the terminal we execute dmidecode indicating which variable to analyze:
sudo dmidecode -t memory
Step 2
We can see system details:
sudo dmidecode -t system

Step 3
We can also review the BIOS:

9 Commands to View Linux File System Information
For this we will use one of the most popular Linux commands and it is fdisk, this allows us to manage the hard disk partitions, it allows us to perform actions such as:
- Create partitions of ext2, ext3 and ext4 file systems
Step 1
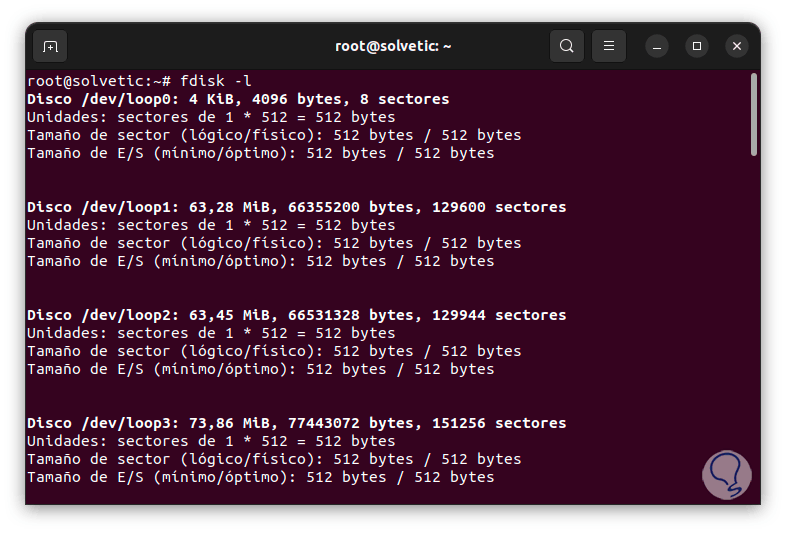
We are going to open the terminal and there we execute:
fdisk -l
Step 2
Some variables to use are:
Options
- -b, --sector-size <size>: Indicates the physical and logical sector size
- -B, --protect-boot: Do not clear boot bits when creating a new label
- -l, --list: show partitions
- -o, --output <list>: indicates which columns to see
- -t, --type <type>: use only the specified partition table type
10 Commands to View SATA Linux Information
Finally we can access SATA details using the hdparm command, this is a command that allows changing the performance parameters of a hard drive, some of its usage parameters are:
Options
- -t – Displays the maximum transfer speed of the hard drive.
- -i – Displays hard drive information such as its model and serial number
- -I: displays hard drive details, such as rotation speed, cache size, and more
- -k : run different performance tests on the hard disk
- -g: list disk geometry
Step 1
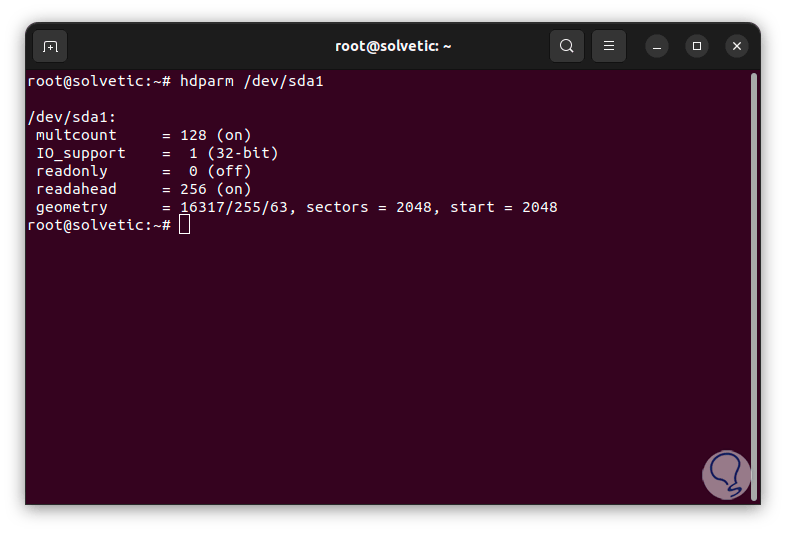
In the terminal we execute the command with the desired path to see its information:
sudo hdparm /dev/sda1
Step 2
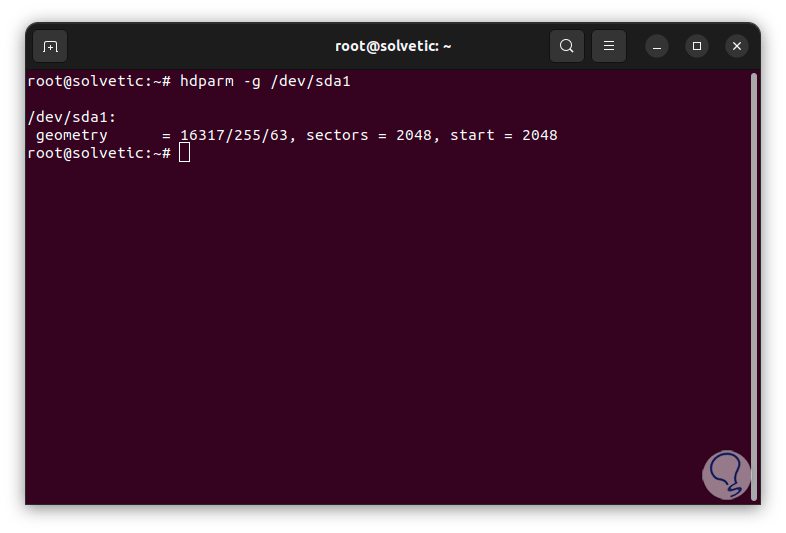
It is possible to use the “-g” parameter to add the geometry of these devices:
Each option will give us complete details of our system and hardware and thus the management will be comprehensive.