To stay up to date, remember to subscribe to our YouTube channel!
SUBSCRIBE ON YOUTUBE
When we use Windows operating systems, in all its versions, and not only Windows but any system and device that accesses the network, various values and network parameters come into play, but without a doubt the most important is the IP address. which is similar to our identification and is vital and mandatory for all network processes..
IP addresses
IP addresses are unique numeric identifiers that are assigned to network devices and that make use of the Internet Protocol (IP) to have communication between them, IP addresses can be from the group:
- IPv4 (Internet Protocol version 4): it is the oldest system and in which we currently use and these IPv4 addresses are administered by four decimal numbers separated by points, and these numbers can vary from 0 to 255 but we must know that they are already being running out of IPv4 addresses to be assigned.
- IPv6 (Internet Protocol version 6): IPv6 is the future of IP addressing since its extension is much wider and its format is hexadecimal separated by colons, this allows an unlimited number of IP addresses
Now, apart from this type of IP we also find static and dynamic IP addresses, this varies based on the use of the IP address.
Static IP addresses are fixed addresses that are used for computers that fulfill special roles such as servers or as client access points while dynamic addresses are those that are commonly assigned to a PC and that are assigned automatically thanks to DHCP .
TechnoWikis will teach you how you can change the IP address in Windows 11 through the CMD console for those times when you need to have a special IP for administrative tasks.
How to change IP in Windows 11 from CMD
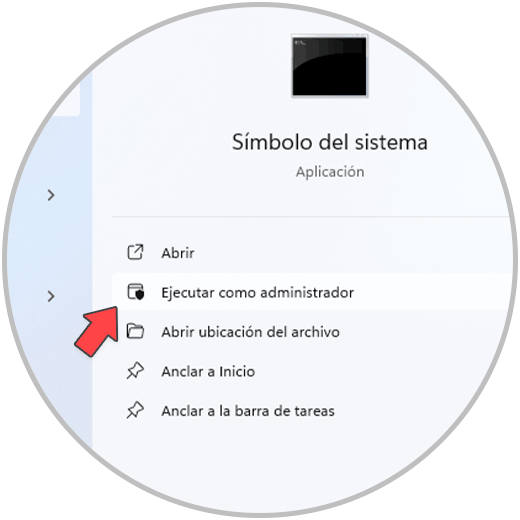
Step 1
To start we are going to open the CMD command prompt console as administrators:
Step 2
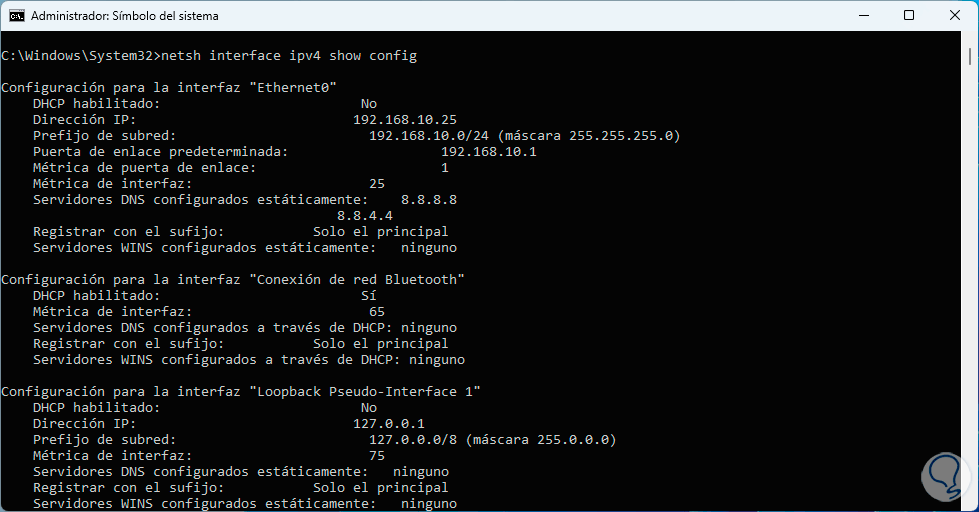
Once we access the console we will see the current properties of the IP address, and of the adapter, for this we execute the following:
netsh interface ipv4 show config
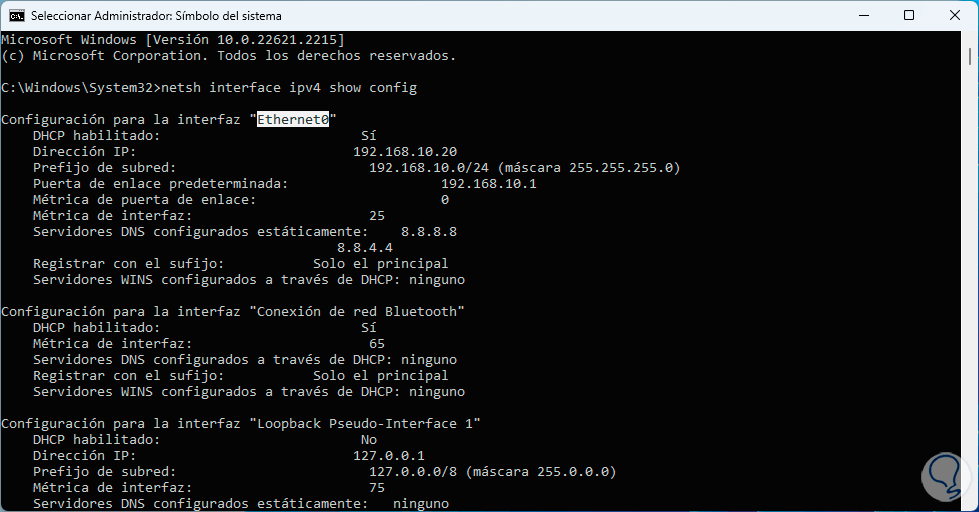
Step 3
There we will keep in mind the name of the network interface but in addition to this we find details such as:
- Current IP that owns Windows 11
- Subnet Prefixes and DHCP Status
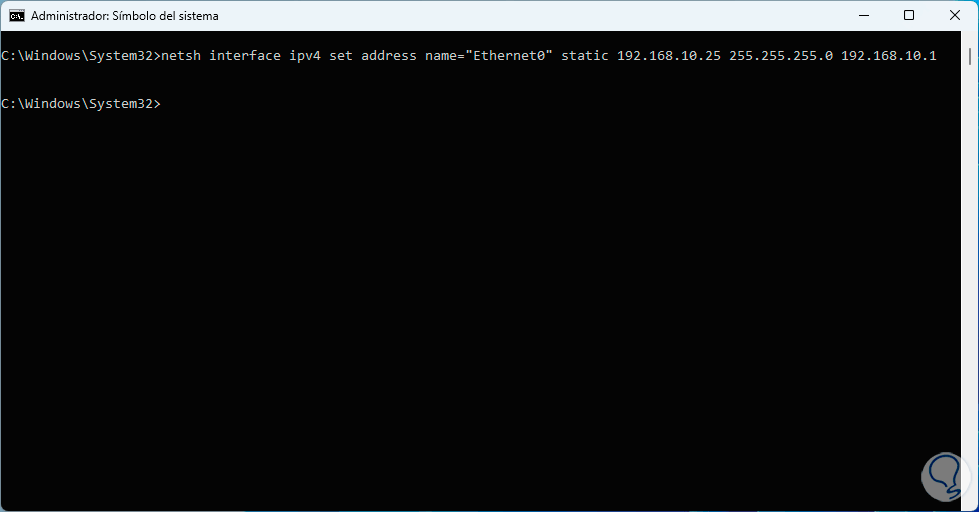
Step 4
Now we are going to set a fixed or static address using the following syntax:
netsh interface ipv4 set address name="interface" static IP_Address Net_Mask Gateway_Gateway
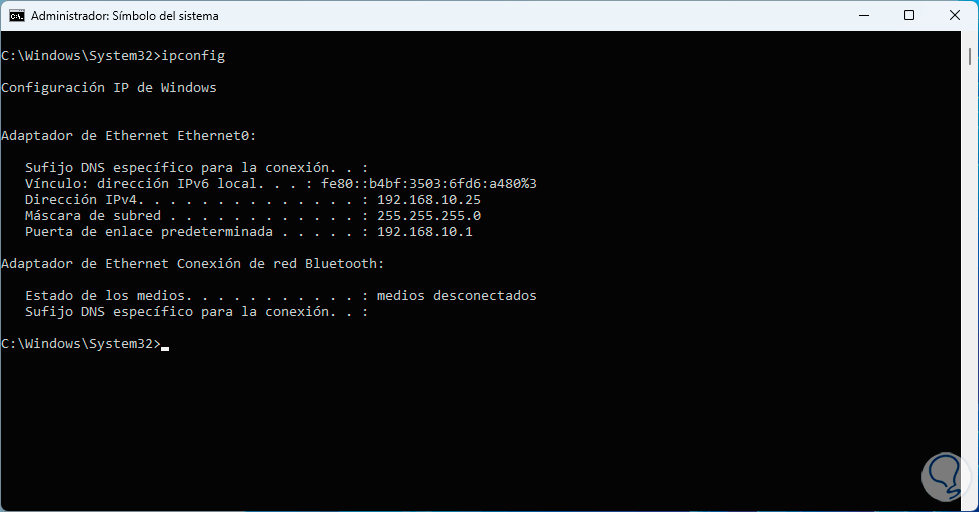
step 5
To verify that everything was correct, we are going to execute the “ipconfig” command. There we see that the IP has been set correctly.
step 6
We can see all the properties of the IP address again and when it is set to static we see that DHCP has been disabled:
netsh interface ipv4 show config
step 7
Now for the IP address to be assigned by the DHCP server we are going to execute the following:
netsh interface ipv4 set address name="interface" source=DHCP

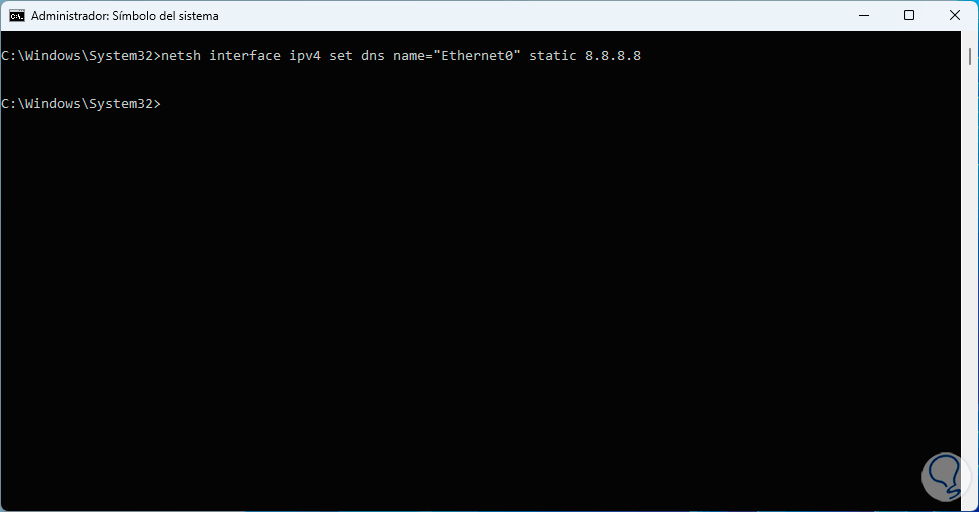
step 8
Now it is possible to set some public IP address for DNS:
netsh interface ipv4 set dns name="interface" static IP_DNS
step 9
Some of the options to use are:
Primary IPv4 address: 8.8.8.8 Secondary IPv4 address: 8.8.4.4 Primary IPv6 address: 2001:4860:4860::8888 Secondary IPv6 address: 2001:4860:4860::8844
Primary IPv4 address: 1.1.1.1 Secondary IPv4 address: 1.0.0.1 Primary IPv6 address: 2606:4700:4700::1111 Secondary IPv6 address: 2606:4700:4700::1001
Primary IPv4 address: 208.67.222.222 Secondary IPv4 address: 208.67.220.220
Primary IPv4 address: 8.26.56.26 Secondary IPv4 address: 8.20.247.20
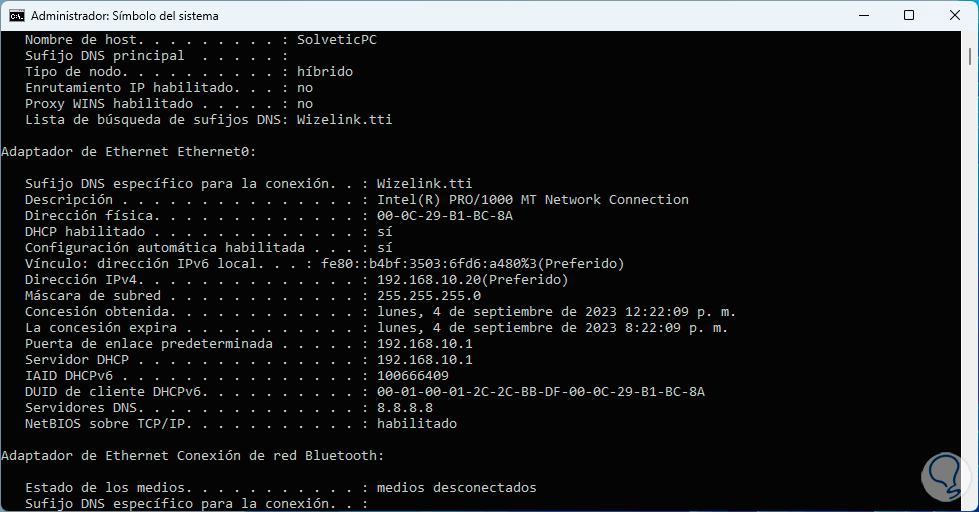
step 10
To verify that DHCP has been enabled and that the public DNS IP address is established, we will execute the following command:
ipconfig /all
step 11
Finally, it is possible to resort to two commands that help us assign our dynamic IP in case of failures, first we are going to "release" the IP with the command:
ipconfig /release
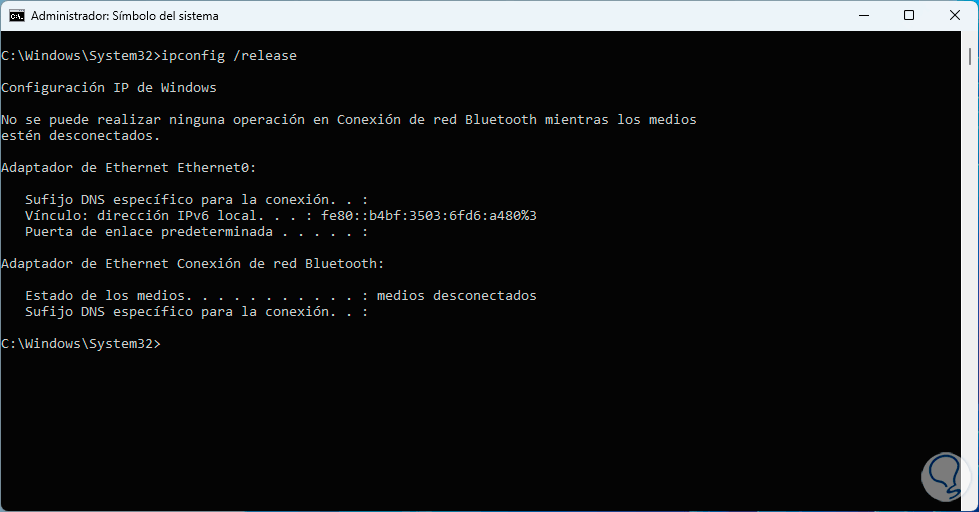
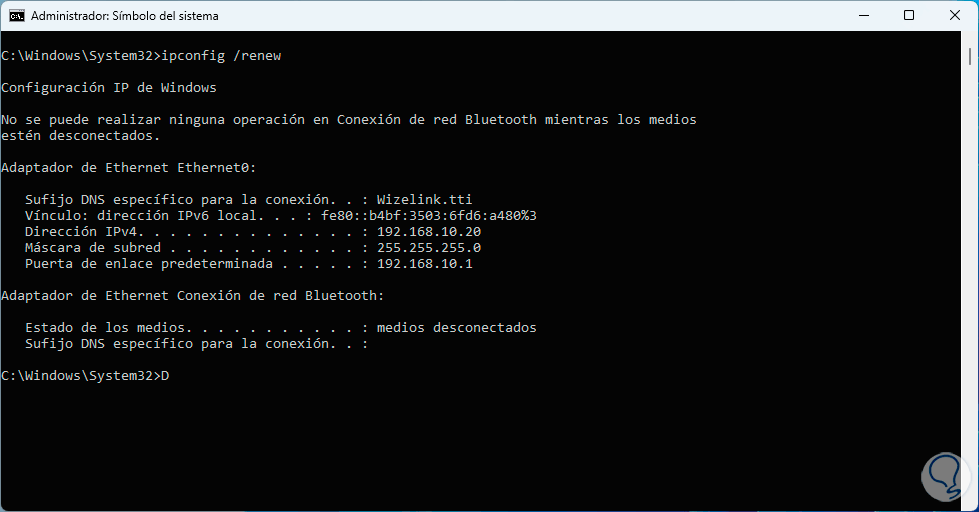
step 12
This releases the IP address assigned to the network interface and is part of the IP address update tasks, once the IP has been released we will renew it so that it is assigned automatically with the command:
ipconfig /renew
step 13
This command allows the DNS server to look for any available IP addresses in its table to assign to the system.
Keep in mind that by default the DNS server is managed by the internet provider that we have contracted but this can collapse so it is more reliable to use public DNS which manage secure and much more robust servers but TechnoWikis always advises you to be careful with your data in this type of environment that something has public..
So you can change your IP in Windows via CMD.