The current use of USB devices or SD cards has grown vertiginously and that is why today we can see how it is possible to install operating systems from USB media and transport thousands of files on SD cards between different devices. This translates into portability, efficiency and time savings. Now, most of these USB storage devices have, in an integrated way, a write protection tab through which it is possible to protect the device against accidental writing or the addition of unauthorized elements..
The problem is that sometimes we will see the message "Disk protected against writing" without apparent cause which ultimately results in the inability to access this device and use it for the task we are going to execute. This error can be our enemy when we urgently need to enter the information from an external memory and we find it protected against writing, if we do not know how to deactivate it we will get desperate.
To keep up, remember to subscribe to our YouTube channel! SUBSCRIBE
Today TechnoWikis brings a series of integral solutions thanks to which we will recover the optimal state of our USB device and it will be ready to use without any problem..
1. Remove write protection using the Windows 10 Registry Editor
Before starting with this process, it is recommended to create a backup or restore point since a badly managed registry can result in a general system error.
Step 1
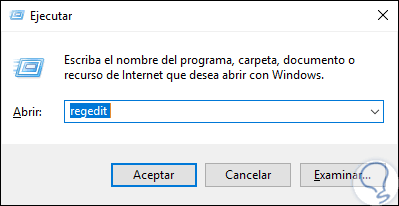
To access the registry editor we will use the following key combination and execute the regedit command
: + R
regedit
Step 2
Click on Accept or Enter and in the window we will go to the following route:
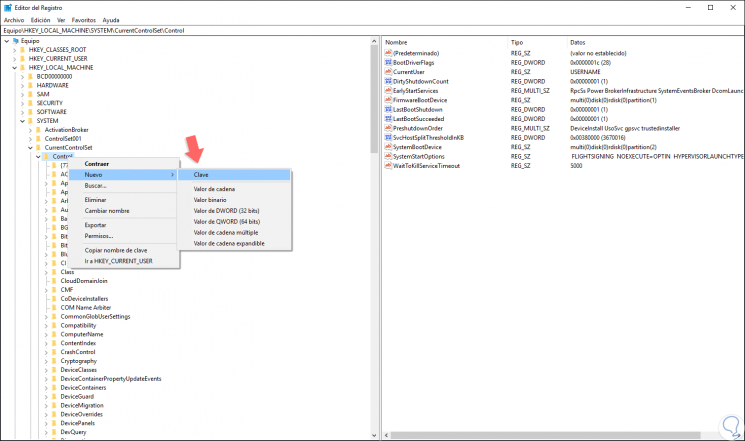
HKEY_LOCAL_MACHINE \ SYSTEM \ CurrentControlSet \ Control
Step 3
There it will be necessary to create a new password by right clicking on the “Control†folder and selecting the “New / Password†option:
Step 4
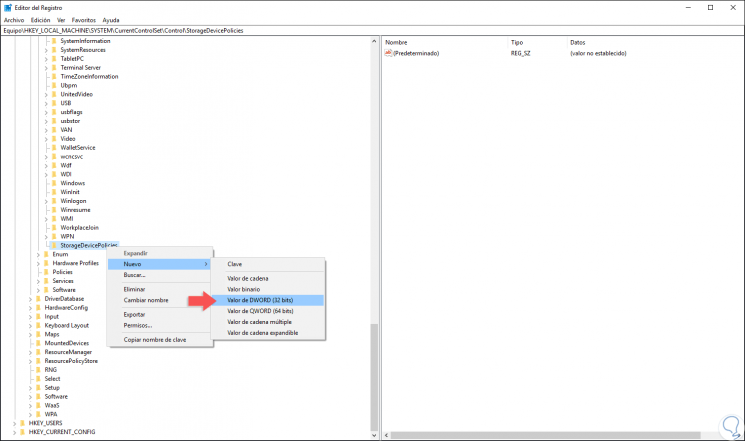
This new key will be called “StorageDevicePolicies†and now we will right click on this key created and select the “New / DWORD Value (32 bits)†path:
Step 5
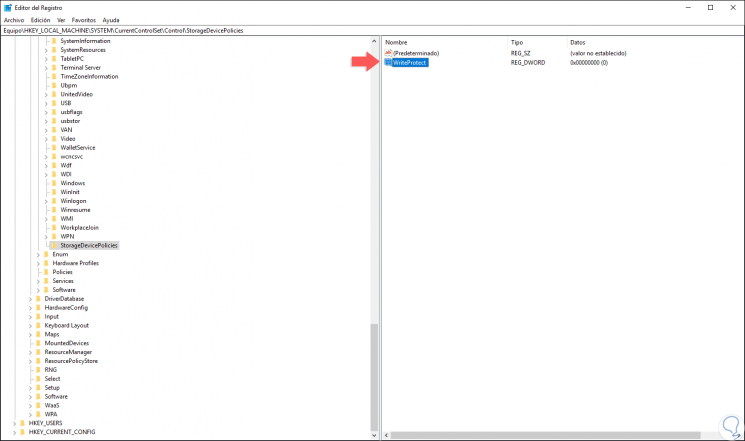
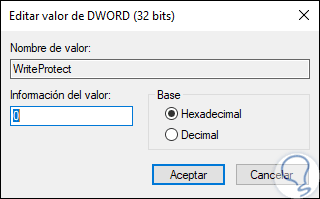
This new DWORD value will be called “WriteProtectâ€:
Step 6
We will double click on that value and in the field "Value information" we set the value 0 in the Hexadecimal base. Click OK to apply the changes and we can exit the registry editor.
2. Remove write protection using Diskpart Windows 10
Diskpart is a command line utility of Microsoft operating systems through which it is possible to work centrally on each of the available storage units.
Step 1
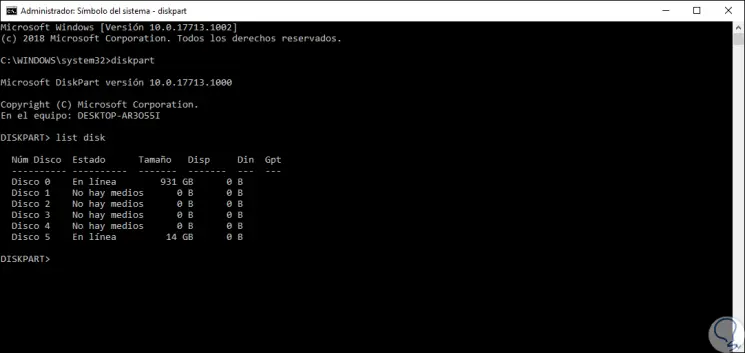
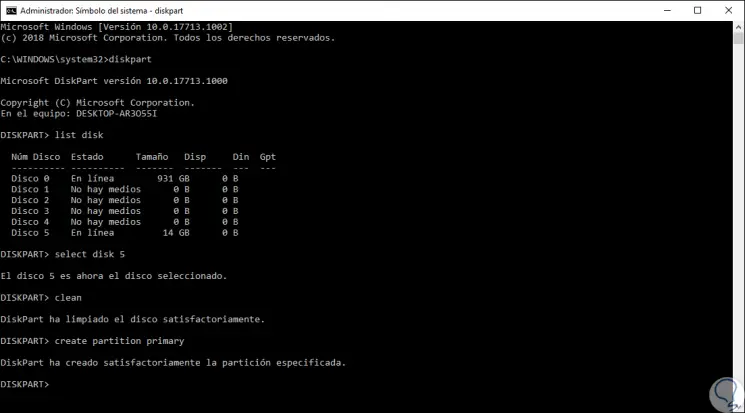
To make use of this option, we access the command prompt as administrators and there we execute the diskpart command and once we access it we execute the “list disk†line in order to observe each of the disk drives in Windows 10:
Step 2
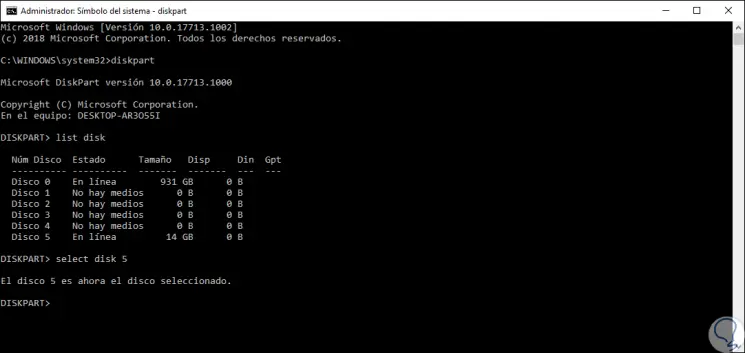
In this case the USB drive with failures is labeled "Disk 5", to select this disk we will use the following line:
select disk 5
Step 3
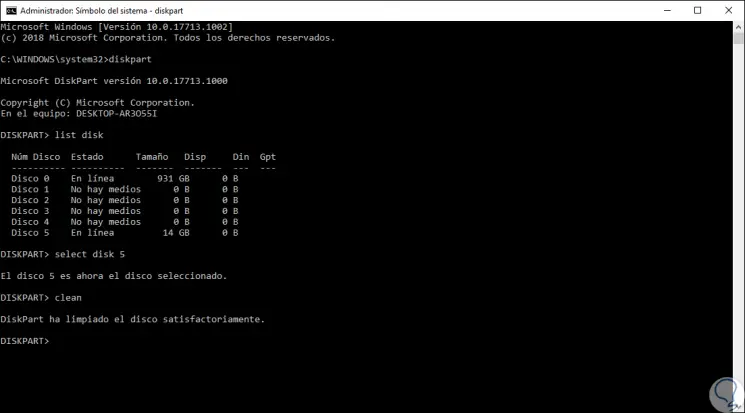
We confirm that the disk has been selected, now, we will execute the "clean" command to format the drive:
Step 4
The next step to take will be to create a new partition on that USB device by running the following line:
create partition primary
Step 5
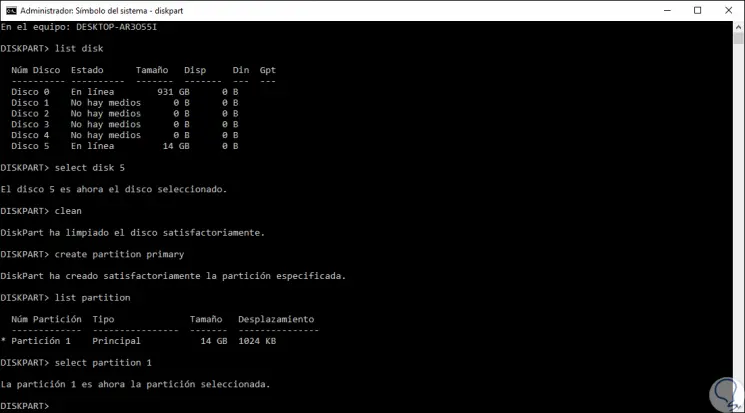
We can use the "list partition" command to verify that the partition has been created and once confirmed we select it by executing:
select partition 1
Step 6
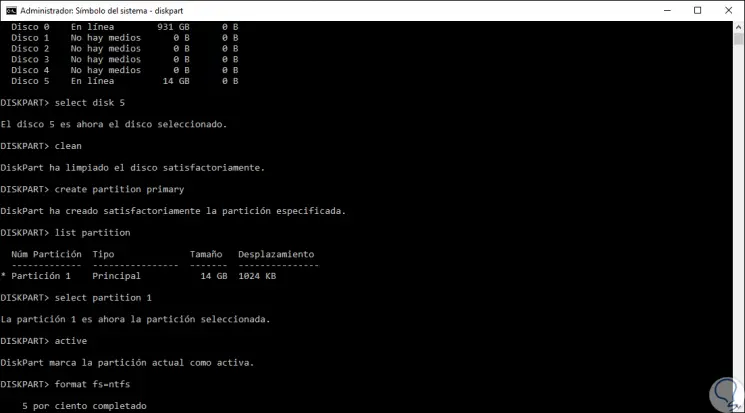
We proceed to activate this partition by executing the
active command and finally apply the NTFS file system by executing. We hope that the process culminates in order to have access to the USB media in the correct way.
format fs = ntfs
3. Remove write protection using the Windows 10 Group Policy Editor
This option is only available for Pro, Education and Enterprise editions of Windows 10.
Step 1
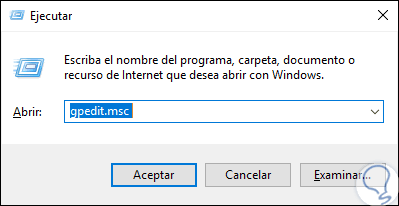
To make use of this option, we will use the following key combination and execute the “gpedit.msc†command:
+ R
Step 2
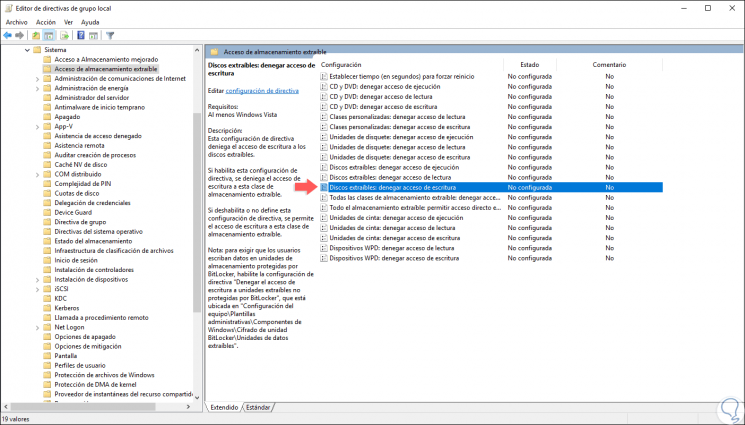
Press Enter or Accept to access and in the deployed editor we will go to the following route:
Step 3
There we will locate the policy called “Removable disks: deny write accessâ€:
Step 4
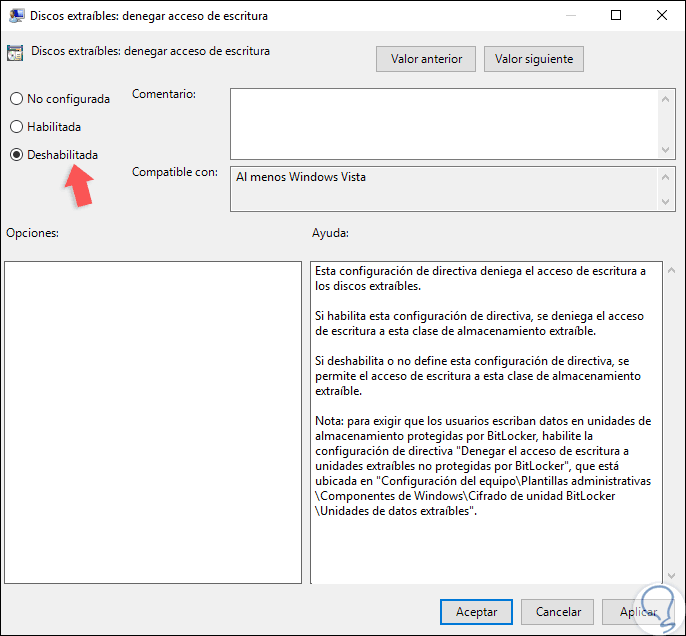
We will double click on this policy and in the new window we activate the “Disabled†box. Click on Apply and Accept to save the changes.
4. Remove write protection using Windows 10 Disk Manager
Step 1
This is an option by which you get full control of the storage devices of the computer, to access this Windows 10 Disk Manager we can use any of the following options:
Step 2
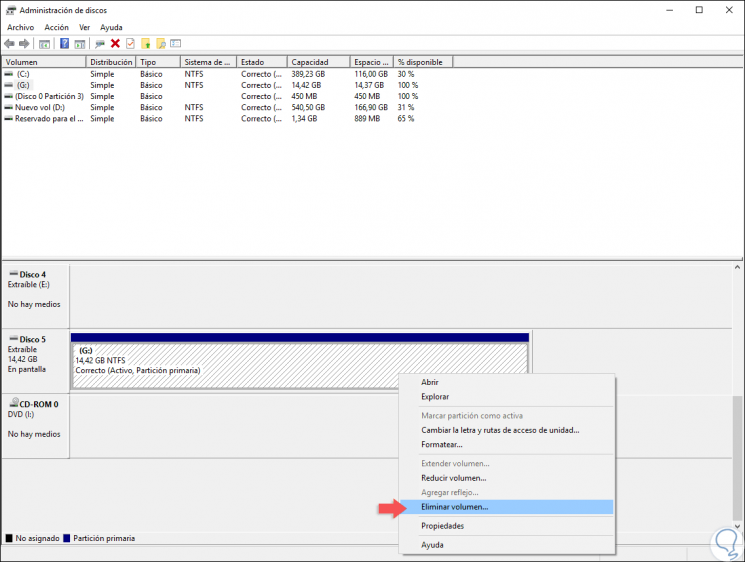
In the disk manager we will locate the drive with the error and right click on it and select the option “Remove volumeâ€:
Step 3
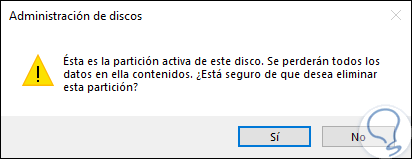
The following message will be displayed:
Step 4
Click on Yes to confirm the action and now we will right click again on the unit and select the option “New simple volumeâ€:
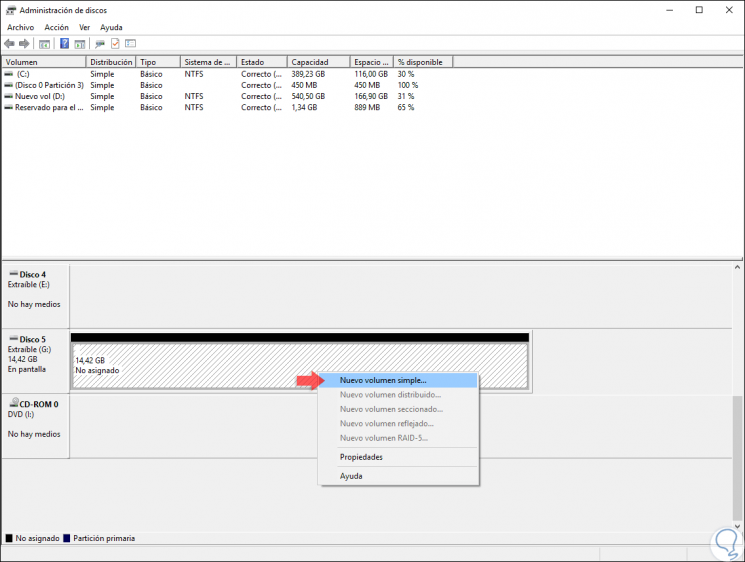
Step 5
The following wizard will be displayed where we first define the size to use:
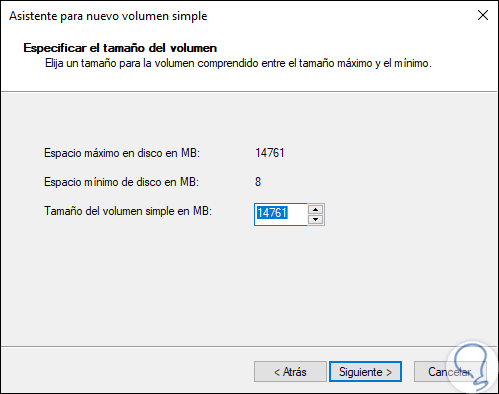
Step 6
Then we define the letter to assign to the unit:
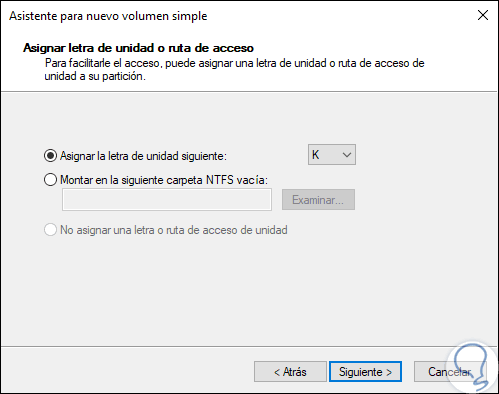
Step 7
Subsequently we define the file system to use, name to assign and check the box "Format fast":
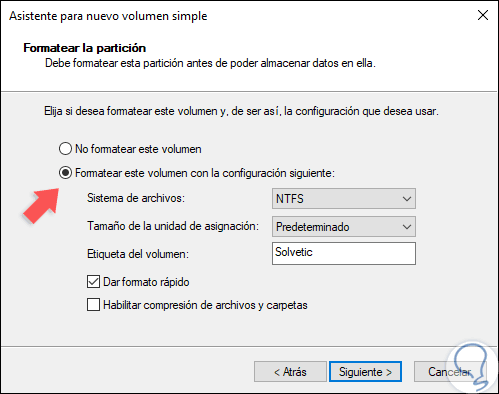
Step 8
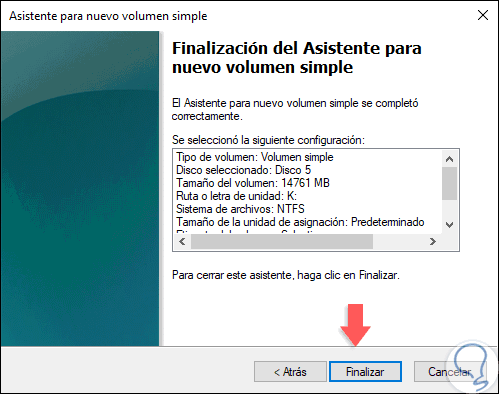
Click Next and we will see a summary of the action to be carried out. Click on Finish to complete the action.
5. Remove write protection using third-party applications Windows 10
No less important are third-party applications which offer intuitive interfaces to execute such action in the most practical way possible. Some options to use are:
SDFormatter v4
This free application formats SD memory cards, SDHC memory cards and SDXC memory cards that meet the SD file system specification created by the SD Association (SDA). Your download is available at the following link. This app corrects file reading and writing errors and eliminates the write protection of the selected SD card.
SDFormatter v4
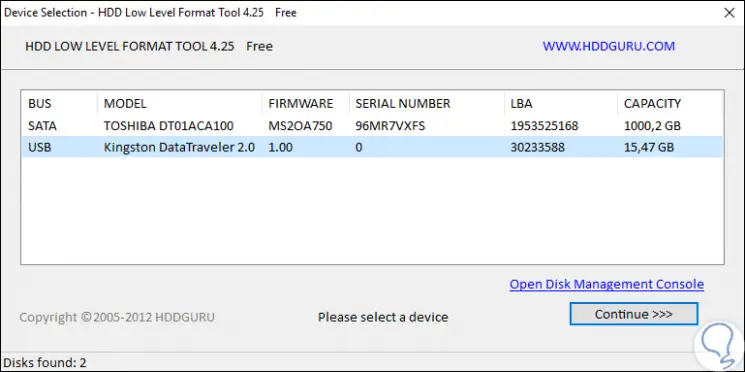
HDD Low Level Format
One of the most striking for its simplicity and functionality, this app executes low level formatting in internal and external units in a total way and can recover inaccessible units.
It has a free and a paid version which are available at the following link:
HDD Low Level Format
HP Disk Format Tool
It is a Windows-based format utility through which it will be possible to format any USB flash drive in FAT, FAT32 or NTFS file systems and create DOS boot disks to boot any computer. Your free download is available at the following link:
HP Disk Format Tool
With any of the methods indicated we will recover the optimal operation of our USB or SD devices in Windows 10.