To stay up to date, remember to subscribe to our YouTube channel!
SUBSCRIBE ON YOUTUBE
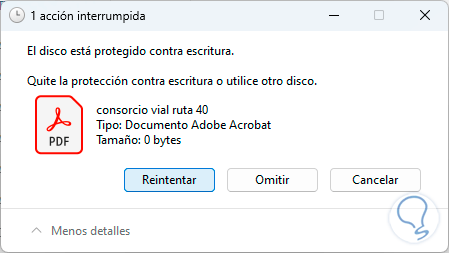
USB media gives us the possibility of storing large amounts of information as well as carrying out many other tasks within Windows 11, but sometimes we encounter an error that prevents us from using the device and it is the error that the media is Write protected, that is, when you see this error it will be impossible to copy, paste, move or edit any element on the USB..
If we encounter USB Write Protection, we will not be able to access the USB memory and an error will appear that will prevent us from working with it, so these different options will help you resolve USB protection. This error can occur for various reasons and TechnoWikis has the solution to correct it.
1 USB Write Error Check
First of all we will see the error message, for this we open the File Explorer, on the USB we try to perform some action, the error in question will appear:
2 Remove USB Write Protection from the Console
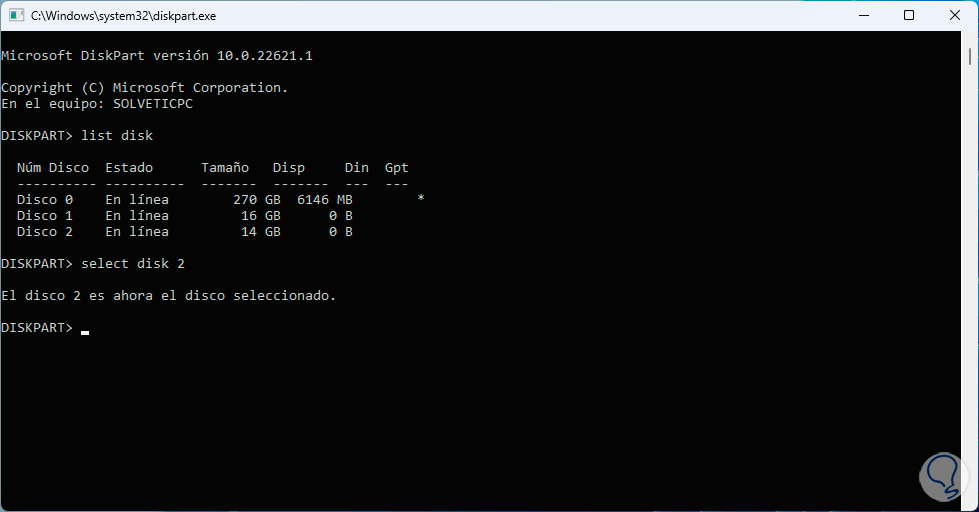
Step 1
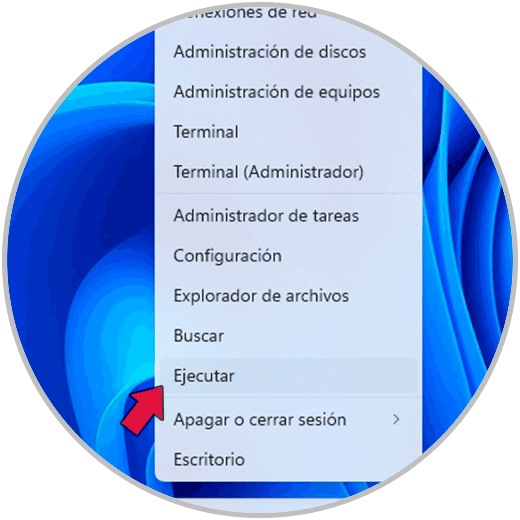
The first method to use will be from the command prompt console through a special command, to use it we right click on the Start menu and select “Run”:
Step 2
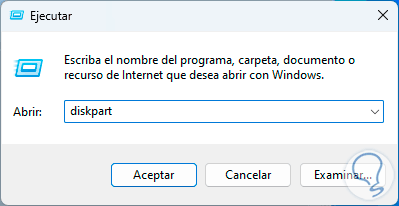
In the Run console we enter the command “diskpart”:
diskpart
Step 3
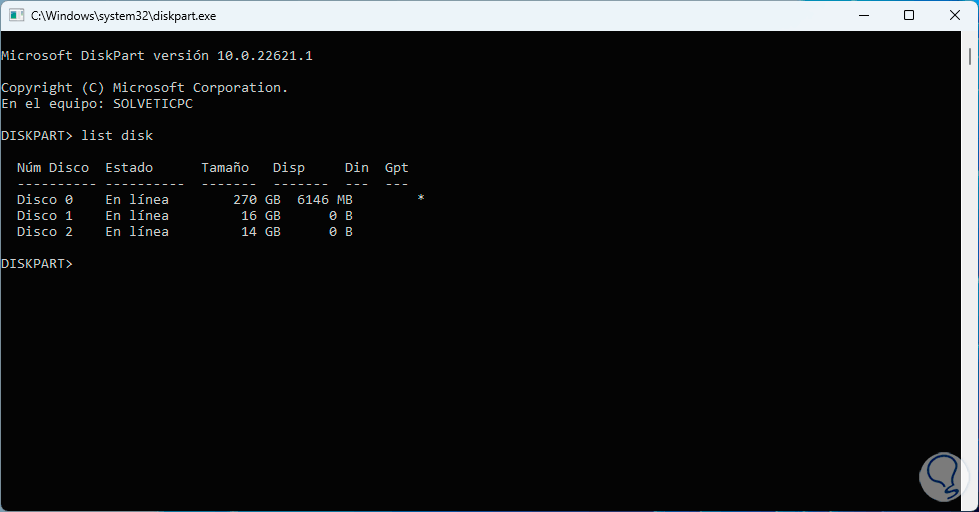
We click on OK, then we are going to list the current disks on the PC, to do this we execute the command:
list disk
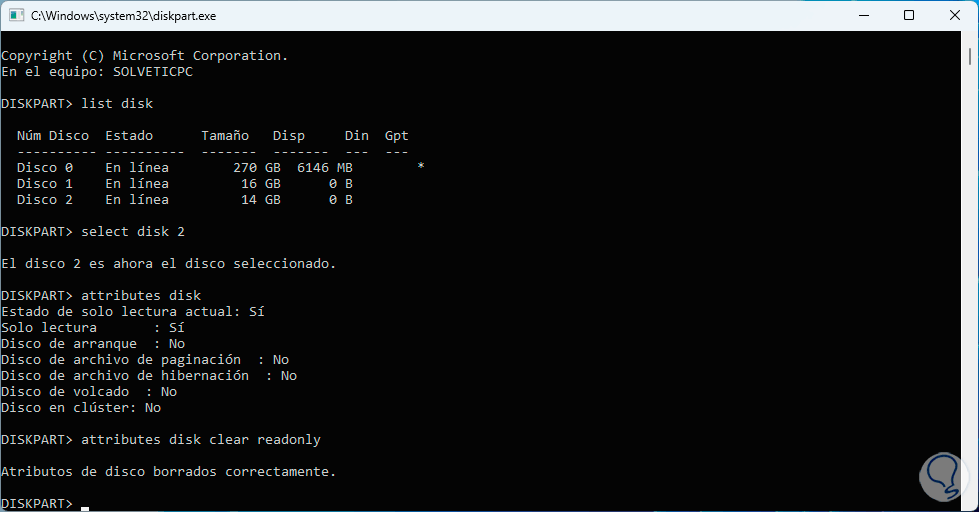
Step 4
We select the USB using the command:
select disk #
Step 5
Now we are going to list the properties of that disk with the “atrributes disk” command:
6
Step 6
We can see in the “Read only” line that its status is “yes”, to remove this and allow work on the USB we execute:
attributes disk clear readonly
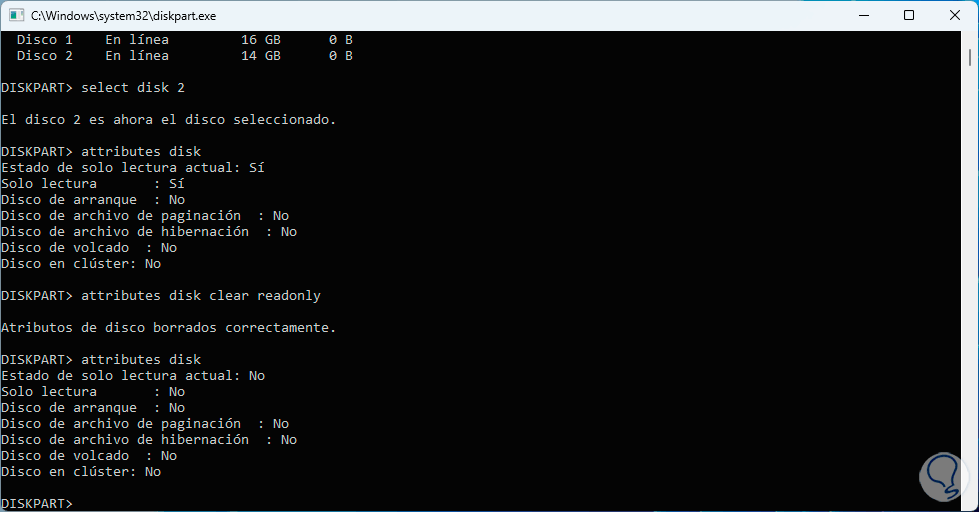
Step 7
Again we validate its status with “attributes disk”. We can see that read-only mode is no longer active.
attributes disk
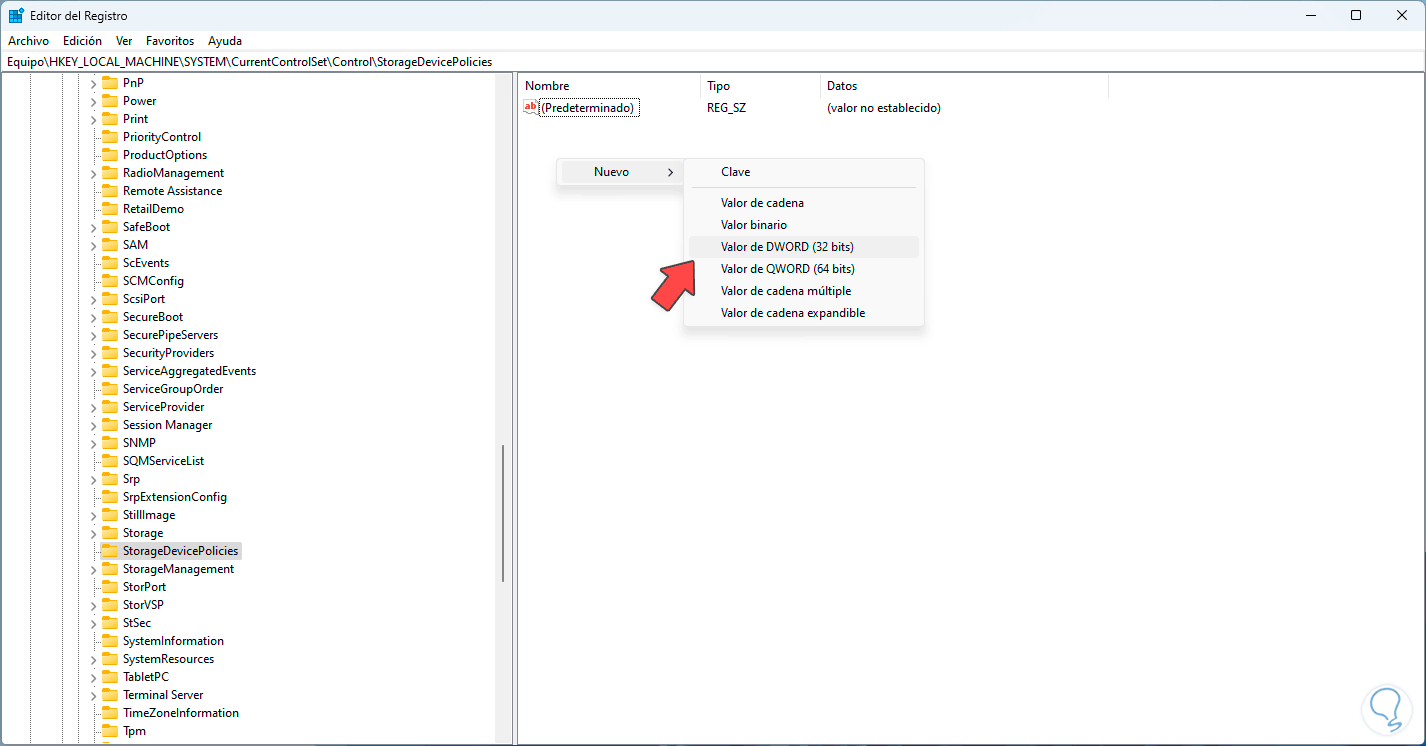
2 Remove USB Write Protection from Registries
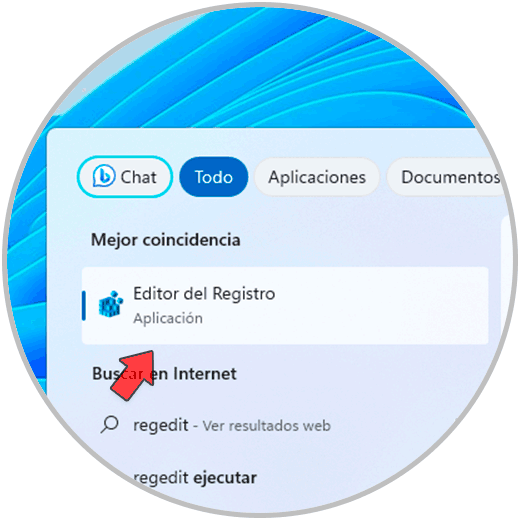
Step 1
Another means available for this task is to use the registry editor, in this case from the search engine we open the Registry Editor with the “regedit” command:
Step 2
There we will go to the following route:
KEY_LOCAL_MACHINE\SYSTEM\CurrentControlSet\Control\StorageDevicePolicies
Step 3
We right click somewhere free, then click on “New – DWORD (32-bit) Value”:
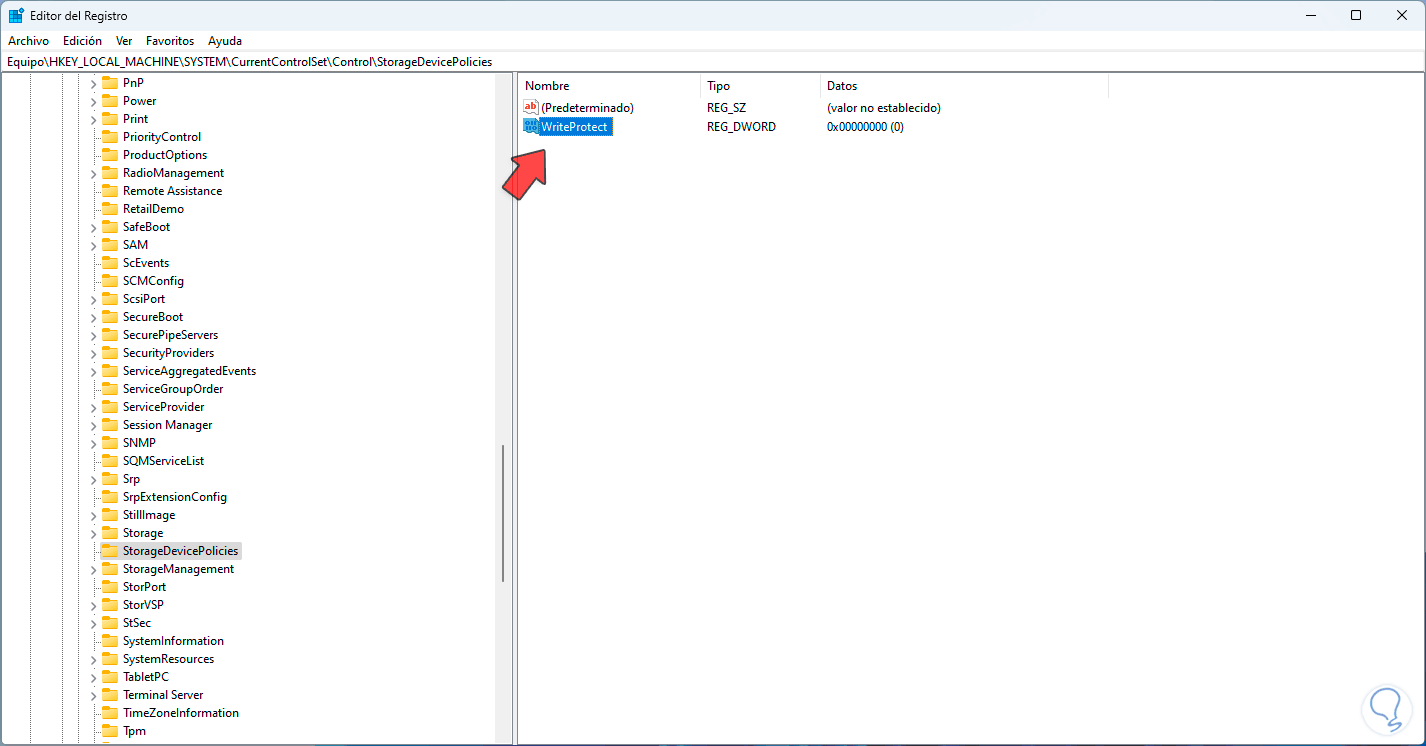
Step 4
We assign the name “WriteProtect”:
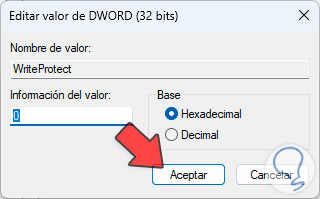
Step 5
We double click on this value and validate that its status is zero. Apply the changes.
These ways will help us remove write protection in Windows 11..