The monitors in Windows 10, and in any operating system, is one of the most popular hardware elements since without them it is practically impossible to see the contents of the folders or to visualize what action we are taking in the system. Although there are different types of monitors , LED, LCD, 4K, etc., all have an option integrated to configure different values ​​of the same cone, their frequency, available memory, chip type, used controller, video memory or color management. TechnoWikis will explain two basic ways to access these properties and better manage our monitors in Windows 10..
To keep up, remember to subscribe to our YouTube channel! SUBSCRIBE
1. Access the screen properties using the Configuration utility in Windows 10
Step 1
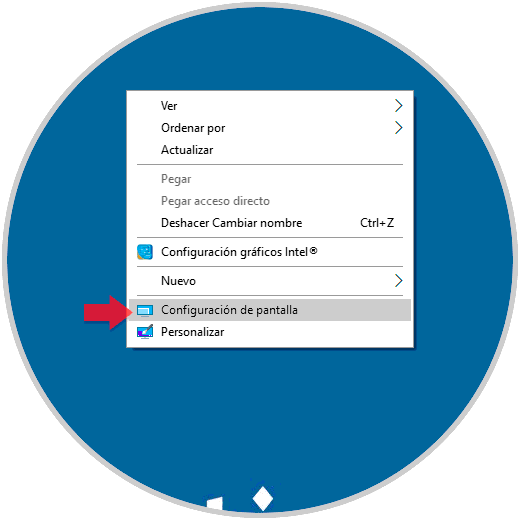
To make use of this method, we must right-click somewhere free on the desktop and there select the line "Display Settings":
Step 2
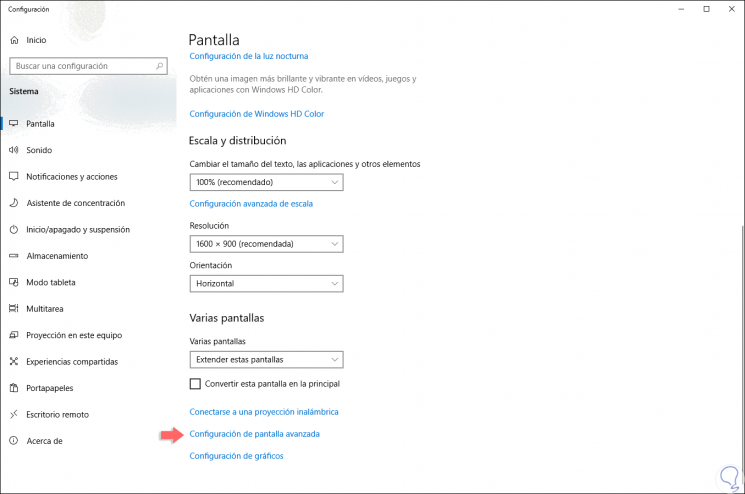
The following Configuration window will be displayed and at the bottom we find the option “Advanced screen configurationâ€:
Step 3
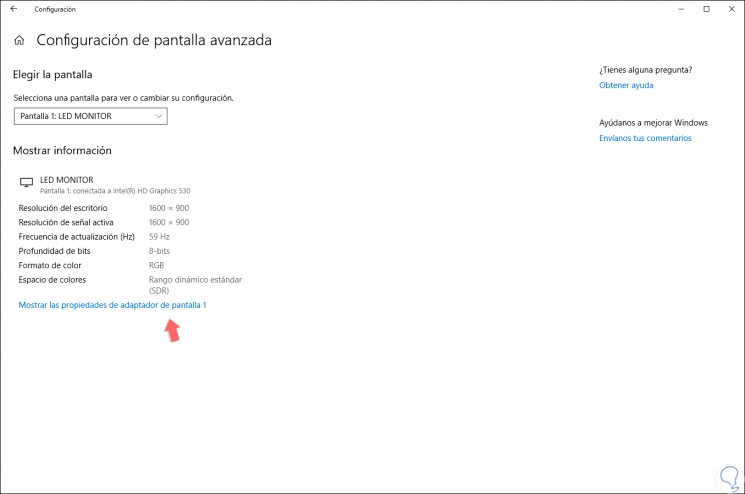
Clicking on it will display the following:
Step 4
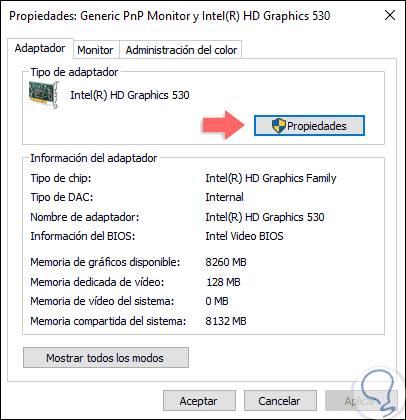
Initially we find some details of the selected monitor, if we have an ortho monitor, we can select it in the “Select a screen to view or change its settings†field. There we click on the “Show the display adapter properties†line and in the pop-up window we go to the “Adapter†tab. There we click on the "Properties" button to access the properties of our monitor.
2. Access screen properties using Device Manager in Windows 10
Step 1
To access this option we have the following options:
To keep up, remember to subscribe to our YouTube channel! SUBSCRIBE
Step 2
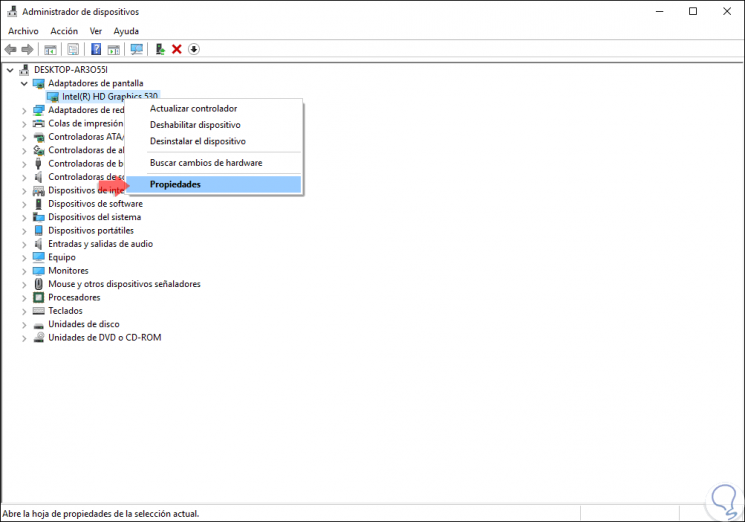
In the displayed window we go to the section “Display adapters†and there we will right click on our adapter and select the option “Propertiesâ€:
Step 3
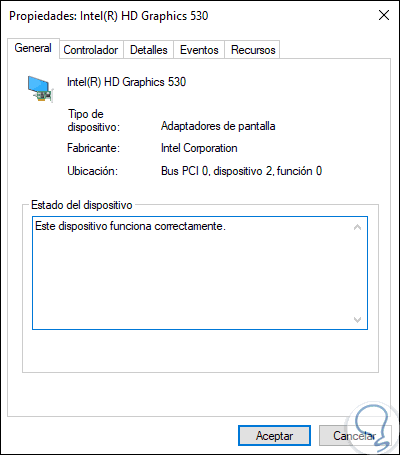
In one of the two ways used this will be the open properties window. From there we can make general adjustments on the controller or its resources.
With these simple steps we will access this functionality of our screen in Windows 10.