One of the fundamental hardware elements for any operating system is the screen since without it it would be possible to visualize what we are working on or what type of actions are necessary to execute.
We currently have various types of monitors, from LED to 4K which provide us with the option to display better graphics and better performance. One of the ways in which our monitors preserve their useful life is by executing a screen update from time to time so that it is not blocked or its internal components are damaged.
Seen this way, an update frequency refers to the number of times the monitor is updated with new images every second and a higher refresh rate results in a smoother, sharper image.
This rate is measured in measured in Hertz (Hz) so that a screen can have 60 Hz, which means that it is able to update the displayed image 60 times per second. Our eye is able to capture up to 220 different images per second, so, the more images a screen shows per second, the more fluid the movement will be in the form of video, and this results in the difference between one image and the next It is smaller.
Previously, it was more required to change the refresh rate for CRT screens in which a low refresh rate produced a constant flicker of affecting our visual health. The maximum refresh rate to be used will depend on the technical capabilities of the monitor, which is why low-cost monitors support lower update rates than high-end monitors and it is possible to define a frequency for each monitor in case of having multiple screens connected to the equipment.
To keep up, remember to subscribe to our YouTube channel! SUBSCRIBE
1. Edit the screen refresh rate in Windows 10
To perform this process in Windows 10 we have two options.
Change refresh rate from Settings
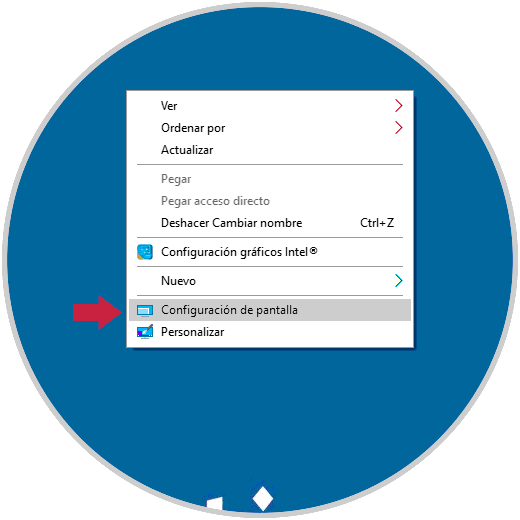
The first is to right click on the desktop and there select the option "Display Settings":
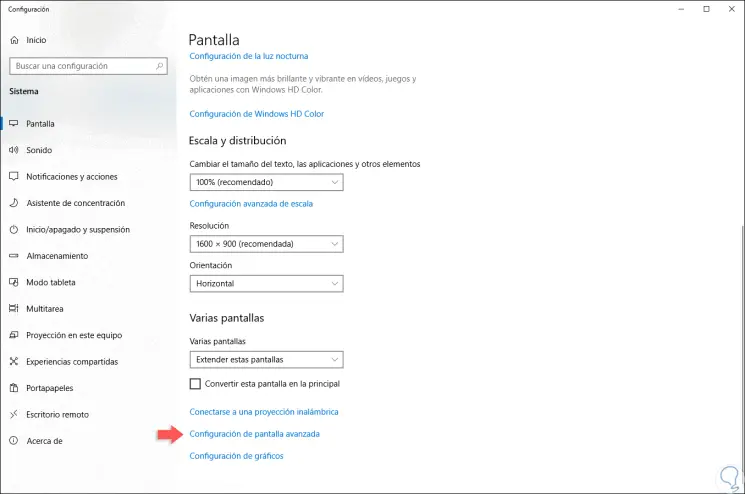
In the pop-up window we will go to the bottom where we select the "Advanced screen settings" line:
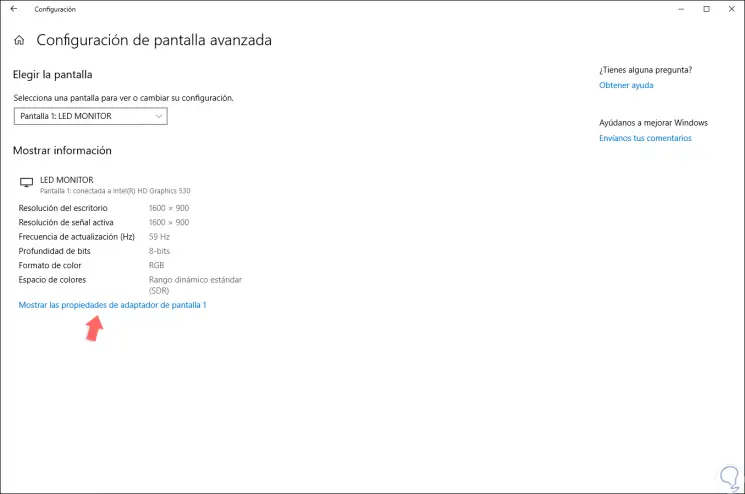
The following window will be displayed where at the top we select the monitor to be edited, if we have several and there we must click on the line "Show screen adapter properties" at the bottom:
Change refresh rate from Drivers
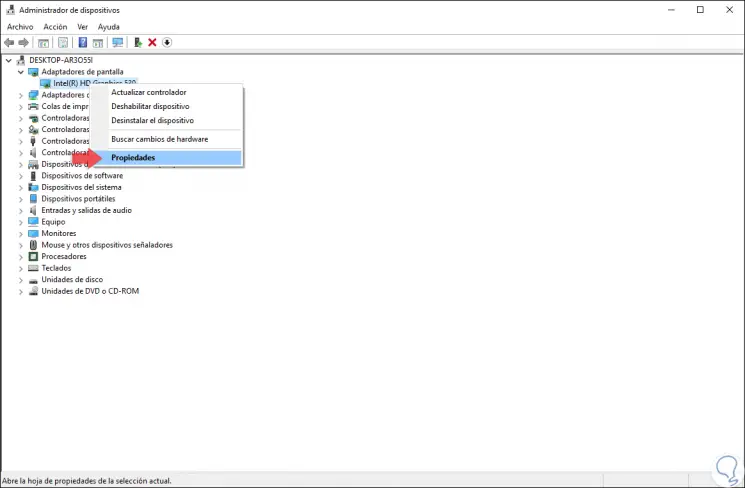
The second option to use is to access through the Device Manager, for this we have the following options:
To keep up, remember to subscribe to our YouTube channel! SUBSCRIBE
In the displayed window we will go to the "Display adapters" section and there we will right click on our screen controller and select the "Properties" option:
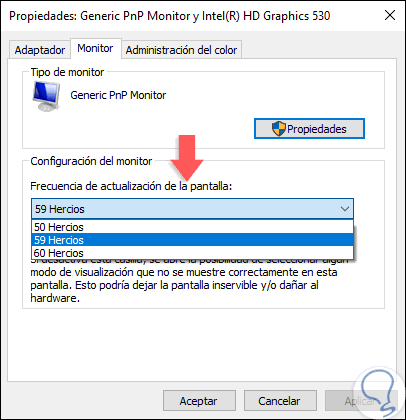
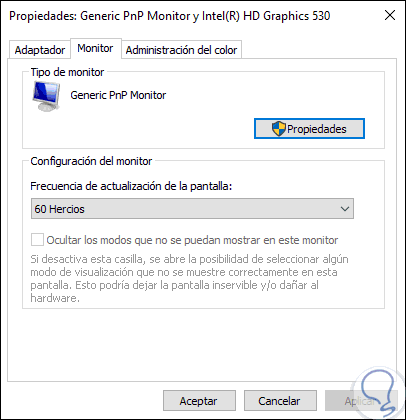
In both cases, the following window will be displayed where we go to the "Monitor" tab and there, in the "Screen refresh rate" section, click on the drop-down arrow and define the desired frequency. Click on Apply and Accept to save the changes. In this way we edit the frequency of the monitor in Windows 10.
2. Edit the screen refresh rate in Windows 7
Step 1
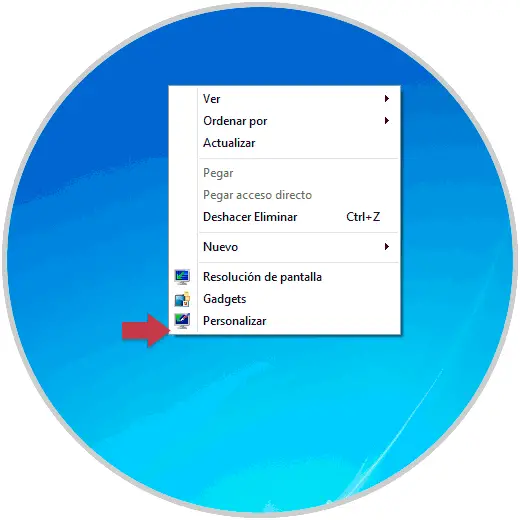
In the case of Windows 7 we can right click on the desktop and there select the option "Screen resolution":
Step 2
The following window will open: 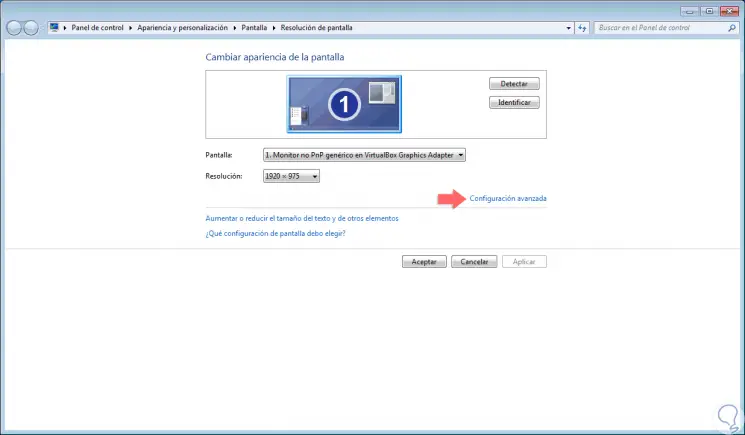
Step 3
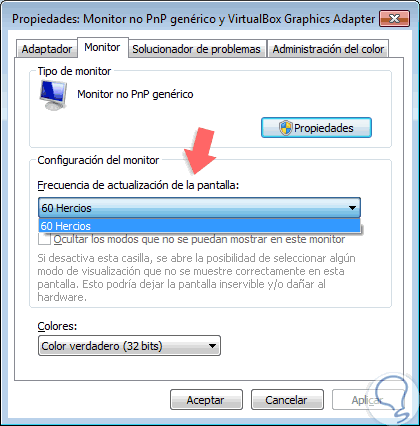
Click on the "Advanced configuration" line located on the right side and in the window that appears, go to the "Monitor" section and there we will display the options of the "Screen refresh rate" line and select, if applicable, the new frequency :
Step 4
Click on Apply and Accept to apply the changes. In some situations we can see the following.
In this case, the option to edit the frequency values is not available since the "Hide modes that cannot be displayed on this monitor" check box has been activated, which makes it impossible to edit these frequencies.
For some monitors this box may be enabled to access the frequency editing, but when the monitor is not compatible it will remain dimmed avoiding changes.
We have seen how it is possible to define a new frequency for our screens in Windows 10 and in Windows 7 to select the one that best suits our configuration needs.