There are a number of terms and technologies in the IT world which, although we listen to them frequently, do not really know their purpose and objective. Many of these technologies are security, networks, environments, etc., but one that is essential is RAID which is linked to the availability of priority information and more than that this technology can depend on a hard disk to take its normal course without that the entire operating system process is affected at all..
Imagine the following, we manage a series of vital servers or client computers, management style or financial area, and some of your hard drives fail, this results in non-access to the information hosted there, system access errors and this can bring consequences for us if we do not have a practical solution and results.
Therefore, TechnoWikis will explain how RAID will avoid this type of headaches and thus always have the total availability of the hard disk..
What is RAID?
RAID (Redundant Array of Independent Disks), a technology that combines various hard drives, internal or external, with the purpose of forming a single logical drive, where the same data on a disk will be stored in all disks, this is called redundancy.
RAID was invented by David Patterson, Garth A. Gibson, and Randy Katz, they from the University of California, Berkeley in the year 1987 and since then RAID has taken ground in terms of support being updated periodically in various RAID categories each with its own requirements and functionalities.
To create a RAID successfully, at least 2 hard drives are required, thus, the operating system is responsible for configuring and “logically†joining the disks as a single logical unit. Thanks to RAID, it will be possible to store identical data on several disks so that there is always redundancy, better overall performance and a longer average time between errors (MTBF) which are more than vital points in any type of organization since this The result is that all data will be available in full 7 X 24..
In any RAID configuration, part of the physical storage capacity will be with the redundant information related to the data stored on the hard drives so that the redundant information is in the ability to regenerate the data in the event of an error. on any of the disks or paths, remember that a hard drive may suffer failures due to factors such as:
- Failures in their sectors
- Electrical or mechanical damage
- Software failures and more.
1. Types of Mac RAID
We currently have multiple options to configure RAID as RAID 0, 1, 2, 3, 4, 5, 6, 0 + 1, and more, but macOS Mojave just does not give the opportunity to implement levels 0, 1 or a function called JBOD
RAID type 0
When a RAID 0 is configured, a disk array is included that implements the creation of bands without any redundancy of the physical drive, that is, it does not offer fault tolerance and is less reliable than an implementation of a hard disk drive
RAID 0 can be called “Stripping†or “Fractioningâ€, since the hosted data will be divided into small segments and these are distributed among the used disks.
The only advantage of using RAID 0 is:
- Improves the speed in the process of recording and reading information from discs
- System Performance Improvements
- The data entered is stored immediately which is associated with its speed
Remember, any failure in any of the hard drives will result in the loss of information.
RAID type 1
RAID 1 is designed to be a reflex disk, that is, we have two disk drives where identical information is stored so that one is a reflection of the other in everything like that, any operation performed on the disk, the operating system must write the same information on both discs thus allowing total and integrated data availability.
RAID 1 is also called "Mirroring" or "Mirror" for the reasons mentioned above. RAID 1 allows that, if one of the hard drives presents some type of failure, the other one automatically and in real time assumes the role and the operation so that the fault is not noticed since it has the same information, due to this process the recording of data would be slower since it must be done twice.
Within its characteristics we find
- The recording of information is slower due to the double copy process
- The reading of the information is faster since there is a backup of the data
- Its use is implemented in greater range in file servers due to the availability of information
- With RAID 1 we have redundancy which is one of the key principles of RAID.
JBOD
JBOD (Just a Bunch of Disks), is one of the implementations that we will see in macOS Mojave, and when using this option, each drive is considered as an independent device, in the same way as with the independent hard disk drives.
Thus, all disks will be reflected in the system as individual hard drives, divided into partitions created by the macOS Mojave disk utility.
The most outstanding advantage of JBOD is the use of the full capacity of both units which expands the storage levels of the equipment. Apple itself reminds us that JBOD is not a RAID therefore it does not offer data protection (redundancy) or better read or write speed.
Knowing these key concepts we will see how to configure a RAID in macOS Mojave.
2. How to create and configure RAID in macOS Mojave
Step 1
To begin we will access the disk utility using one of the following options:
- Entering the word disks in Spotlight and there select the utility
- On the Go / Utilities / Disk Utility path
- Using the key combination ⇧ + ⌘ + U and select the disk utility in the displayed window
Step 2
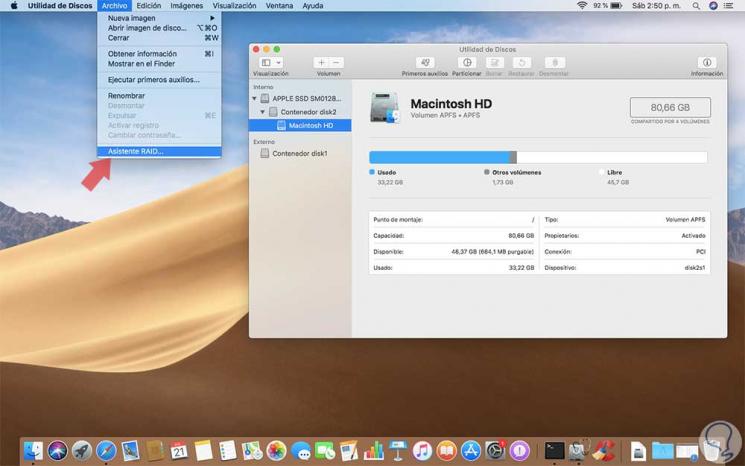
When the disk utility opens, we will go to the File menu and there we select the RAID Assistant option:
Step 3
The following wizard will be displayed where we will select the type of RAID to be implemented in macOS Mojave:
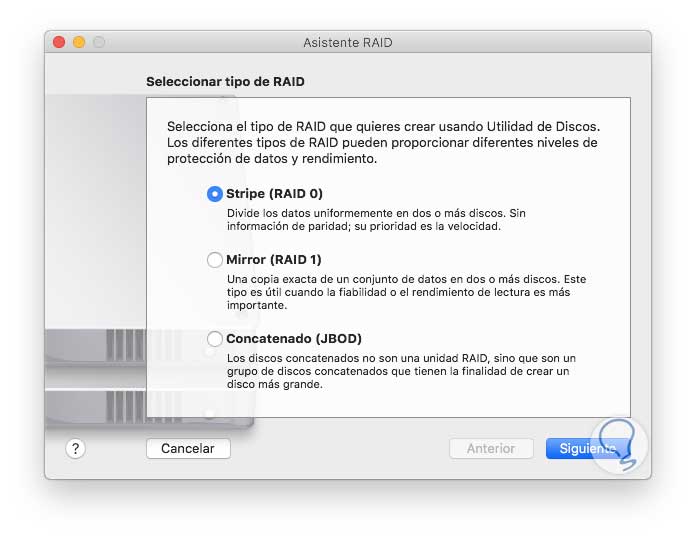
For this case we will select the Stripe option (RAID 0) and click Next.
Step 4
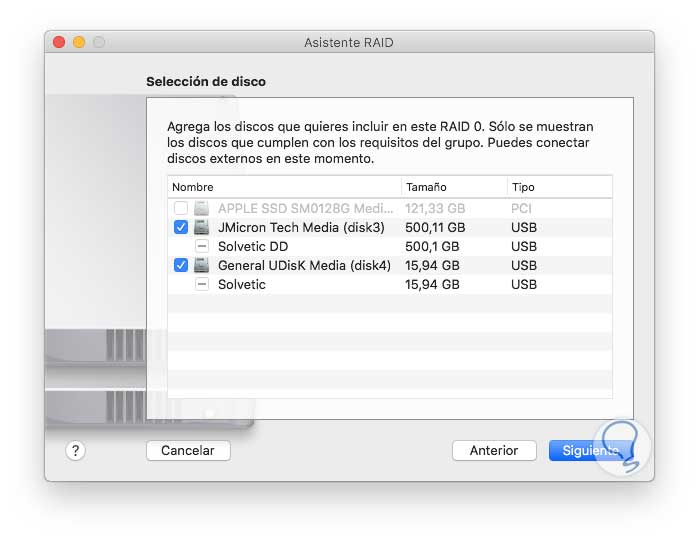
Now, in the next window we activate the boxes of the disk (s) that we are going to use to create our RAID 0 in macOS Mojave:
Step 5
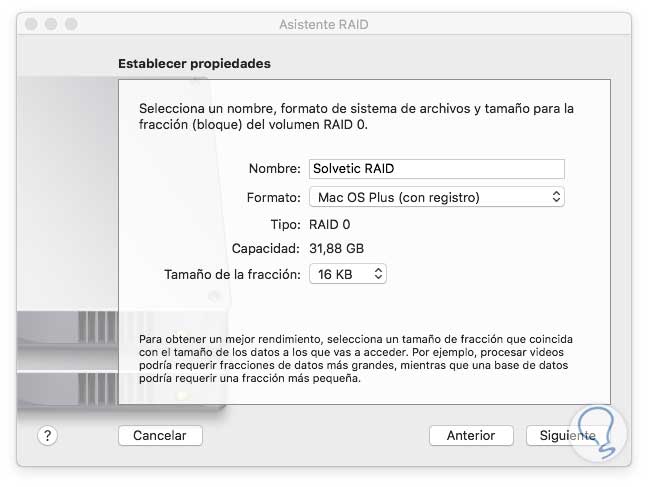
Once selected, click on Next and in the next window we define
- Name to assign to the RAID
- Format to use in that group
- Fragment size that will be associated with the size of the data to use
Step 6
Click on Next and the following message will be displayed:
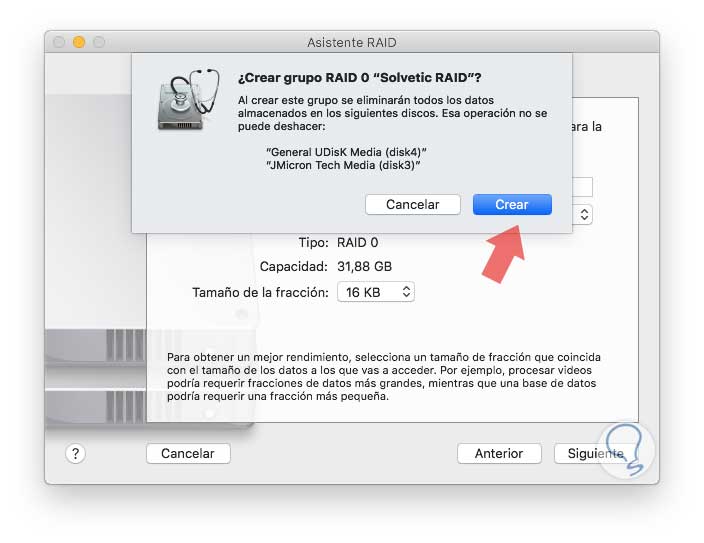
Step 7
Click on the Create button to start the process of creating the RAID group in macOS Mojave:
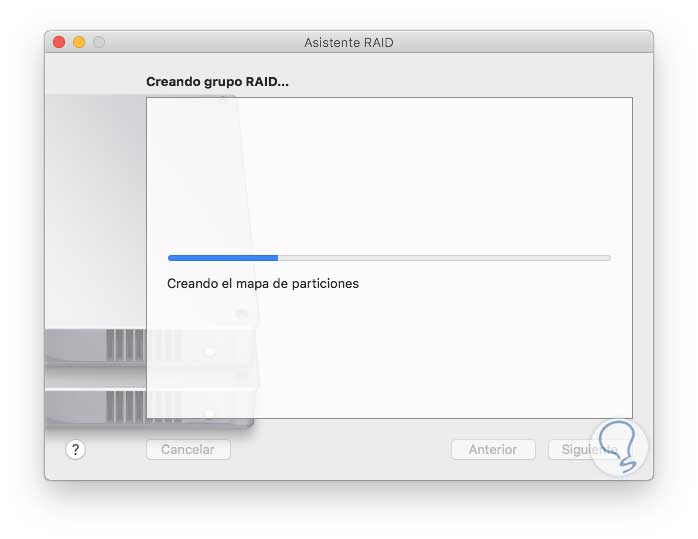
Step 8
Once this process is finished we will see that the RAID group has been created correctly:
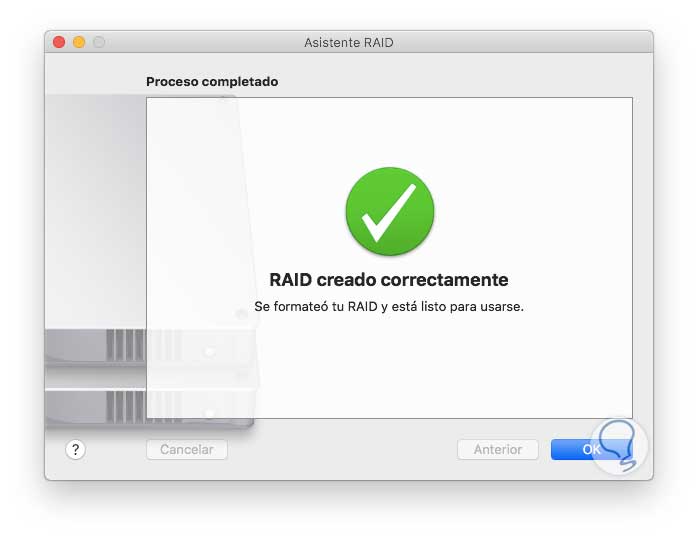
Press the Ok button to exit the wizard.
Step 9
We will be redirected back to Disk Utility where we will see our available RAID group:
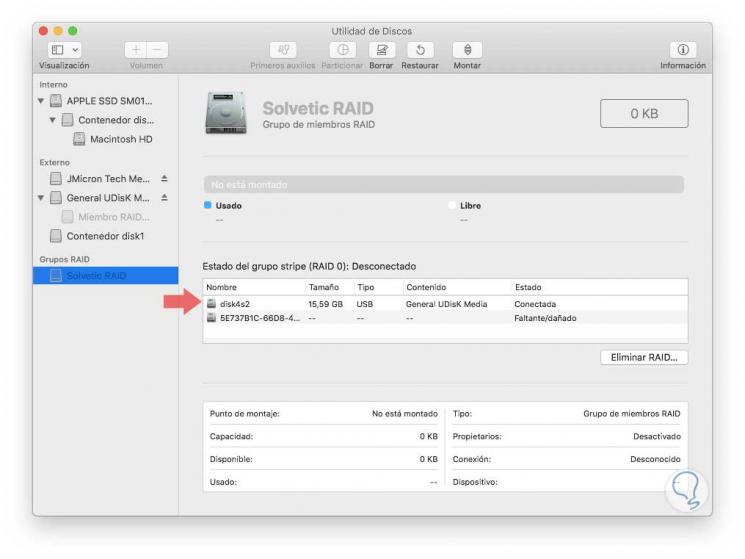
In the central part we find real-time details about the units that we have connected. From this point on we are ready to mount this RAID array and thus begin to get the most out of your storage.
3. How to delete a RAID group in macOS Mojave
When we want to delete the Mojave RAID array because it is no longer necessary, just access Disk Utility and go to the RAID Groups section and click on the Delete RAID button and the following message will be displayed:
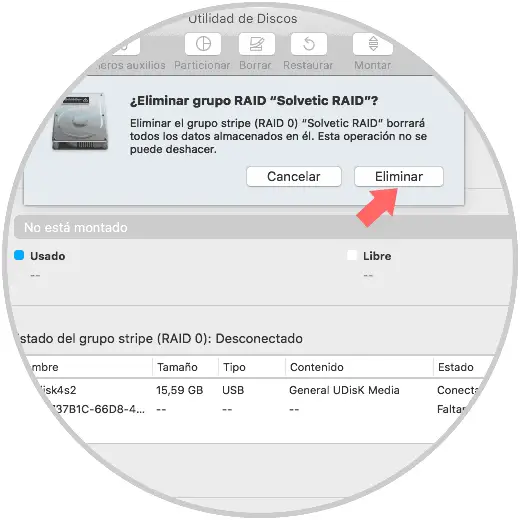
Click on the Delete button and the process to remove the created RAID group will begin:
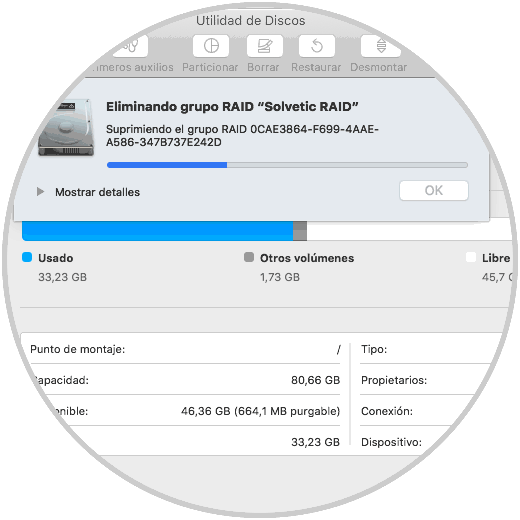
Once finished we will see the following:
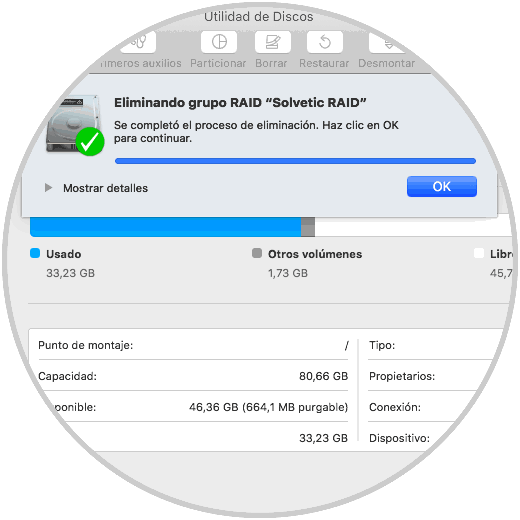
Click on OK to close the wizard.
Thus, we can easily create a RAID array in macOS Mojave to always have the availability and integrity of the most important information.