Nowadays playing online on the computer is increasingly common since millions of users access different platforms daily to challenge themselves with other users. There is no doubt that the gaming world is increasingly popular and that the possibilities have increased over the years. I hope that doing it through a good platform is something that users value more and more and take more into account when registering on one of the platforms that we can find available on the web..
Steam is one of the gaming platforms that has gained the most users in recent years for everything it offers us to download and play online, optimizing downloads, offline games and much more. As you should assume, this requires good hardware requirements (RAM, CPU, graphics, etc.) in order for the games to run smoothly in order to enjoy them to the fullest.
However, it is possible that despite having good hardware, Steam is slow and this means that the experience during the game is not good and you cannot make the most of all your gaming skills. In the event that this happens, you do not have to worry since below we show you different solutions to improve the speed of Steam..
1. How to clear Steam cache
As we download games from Steam, they leave accumulated cache memory which little by little fills the registers and with which any change will have a negative impact on the performance of the application.
Step 1
To clear this cache, we are going to access the Steam application and go to the “Steam” menu and then select “Parameters”:

Step 2
In the window that will be displayed, we will go to the “Web Browser” section where we will see the following:

Step 3
There we click on the “Clear web browser cache” button and we will see the following:

Step 3
We click on Accept to confirm the action and after that we click on the “Delete all cookies” button and the following will be displayed:

We click Accept to confirm the deletion of Steam cookies.
2. Adjust Steam proxy settings
In some specific cases, an incorrect configuration of proxy servers can cause errors when running Steam, which is why we can disable them and check the operation of Steam.
Step 1
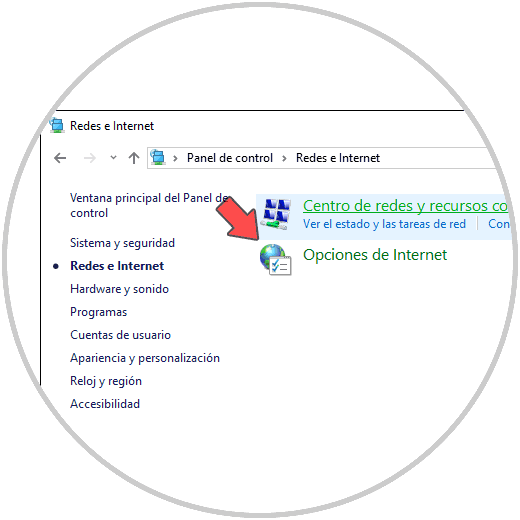
For this we will go to the following route:
Network and Internet Control Panel
Then there we will see the following:
Step 2
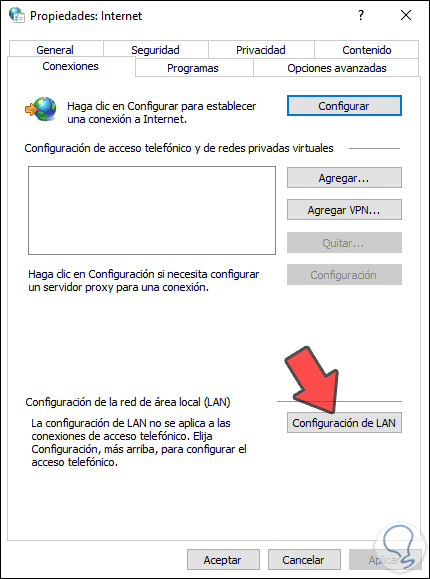
We click on “Internet Options” and in the new window we will go to the “Connections” tab:
Step 3
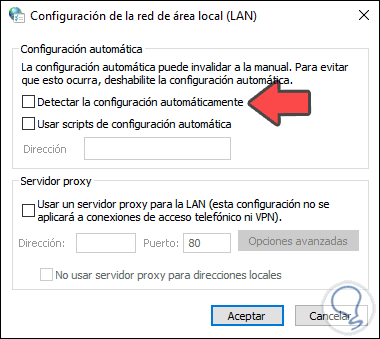
There we click on the “LAN Configuration” button and after that we must deactivate the “Detect configuration automatically” box. We click on Accept to complete the process.
3. Clear Steam download cache
This process consists of deleting the cache generated by frequently downloading games on Steam, which prevents the application from being executed correctly.
Step 1
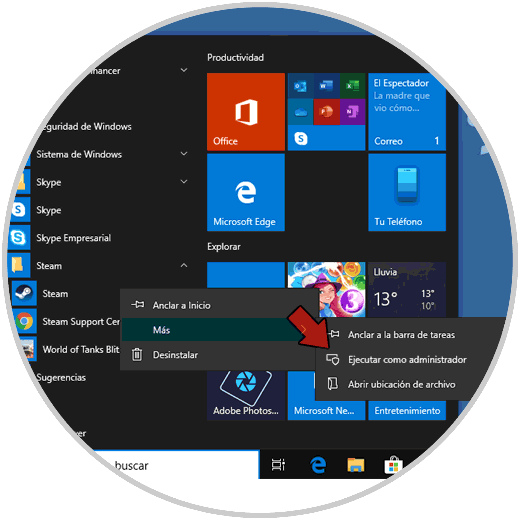
For this we must access Steam as administrators from the Start menu and selecting More / Run as administrator:
Step 2
Once we accept the UAC permissions, we will go to the Steam menu in the application and there we select “Parameters”:

Step 3
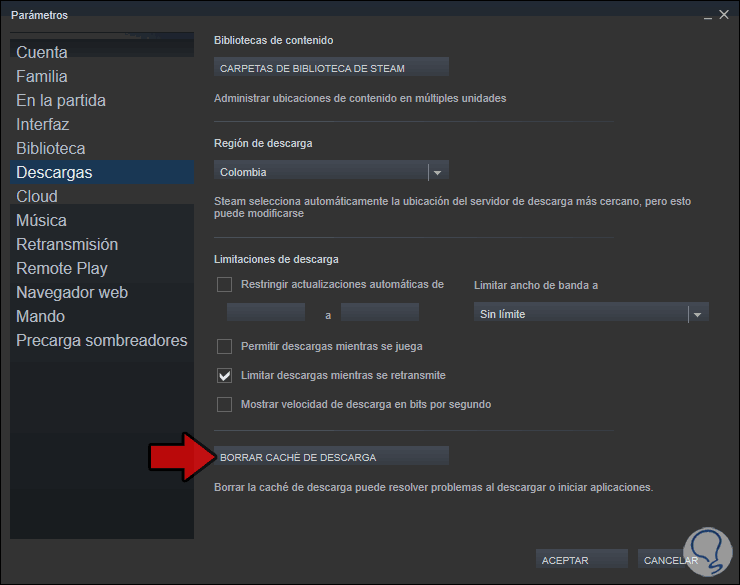
In the next window we will go to the “Downloads” section where we will see the following:
Step 4
There we click on the “Clear download cache” button and the following will be displayed:

Step 5
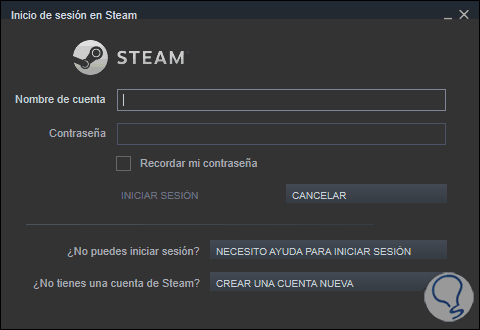
By clicking OK, Steam will be automatically restarted to clear said cache and we must enter the access data again:
4. How to repair Steam
If none of the solutions that we have given you provide a solution to Steam's performance, we can finally repair the application to restore all its variables, for this we must use the Windows + R keys and there execute the following:
"C:\Program Files (x86)\Steam\Steam.exe" /repair
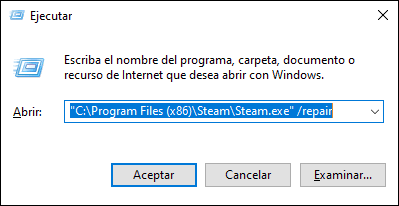
We click on Accept and this will open Steam having previously performed an error analysis..
5 . Check download speed limit
Another configuration that we can carry out is to check that the download speed is not limited and this is what may be influencing Steam to go slower than it should. To check this, we must follow the steps detailed in the following tutorial. In it you will find the entire procedure that you must follow.
If you prefer to see this process on video, you can also do so by entering the following YouTube link where you will find the steps to follow visually.
To stay up to date, remember to subscribe to our YouTube channel!
SUBSCRIBE ON YOUTUBE
6 . Run Steam as Administrator and with compatibility
Step 1
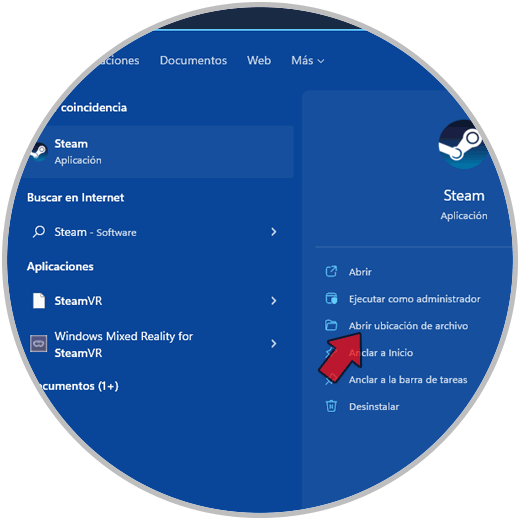
We go to the Start search engine and write Steam. Then we click on the “Open file location” option.
Step 2
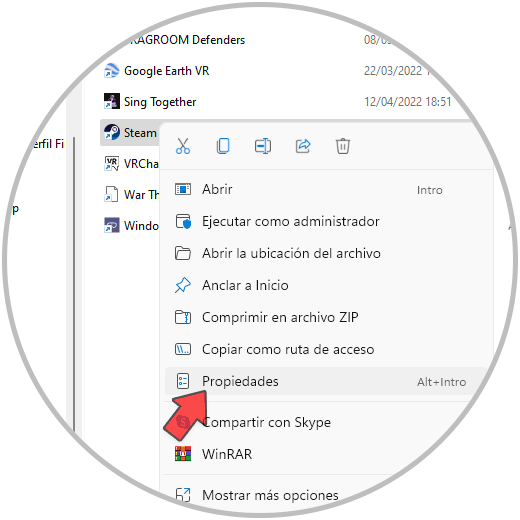
Now we will right click on the Seam shortcut and choose “Properties”.
Step 3
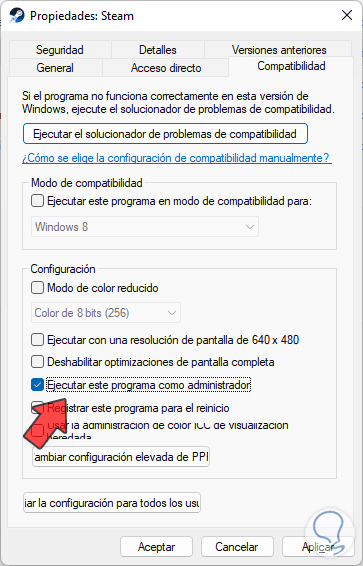
We will then click on the “Compatibility” tab. Here we will activate the “Run this program as administrator” option. We will apply changes.
This configured shortcut will be the one we will use to open our Steam and verify that the problem has been solved.
Step 4
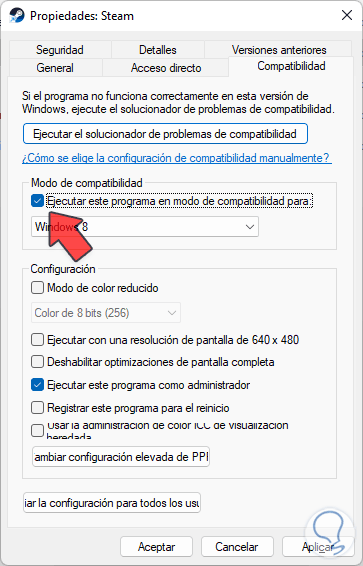
If you continue having problems, we will return to the “Properties” window and also activate “Run this program in compatibility mode for:”. We apply changes.
7 . Verify Steam game file integrity
Step 1
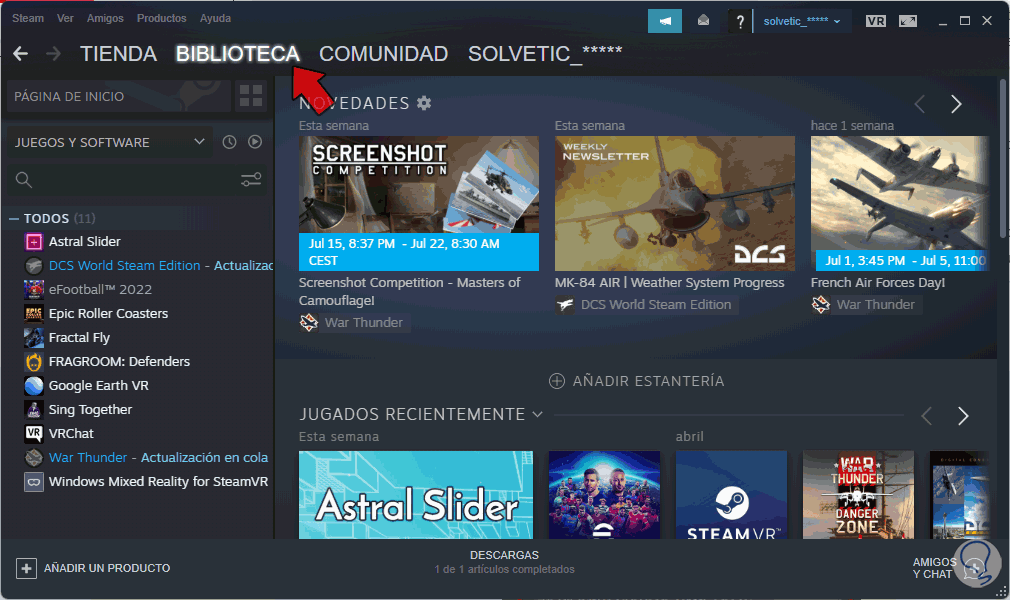
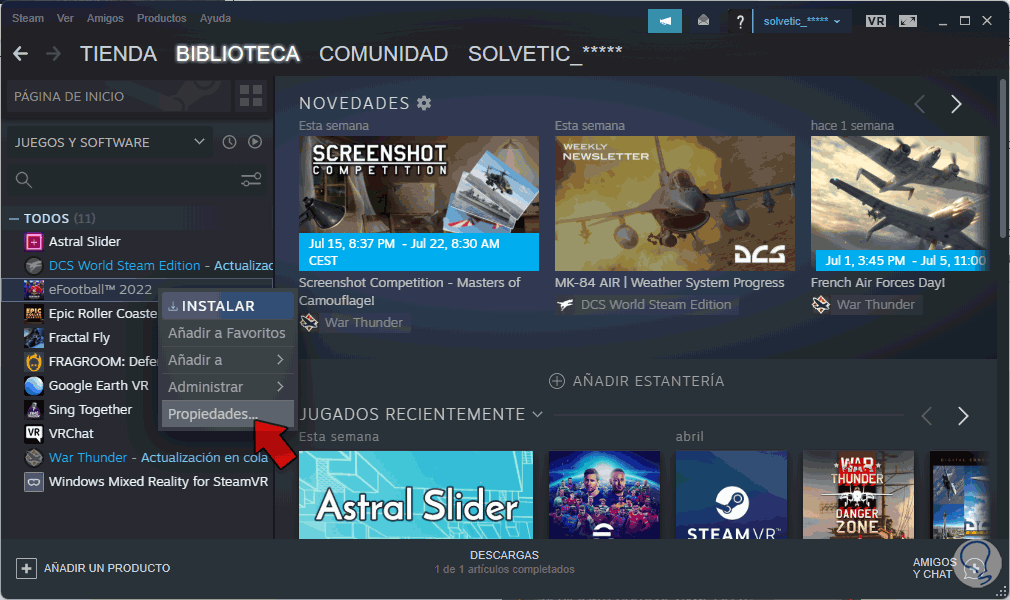
We go to Steam and we will enter the “Library” section.
Step 2
We right click on the game that is running slow or not going very well and choose “Properties”.
Step 3
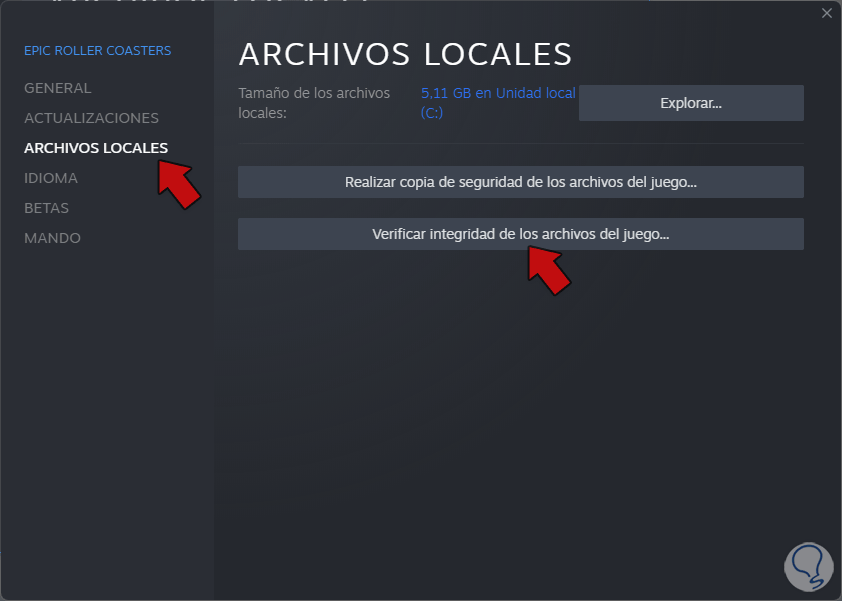
Now we will click on “Local files” and then we will execute the “Verify integrity of game files” option.
Step 4
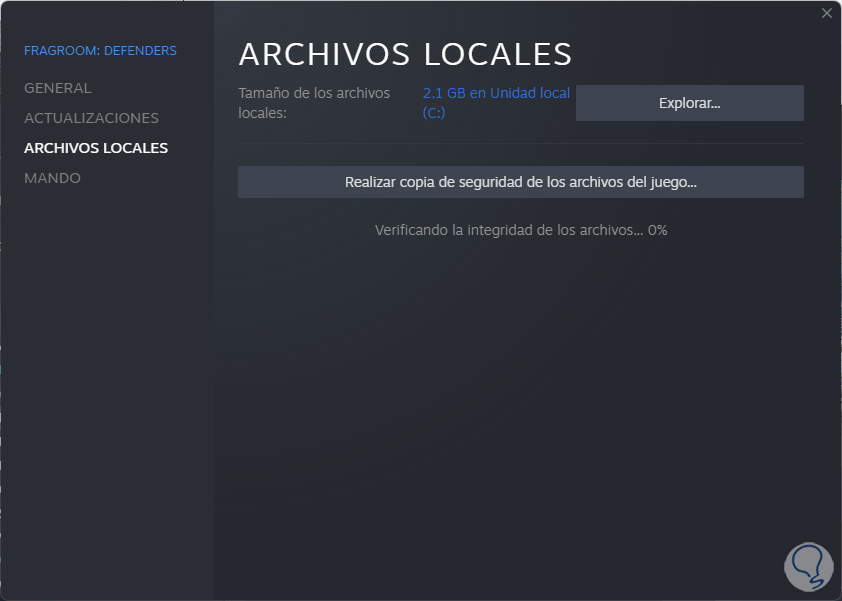
The process to verify integrity will begin and run:
8 . Disable programs and services starting Windows 10
Starting the System with configured programs and services can make Steam run slower so we will try to fix it.
Step 1
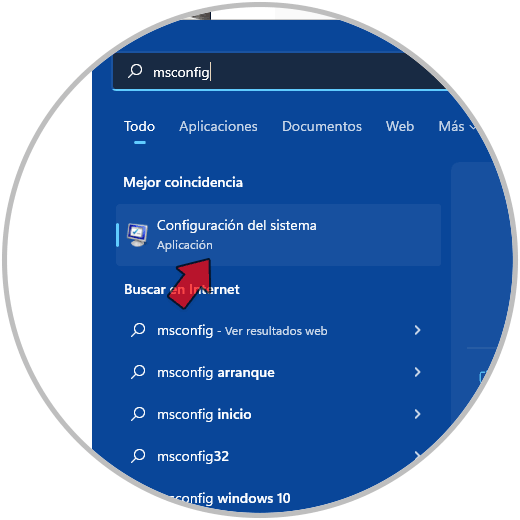
Let's open "System Configuration" from the beginning with "msconfig".
Step 2
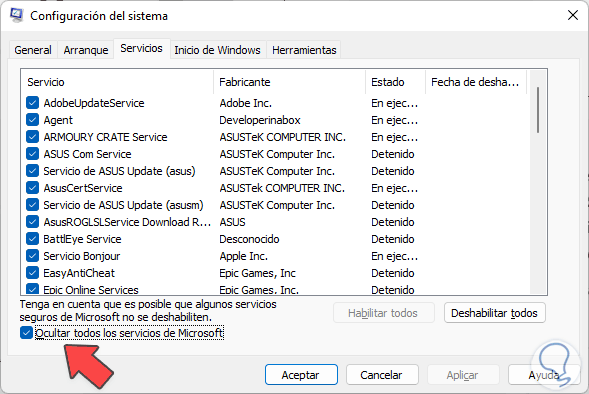
Click on the “Services” tab. Here we will activate the “Hide all Microsoft services” box.
Step 3
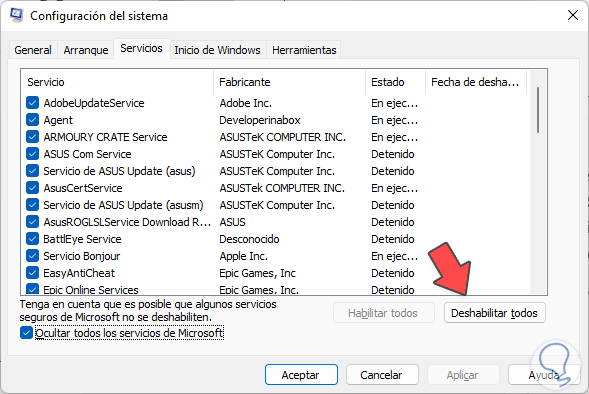
We will click on “Disable all”.
Step 4
In addition, we are going to disable programs at the start of Windows 10 that are also affecting the performance of Steam. To do this you can go to the following link and you will see the complete process:
9 . Activate High Performance Windows 10
Step 1
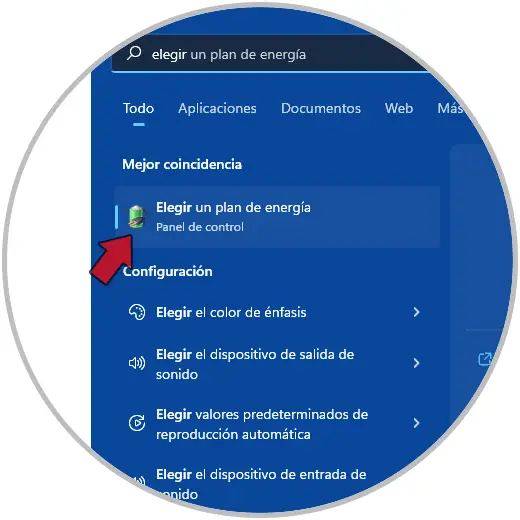
We will go to start and look for the option to “Choose a power plan”.
Step 2
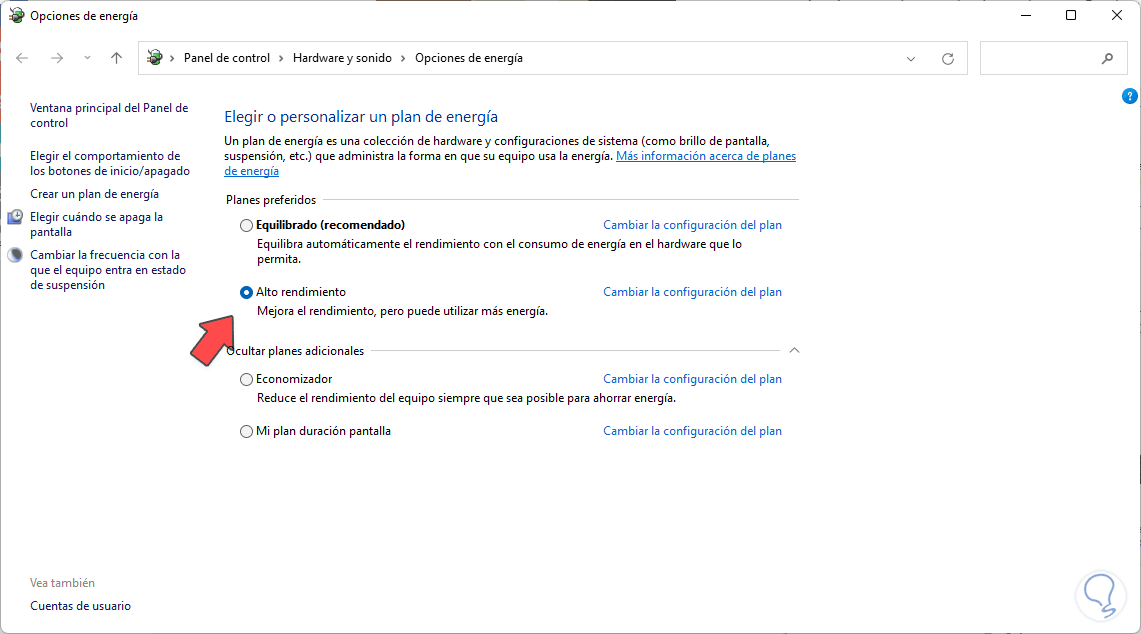
Here we will choose the “High performance” option. Then close the window to apply the changes.
10 . Update Windows 10 graphics drivers
Step 1
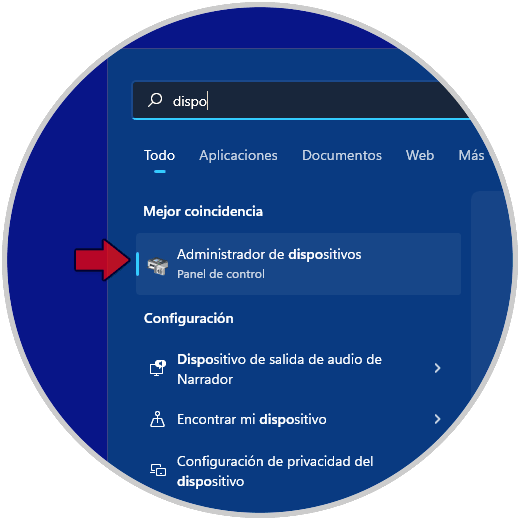
We are going to go to start and open the Device Manager:
Step 2
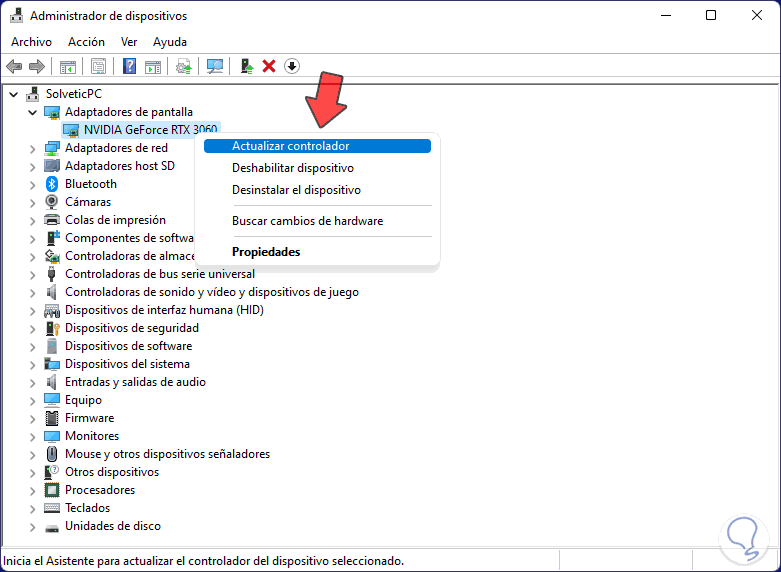
Within the "Screen adapters" tab we see our graphics adapter, which in this case is NVIDIA. We right click on it and choose "Update driver":
Step 3
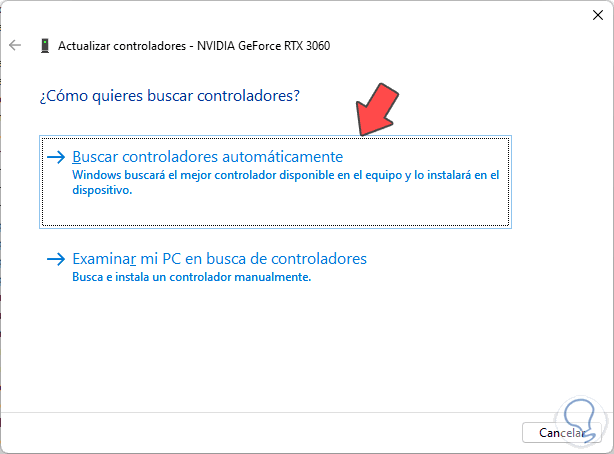
We will click on "Search for drivers automatically" to start the automatic update:
Step 4
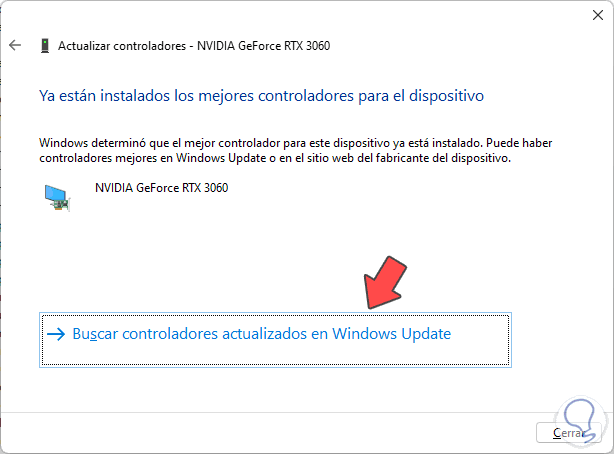
We can also click on "Check for updated drivers in Windows Update" and see if there are system updates available to install:
Note
We can also use the official tool of each driver brand, such as NVIDIA:
GEFORCE EXPERIENCE
Each of these solutions will help you make Steam work correctly based on the hardware installed on your computer and thus enjoy each game to the fullest.