All, or most users, know that when a file is deleted on any operating system, it is not deleted in 100% of the system, since in the process of deleting these elements , actually what happens internally It is that the order is given to the team so that those bits that were used by the deleted file are now overwritten and it is for this reason that with some special tools and with the necessary time, it is possible to recover a file that was theoretically deleted..
This option applies when we use mechanical hard drives (HDD) due to its architecture and design, but with the arrival of solid state hard drives (SDD) , this is no longer a problem because its design is optimized to eliminate definitively all the free space that is unused in the filesystem.
It is important to learn how to safely erase free space so that it is enabled for future storage tasks on our equipment and therefore TechnoWikis will explain the useful way to achieve it. Previously, Apple added a function called Secure Erase Free Space in the disk utility which is a layer of privacy and security for the entire file deletion process, with this function it was possible to overwrite the free space in a storage unit and thus prevent deleted files from being recovered, but with new versions of macOS this function has been removed..
To keep up, remember to subscribe to our YouTube channel! SUBSCRIBE
1. How to safely erase free space using the terminal in Mojave
Step 1
To access the macOS Mojave terminal we have the following options:
- Using Spotlight and enter the word terminal and select the utility
- On the route Go / Utilities / Terminal
- Using the key combination ⇧ + ⌘ + U and in the pop-up window select the utility.
There, we will execute the following line:
diskutil secureErase freespace 4 / Volumes / Macintosh \ HD
Step 2
The parameters used in this line are:
The freespace line indicates that only the free space on the hard disk drive is being erased and not the entire disk itself.
The number "4" refers to the level of scanning that will be performed in the free space of the unit, the options to be used are:
Zero erase single step fill
one
Single step random erase
one
US DoD 7-step secure erase
two
Gutmann Algorithm 35-step secure erase
3
US DoE 3-step secure erase algorithm
4
Step 3
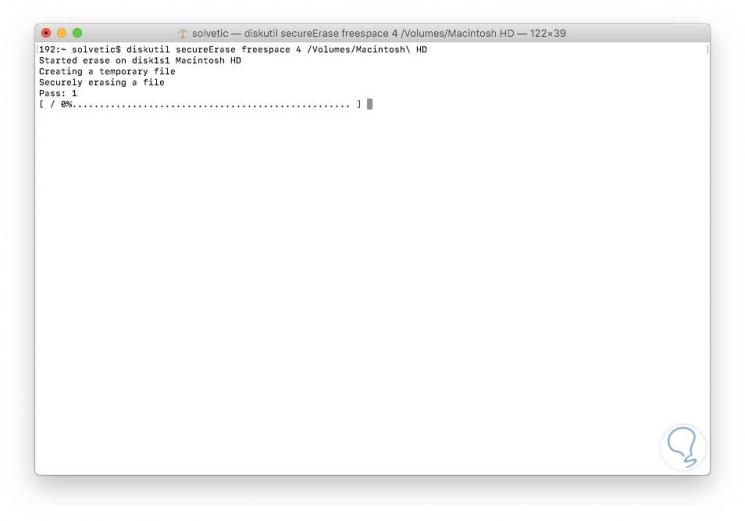
In the Macintosh \ HD volume we must replace it with the correct name of our volume. Once we execute this line we will see that the deletion process begins:

Step 4
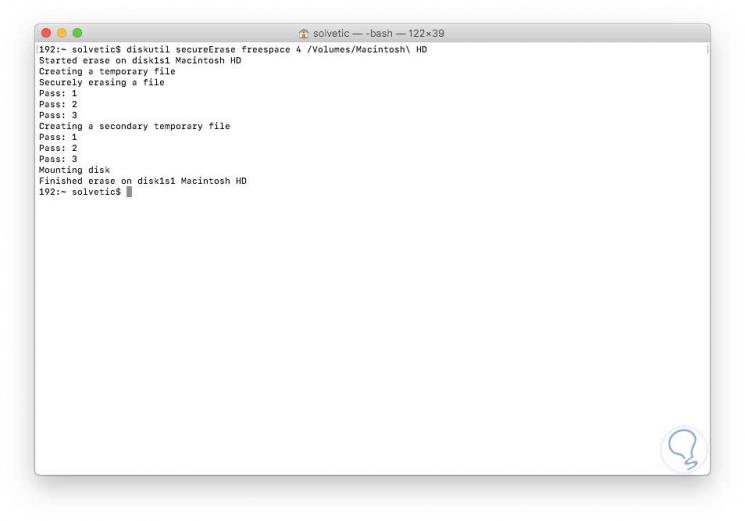
Once this step is completed this will be the result displayed:

We can verify that the erasing process has been executed correctly on the selected disk.
2. How to safely erase free space using CCleaner on Mac
Step 1
CCleaner is an application that is available in paid versions, PRO, or also in free versions.
Your download is available at the following link:
CCleaner
We know that this free tool is full of useful features such as temporary cleaner, registry, program uninstaller and one in particular to securely erase macOS Mojave free space..
Step 2
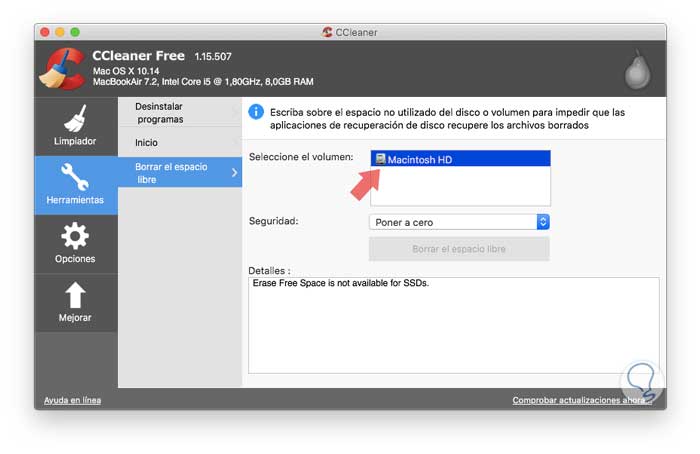
For this, once the application has been downloaded and installed, we proceed to run it and go to the Tools section and there we click on the Clear free space section and on the right side we select the disk to be deleted:

Step 3
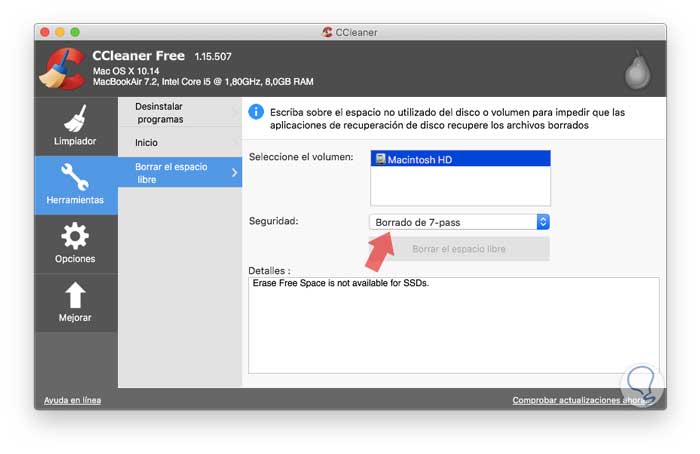
In the security section we have options such as:

The more deletion options we select the longer the process will take. Once this is defined, click on the Clear free space button to execute the process.
Thus, we have safely erased the free space in macOS Mojave and we will be sure that the information has been completely removed.