When filling in information in a table or set of data in Excel, there are Excel resources that allow us to move forward more quickly; They are resources that work better, and we can apply them as long as we are working in a table, or we are working in an orderly manner in an Excel sheet.
In this sense, there are many Excel functions to make our work easier and streamline it, especially in tasks that are repetitive..
For example, being able to stretch a formula or copy the cell that contains the formula to other cells is a way or resource that we can use to advance faster in Excel.
Another example would be functions, which, by using them in some formulas, we can carry out mathematical and other operations. Tasks that, without the help of a function, would not be possible..
Another of the tools that we can include in the same group of Excel tools or resources of tremendous usefulness and productivity is the “Excel Quick Fill ”.
Excel's quick fill is a resource with which we will be able to complete information faster if we know how to use it. We are going to explain where this tool is and how to apply Excel's “quick fill” to complete information..
What is Excel Quick Fill?
The "quick fill"
is an Excel tool that allows us to fill cells automatically following a pattern that we must follow. We create a pattern or an example of the task we want to carry out, and Excel fills cells with the same logic that we have used.
Quick fill is an especially useful resource when we are creating a data table, we perform an operation on a cell, and we want to extend this same operation to the rest of the cells in a column.
It is very useful on some occasions when we want to carry out an operation, and we do not know which function to use, or we simply do not have a function that can help us with that specific task.
A situation where, for example, we can use quick fill, would be when we have the first and last name of a person in a cell, and we want to separate it into one or several new columns.

As we have seen, in the image, we have certain difficulties in being able to automatically separate all the names from the surname. We cannot use functions to extract text, because we do not have a separator between the first and last name, and we do not have a space or any other element to separate the text into columns.
What could we do in this case to be able to separate each first name from the last name? The answers is Excel quick fill. Thanks to Excel's quick fill we will be able to separate the first name from the last name. We explain how:
1 How to use quick fill in Excel
We are going to continue with this example that we have shown you in the image and we are going to use Excel's quick fill to be able to put the first name separated from the last name in another cell , almost automatically. We say “almost automatic” because as we explained at the beginning, we have to create a pattern or example, a guideline so that Excel understands what we want to do, and can replicate or extrapolate it to the rest of the cells .
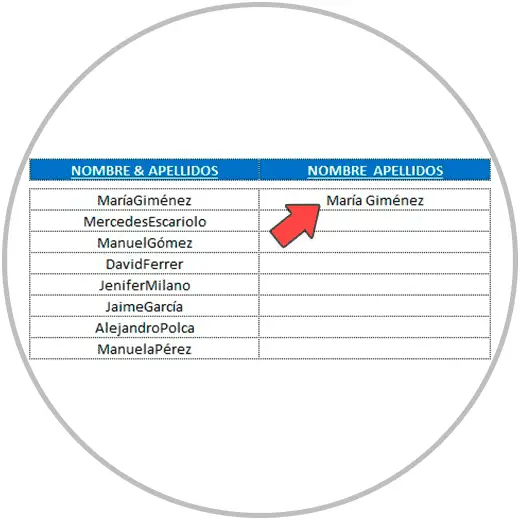
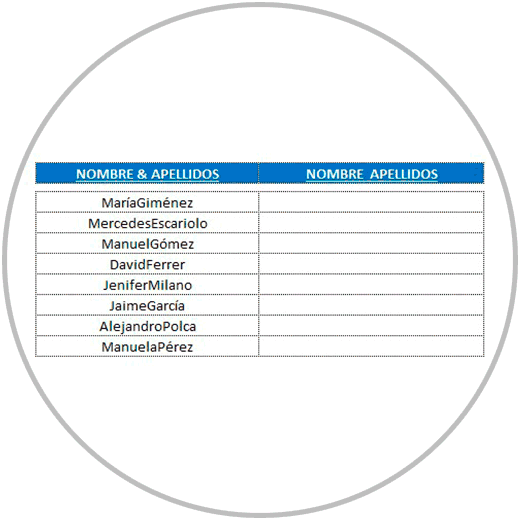
In this case, we want to separate the first name from the last name of all these students that we see in the image:
For this reason, we are going to "show" Excel the operation we want to do with an example, so that you can understand the logic and apply it later. We are going to separate the first and last name in the first student, which in the example would be María Giménez. Let's see how it's done:
Example 1: Separate text and last name with Excel Quick Fill
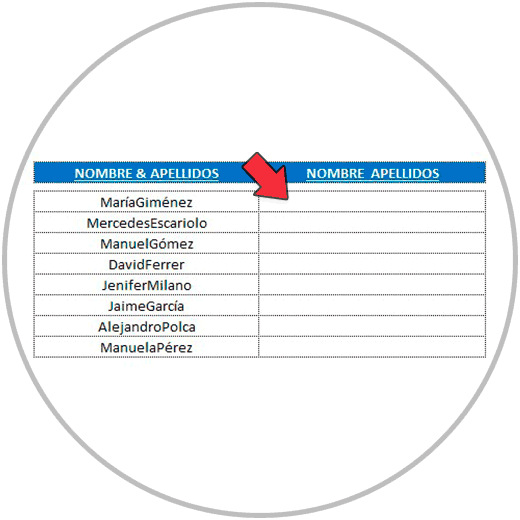
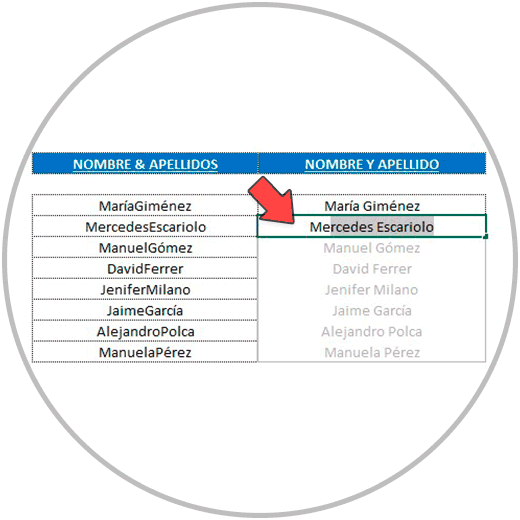
In the cell on the right, as you see in the image below, we are going to write by hand using the keyboard “María Giménez”, using in this case a space to separate the first name from the last name.
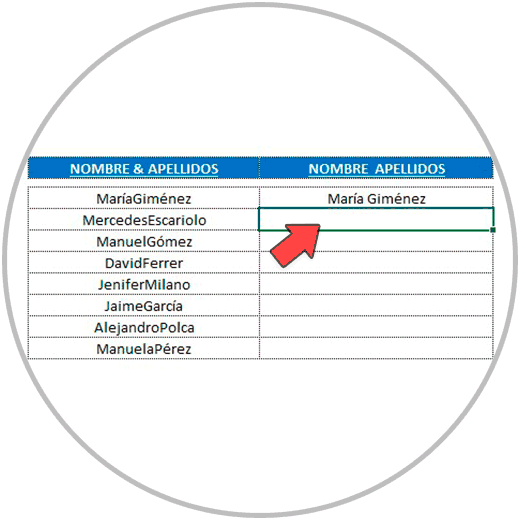
Now, we are going to position ourselves with the mouse and click on the cell that is immediately below the cell where we just wrote the name “María Giménez” with the space.
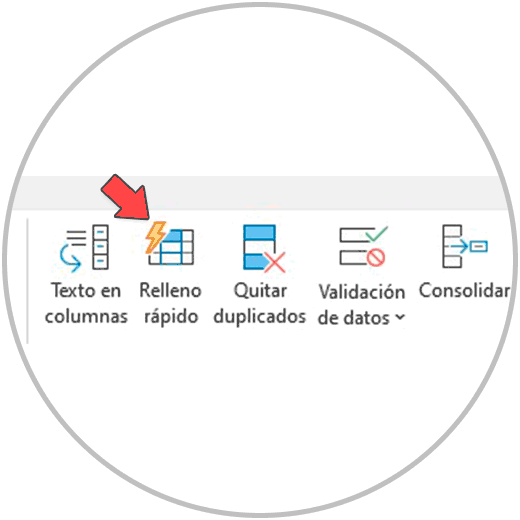
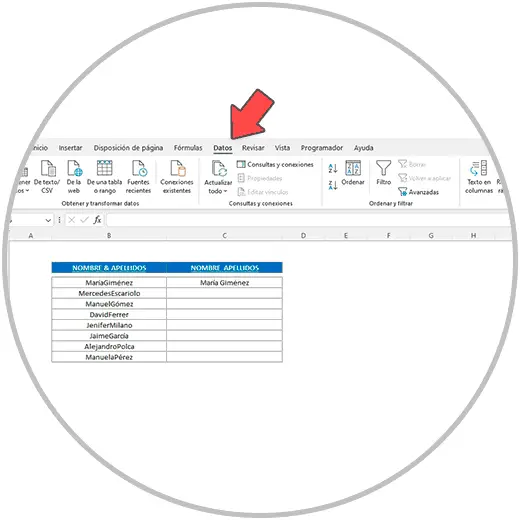
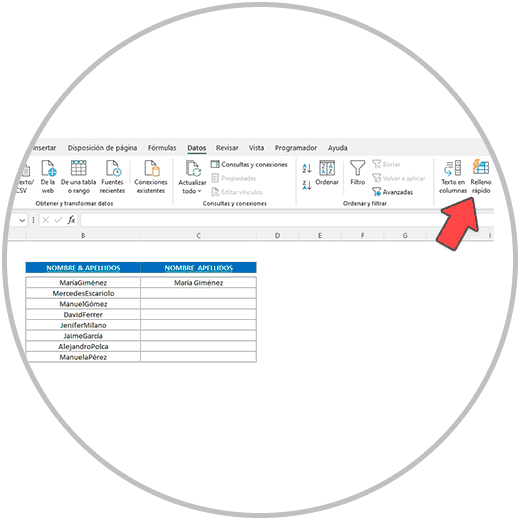
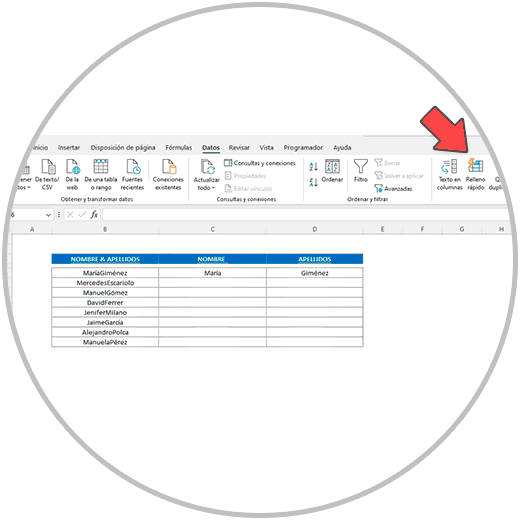
Now we are going to go, in the Excel ribbon, to “Data”, clicking to see the options and tools that are within data. (As you can see in the image):
Once we have clicked on data, in the Excel ribbon, we will see the tool that interests us, the “Quick Fill” tool , which we will easily find among the options.
We click on “Quick Fill”, and we will see how the column has been automatically completed.

In this simple way, we have tackled a task that seemed complex, while we have not been able to tackle it with the use of a function . In this example case that we have seen, we have worked on a simple example, with a few names; But let's imagine that we were working in a more complex case, in a column of data with hundreds or thousands of data, how useful it would be to be able to separate first names from last names in such a simple and quick way. In the example, we only had to create a pattern, and Excel has extrapolated this procedure, in all the rows, as we have seen, filling the entire column.
Example 2: Separate text and last name with Excel Quick Fill in two columns
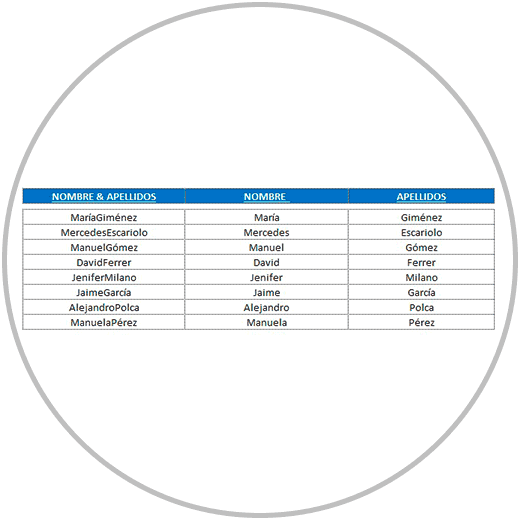
Now let's imagine that we have the same Excel table, and we want to separate the first name from the last name, but in this case, we want to put the first name in one column, and the last name in another column. The procedure that we are going to follow will be very similar: the pattern will change as we are going to explain to you, so that Excel automatically repeats the same operation for all names.
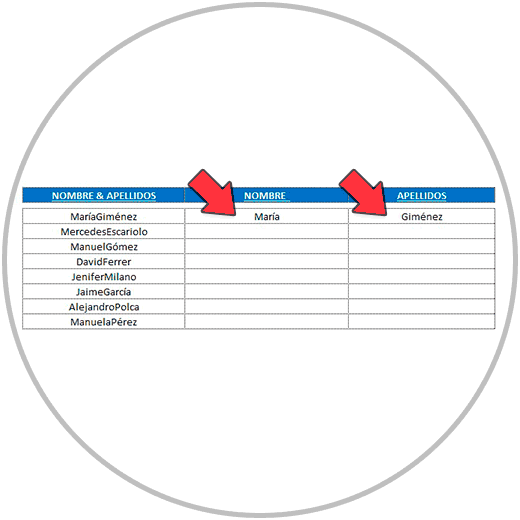
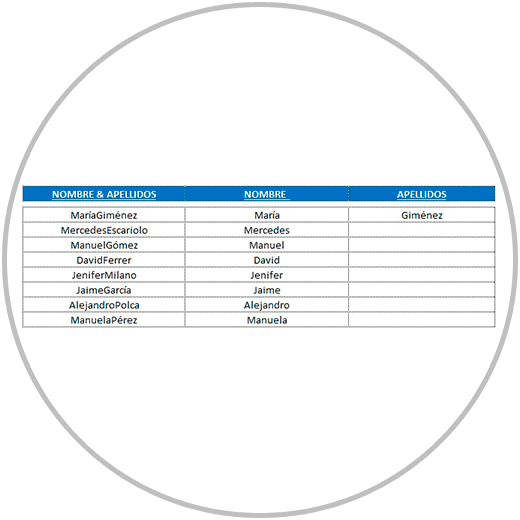
Since we want the students' names to be in one column, and the surnames in another column, the pattern we make in this case is different, and we put the first and last name in different columns.
Now we are going to use the “Quick Fill” to complete the first name column, and then we will do the same to complete the last name column.
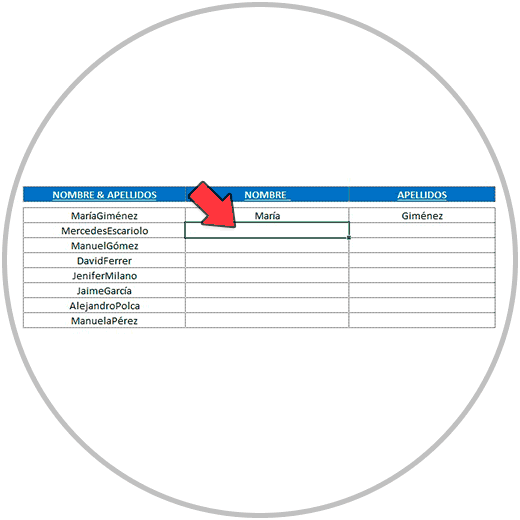
We first complete the column of names, as we already know, by positioning the mouse and clicking under the name that we have written by hand, that is, under the name “María”.
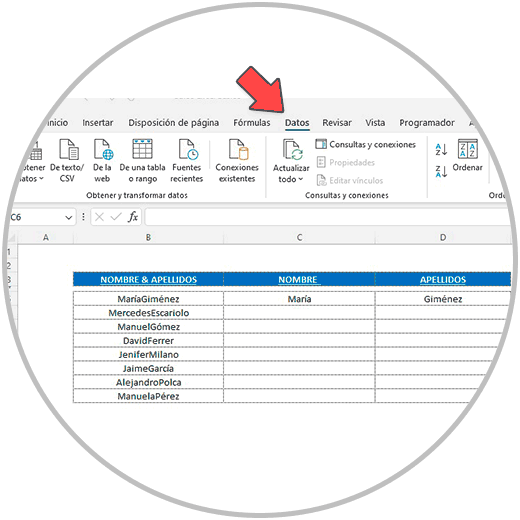
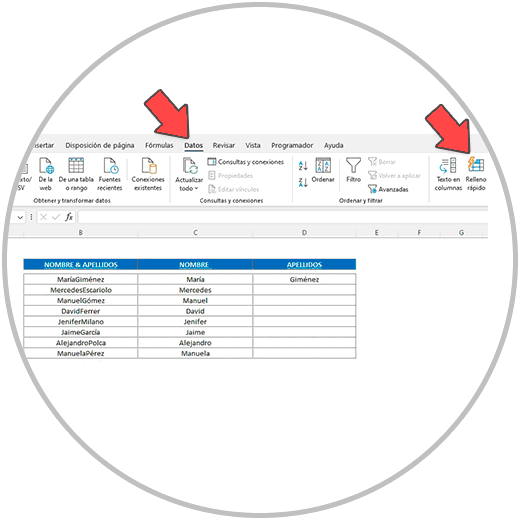
Once we have placed ourselves in the cell below the first name, as in the image, we go to the Excel ribbon and look for the “data” tab where we will click.
Within the “Data” option, we search and click on “Quick Fill”.
Thus first completing the column where the names are found.
Now that we have completed the name columns, we go below the last name that we have written by hand, in the example “Giménez”, in the cell immediately below.
And we follow the same procedure: we click on “Data” in the Excel ribbon, and then we click on “Quick Fill”.
Next, we will see how the column with the students' last names has also been completed, and we have the result we expected to achieve: First name and last name in Excel separated into different columns.
This way we can separate the names from the surnames when we find them together in the same cell without a separator. Being able to separate first and last name in this case has been possible thanks to the Excel Quick Fill tool, and thanks to the pattern that we have created as an example so that Excel can use as an example and model to fill in the rest of the cells in the column.
In this case, it was possible to do so because the name of the surname in particular was in capital letters, and in this way Excel, together with the pattern that we have created, is able to establish a logic and apply it to the rest of the cells.
2 How to Use Excel Smart Fill
In Excel, there is also a way to quickly fill the cells, also using a pattern that we are going to create, in this case that we can use from the cells themselves, when we are working on the data table itself directly.
In this method, we write the pattern to tell Excel how we want to fill the cells once. And we begin immediately in the cell below until we see how Excel suggests that we fill in the data.
Let's see better how this method works with an example, step by step.
EXAMPLE 3: How to separate text in Excel with Excel Smart Fill
We worked on the same data table that we had, with the list of names of several students.
Now, we are going to write in the first row of the cells that we want to fill, in the cell that is immediately to the right of the first student.
We first write the name of the first student, and his last name, which we are going to use as a pattern. In the example, leaving a space between the first and last name, as in the image:
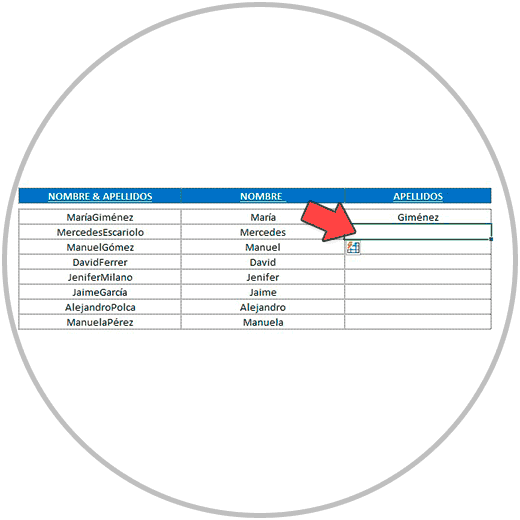
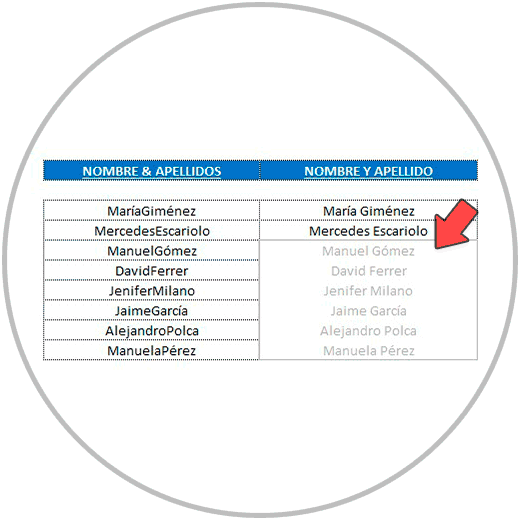
Now in the cell immediately below, we begin to write the name of the second student. We are attentive because we will stop writing just when we see the Excel suggestion.
Important
Normally, when you write the first letter, Excel will show us the suggestion, but it may happen that you have to write one or two more letters in case the first letters match the name above.
As in the example, the first and middle names begin with the same letter, M (María and Mercedes), when we write Me in the cell below, we will be able to see the suggestion to complete the column.
Now we press the Enter key on our keyboard, or click on any cell, and Excel will automatically complete the column, as we see in the image below, following the same pattern that we have used.

Both quick fill and smart fill are two very useful ways with which we can advance our work, much faster, and also safely ; Quick because, as we have seen in just a few clicks, Excel does the work for us, and safe because by not writing all names and surnames by hand, we avoid making spelling errors.
Both Quick Fill and Smart Fill are two forms that also interpret very well how we want to fill the columns.
- Thus, in the example we have seen how it separates the first name from the last name with a space, in example 1.
- In example 2, we have separated the first and last name in different cells so that first and last name were in different columns
But we can also use, instead of a space, another separation sign such as a comma or a semicolon. Excel will interpret it and use the same sign that we put in the pattern.

We can even play with the order, putting the last name first and then the first name, which Excel will also take as a valid pattern following our example.
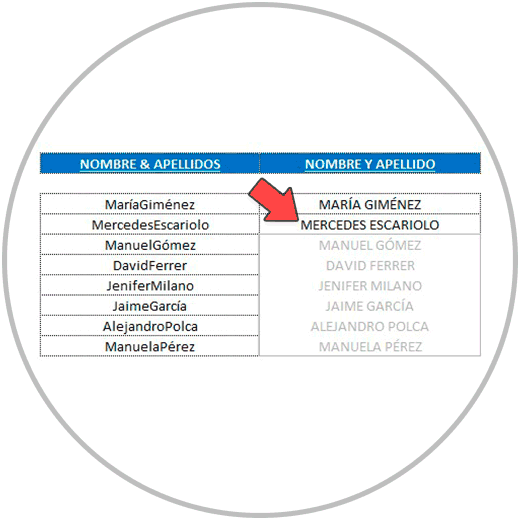
Additionally, both Excel's Quick Fill and Smart Fill interpret both upper and lower case. If, for example, we put the pattern in capital letters, Excel will do the same to fill in the rest of the cells, as we can see in the image:
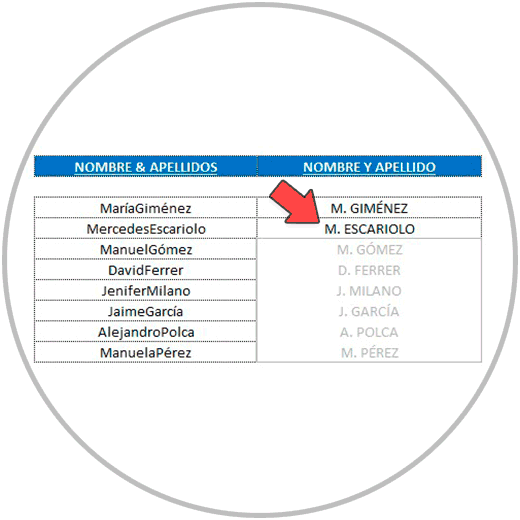
Even if we decide that we want to put the name with initials (instead of putting the full name), Excel also interprets it and follows our pattern.
These are some examples of when and how we can use the Excel quick fill tools, an option that we find, as we have seen, in the “Data” options (On the Excel ribbon); And how to use the smart fill options, an option that is even faster to execute because we can use it directly from the cells, if we look closely, using Excel's suggestions.
In any case, these are just examples. We must first know the existence of these two tools that work for the same objective, and we must be alert to being able to use them on occasions where, for example, the use of a function does not 100% solve the task we want to execute, also thinking that these options in Their operation is easier to carry out.
When we are making a data table, or we are organizing data in Excel, these tools can be very useful. As always when we work in Excel, we must have an open mind to be able to look for a faster way to do what we are doing. Even more so when a task is repetitive, and it is also a laborious task and it takes us a long time to complete it. Let's always think if there is a faster way to carry out the task we are carrying out.
As always, the best way to learn how to use Excel's auto-fill tools in this case is to practice and try them on an example. You will see that if you follow the steps and guidelines that we have given you, this option is as easy as it is useful to use.