To stay up to date, remember to subscribe to our YouTube channel!
SUBSCRIBE ON YOUTUBE
Although we know that Linux distributions are much more secure than some other systems, there is always the risk that some file or malware is present on the network and affects user data, installed applications and even the operating system itself, which is why As administrators and advanced users we must be alert to any threat that puts privacy at risk..
To help us mitigate the impact of a threat, but above all to prevent them, we have Nessus, this is a utility that has been created in order to identify and carry out an evaluation of failures and vulnerabilities in networks, applications and the system itself. independent system whatever the distribution.
Nessus integrates several practical tools to identify and correct entry points that attackers can exploit to carry out their purposes..
Hardware
To use Nessus to its full functionality, the following hardware is required:
- RAM memory of at least 4 GB
Features
Among the main functions and features of Nessus we find:
- You can generate analysis reports in HTML, PDF, XML and CSV formats
- Integrates configuration auditing
- Can analyze web applications
- Performs vulnerability scanning tasks including IPv4/IPv6/hybrid networks
- Scanning with credentials that allow system improvement and missing patches
- Can perform analysis on network devices such as firewalls, routers, and switches
- Nessus meets PCI DSS requirements for vulnerability scanning tasks
- Nessus is compatible with virtualization systems such as VMware ESX, ESXi, vSphere, vCenter, Microsoft, Hyper-V, Citrix Xen server and more
- Compatible with Windows, OS X, Linux, Solaris, FreeBSD, Cisco iOS and IBM iSeries operating systems
- Can detect viruses, malware, backdoors, host and more current threats
- Complies with FFIEC, FISMA, CyberScope, GLBA, HIPAA/HITECH, NERC, SCAP, SOX audit levels
- Supports remote and credentialless scanning
- Allows you to create and configure policies
- It is compatible with RESTful API to integrate Nessus with other programs and thus increase its performance capacity
- Analysis of online and offline systems and devices
Now TechnoWikis will explain how you can install Nessus on Linux and thus improve the security of the system.
How to install Nessus on Linux
Step 1
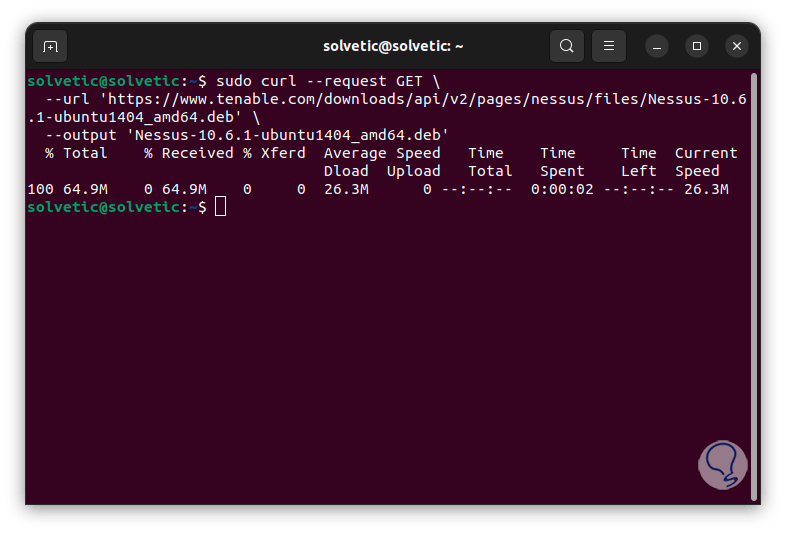
To start, we open the terminal, there we are going to download the most recent version of Nessus with the following command:
curl --request GET \ --url 'https://www.tenable.com/downloads/api/v2/pages/nessus/files/Nessus-10.6.1-ubuntu1404_amd64.deb' \ --output 'Nessus-10.6 .1-ubuntu1404_amd64.deb'
Step 2
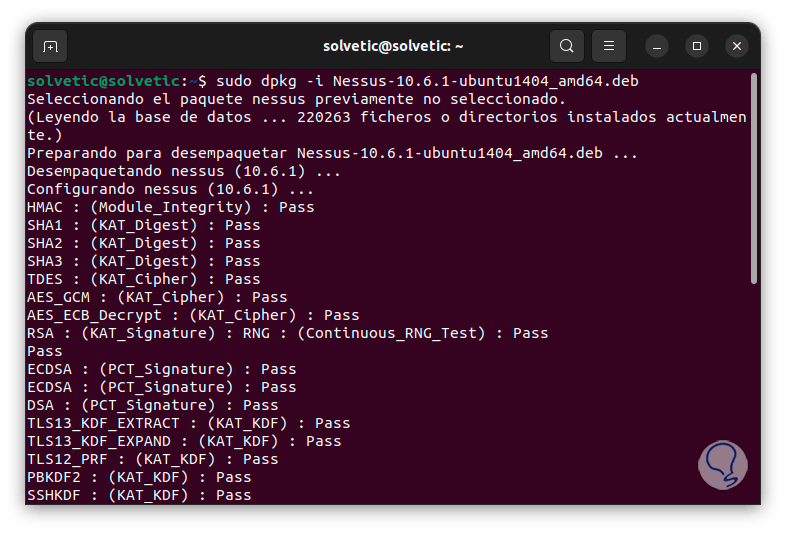
Once downloaded, we extract this file by executing the following syntax:
sudo dpkg -i file.deb
Step 3
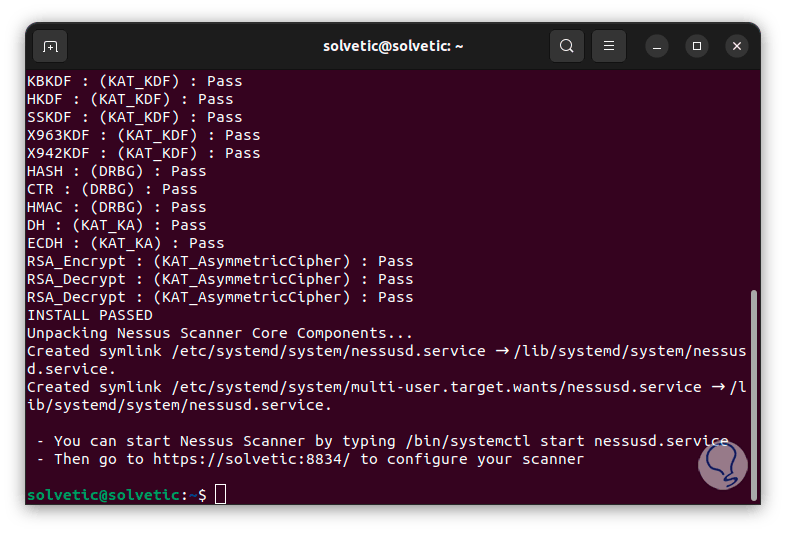
At the end of this process we will see the following:
Step 4
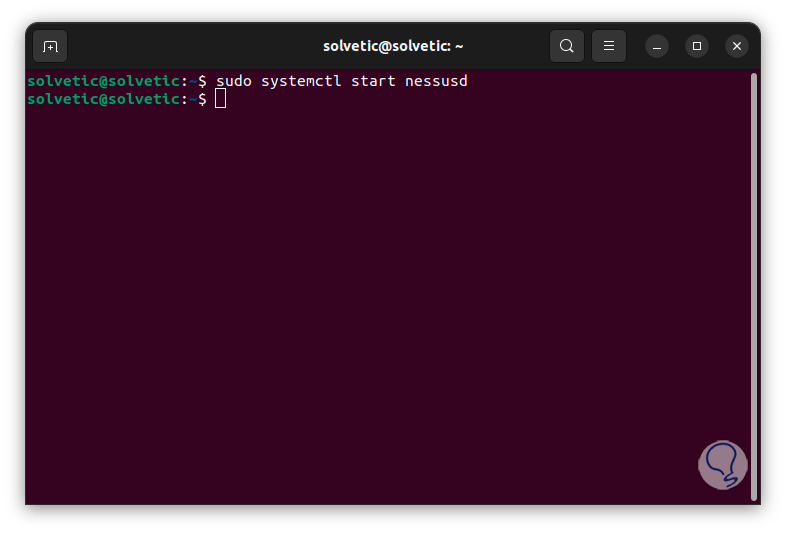
Once we do this, we are going to start the Nessus service:
sudo systemctl start nessusd
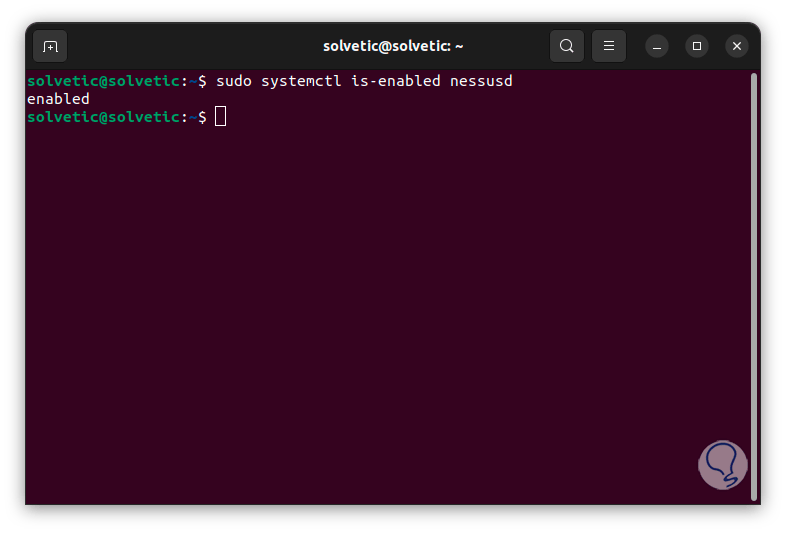
Step 5
Now, we enable Nessus with system boot:
sudo systemctl is-enabled nessusd
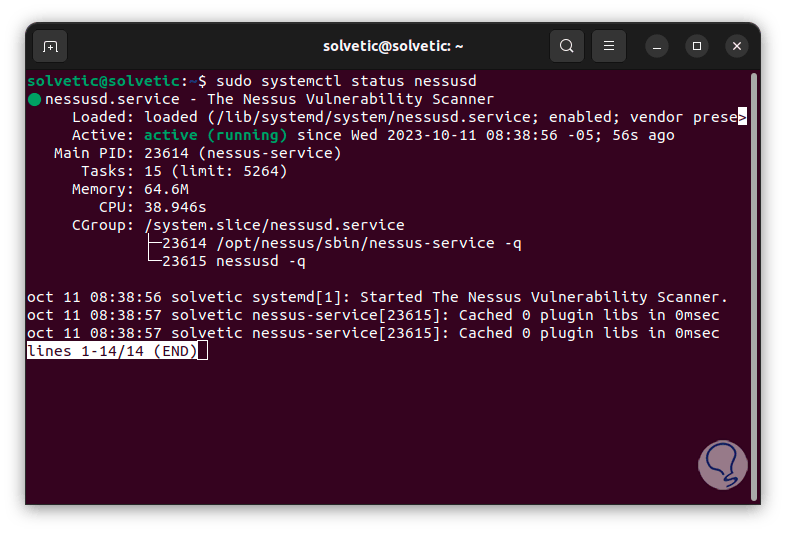
Step 6
We check the status of the Nessus service:
sudo systemctl status nessusd
Step 7
In order for us to have functional access to Nessus, we must make some configurations in the Firewall, first of all, we add the OpenSSH service in case an external connection will be made, we execute:
sudo ufw allow "OpenSSH"

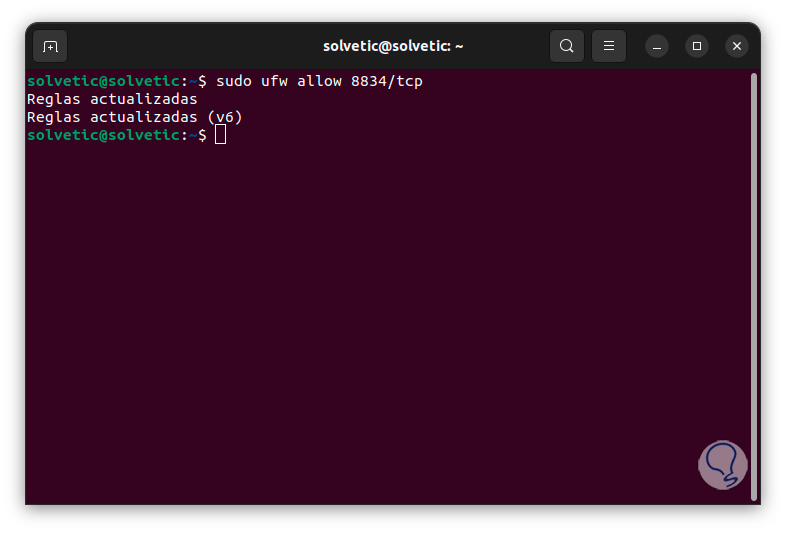
Step 8
Then, we add the port required by Nessus and the TCP protocol:
sudo ufw allow 8834/tcp
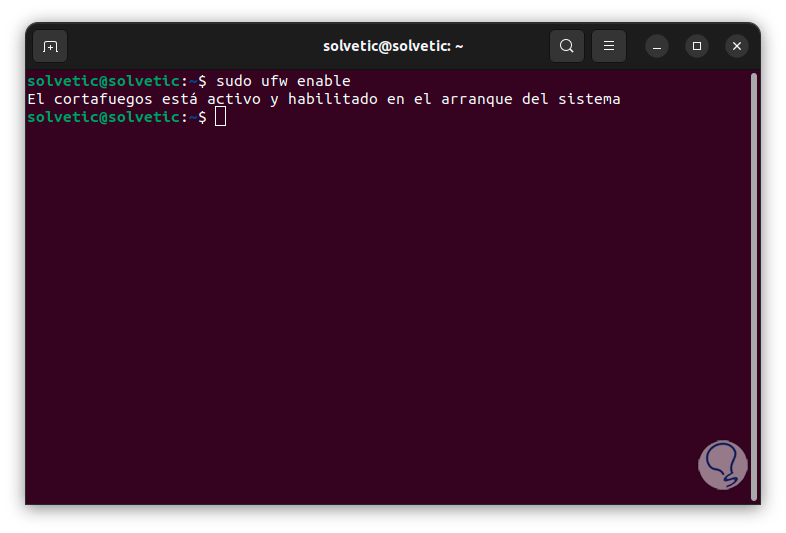
Step 9
We enable the Firewall with the command:
sudo ufw enable
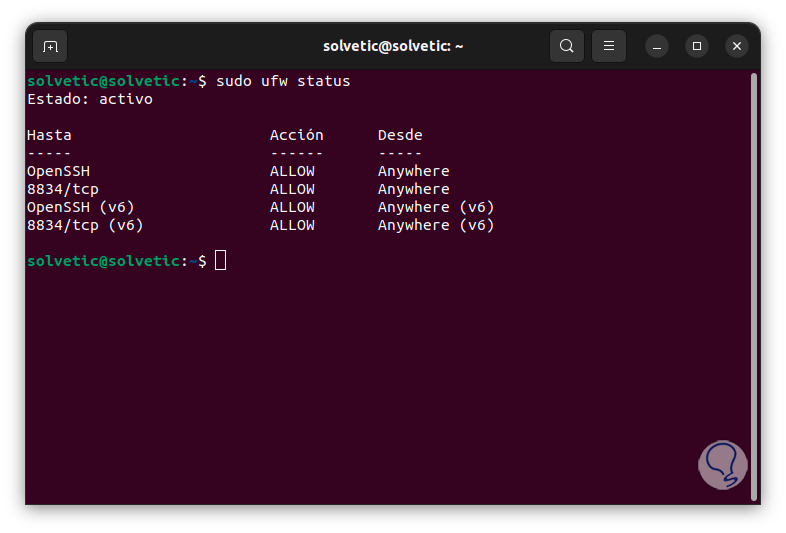
Step 10
Let's check that everything has been configured correctly, to do this we execute:
sudo ufw status
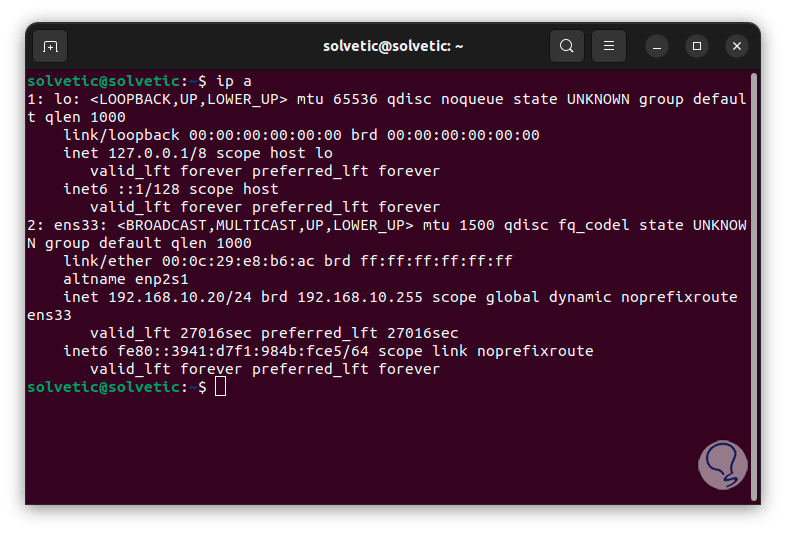
Note
We can execute the “ip a” command to find out the IP address of our system:
Step 11
Now, knowing the IP address, we open a browser and enter the following:
http:IP_Address:8834/
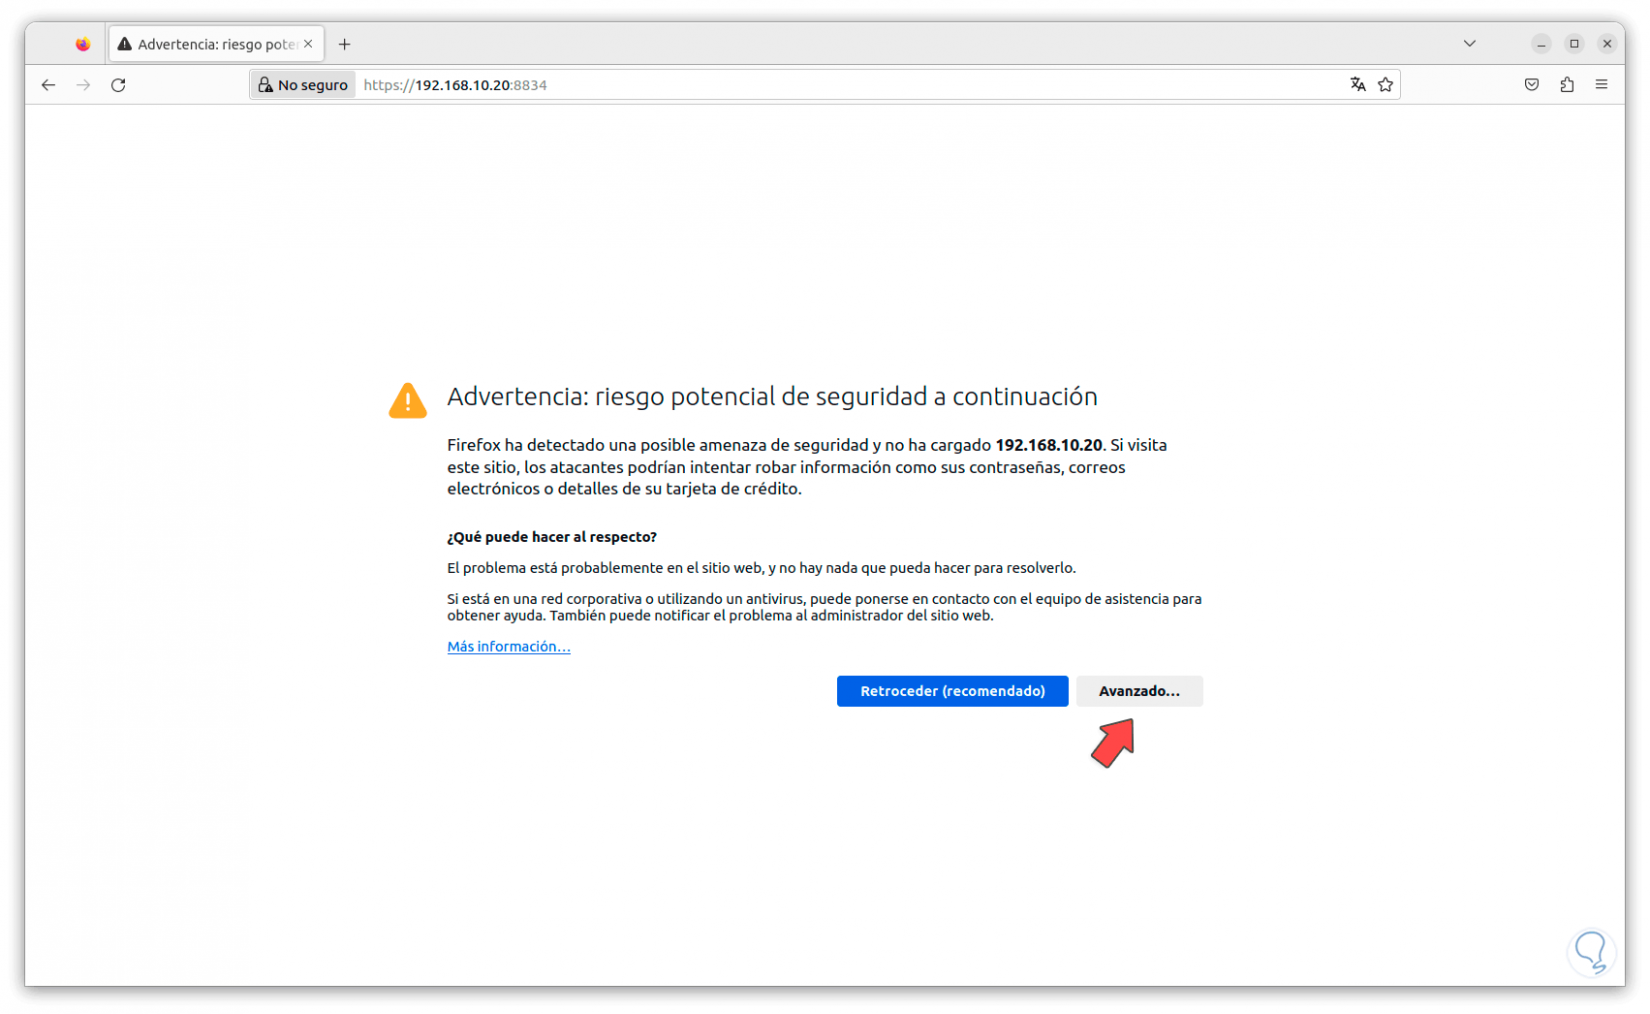
Step 12
When we see this error, we click on “Advanced” and then click on “Accept the risk and continue”:
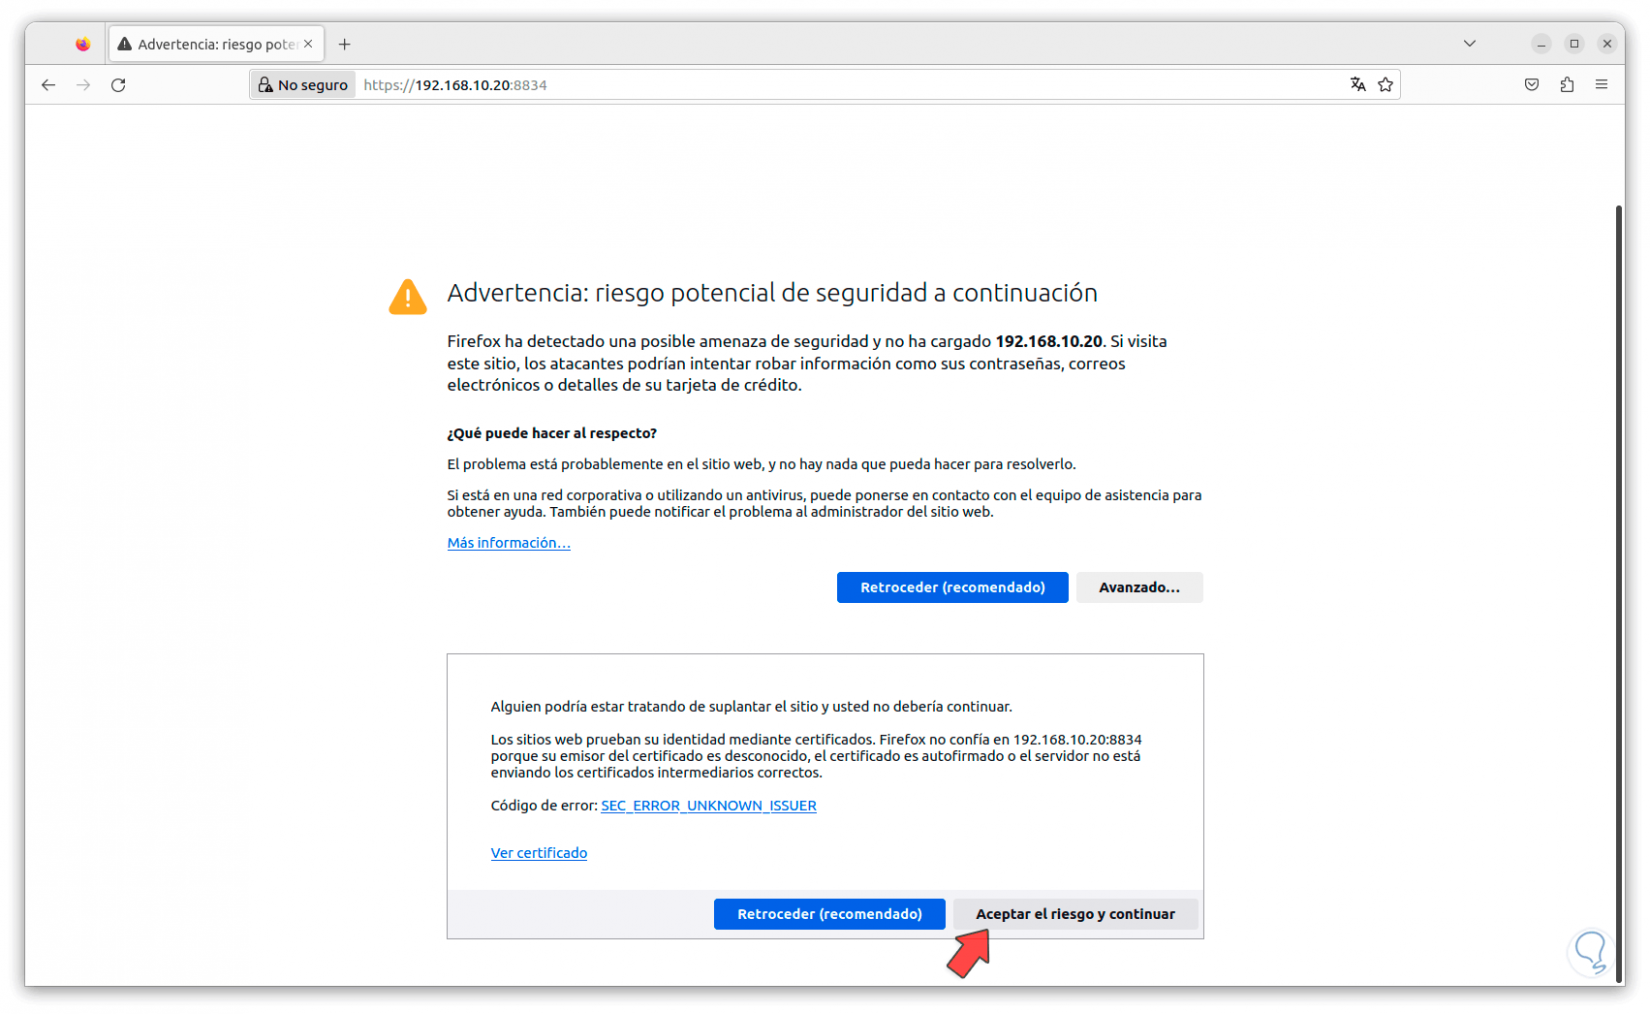
Step 13
By clicking there we access the Nessus console:
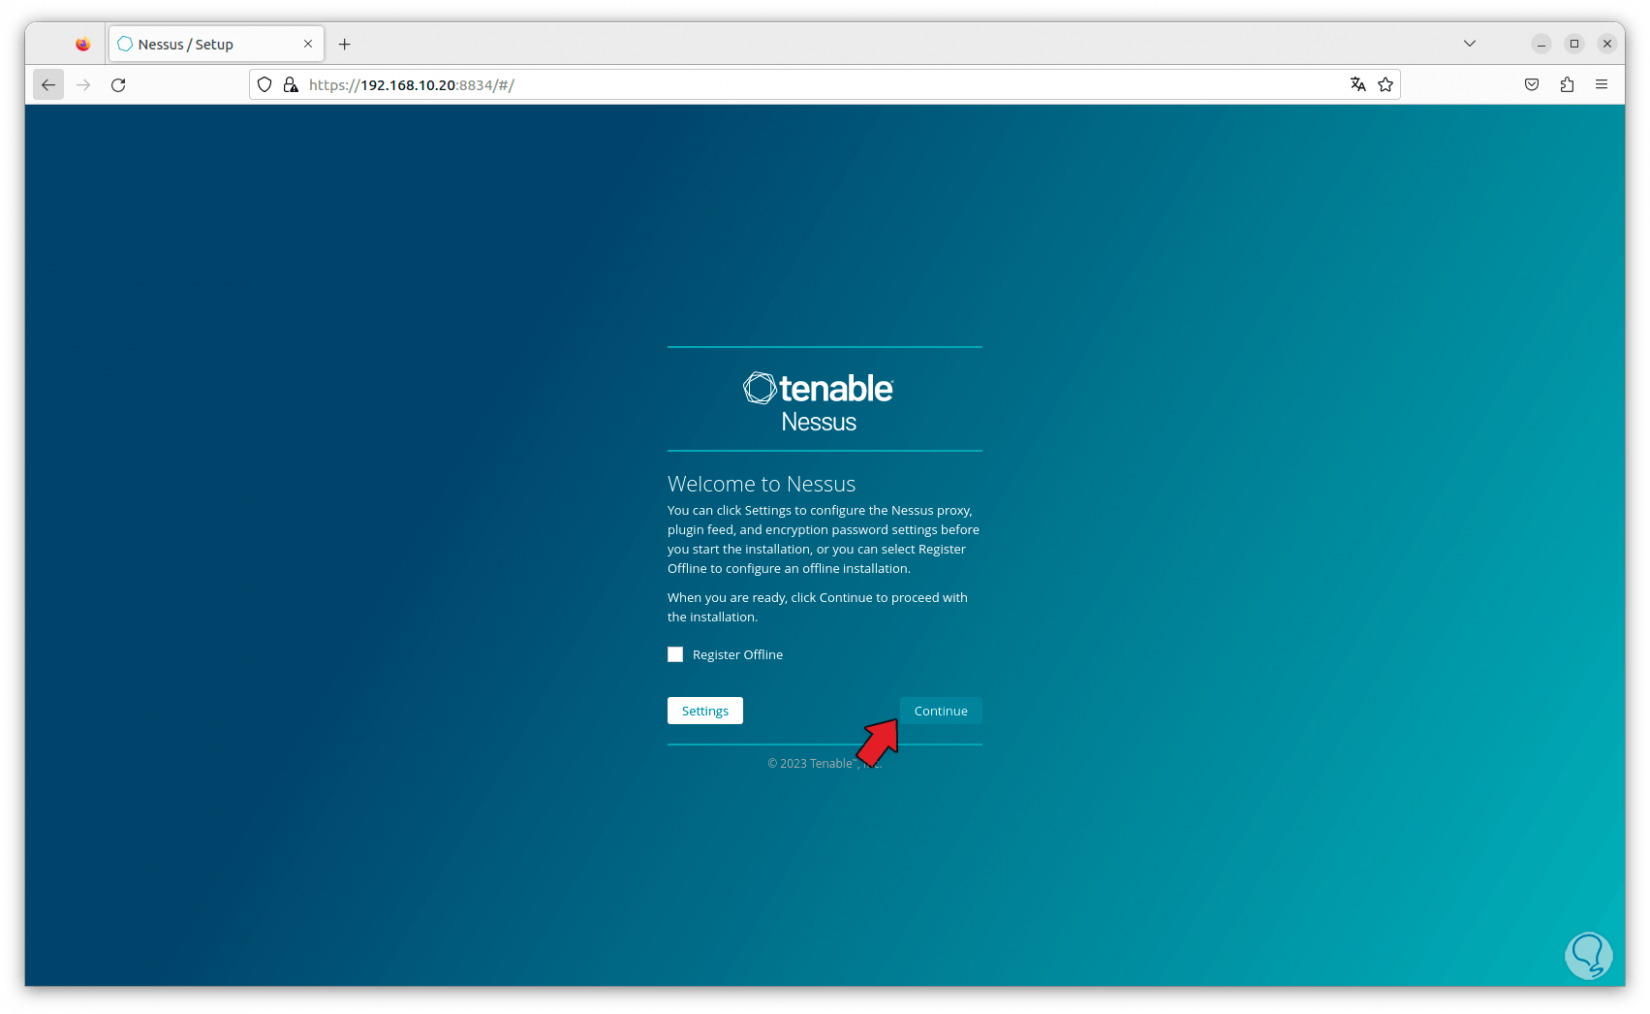
Step 14
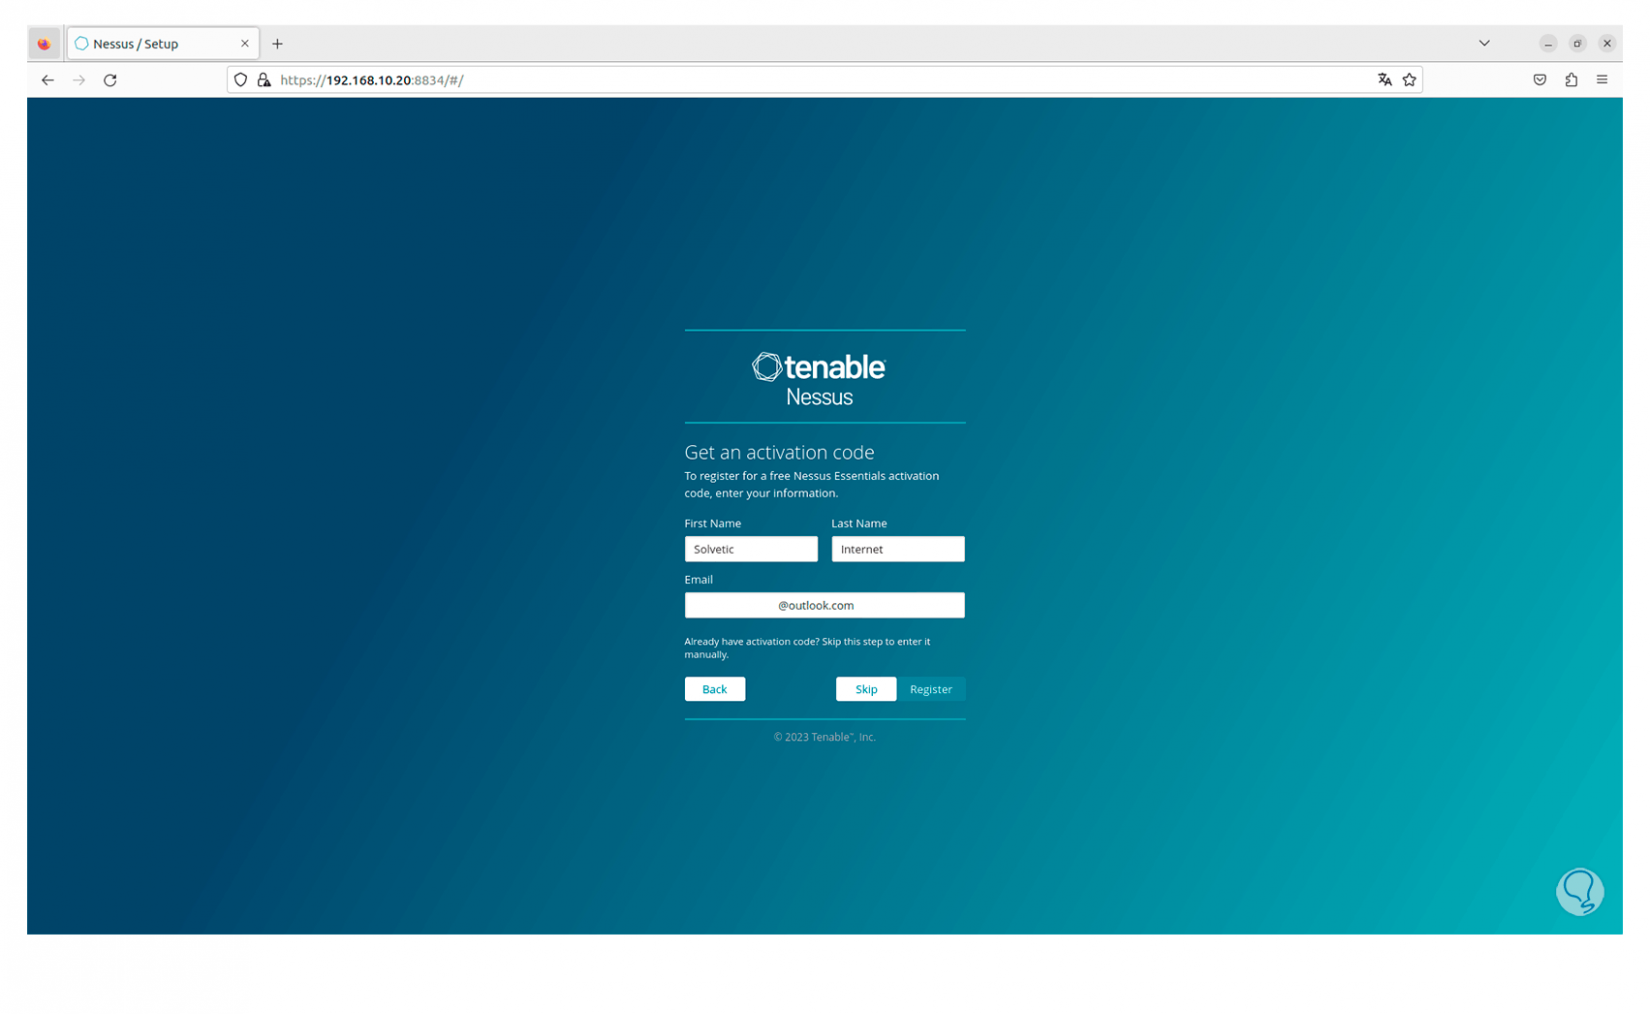
We click on “Continue” and now we must select the product to use, in this case we activate the “Register Nessus Essentials” box. We click on “Continue” and select the different aspects requested to configure the account.
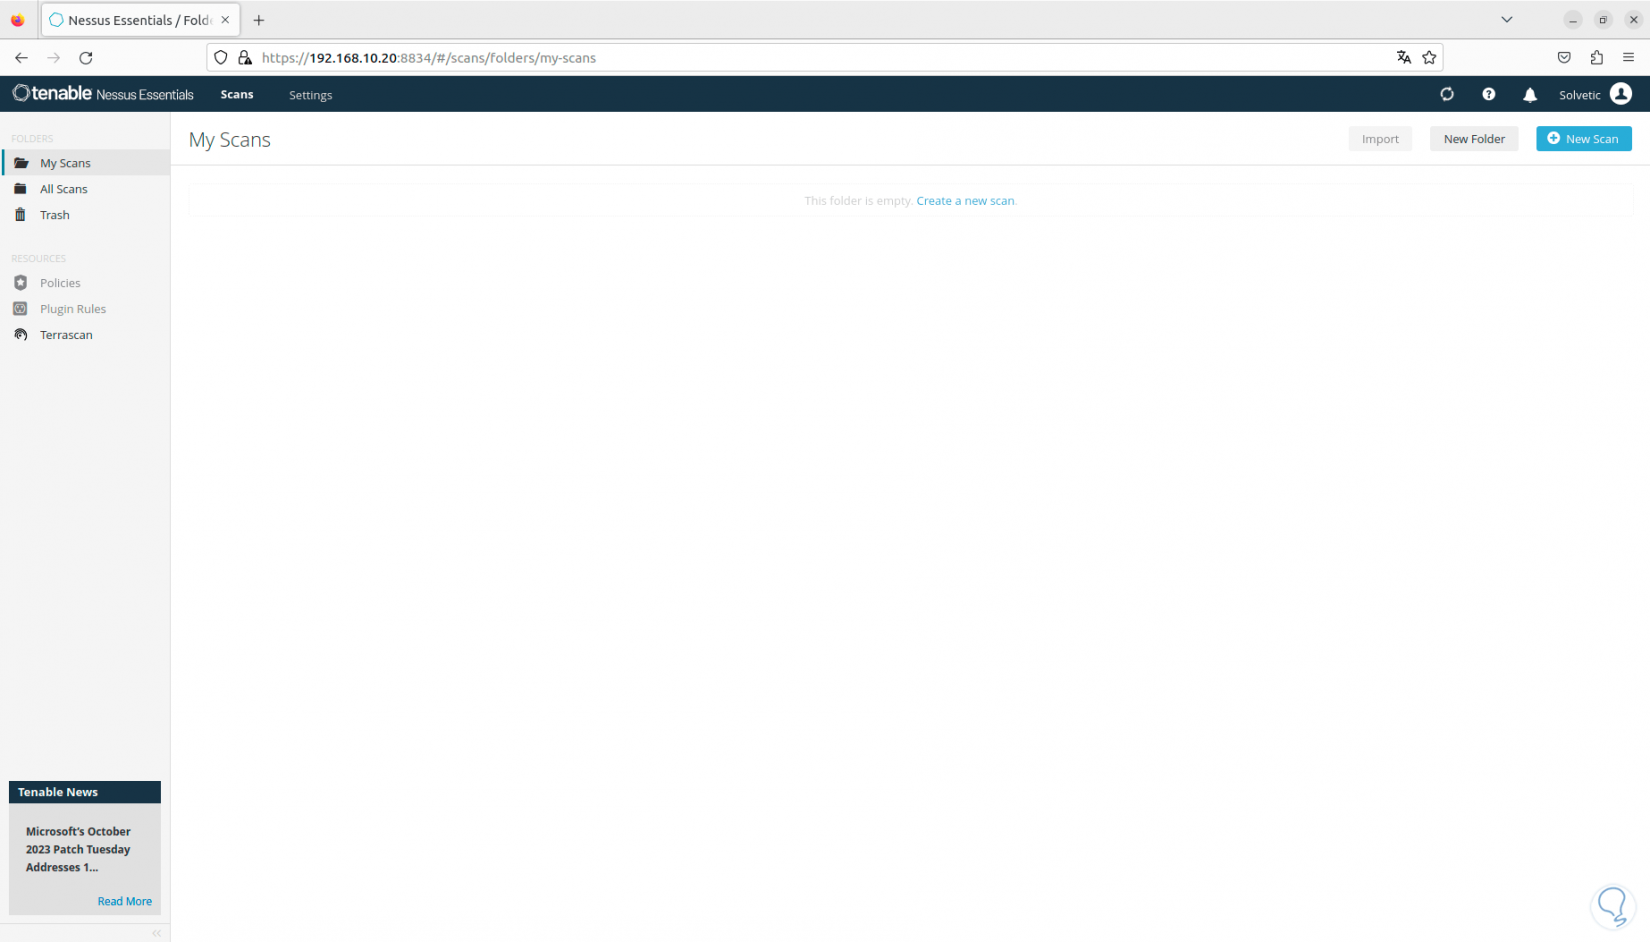
Step 15
Once the plugins are finally downloaded, the console will open. Here we are going to wait for the plugins to be compiled in the console, without this we will not be able to carry out any activity in Nessus.
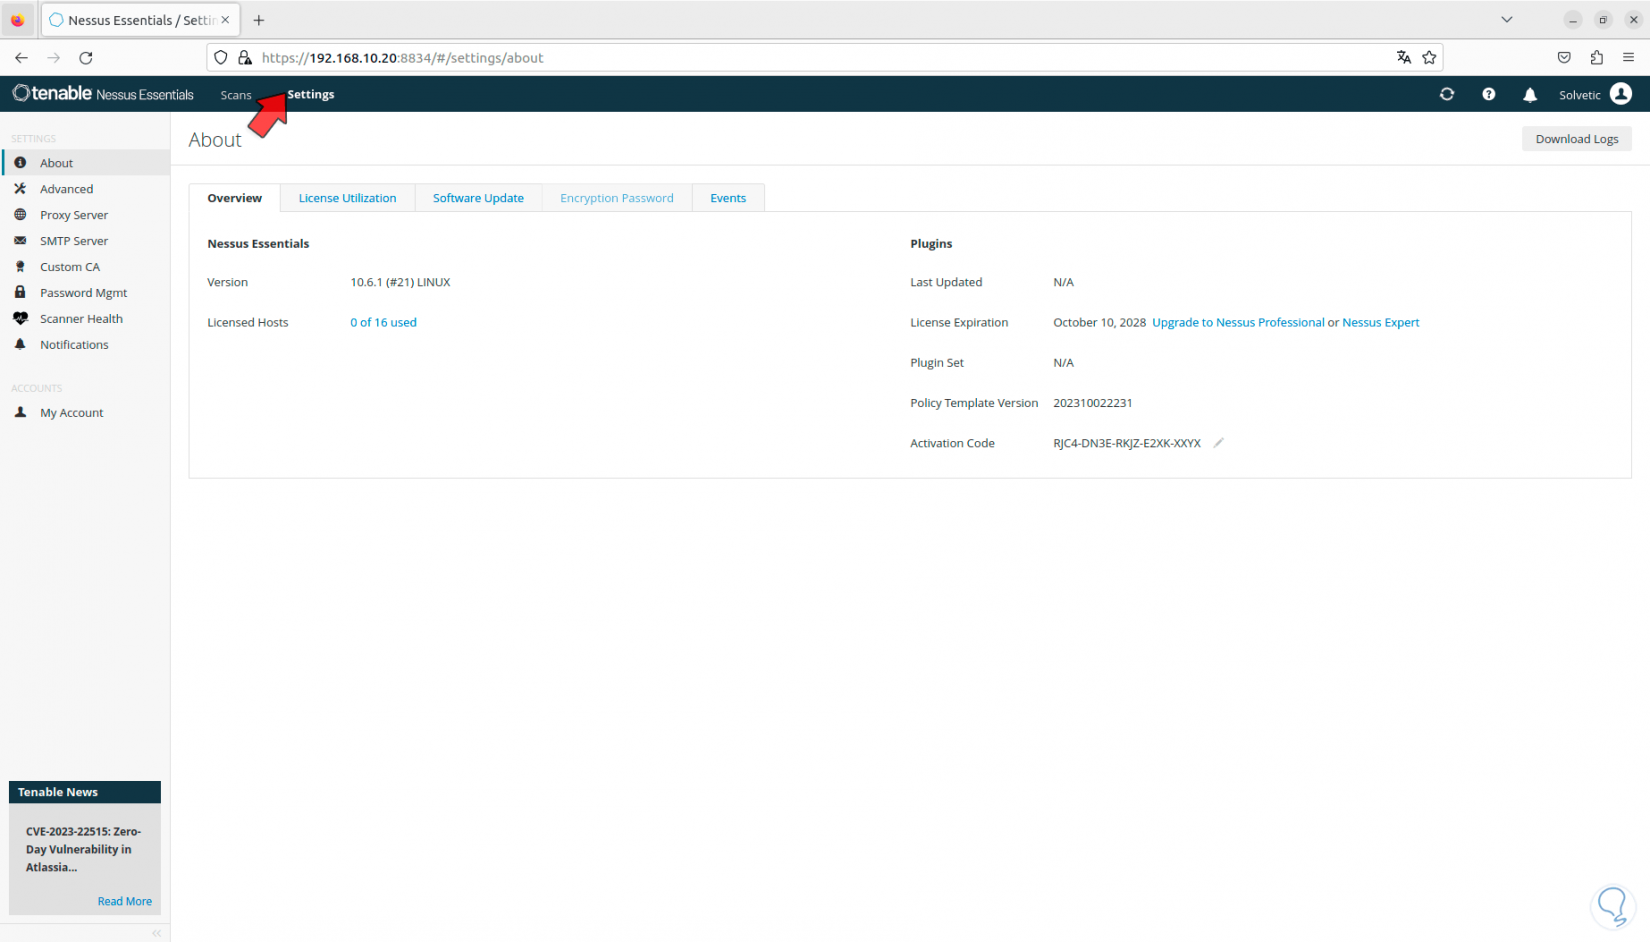
Step 16
Now, we click on “Settings”, there we have some options to use, for example it will be possible to see a brief summary of the application:
Step 17
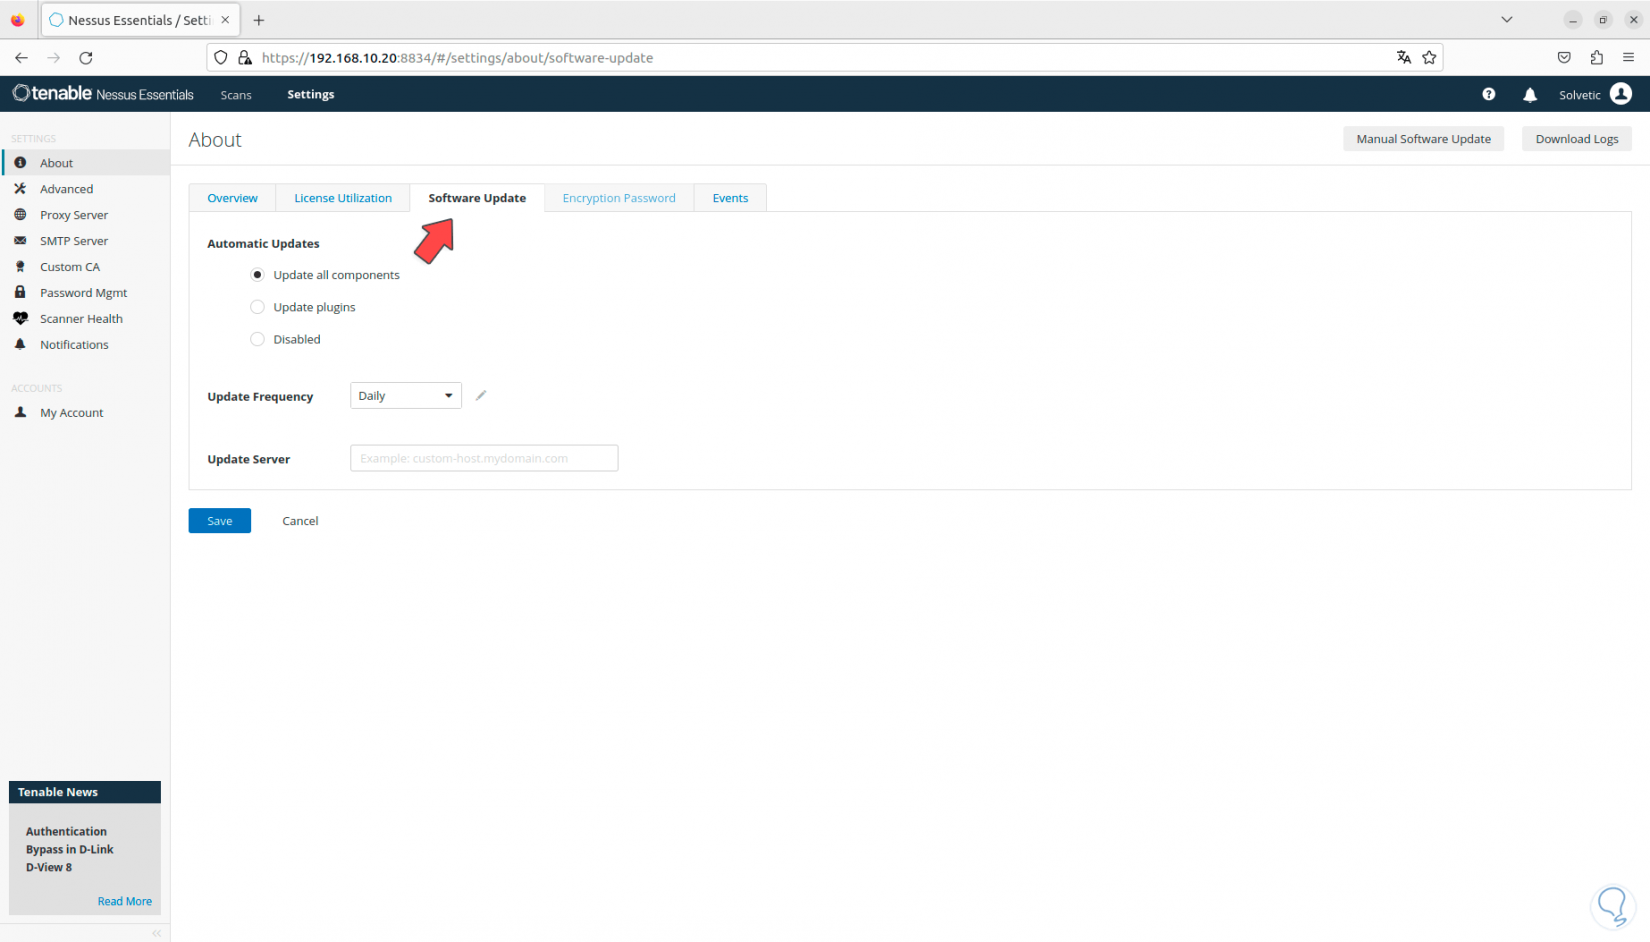
Then, in “Software update” it will be possible to configure the update frequency and whether it will be done automatically or manually:
Step 18
In the “Advanced” section we can see all the global parameters of Nessus. We can see various tabs to navigate in each one and see its configuration.

Step 19
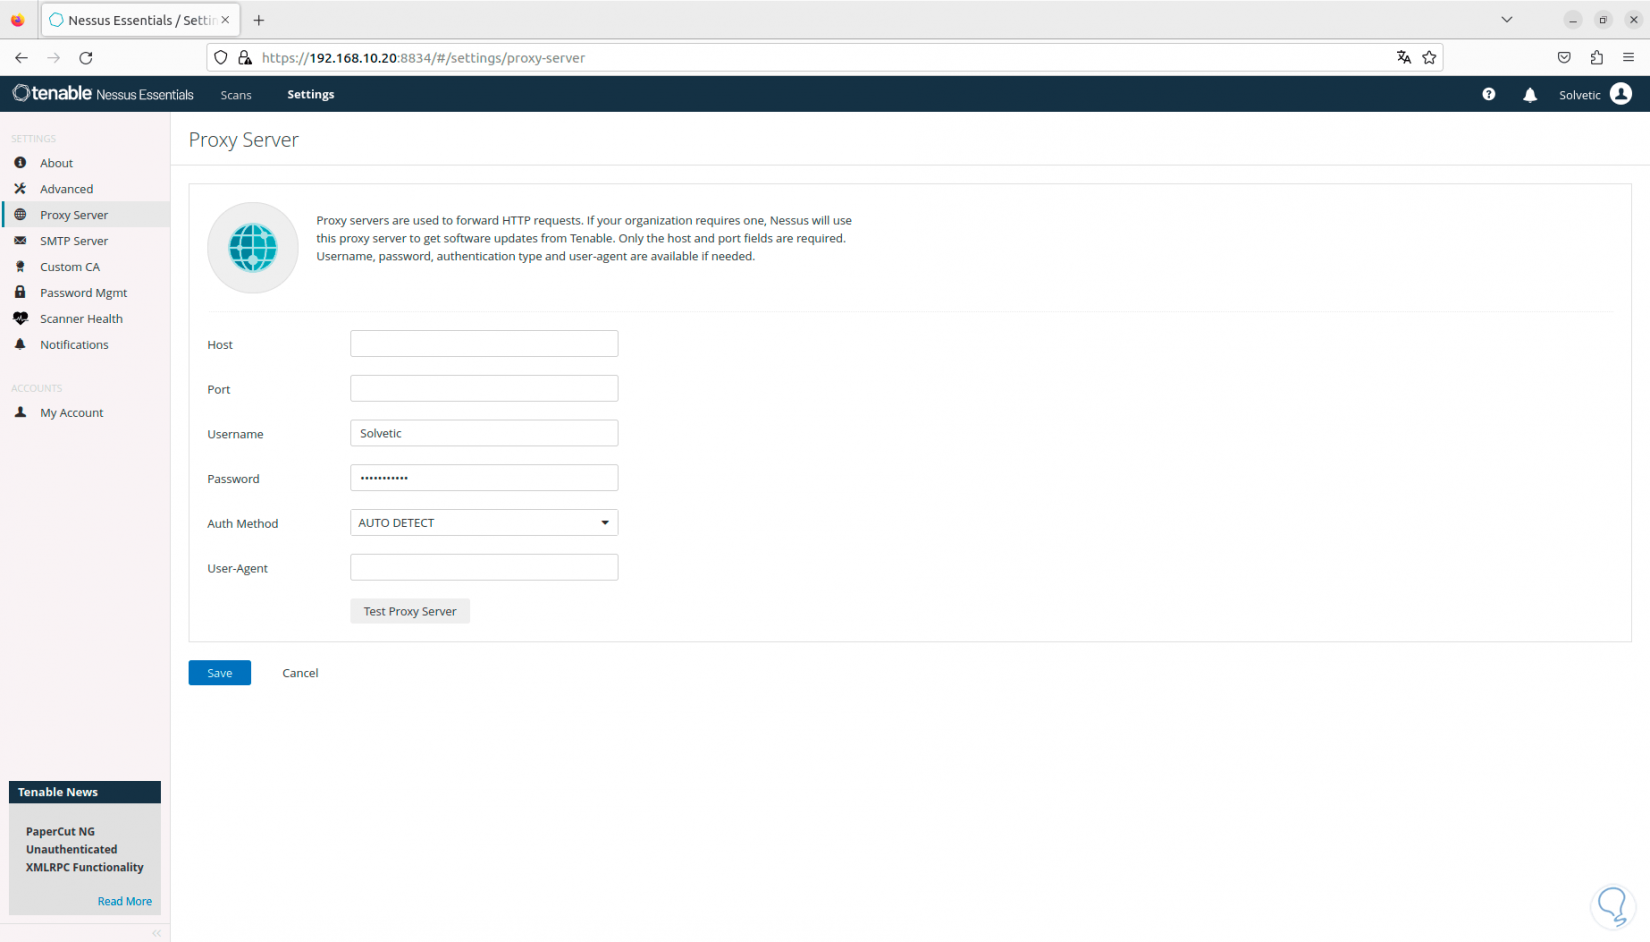
In the “Proxy server” section we have the possibility of creating and configuring, if required, the proxy server:
Step 20
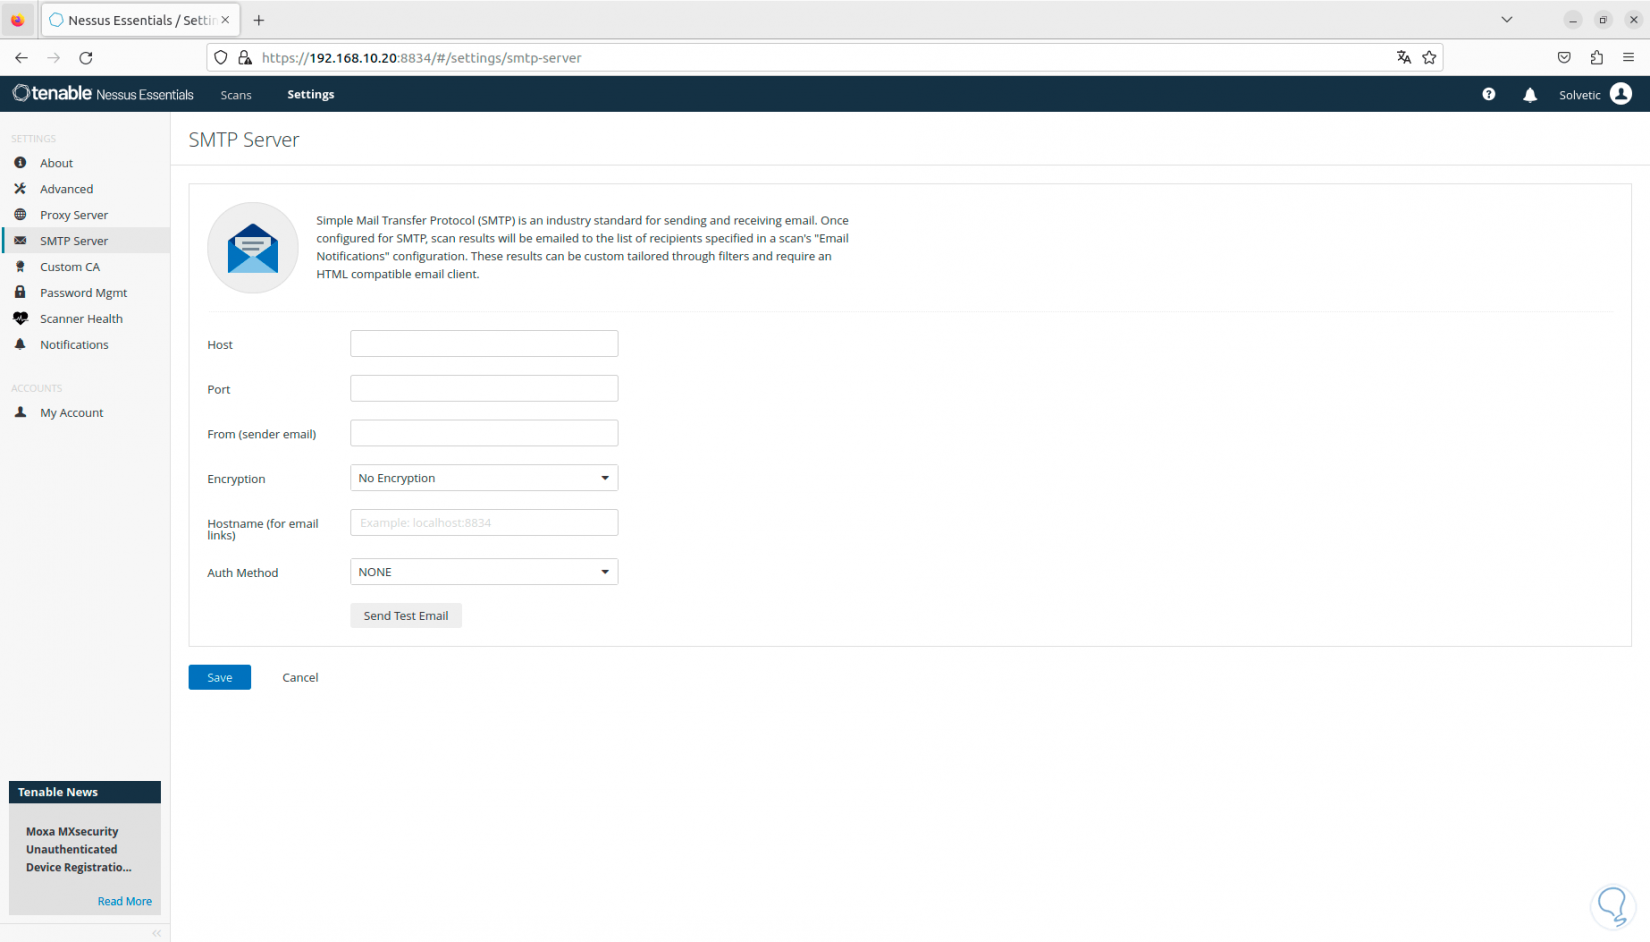
If the use of mail servers is required, we can configure SMTP in the respective section:
Step 21
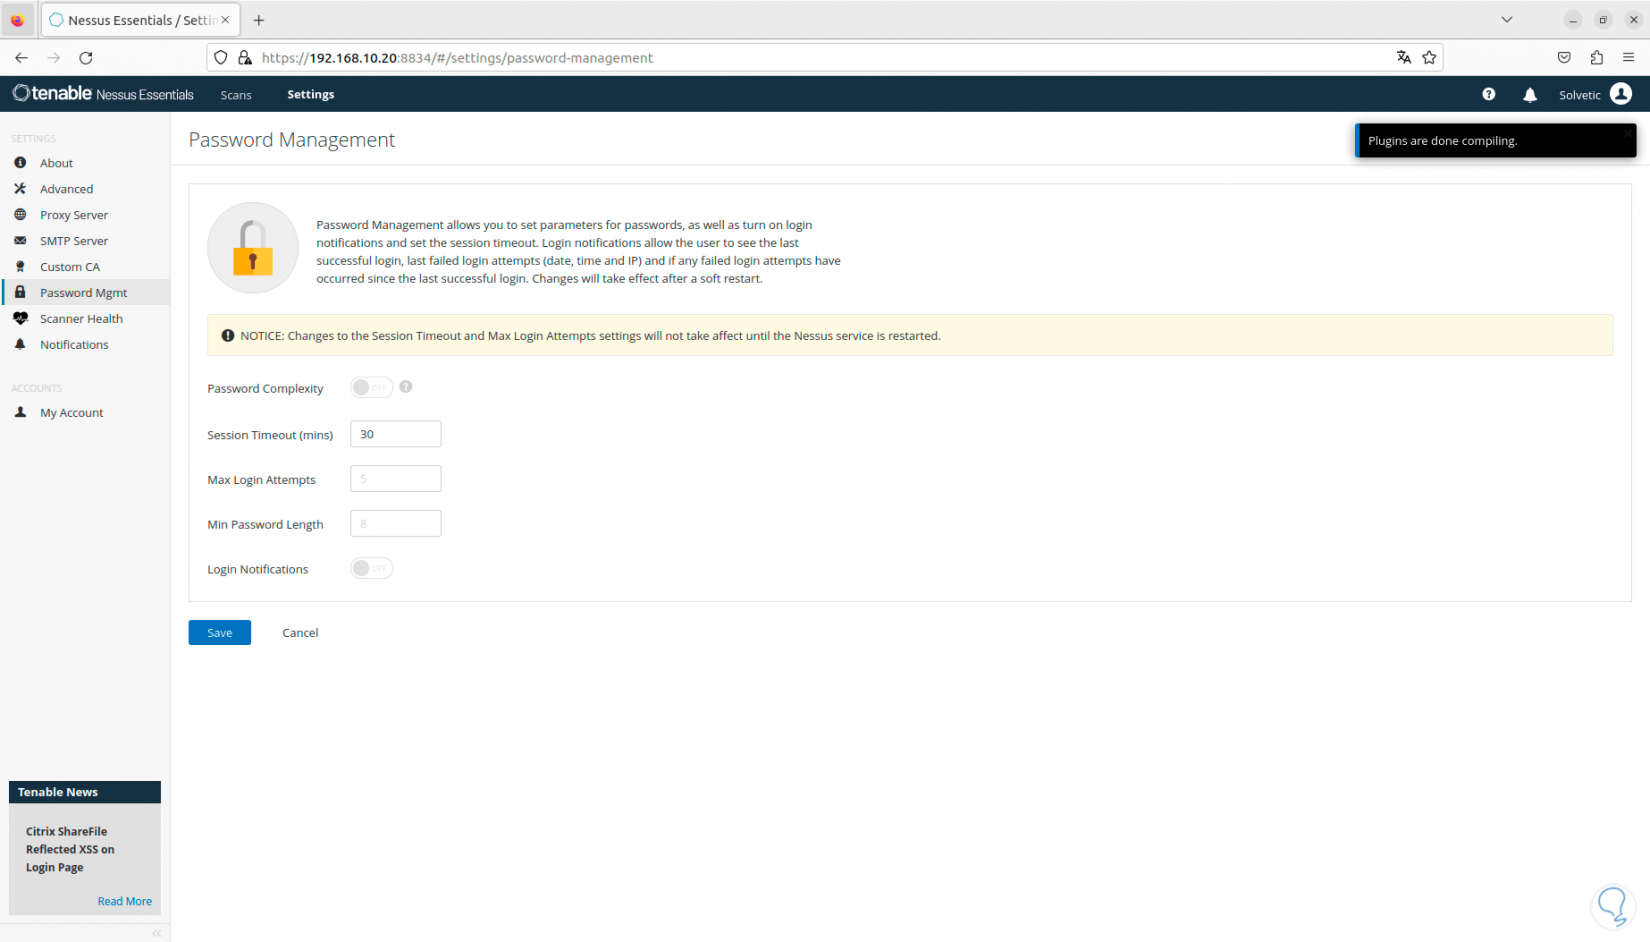
In the “Password Mgmt” section we will have the opportunity to configure the password with criteria such as:
- Minimum and maximum number of attempts, etc.
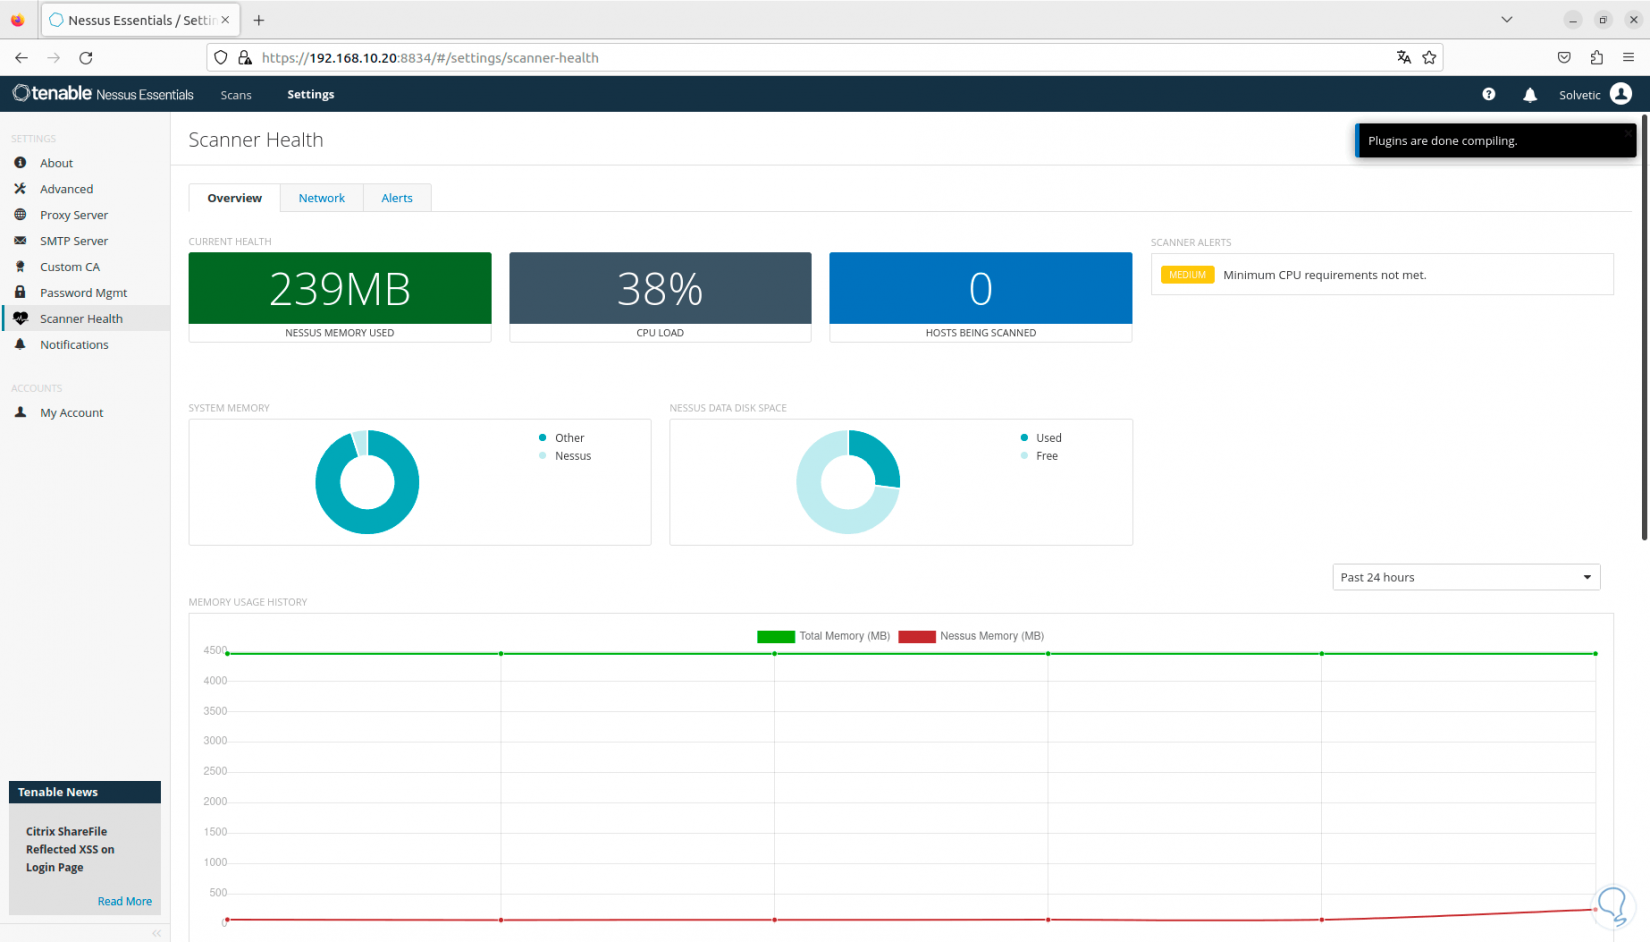
Step 22
In “Scanner Health” we can have real-time access to the status of the system at a global level:
Step 23
Once the plugins have been loaded, we go to “Scan” and we will see the following:
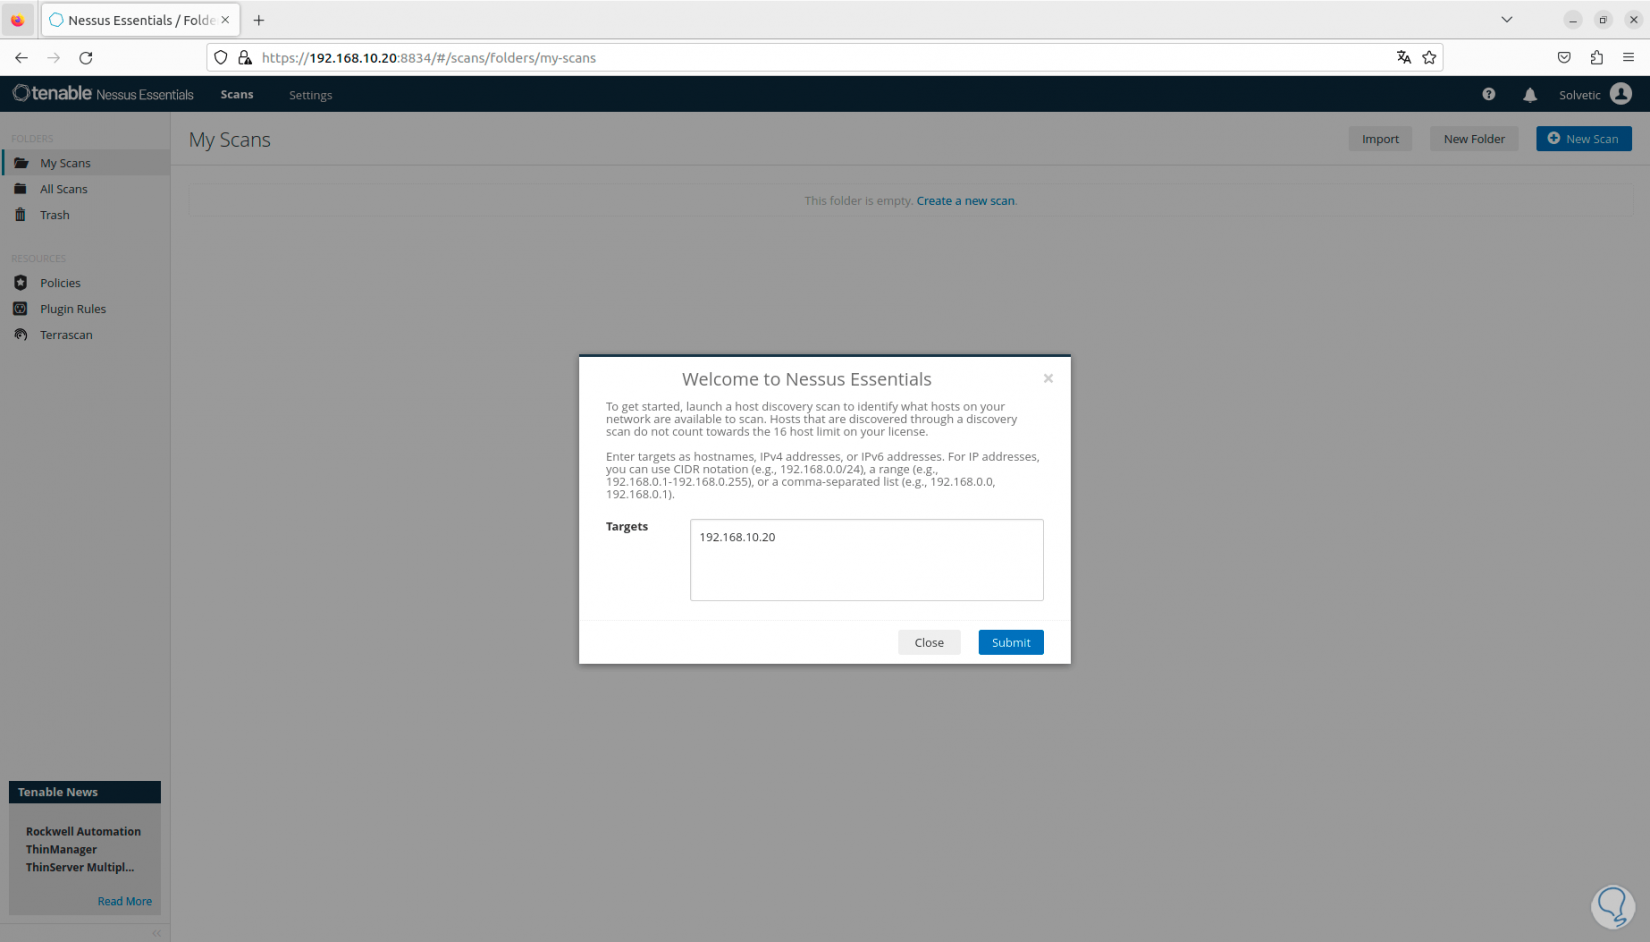
Step 24
There we enter the IP address of the device to be analyzed, click on “Submit” and once it is detected, we select the device:
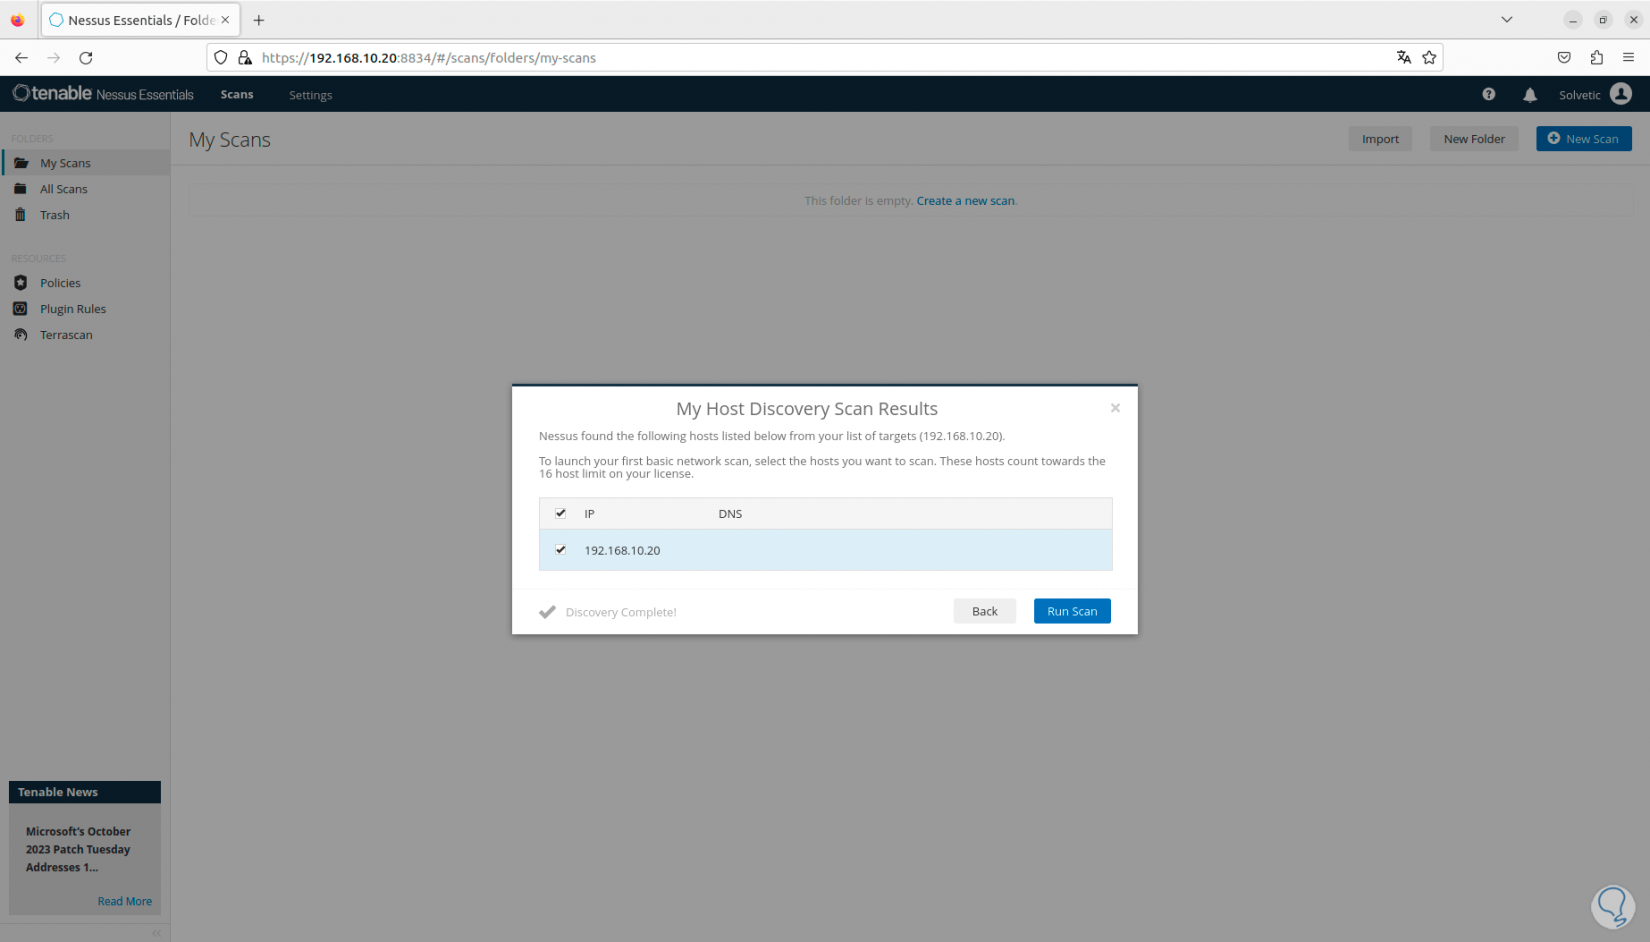
Step 25
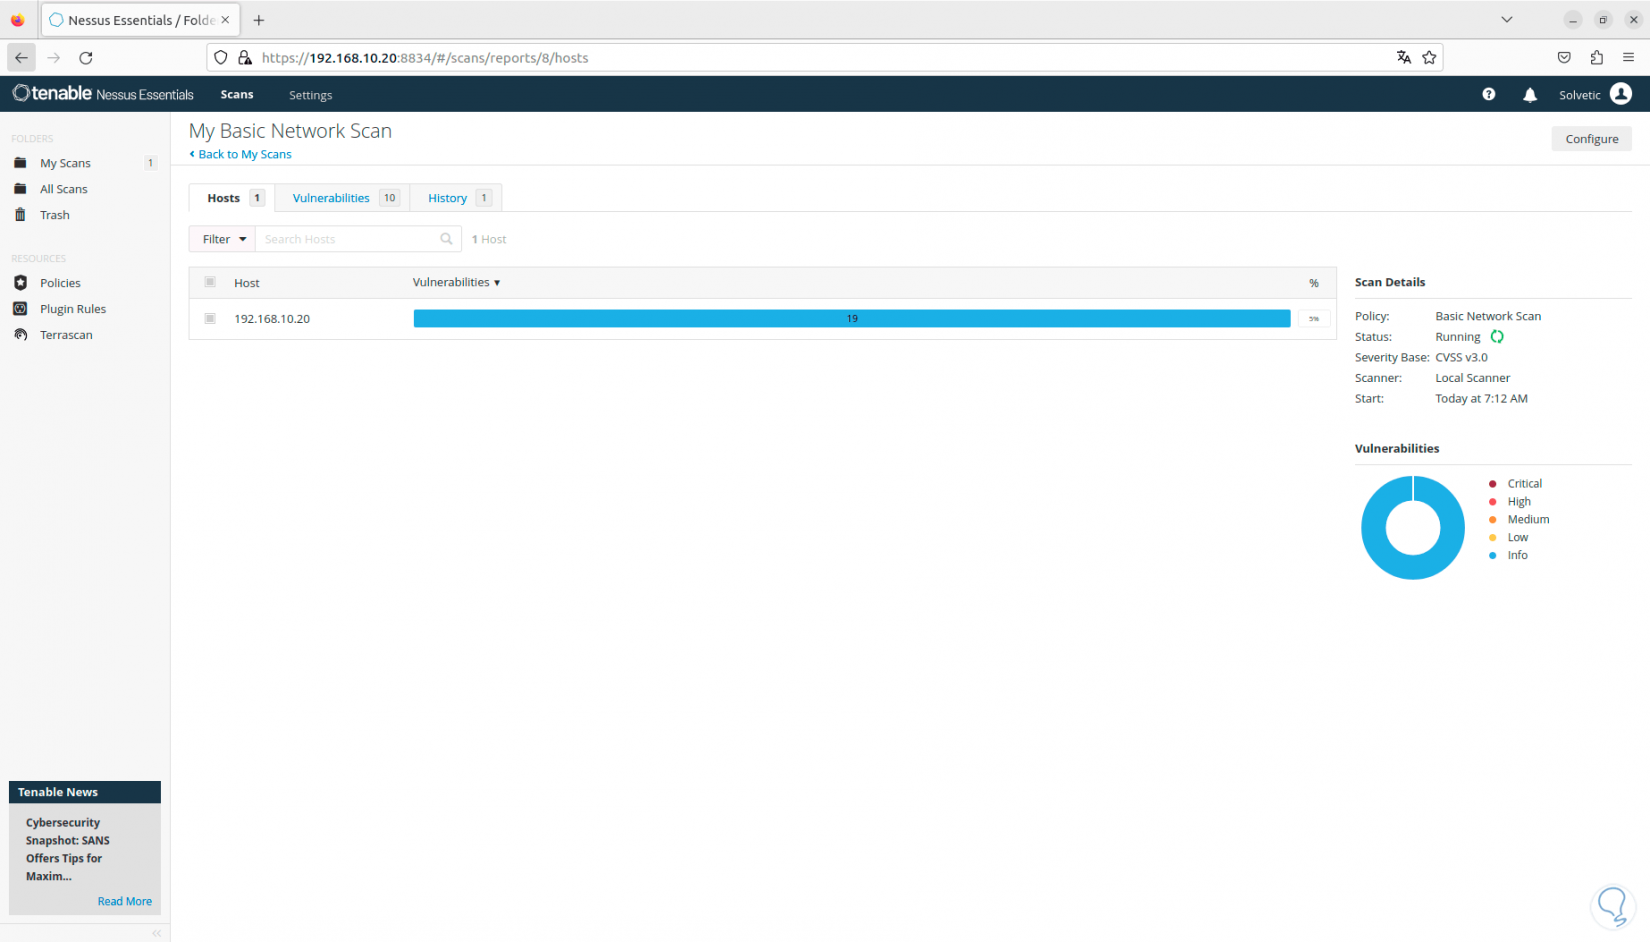
We click on “Run Scan” so that we can see the status of the scan in the console:
Step 26
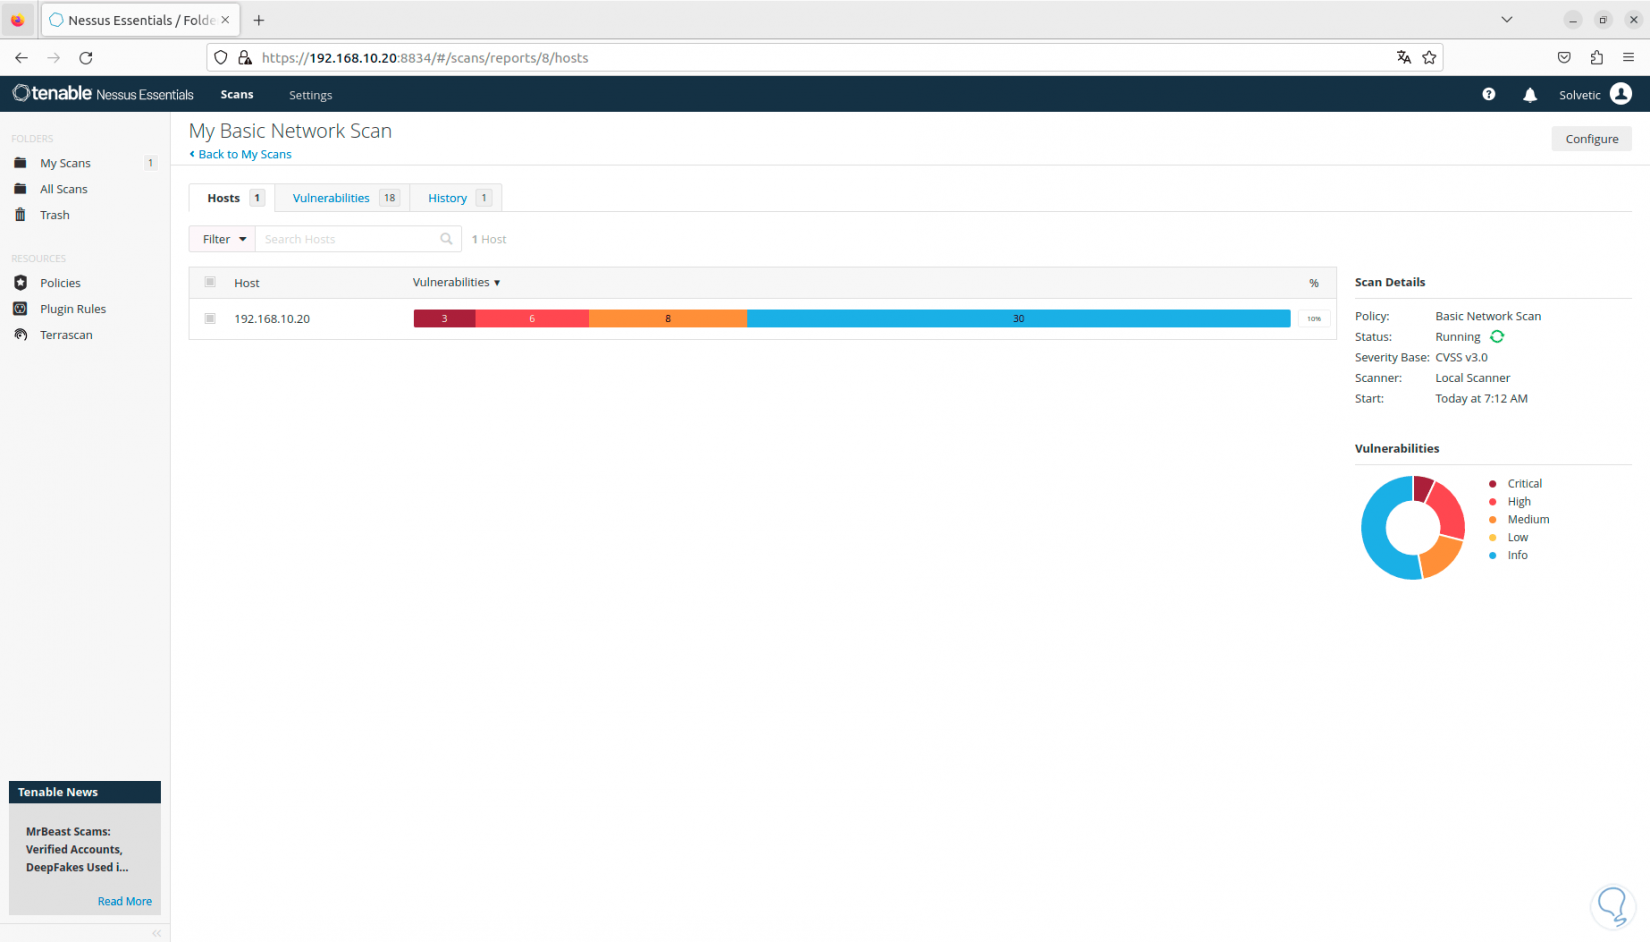
In the “Vulnerabilities” tab it will be possible to see the threats for that device. It is possible to click on any of them to have more complete information about the threat. Nessus graphically displays the vulnerabilities by type of impact, high, critical, low, etc.:
Step 27
One of the great advantages of Nessus is the integration of templates, these will be available based on the plan we use, when we click on “New Scan” we will see the following:
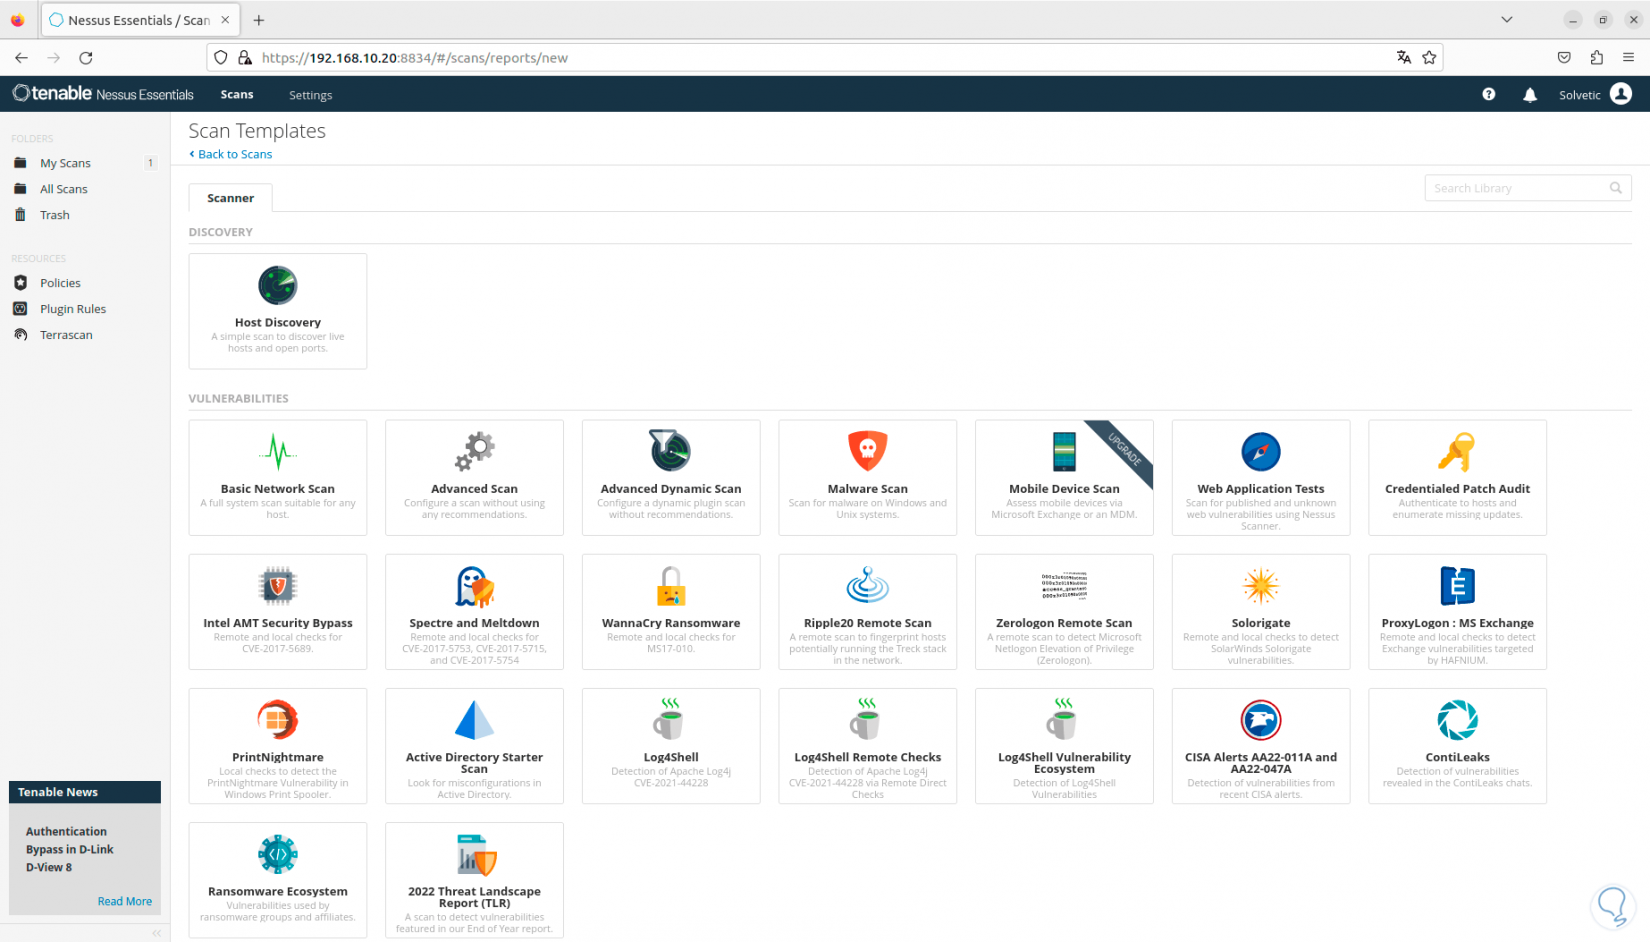
Step 28
There it will be possible to choose the type of template from options such as:
Step 29
When a template is selected, we must enter basic data for its use:
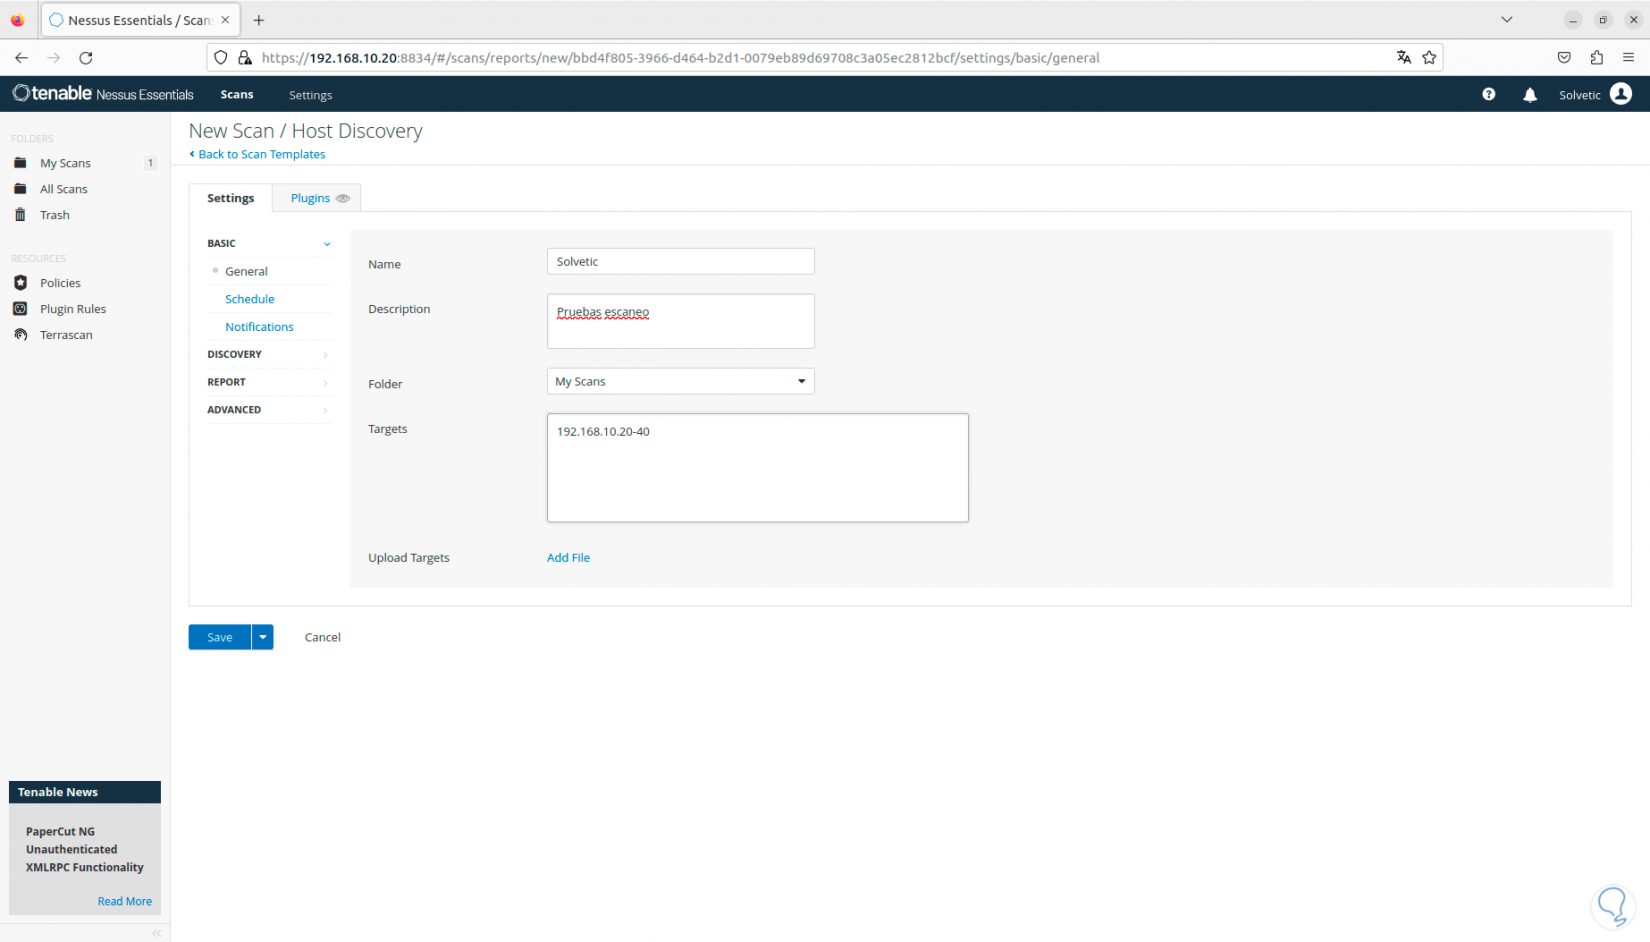
Step 30
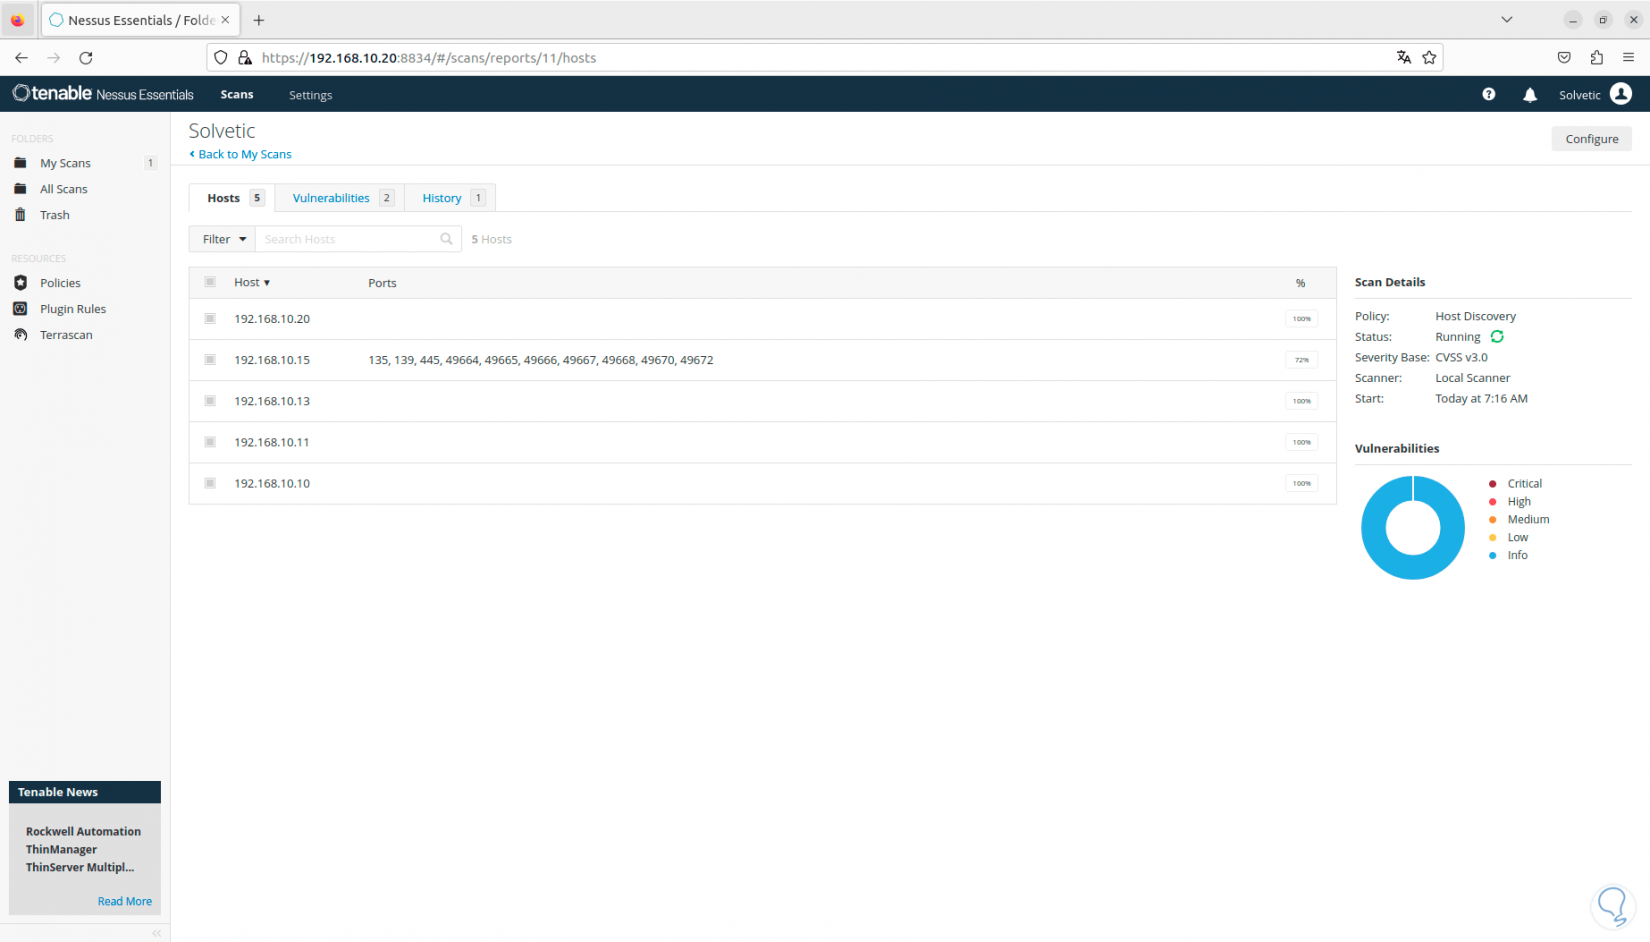
We can choose a range of IP addresses to search the entire local network:
Step 31
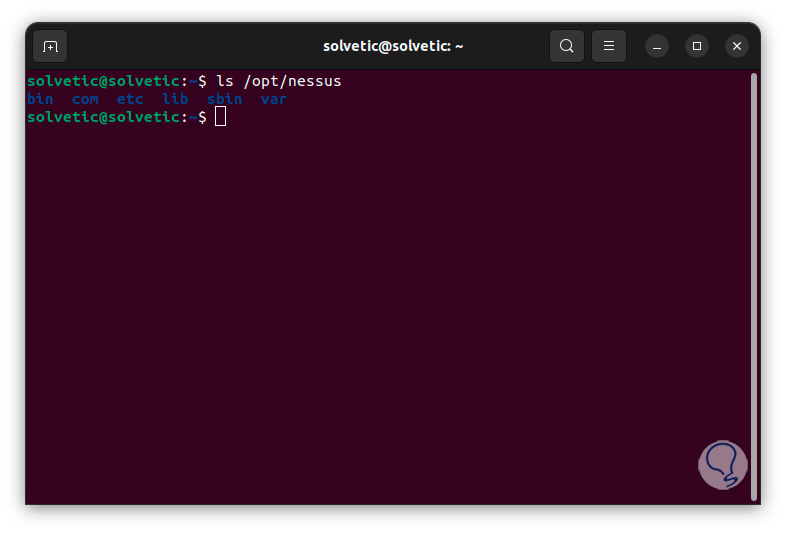
In Linux we find the possibility of using the terminal to manage Nessus, if we want this method, we first check the Nessus directory:
ls /opt/Nessus
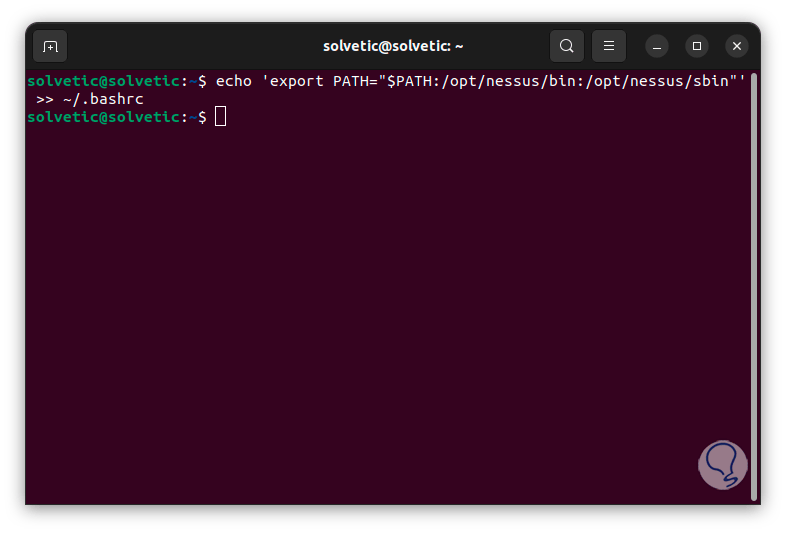
Step 32
Now, we add the Nessus bin directories to the system path using the ~/.bashrc configuration file, run:
echo 'export PATH="$PATH:/opt/nessus/bin:/opt/nessus/sbin"' >> ~/.bashrc
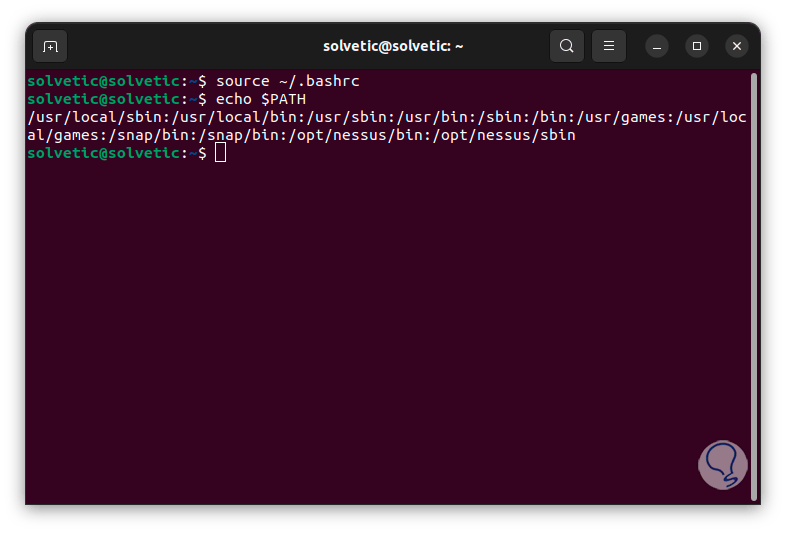
Step 32
Now we reload this file and check the path:
source ~/.bashrc echo $PATH
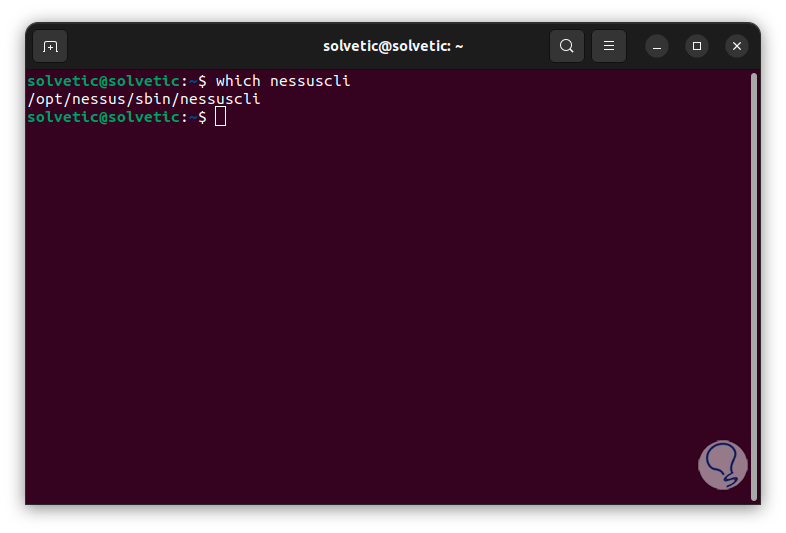
Step 33
Then we check the client configuration:
which nessuscli
Step 34
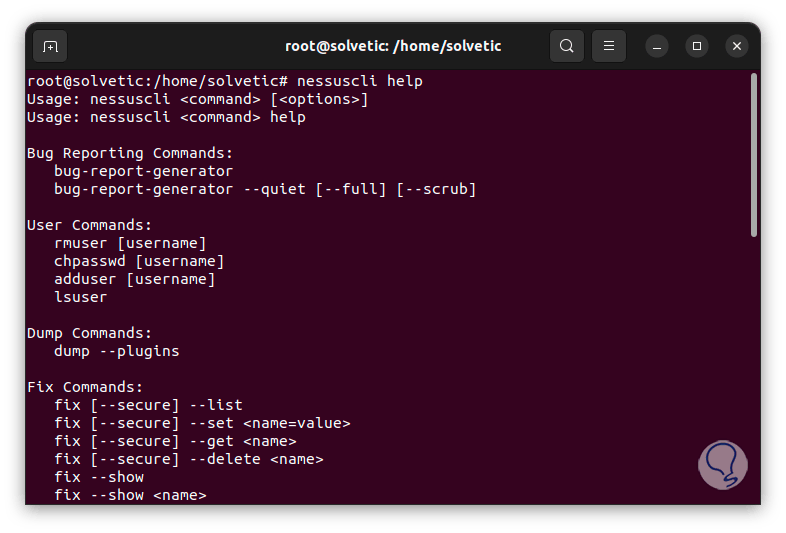
Finally, we can access the help of this command:
nessuscli help
We can see how Nessus becomes a strategic ally to help us optimize the security of our Linux distribution, keeping in mind that threats will always be the order of the day but we must always be one step ahead of these situations..