Hard drives will always be the most essential hardware element for any operating system since it is possible to carry out the installation of said operating system, store installed applications and logically save our daily files..
One of the good practices that we can manage as IT support personnel or as system administrators regardless of the size of the organization is to learn how to manage the hard disk either by expanding or reducing its size in order to carry out tasks such as:
- Host applications and files on a different drive than C.
- Enable unit C availability.
Now, these tasks become more important if they are done on a server with Windows Server 2019 due to the importance of preserving and maintaining the information of each user, but this must be analyzed in detail before its execution to know what space has been to use
What is Server Administrator?
Server Manager is always the first utility that is loaded in Windows Server 2019 and from there we have a central console to carry out various actions within the system such as adding or removing roles and features, managing installed roles and many more tasks within Of which we have the option of extending or reducing our hard drives.
TechnoWikis will explain through this tutorial the way to extend or reduce a volume in Windows Server 2019 and thus centrally and completely manage the space on the hard disk.
To keep up, remember to subscribe to our YouTube channel! SUBSCRIBE
1. Reduce hard disk using Server Manager in Windows Server 2019
Step 1
To start, we go to the Server Administrator where we will see the following:

Step 2
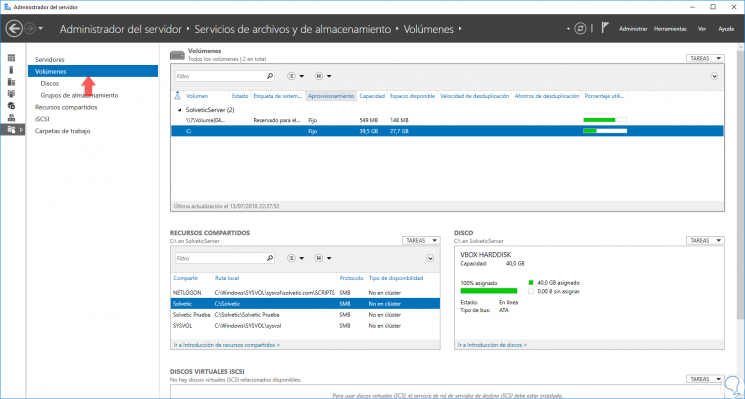
There we go to the "File and storage services" section and in the new window displayed we go to the "Volumes" section where we will see the hard drives currently installed on the server:
Step 3
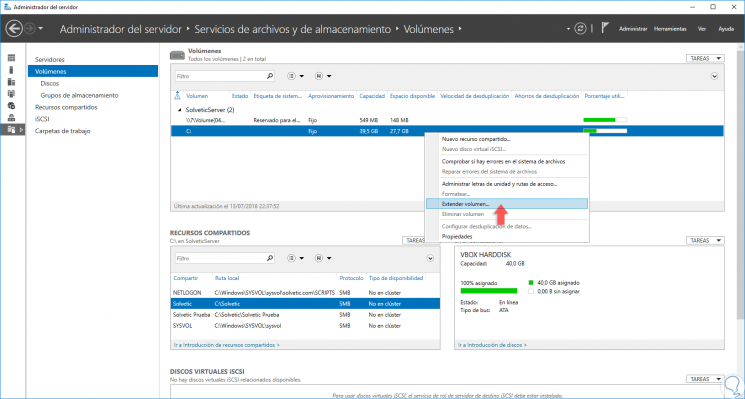
There we will right click on the disk to be managed and initially we will only see the option “Extend volumeâ€:
Step 4
To reduce the volume from there, to reduce the volume of the hard disk we go to the "Tools" menu and there we select "Computer Management" and the following window will be displayed:
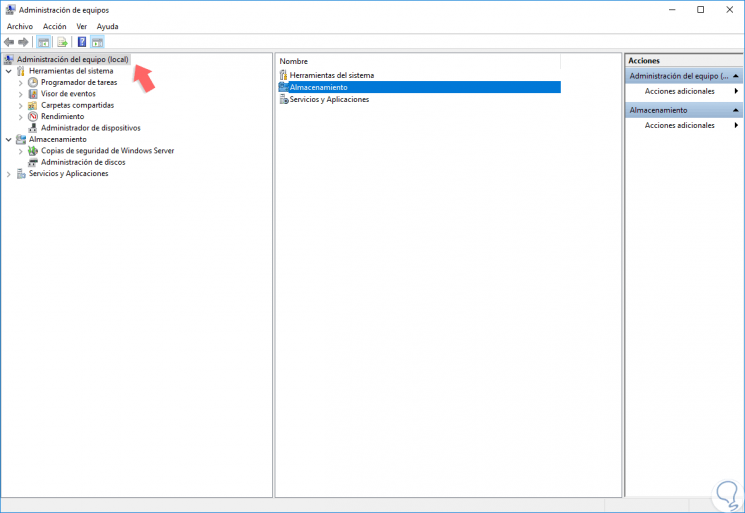
Step 5
We will double click on “Storage†and we will see the following:
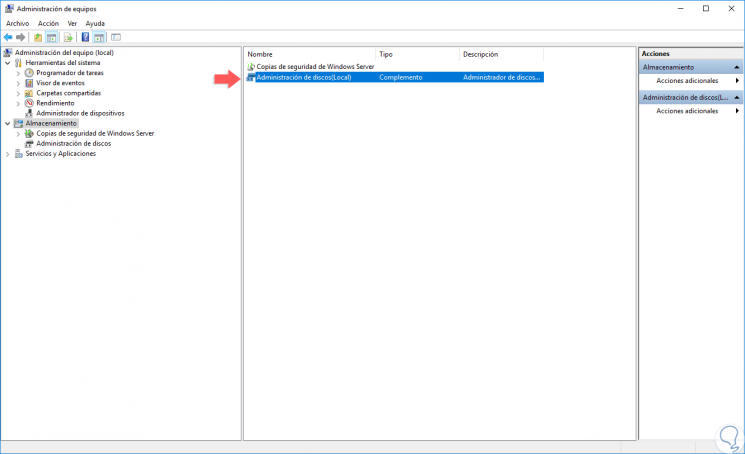
Step 6
We double click on the "Disk Management (Local)" line and in the new window we will right click on the disk to be reduced and select the "Reduce volume" option:
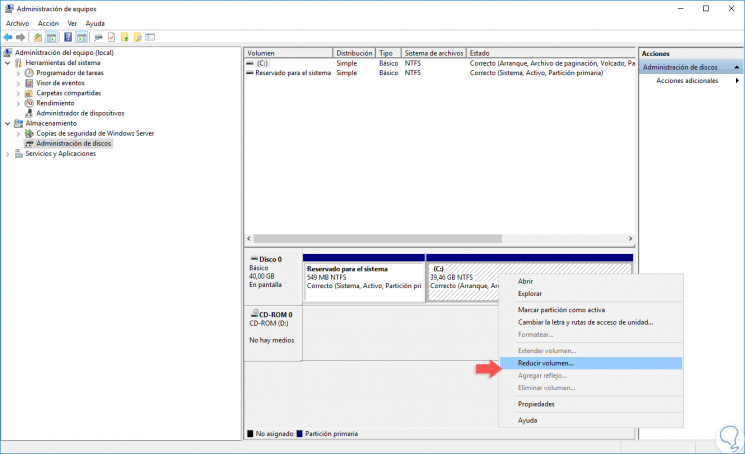
Step 7
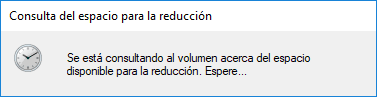
We will see that the analysis process starts by Windows Server 2019 to determine the maximum amount of space to reduce on the hard disk:
Step 8
After this, we enter the amount of space, in MB, to reduce:
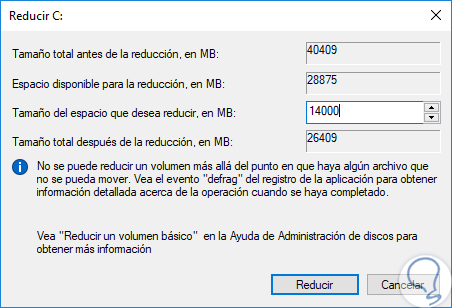
Step 9
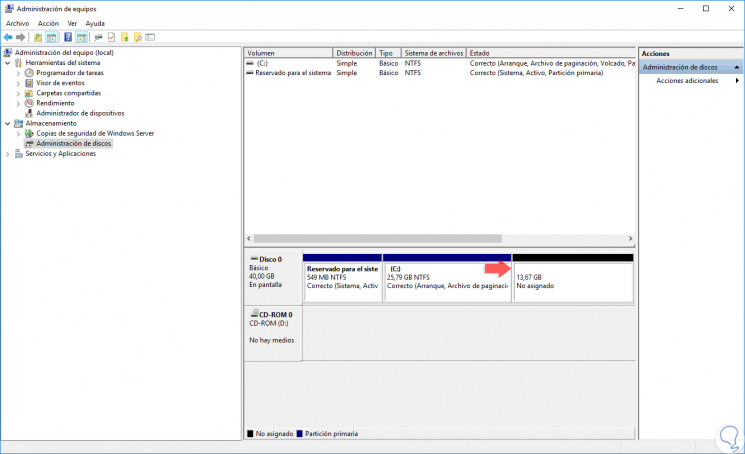
Click on the "Reduce" button and we will see that this new segment of Windows Server 2019 hard disk space has been created:
Step 10
Now we can configure this free space to create a new partition by right clicking on it and selecting the option “New simple volumeâ€. Thus we have reduced the hard disk in Windows Server using this method.
2. Extend hard drive using Server Manager in Windows Server 2019
Step 1
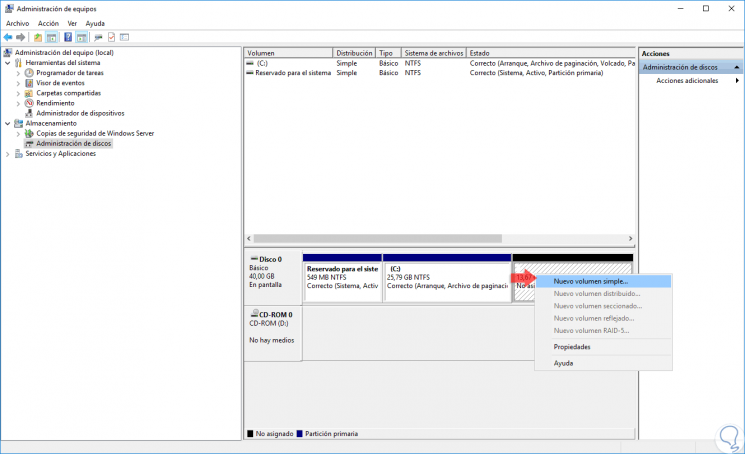
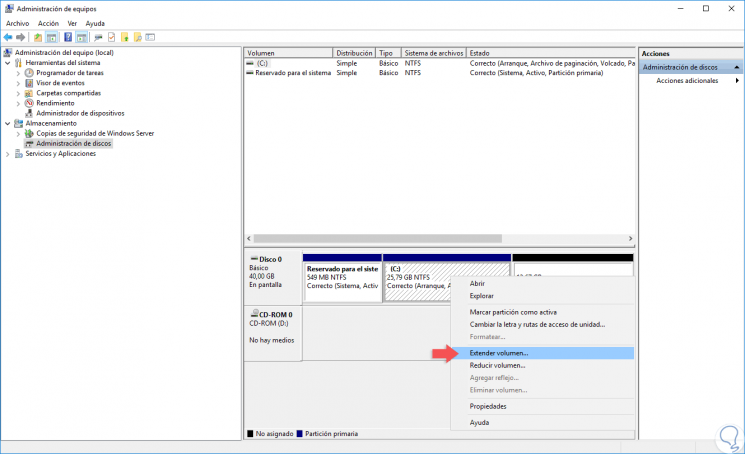
Now, to extend the volume using this same method, just right click on the disk to work and select the option “Extend volumeâ€:
Step 2
The following wizard will be displayed:

Step 3
Click Next and then select the disk that will be affected, in this case the one created with the reduction:

Step 4
Click on Next and you will see the following:
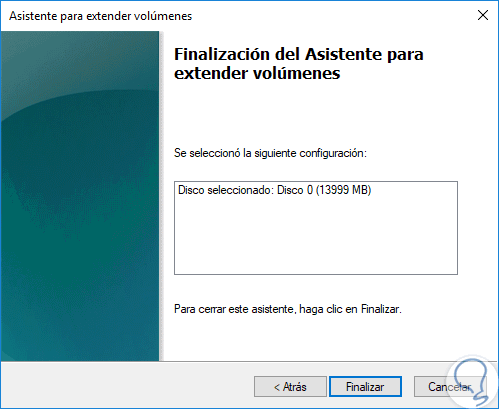
Step 5
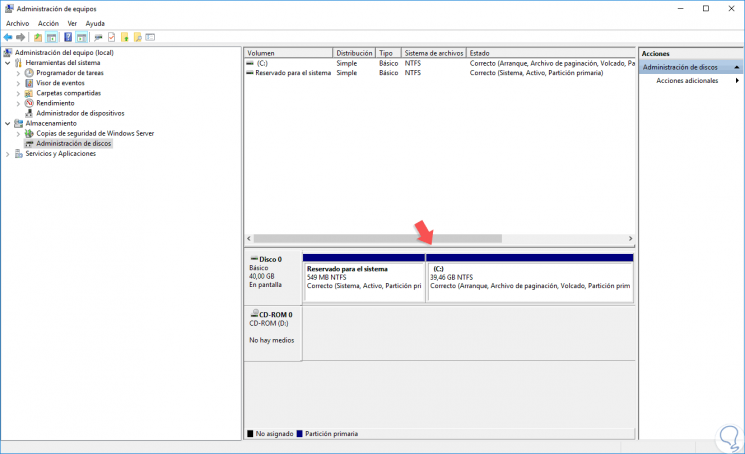
Click on the Finish button and we will see that the volume has been extended. It's that simple we can use these methods through the server administrator.
3. Reduce or extend volume with Windows Server 2019 command line
Another of the options offered by Windows Server 2019 for the management of hard drives is the diskpart command through which various actions associated with hard drives can be carried out.
Reduce hard drive using diskpart
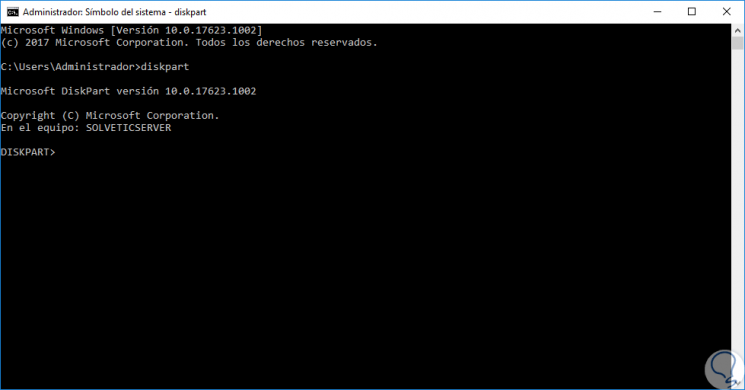
For use, we access the command prompt as administrators and there we execute the diskpart command and we will see the following:
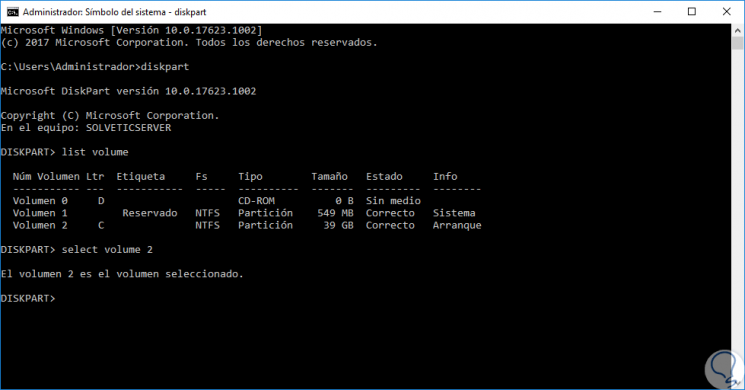
There, first, we must list the hard drives of the computer and for this we execute the line "list volume":

Now we will select the disk to reduce by executing the following syntax:
select volume #disco
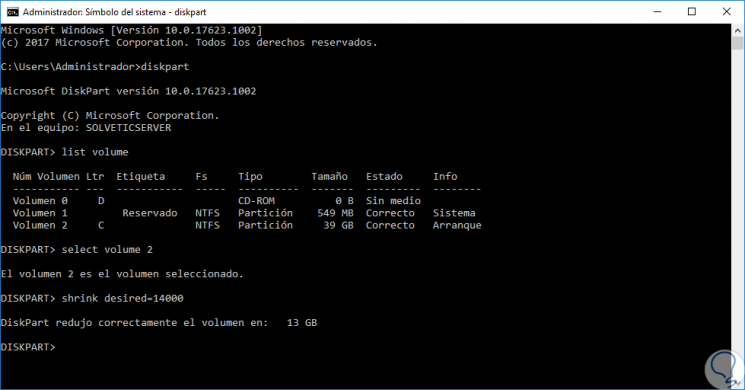
To reduce the hard disk we will use the following syntax:
shrink desired = (size in MB)
Extend the hard drive using diskpart
For this case, just follow the steps above in your order like this:
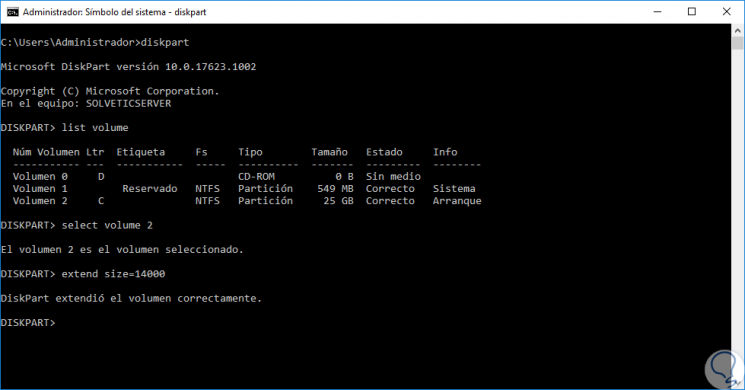
volume list select volume #disco
Once the disc is selected, we execute the following:
extend size: (size)
We see how these two options will be useful and complete for everything related to the management of hard drives in Windows Server 2019 being aware of their importance and impact at a general level..