One of the tools we use the most when working with the computer is Office. Thanks to the different programs offered by Microsoft, we can carry out multiple tasks thanks to its diversity of options such as Excel , Word, PowerPoint , etc..
One of the most used is Excel. This spreadsheet allows you to perform different actions as it has great possibilities and options for use. Excel 2019 is loaded with multiple functions that have been developed in order to facilitate and improve the experience of each user at the level of data management in their spreadsheets. We have several options to improve the administration and presentation of our work in Excel 2019 is to add the page numbers of each sheet in order to better manage each workbook.
In Microsoft Excel 2019 it will be possible to insert page numbers in the headers or footers of the pages of the worksheets worked, from the Normal view, the page numbers that we insert in the spreadsheet will not be displayed, these will only be visible in Page Layout view and on printed pages..
TechnoWikis will explain how to add page numbers in Excel 2019.
To keep up, remember to subscribe to our YouTube channel! SUBSCRIBE
Step 1
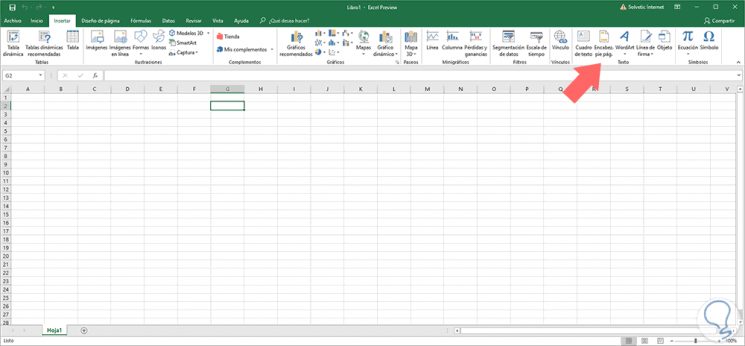
To do this we go to the sheet where the page numbers will be added, we go to the Insert menu and in the Text group we click on the Header and footer option:
Step 2
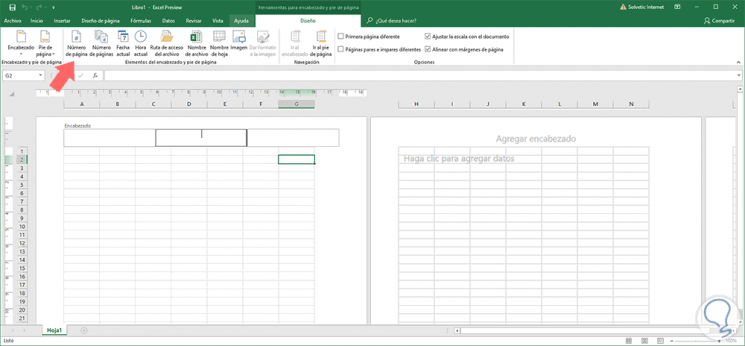
The following window will be displayed:
Step 3
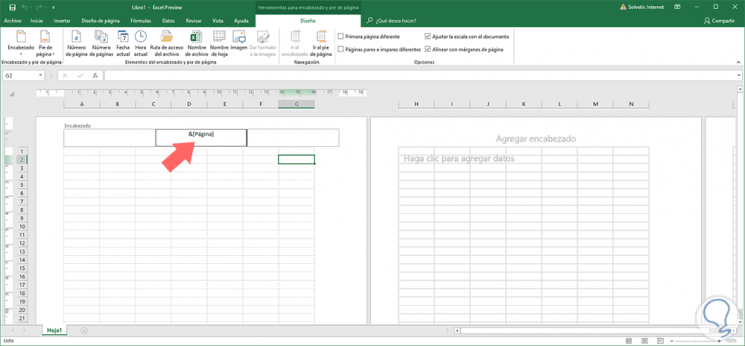
There we go to the Design menu and in the Header and Footer Elements group we click on the Page Number option:
Step 4
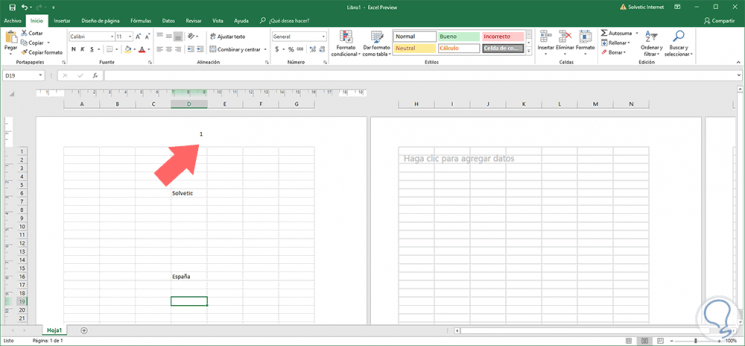
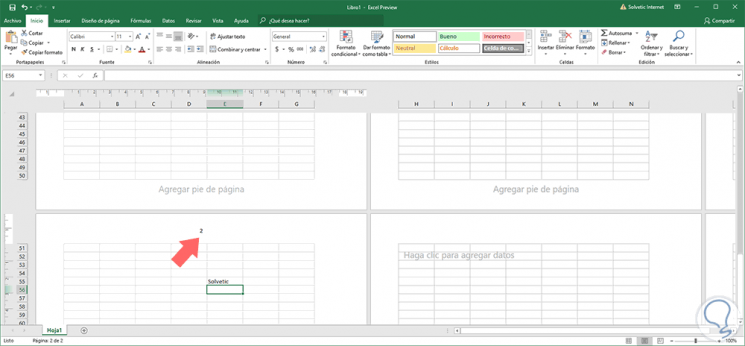
We enter text in some cells and we will see that the page number is automatically added in the upper central part:
Step 5
We can go to lower pages and check that the respective page number is added:
With this simple method, the page numbers in Excel 2019 will be added and, as we have mentioned, this will be visible only in the design view or when the pages of the book itself are printed. In this way it will be easier to detect a specific document on the page..