Information security must be one of the principles to fight for every day regardless of the type of information we use and even more if it is confidential information such as bank statements, organization data, university notes, etc..
One of the elements that we use most often many of those who work with the computer, is Word. Thanks to this Microsoft application, we can create and share documents easily with other users. These documents may include in certain cases confidential information or that we do not want to be modified.
However, we are all exposed to the fact that at some point this information is vulnerable for reasons such as malware attacks , failures when saving the document or leaving it open, overconfidence and more. Fortunately, Microsoft Word 2016 offers us a comprehensive and practical solution to restrict the edition of our documents and thus preserve their integrity at all times..
TechnoWikis will explain how we can achieve this thanks to the Word 2016 program itself.
To keep up, remember to subscribe to our YouTube channel! SUBSCRIBE
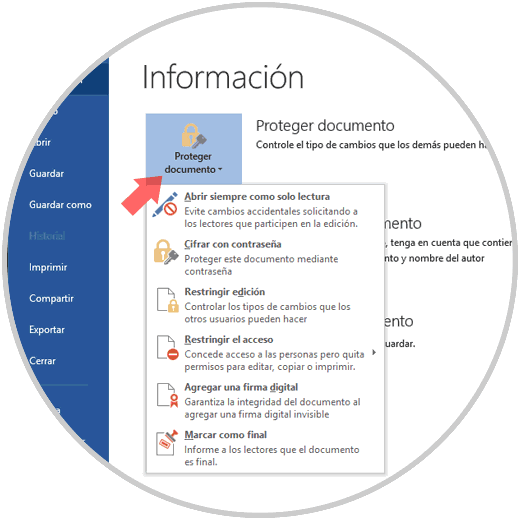
Step 1
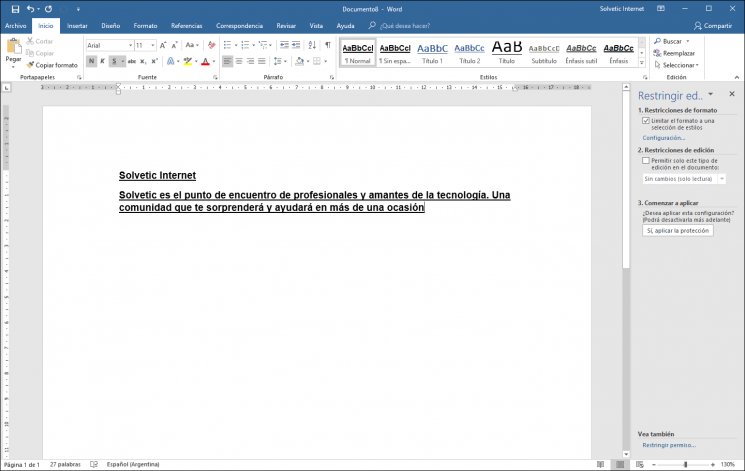
To carry out this process, we will go to the File menu and there, in the Information section, click on Protect document and the following options will be displayed:
Step 2
There we select the Restrict edition option and the following sidebar will be displayed in the document to be protected:
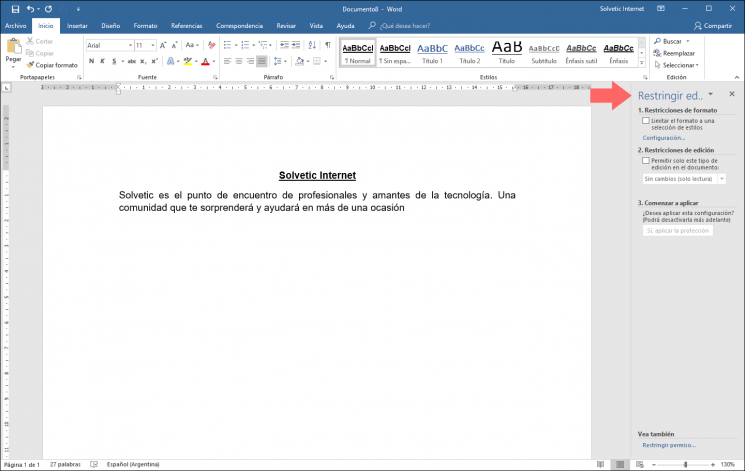
As we can see we have the following alternatives:
- Restrict the document format to a series of defined parameters
- Restrict the edition with some exclusive permissions
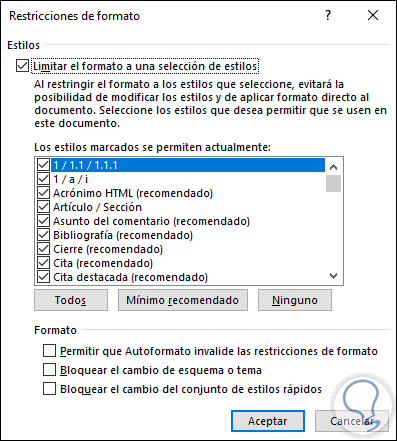
Step 3
If we choose to restrict the format, we will activate the box and click on the Configuration line and the following window will be displayed:
Step 4
There we can activate or not the boxes that we want to authorize and at the bottom we can define whether or not some editing tasks are blocked in the document.
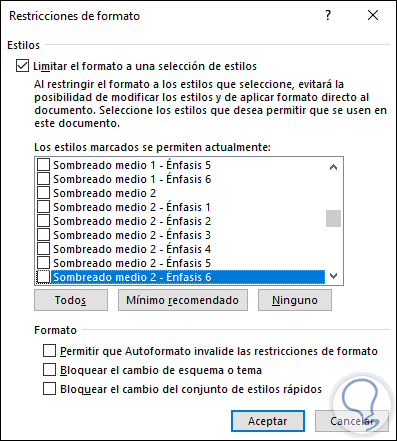
Note that Word 2016 allows the All actions to select all the boxes, Minimum recommended to define only the boxes that are considered basic or None to uncheck all options..
Step 5
Once we click on the Accept button the following message will be displayed:
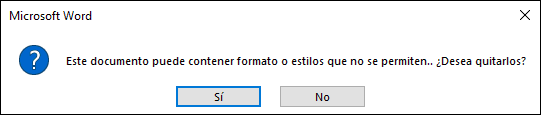
Step 6
Click on Yes and we will see that the style we had in the document automatically changes:
Step 7
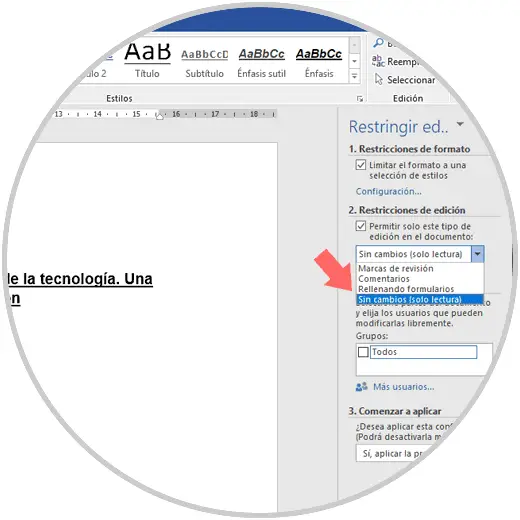
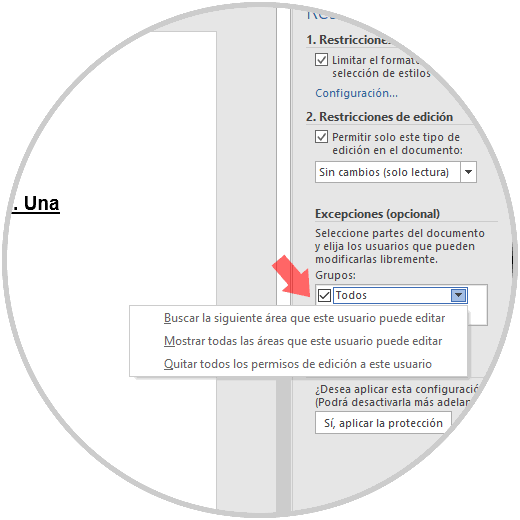
Now, if we check the Restrictions for editing box, it will be possible to set the following permissions:
- No change which only enables reading, but nothing at all for editing
- Review marks which allows editing this function
Step 8
When selecting some specific options we will see the following:
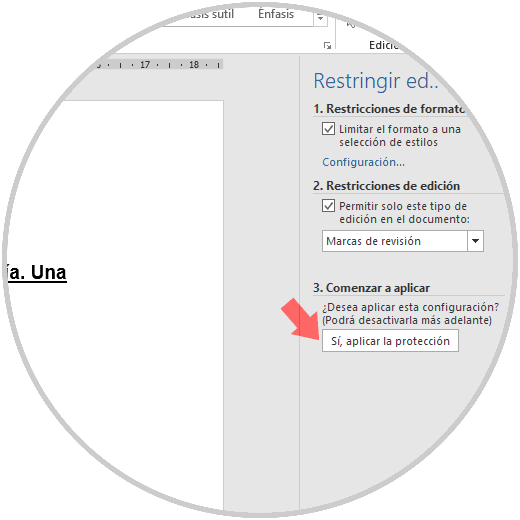
Step 9
There we click on the Yes button, apply protection to avoid editing in the entire document, but in the selected option. In other cases, as with the Unchanged option, we will have some additional options as follows:
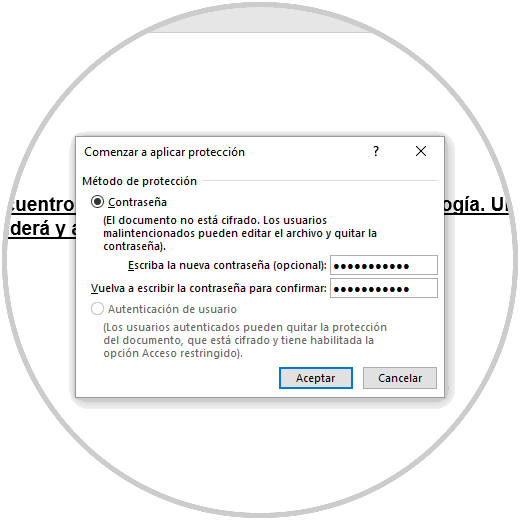
Step 10
When selecting the Yes line, applying protection will display the following window where we will enter the password to edit the document:
Step 11
Click on OK and we will see the following on the lateral side:

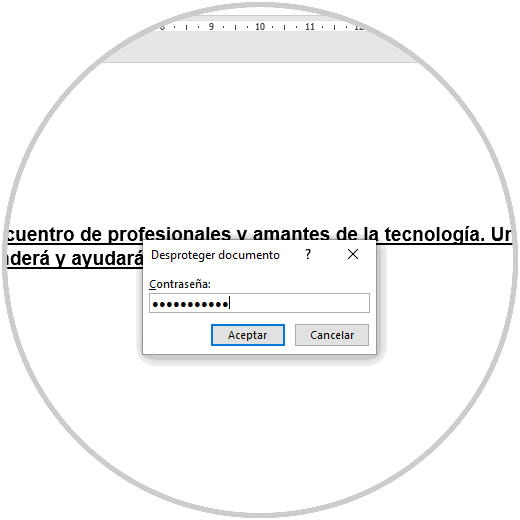
Step 12
If we wish to eliminate the protection, click on the lower button to suspend the protection and it will be necessary to enter the assigned password:
As we can see, most of the options for editing the document are disabled at the top. In this way Word 2016 allows us to protect our files against editions without authorization.