Two of the office applications that we use most for corporate and personal use tasks are Microsoft Word and Microsoft Excel which have released a beta version so that at the time they are released in a stable version to the general public we are already familiar With its environment and news, to know how to download this beta version of Office 2019 we can visit the following link:
Among its novelties we find:
- New functions for drawing and handwriting, adding ink and pressure effects.
- New tables and formulas in Excel.
- More and new or improved animations for PowerPoint.
- Greater integration with Cortana and new voice recognition functions.
As users of these applications we must be aware that sensitive or confidential data is handled especially in Excel where payroll data, bank data and much more are housed, so it is ideal and recommended that we take the necessary security measures and these two applications, Word 2019 and Excel 2019, have privacy and security settings being the restriction of editing one of the most striking since although it allows users to access the file, these can only be read but not edited according to the parameters that we define at the moment of the configuration.
TechnoWikis will explain through this tutorial how we can restrict the edition of our Word and Excel 2019 files in an integral way..
To keep up, remember to subscribe to our YouTube channel! SUBSCRIBE
1. Restrict file editing in Microsoft Word 2019
We often create sensitive documents in Microsoft Word such as university thesis, work letters, management documents or more, so restricting the edition of these documents is more than necessary to always guarantee the availability and integrity of them.
Step 1
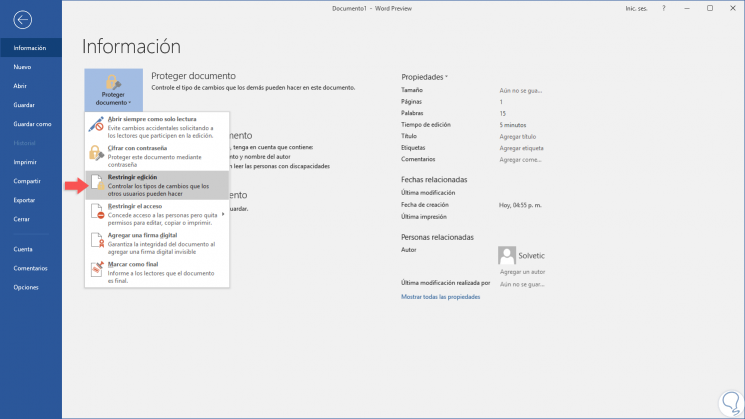
To restrict a Microsoft Word 2019 file we go to the “File†menu and there we click on the “Protect document†option located in the “Information†section and in the displayed list we select “Restrict editionâ€.
Step 2
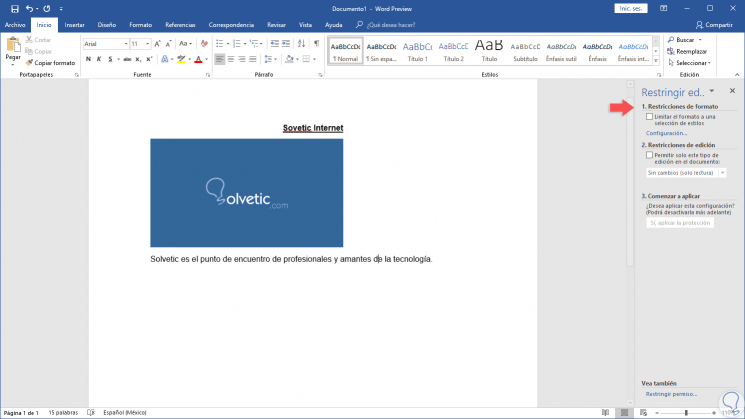
Pressing this option will display the following sidebar in the Word 2019 document that we are going to protect:
Step 3
In this sidebar we have the following options to use for document protection:
- Restrict the document format using a series of special parameters
- Restrict the edition based on some available permissions
Step 4
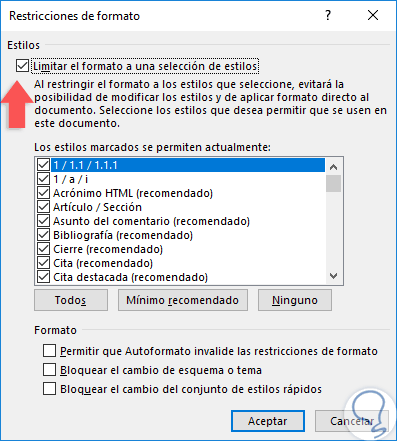
First, we activate the “Format restrictions†box and click on the “Configuration†line and the following will be displayed:
Step 5
By default Word 2019 gives us the following automatic options:
Everyone
Select all available format boxes.
Recommended minimum
Check only the boxes that are considered sufficient for basic file editing.
None
To uncheck all available options.
Step 6
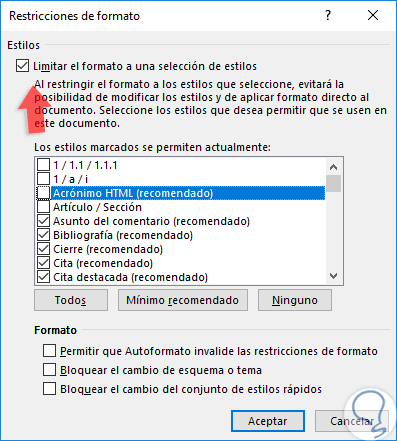
To apply any change in this section we must check the box “Limit the format to a selection of stylesâ€. At the bottom of this window it will be possible to activate certain boxes to block or prevent users from applying certain general formats in the document. We can deactivate the boxes that we consider necessary there:
Step 7
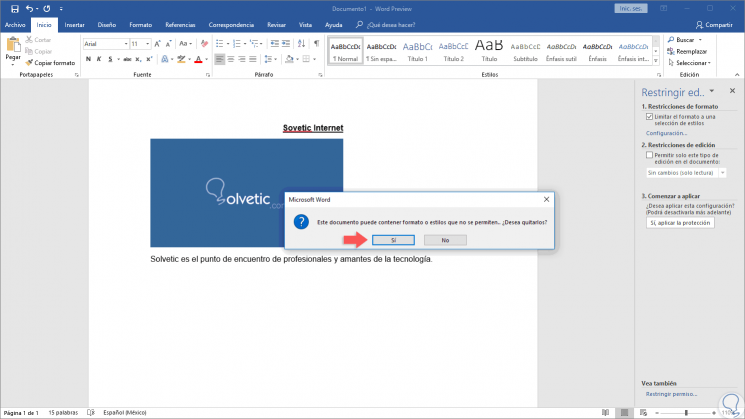
Once this is done, click on the Accept button and the following message will be displayed:
Step 8
Click on the Yes button and automatically all the editing actions we have performed will be deleted:
Step 9
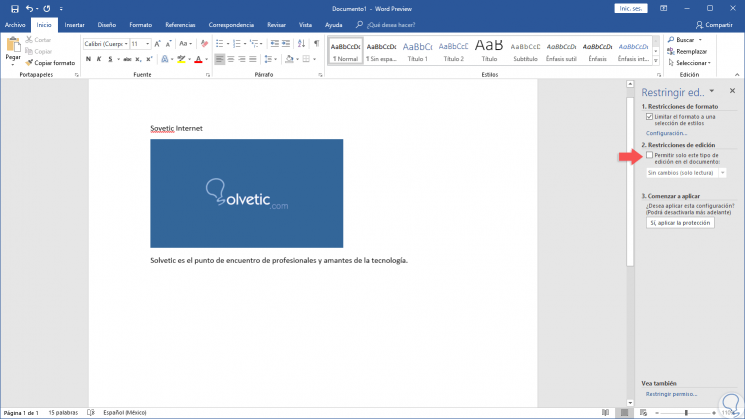
Next, we activate the “Restrictions of editing†box and clicking on the drop-down field we will see the following:
Step 10
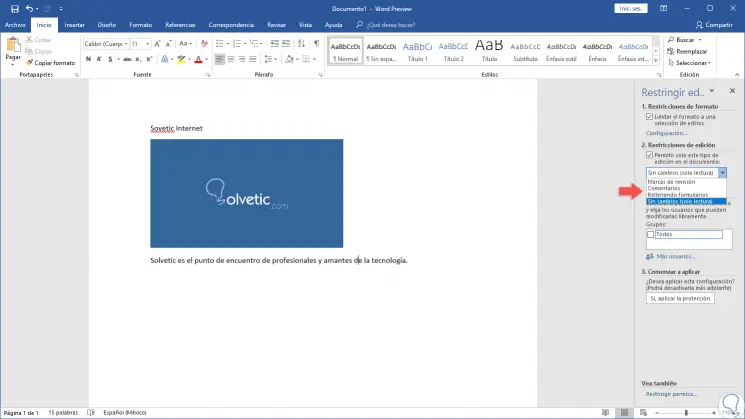
We can see that we have some options associated with the restriction such as:
- No changes (read only) enables only document reading, but prevents full editing
- Review marks which allows you to edit the marks that the document contains
- Editing comments if they exist there
- Fill out forms which is useful for files created for that purpose
Step 11
The “Review mark and Filling forms†options display the following:

Step 12
With the other options we must specify which users will be exempt from such restriction:

Step 13
For this case, we select the option “Review marks†and click on the “Yes, apply protection†button located at the bottom and the following window will be displayed where we will enter the protection password of this document:
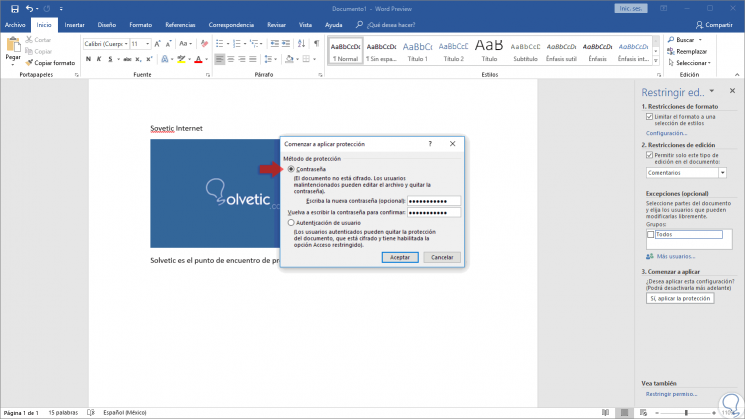
Step 14
Once the password is defined, click on OK to apply the changes. We can see the following:
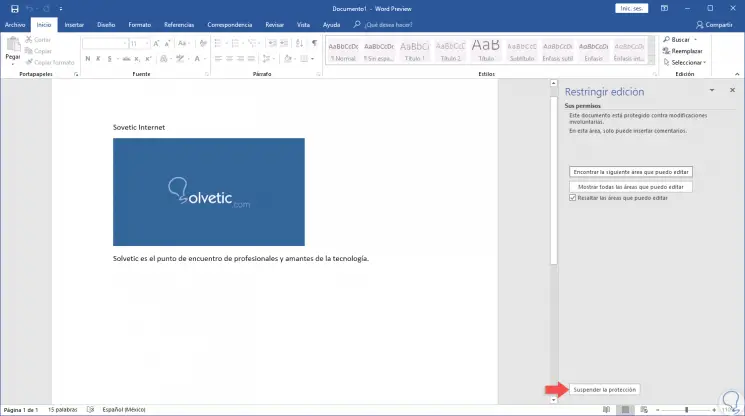
Step 15
There we found the following:
- All editing options at the top are disabled
- In the side panel we can access to visualize what areas are allowed for editing the document or find the areas enabled for it.
Step 16
If you wish to remove the protection of the Word 2019 document, click on the lower button “Suspend protection†and it was necessary to enter the password defined for it:
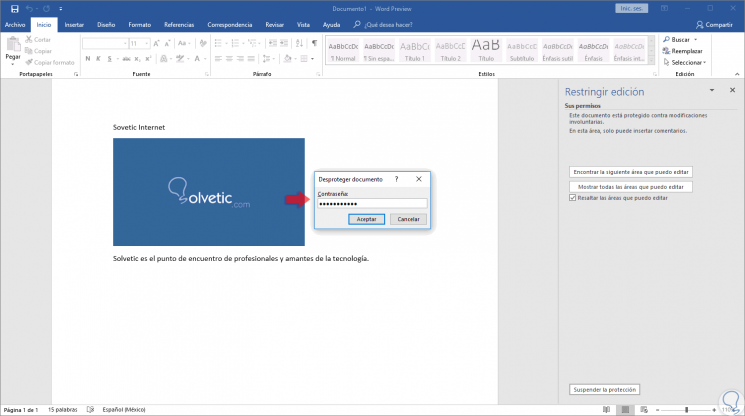
With this method it will be possible to avoid editing our private documents in Microsoft Word 2019.
2. Restrict file editing in Excel 2019
In the case of Excel 2019 the process is different since the information stored there can become much more delicate.
Step 1
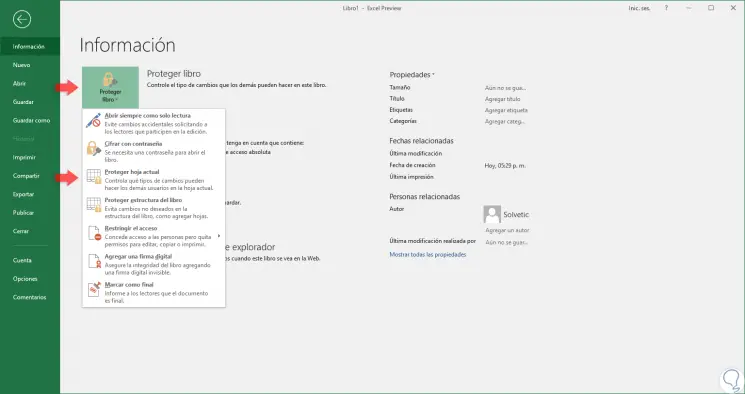
For this, we go to the "File" menu and there we go to the "Information" section and click on the "Protect book" option and the options displayed, useful to avoid editing the sheet, are:
- Always open as read only which every time the sheet is opened it will be in read-only mode avoiding changes in it.
- Encrypt with password which forces you to enter a password to access the content
- Protect current sheet which protects only the sheet in use by defining some variables
- Protect book structure which prevents modifications to the general structure of the book
Step 2
The "Restrict access" option requires connection to the Microsoft server and to implement IRM certificates.
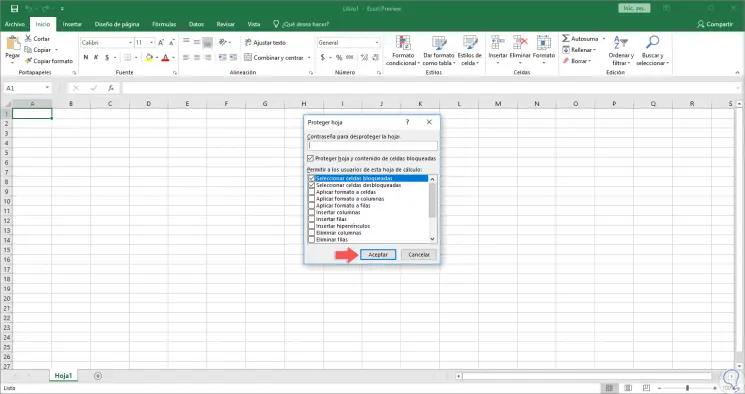
For this case we will use the option “Protect current sheet†and the following window will be displayed:
Step 3
There we define the following:
- Enter the password to access the edition of the sheet
- We can uncheck the "Protect sheet and locked cell contents" box so that the changes apply to the cells or sheets that have been locked in the editing process
- Activate the permissions based on each available box

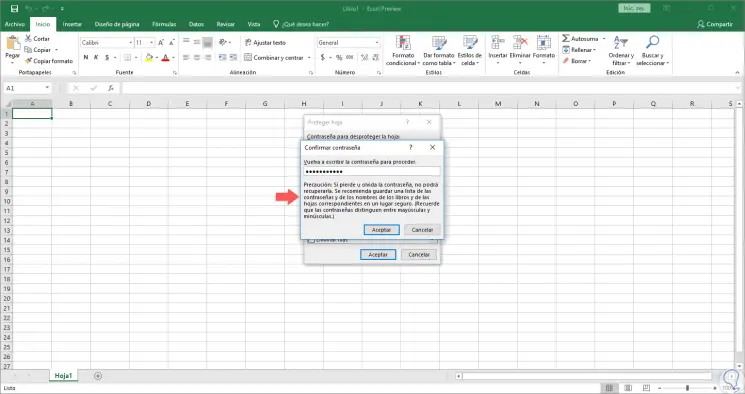
Step 4
The activated boxes are the editing permissions that users will have in Excel 2019. Once this is defined, click on the Accept button to apply the changes and the following window will be displayed where we confirm the assigned password:
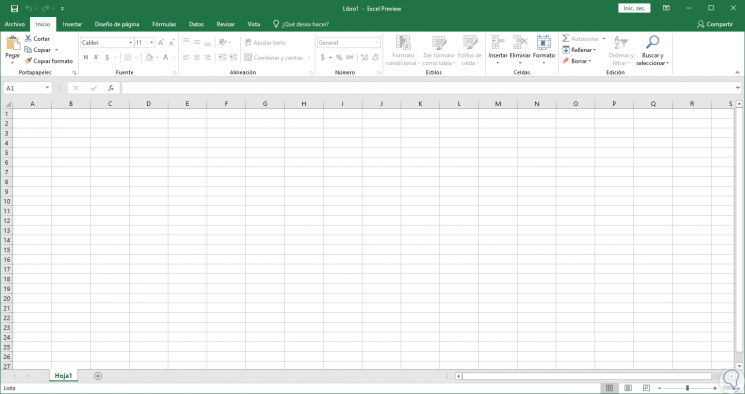
Step 5
By clicking on OK we will see that all editing options have been restricted in the current sheet:
Step 6
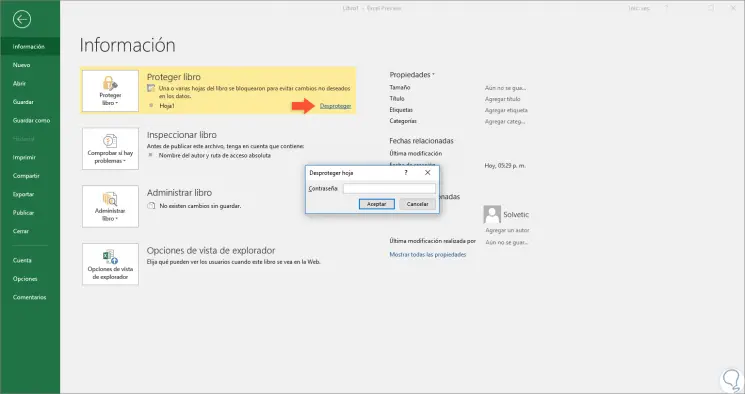
If we access the “File / Information†route again, we will see that the sheet is protected:
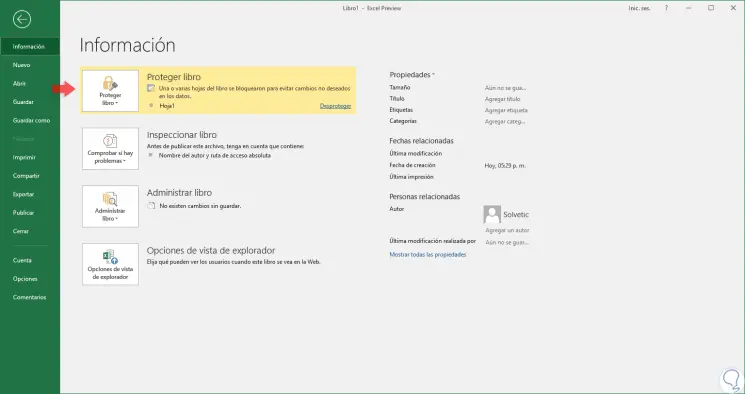
Step 7
If we want to check out the sheet, we will click on the line "Check out" and it will be necessary to enter the assigned password. Click on Accept and in this way we will access the sheet to make the changes.
We have seen how we can protect our files in Word or Excel 2019 in a total way and thus guarantee the integrity of the information stored there..