To stay up to date, remember to subscribe to our YouTube channel!
SUBSCRIBE ON YOUTUBE
One of the key points in Windows 11 is network connectivity since, as we know, a high percentage of the things we do today are based on network parameters, it does not matter if we use Wi-Fi or Ethernet networks, the network is essential piece for the system to work, for example, without a network the system cannot be updated and we may be exposed to attacks and threats..
Now, Windows creates a network connection method where it is determined whether the network to be used will be public, private or domain. This will depend on certain configurations and use environments, but an error that has arisen today is the error “It is not possible to connect to this network” and with this the entire communication process between the equipment, the system and the outside world.
There are various reasons for this error and TechnoWikis will teach you various steps to solve it..
1 Repair Windows 11 Network from Troubleshooter
Step 1
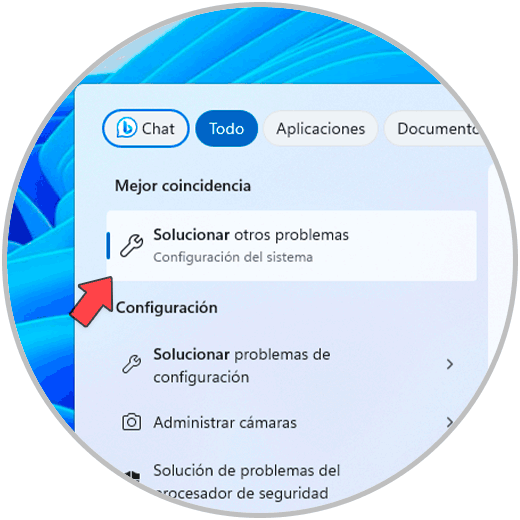
Our first method will be to use the tool integrated into Windows with which you can do a detailed analysis of the network, and all its components, to find the causes of the error and automatically provide the solution, to use this method, In the search box we enter “solve” and then click on “Fix other problems”:
Step 2
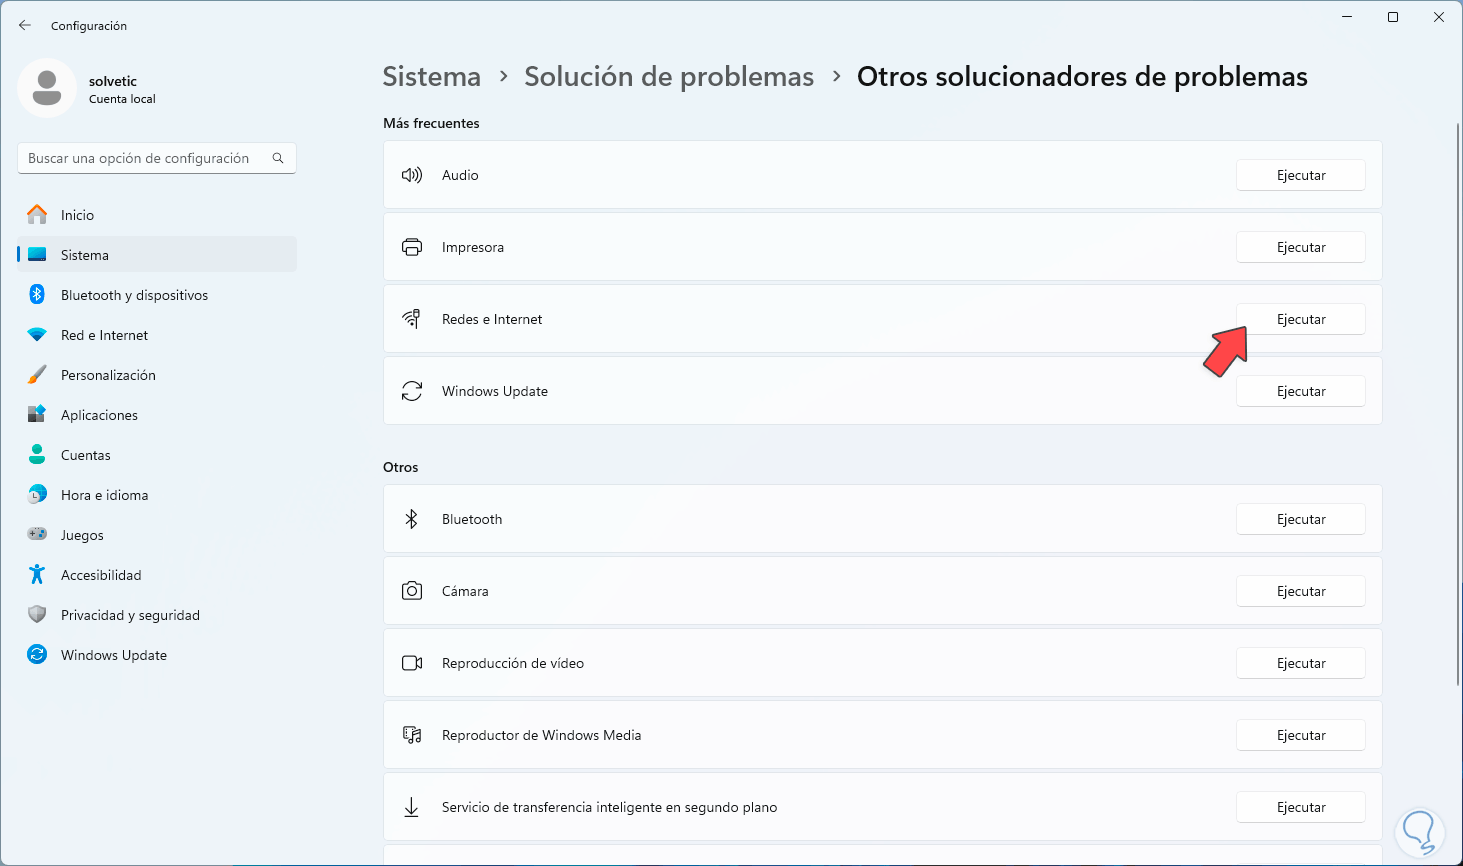
The following will open: In the “Network and Internet” section we click on “Run”
Step 3
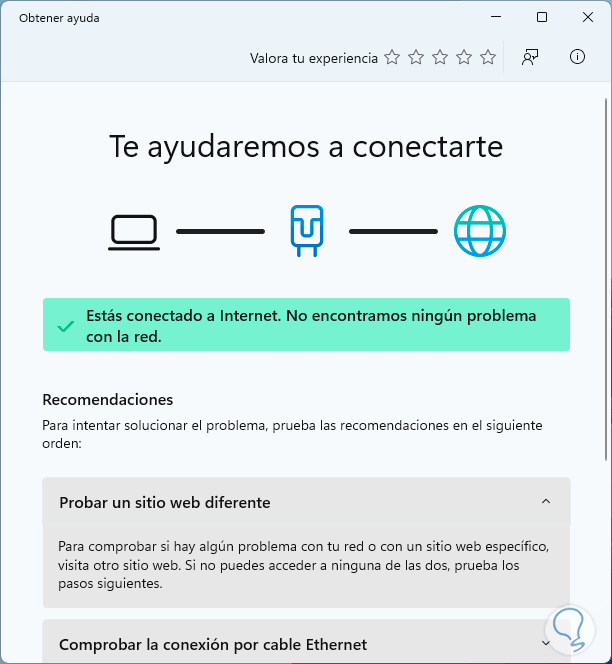
The following wizard will open: We can see that it tells us that the network is working, at the bottom a series of tips are provided that we can do to detect the error. If we click on each of them it will be possible to see the methodology to use for said error:
2 Repair Windows 11 network by restarting connections
Step 1
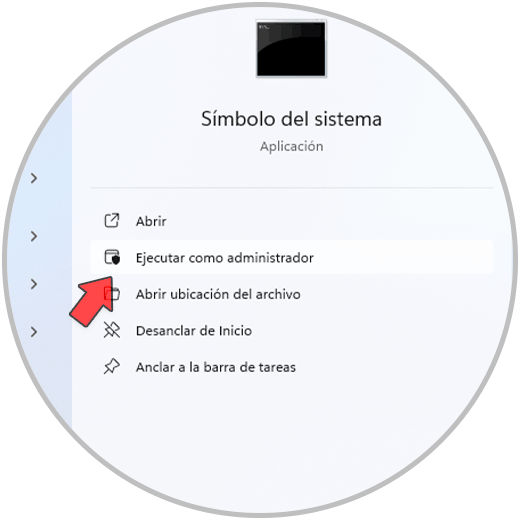
Another reason why the network not detected error occurs in Windows 11 is due to poor configuration of network connections, in this case we will use some commands to reset their values, in this case we open CMD as administrator :
Step 2
You will need to confirm UAC permissions:

Step 3
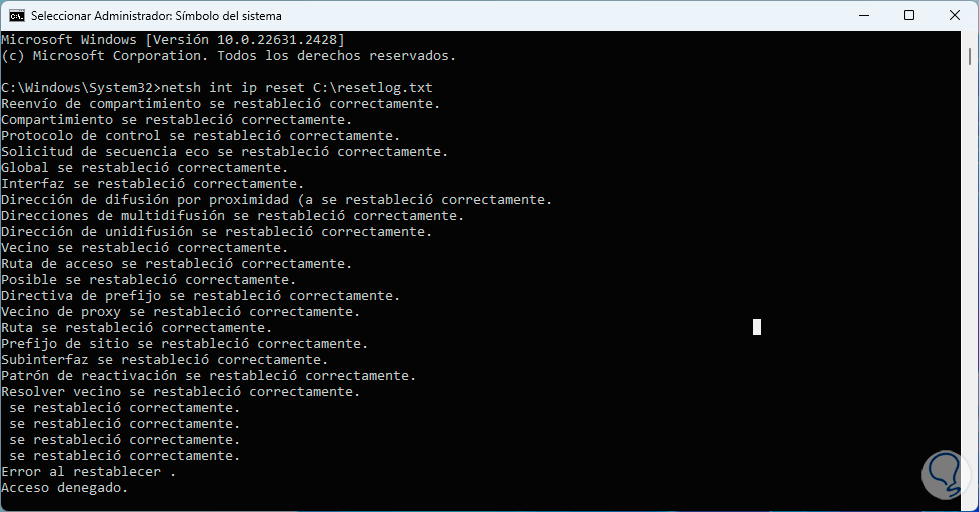
First of all, we are going to reset the TCP/IP protocol values with the following command:
netsh inti p reset C:\resetlog.txt
Step 4
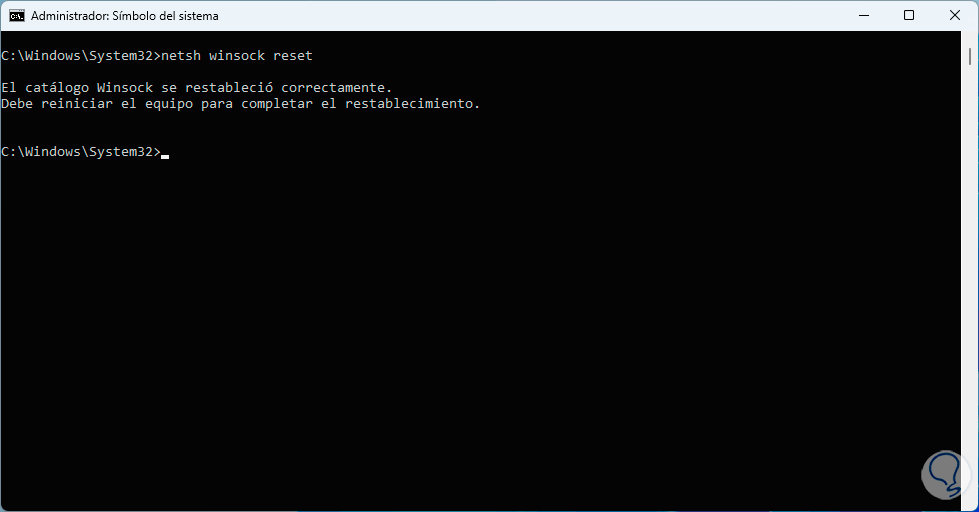
Now let's reset the Winsock catalog by running the command:
netsh winsock reset
Step 5
Finally, we release the DNS cache which accumulates little by little with the use of the network, in this case we execute the following:
ipconfig /flushdns

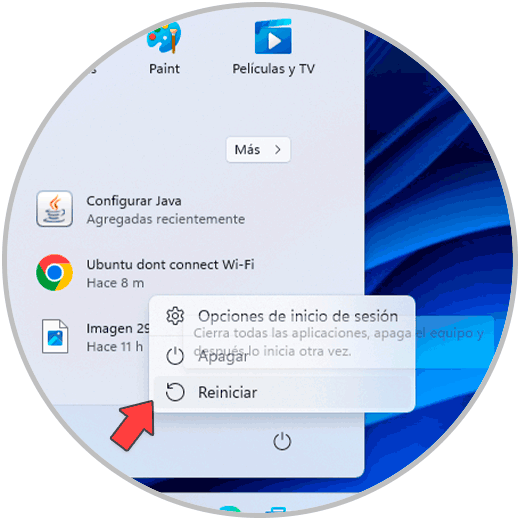
Step 6
To apply these changes, we must restart the system. We wait for the reboot to complete:
3 Repair Windows 11 network by resetting the network
Step 1
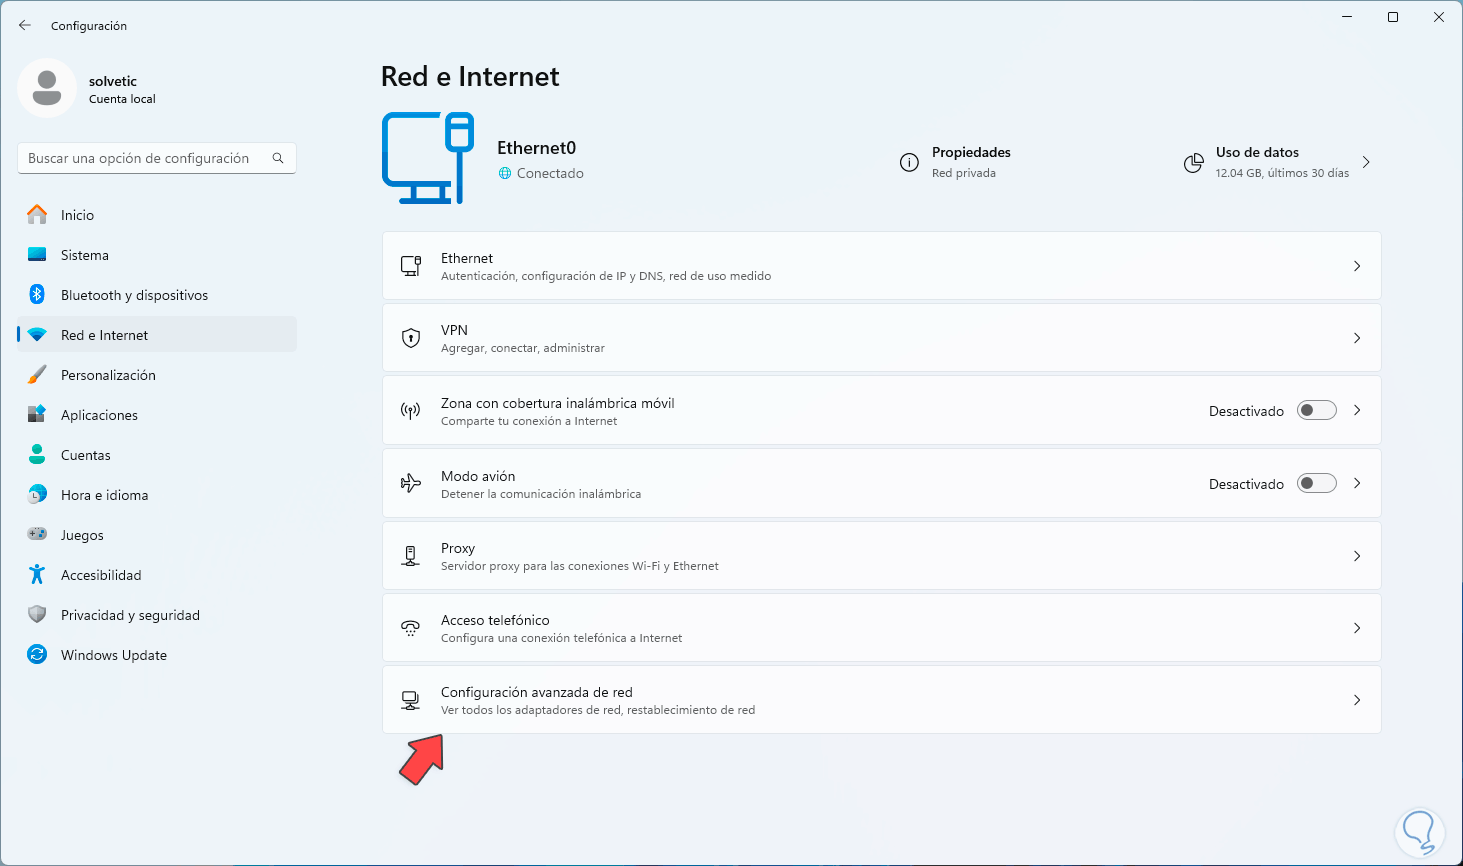
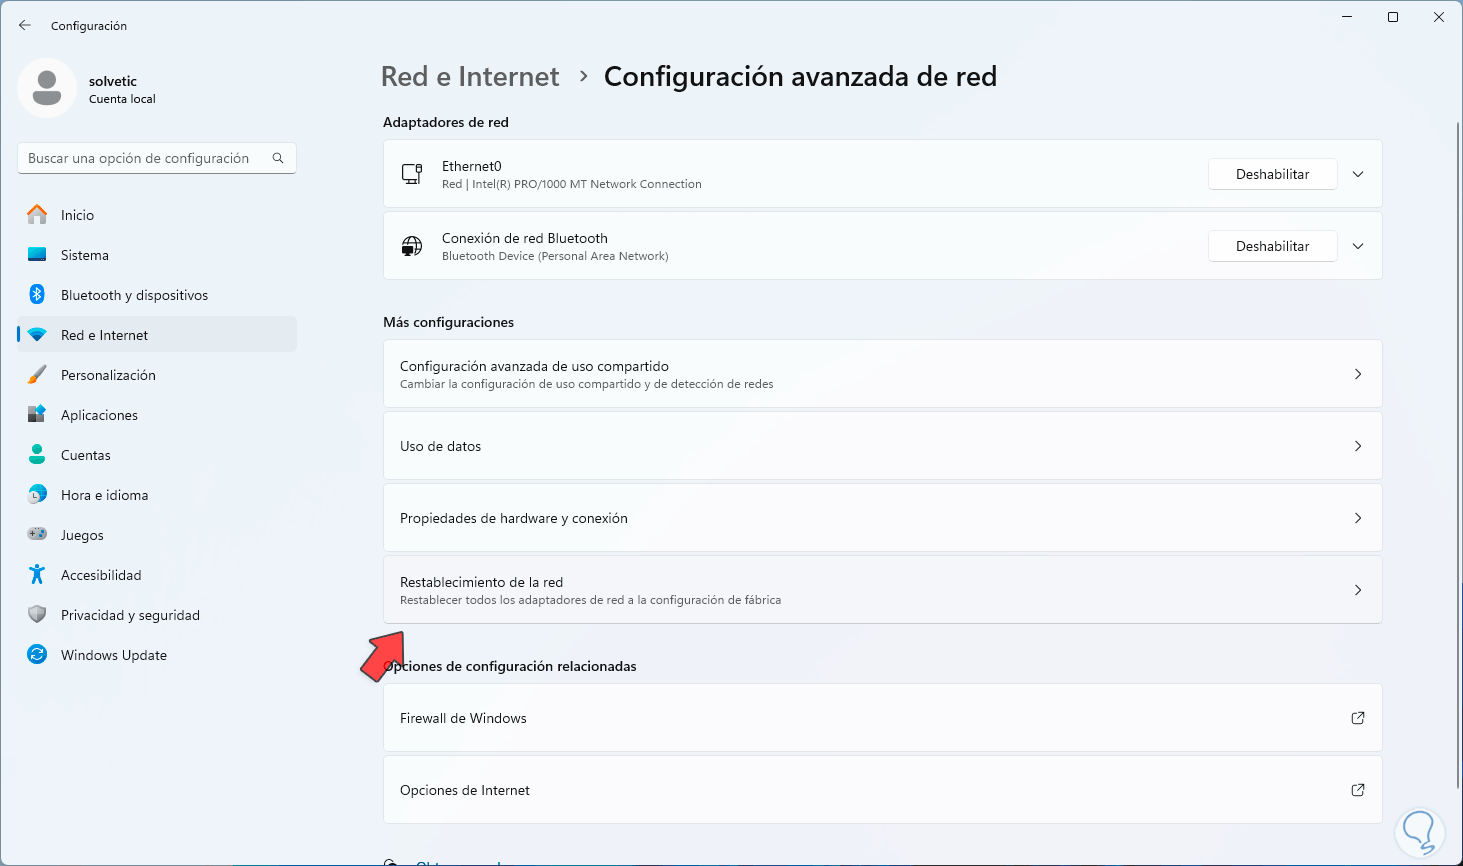
When configurations are made to the network over time, it is possible that some of them cause a connection error and the most feasible thing in this case will be to restore the network to its original value and not look for multiple causes, to restore the network we must go to “Start – Settings” menu. Then we go to “Networks and Internet”. We click on “Advanced network configuration” to access the following:
Step 2
Here we click on the “Network reset” option and the following will open:
Step 3
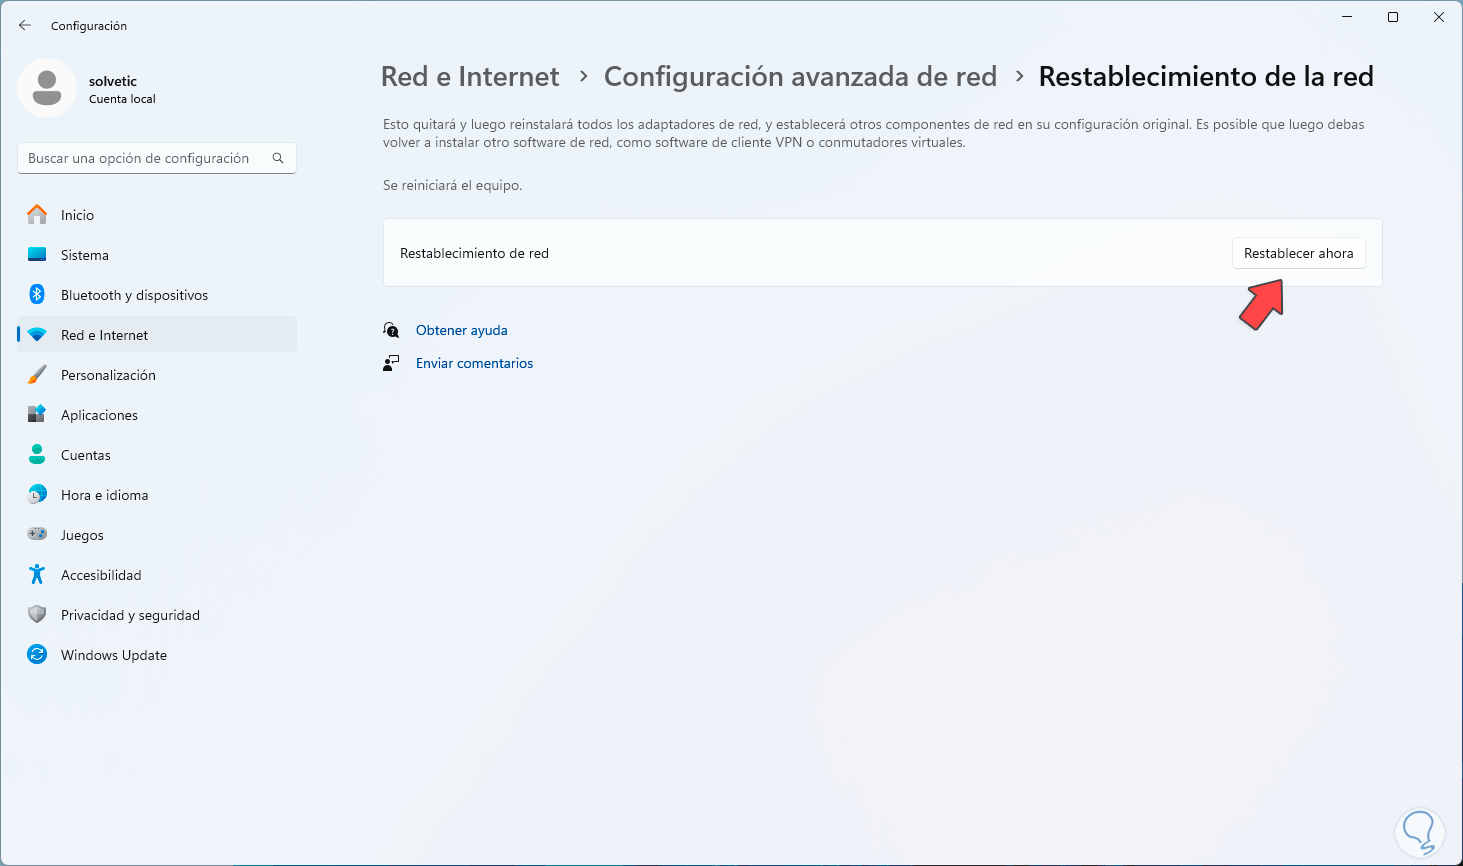
Now we click on “Reset now”
Step 4
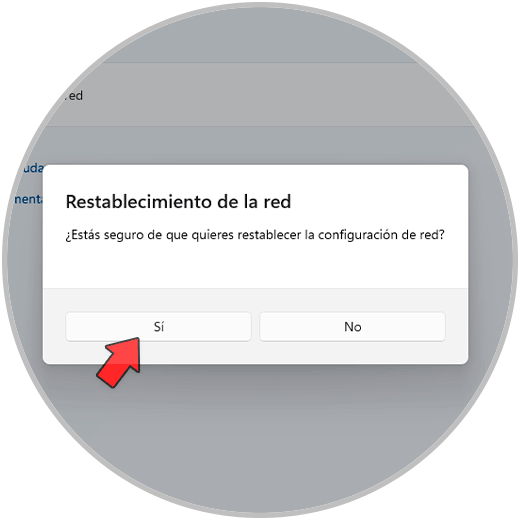
and we must confirm this operation. When we click “Yes”,
Step 5
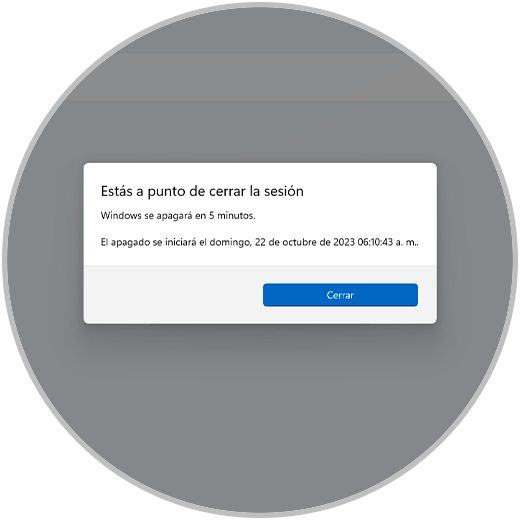
Then we will see the following message indicating when the system will restart:
Step 6
We can close this window and manually restart the computer:

4 Repair Windows 11 network by manually installing driver
Step 1
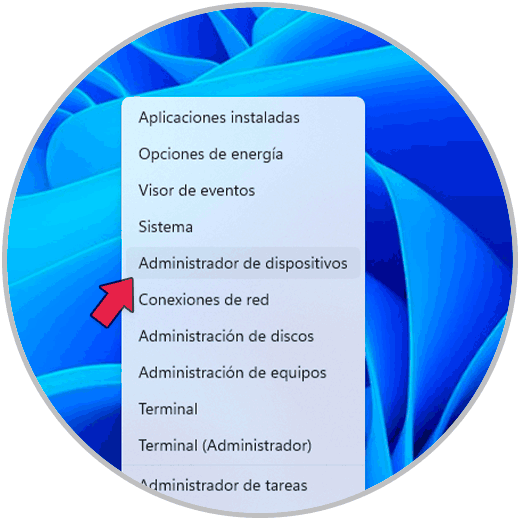
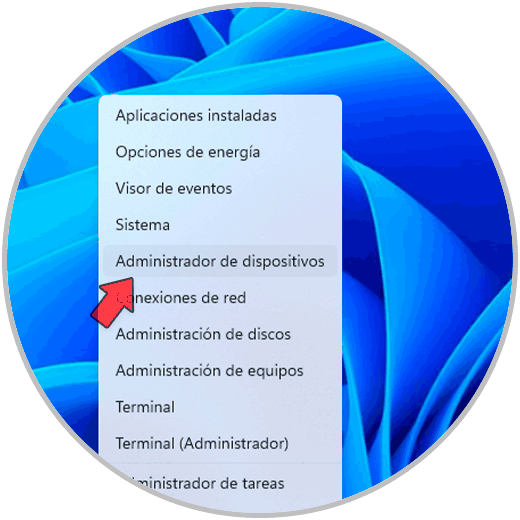
Another solution that TechnoWikis offers is to install the network driver, which manages and manages a large part of the card's functions, manually using the driver integrated into Windows. For this method, right click on the menu Start and select “Device Manager”:
Step 2
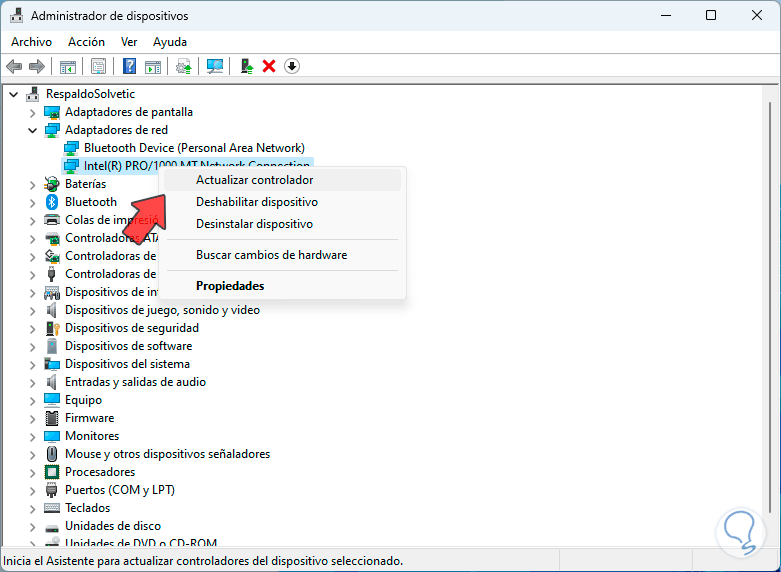
In the “Network adapters” section, right-click on the driver and select the “Update driver” option:
Step 3
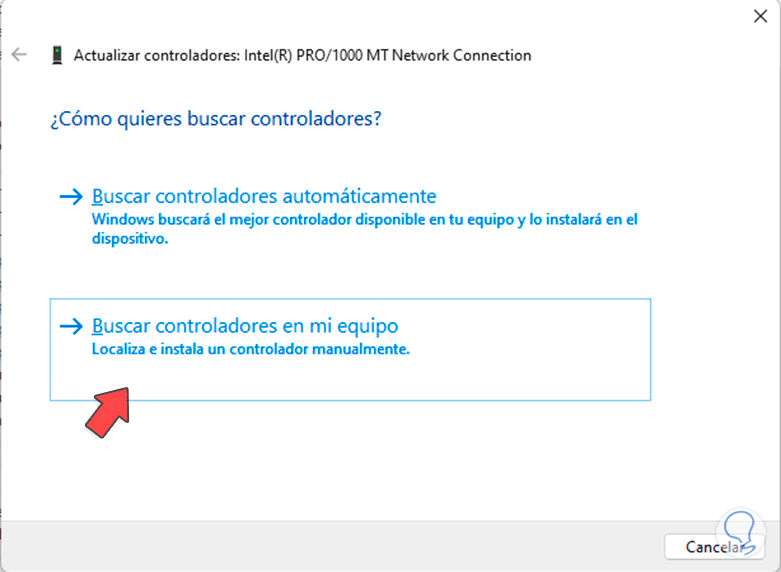
We will see the following. We click on “Search for drivers on my computer”
Step 4
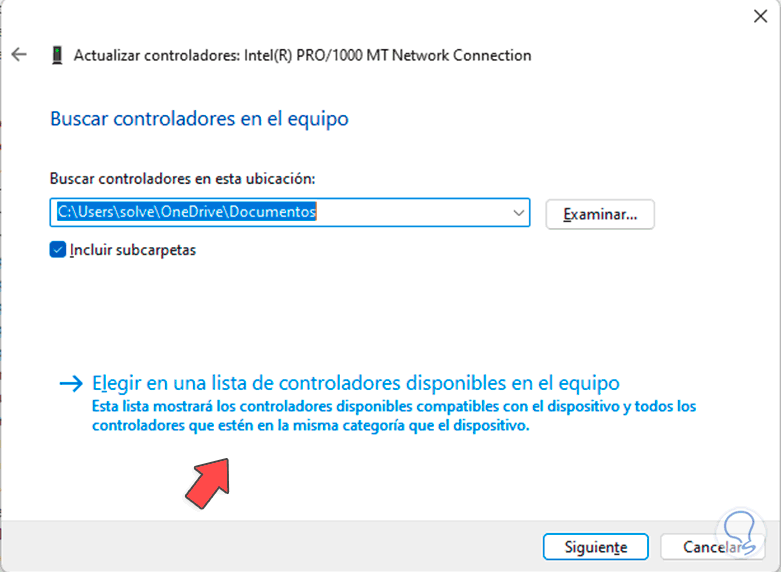
We'll see about this later. Here we will click on the option “Choose from a list of drivers available on the computer”
Step 5
Then we select the desired driver:
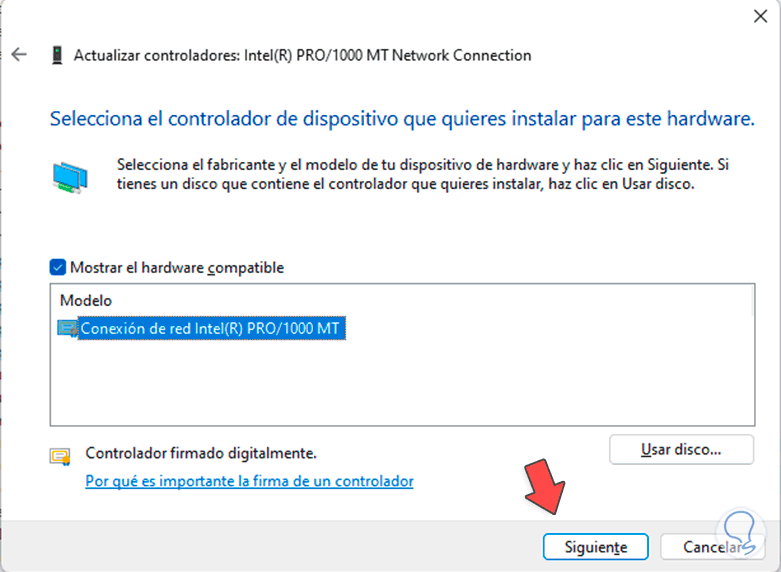
Step 6
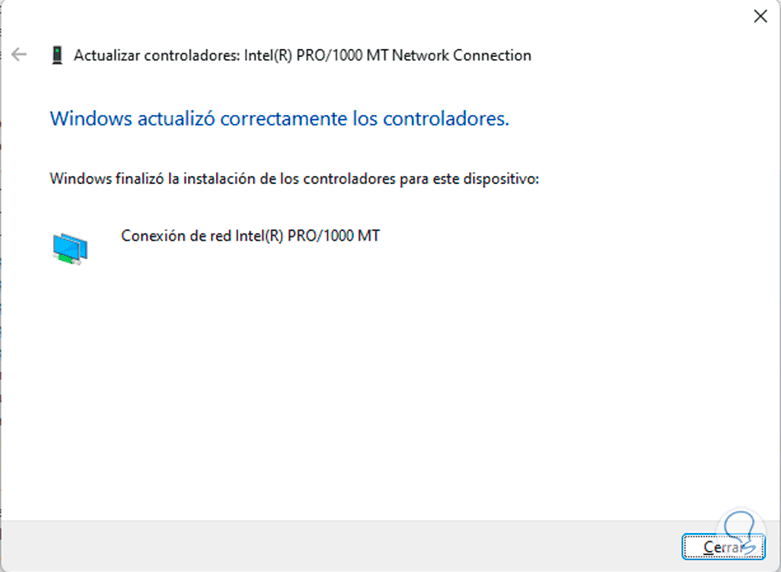
We click on “Next” and wait for this process to come to an end:
5 Repair Windows 11 network by installing reinstalling driver
Step 1
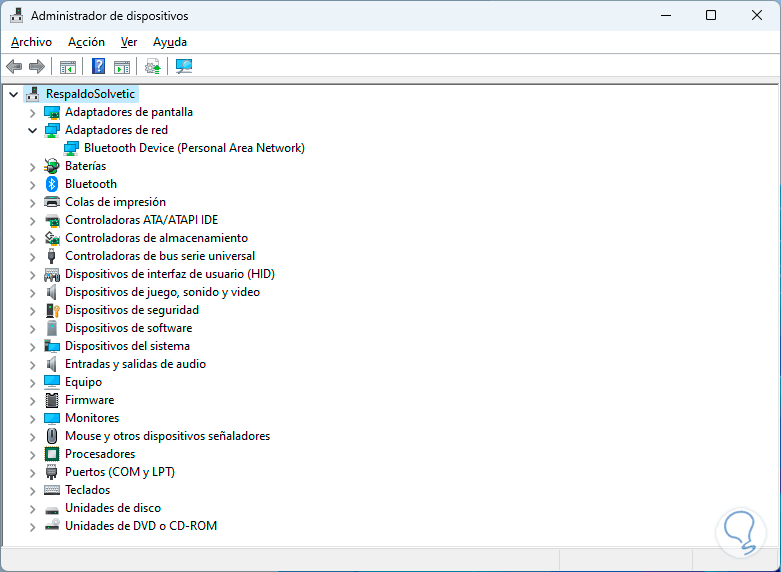
If the failure persists, we can reinstall the driver, this will not affect the work at all since we are going to enable it again, we open the Device Manager from Start:
Step 2
Now, in Network Adapters, we right click on the driver and select the “Uninstall device” option:
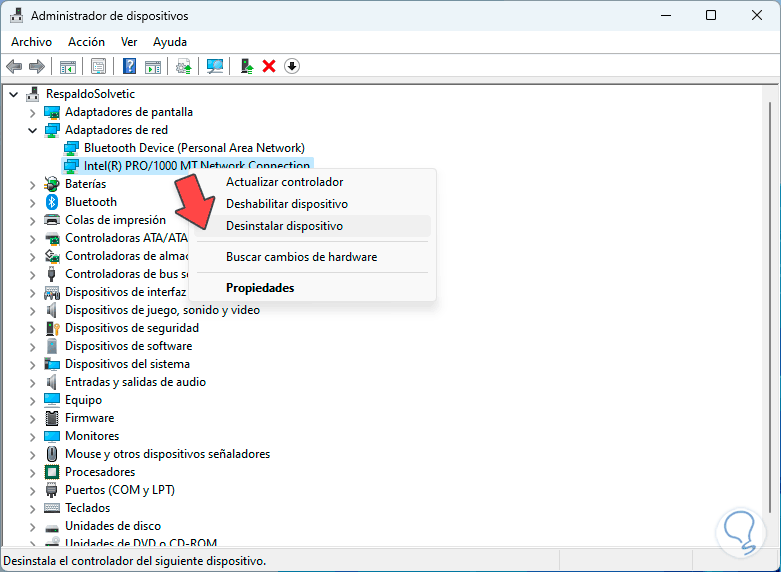
Step 3
The following message will open. We click on “Uninstall” and we will see that the adapter has been uninstalled:
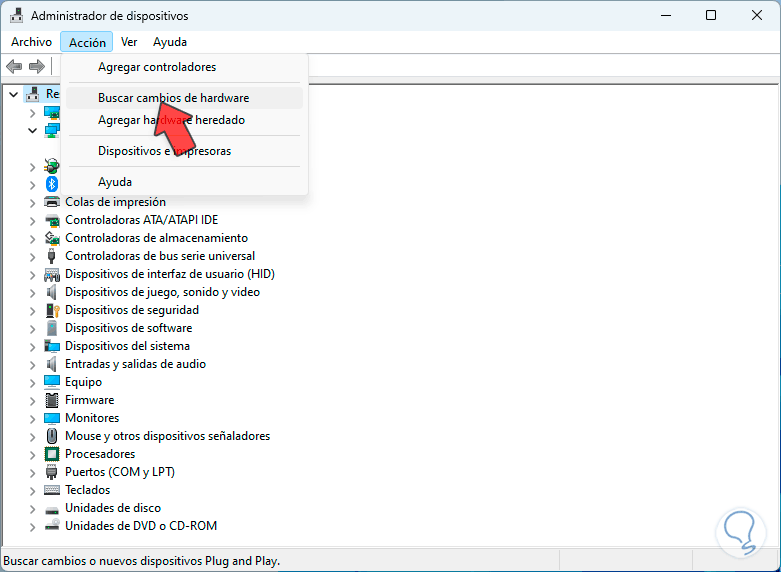
Step 4
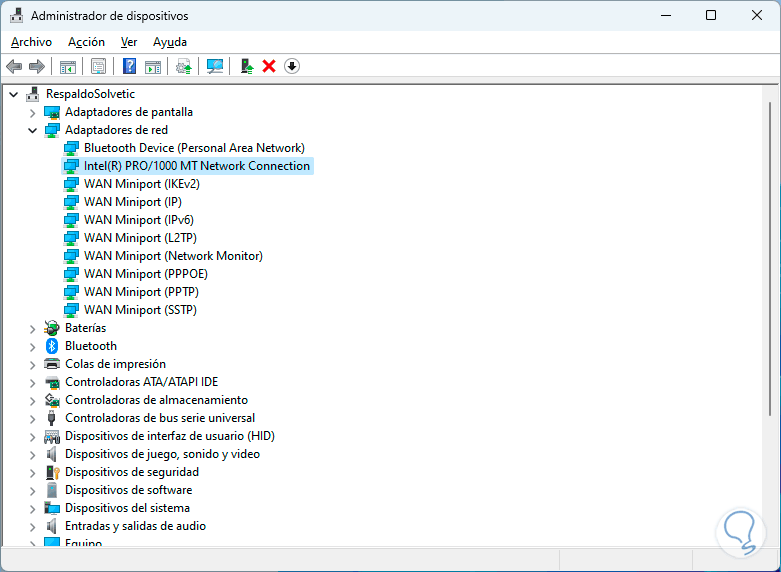
Now we will go to the “Action” menu, there we click on “Check for hardware changes”:
Step 5
Clicking there after a moment will reinstall the keyboard driver:
6 Repair Windows 11 network by installing and configuring IP
Step 1
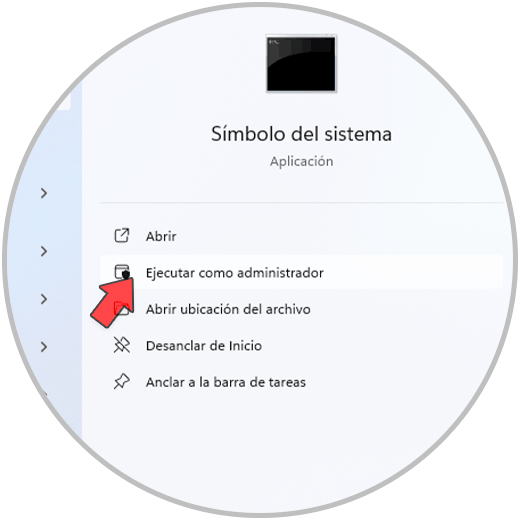
Finally we have the opportunity to configure our IP which is the address of the computer to have access to the Internet network, to use this method we are going to open CMD as administrators: We accept the UAC permissions:
Step 2
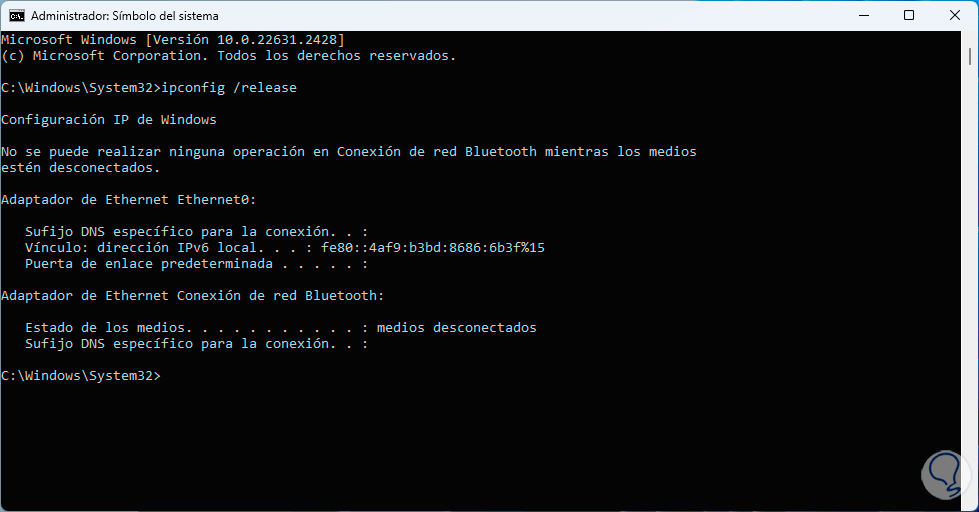
Now we are going to release the IP address by executing the command:
ipconfig /release
Step 3
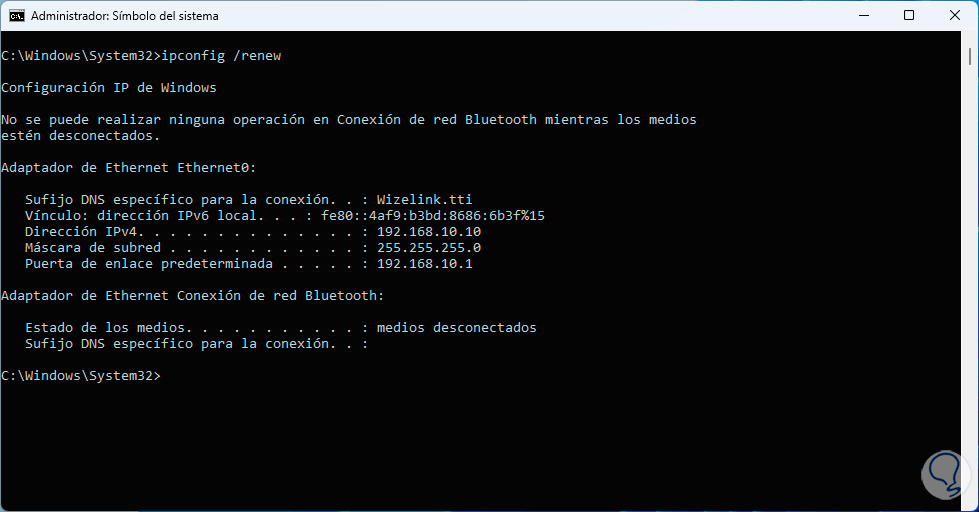
Then we renew the IP by executing the following command:
ipconfig /renew
Step 4
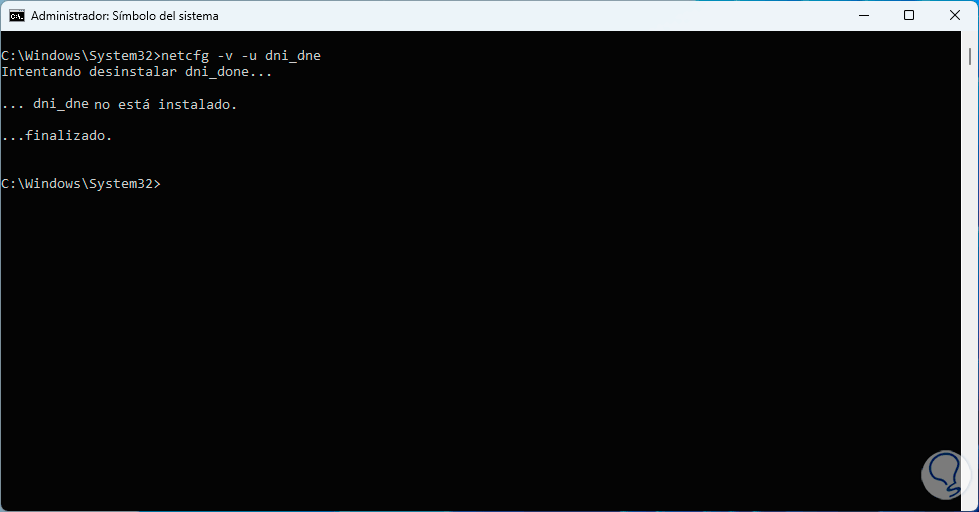
This will allow the IP address to be renewed using the DNS server, then we will execute the following:
netcfg -v -u dni_dne
This command is responsible for making some internal adjustments to the network configuration, allowing all connection tasks to be successful.
Each of these steps are integral in helping us fix the not connecting to a network error in Windows.