In Windows 10 we access websites every day to use study, work or entertainment sites, but an error that we can see when accessing a site is the error that we cannot access that site even though we know that it is a trustworthy site or one that is accessed normally, this error can occur for many reasons, both specific to the operating system and the browser, or the domain itself that we are accessing..
"The 'This website cannot be reached' message in Windows 10 indicates that the operating system cannot establish a connection to the desired website. This can be caused by network problems, incorrect browser settings, or access restrictions to Internet, such as firewall blocks." TechnoWikis has a series of solutions to correct this error so you can browse or visit this site without problems.
1 Check the proxy and firewall by configuring DNS Windows 10
Step 1
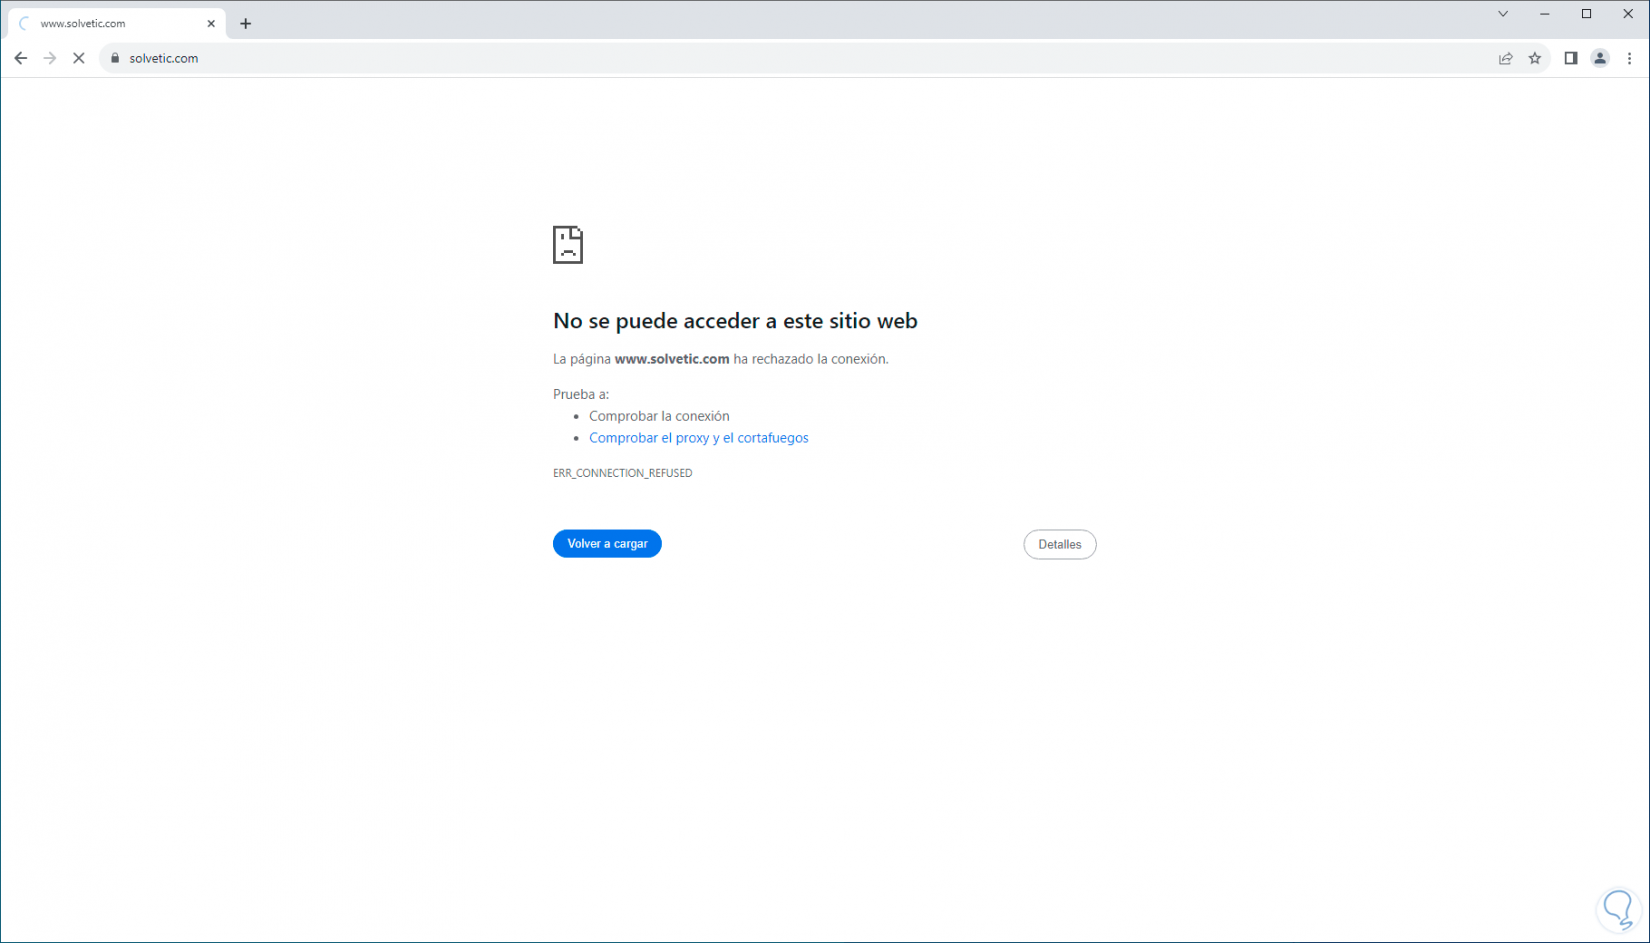
The first thing will be to see the error in the browser:
Step 2
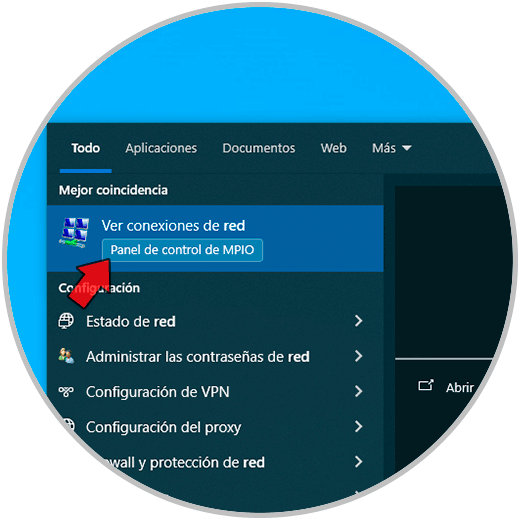
Now, in the search box, we enter the word “network”, click on “View network connections”:
Step 3
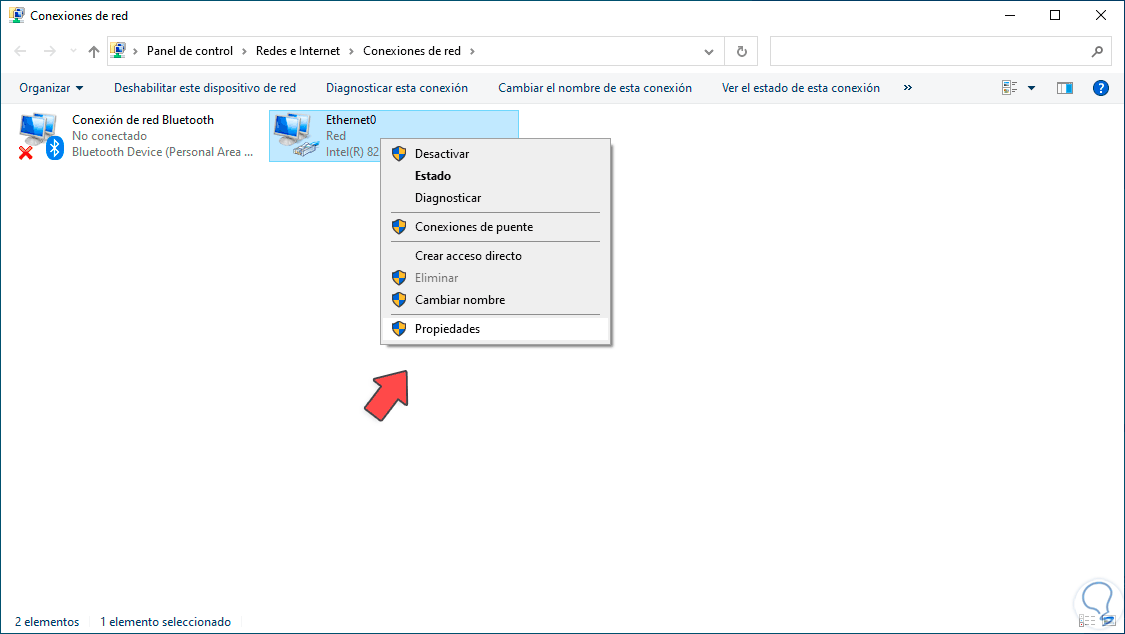
After this, we right click on the network adapter and click on “Properties”:
Step 4
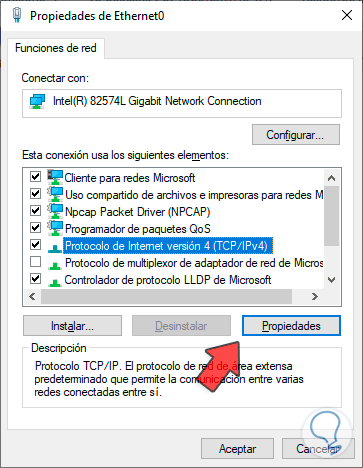
In the pop-up window, we select the line “Internet Protocol version 4”:
Step 5
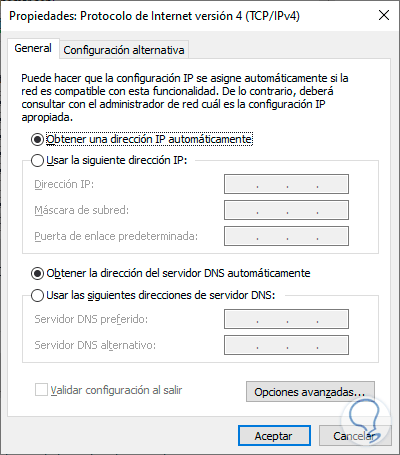
We click on “Properties” to see the following:
Step 6
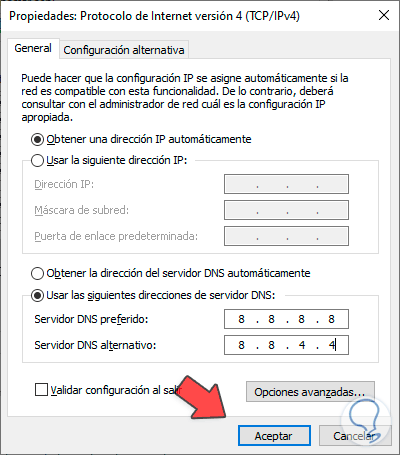
We activate the “Use the following DNS server addresses” box and enter the IPs we want:
Step 7
Some public DNS server options are:
Cloudflare DNS: Primary IPv4: 1.1.1.1 Secondary IPv4: 1.0.0.1 OpenDNS: Primary IPv4: 208.67.222.222 Secondary IPv4: 208.67.220.220 Comodo Secure DNS: Primary IPv4: 8.26.56.26 Secondary IPv4: 8.20.247.20 Google Public DNS: IPv4 primary: 8.8.8.8 Secondary IPv4: 8.8.4.4 By doing this we apply the changes.
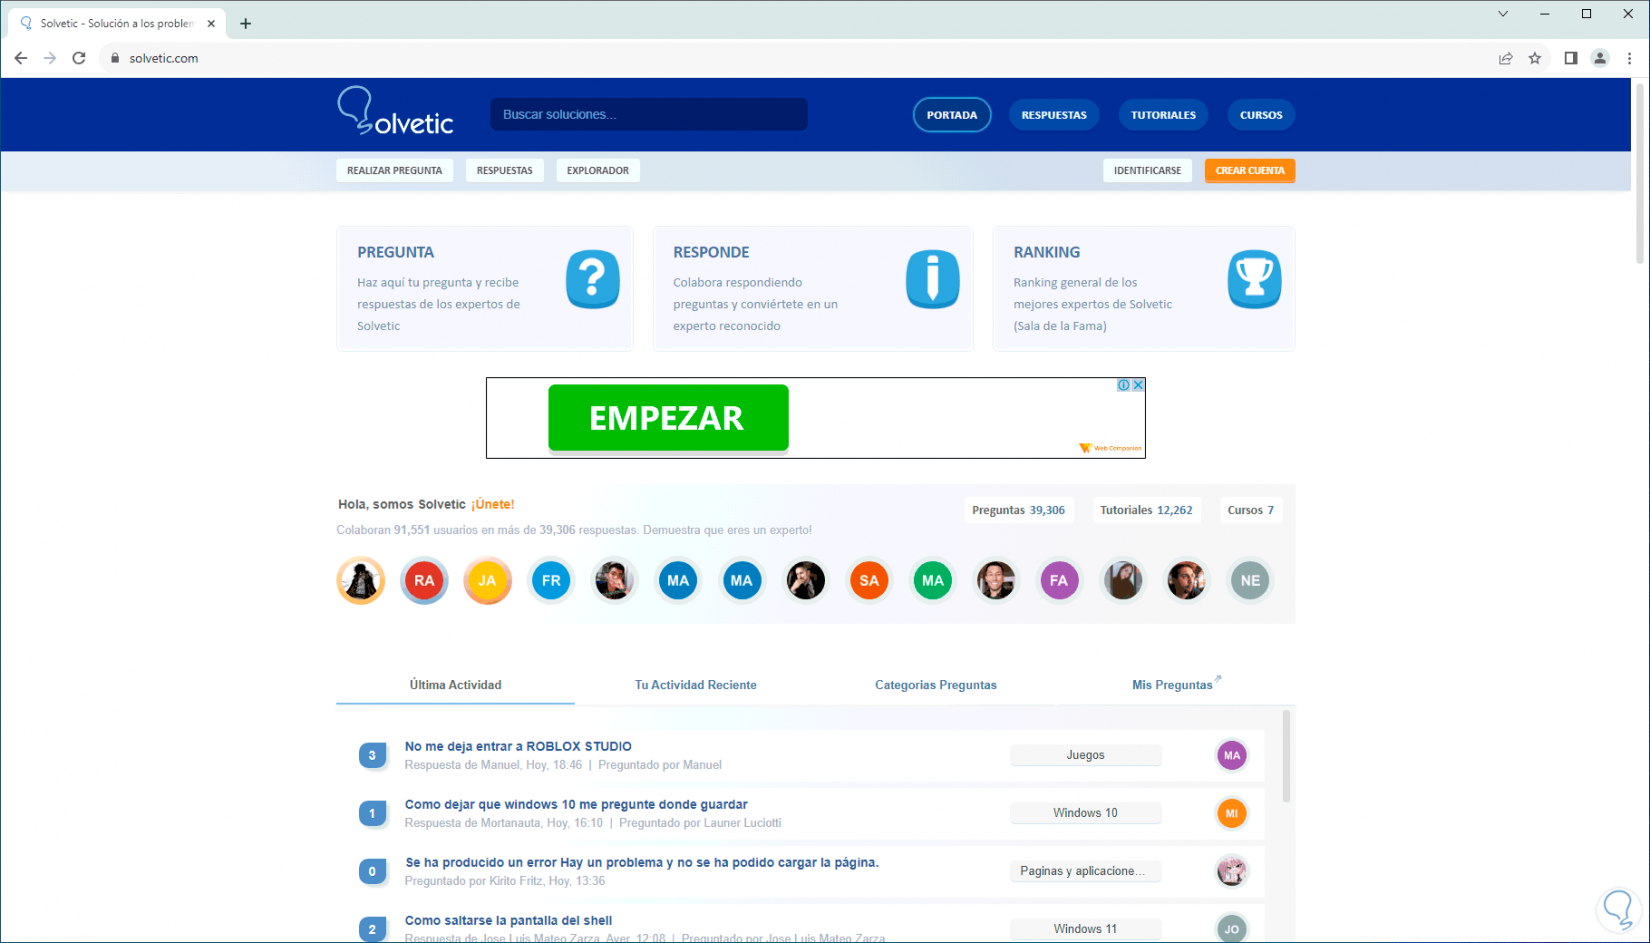
We refresh the website to see that it loads correctly:
2 Check the proxy and firewall from the hosts file Windows 10
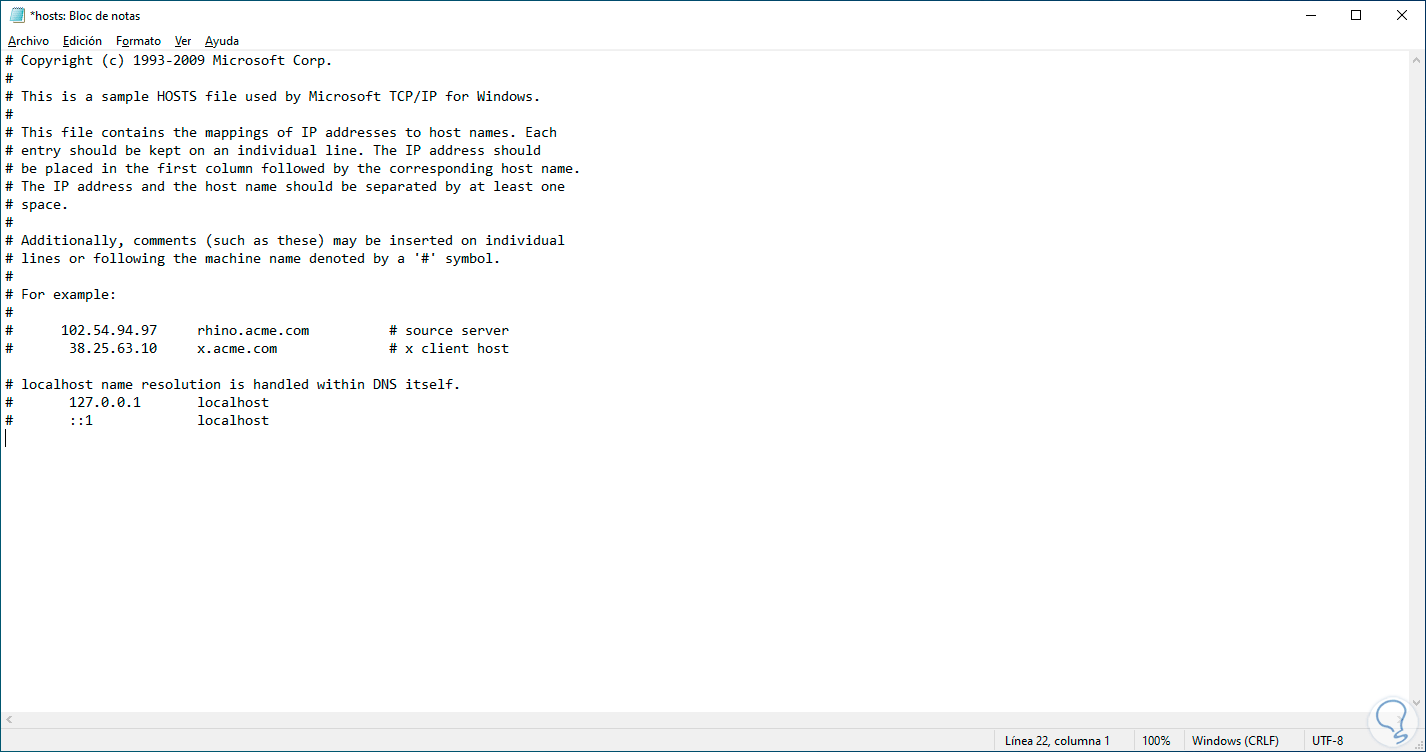
The hosts file is a configuration file which allows mapping IP addresses to domain names. This allows you to manage the sites that are accessed from a computer. Its operation allows Windows to access a website when accessing it. 10 will make the query in the hosts file in order to confirm if there is an entry for that domain, if not, the domain name server or DNS will be used to perform the task of resolving the domain name to the IP address.
Step 1
It is possible that due to some configuration error, the domain we are trying to access is blocked. To review this, we will see the error first.

Step 2
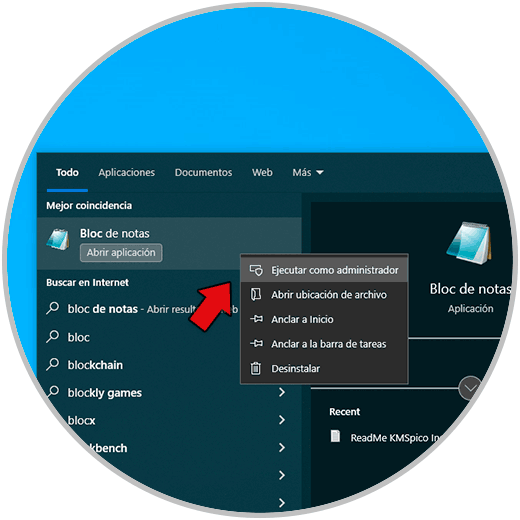
Now in the search box we enter “notepad”, in notepad, click on “Run as administrator”:
Step 3
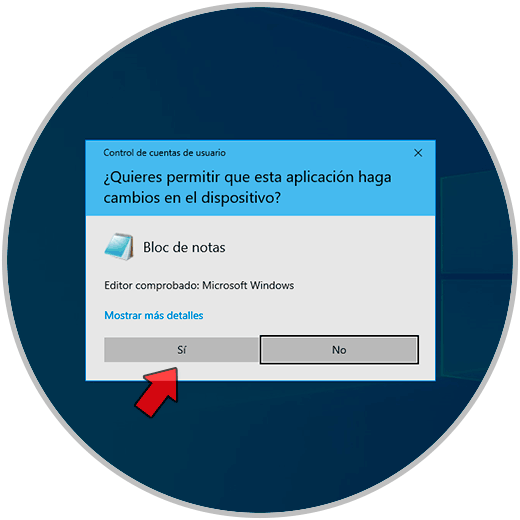
We must accept the UAC permissions:
Step 4
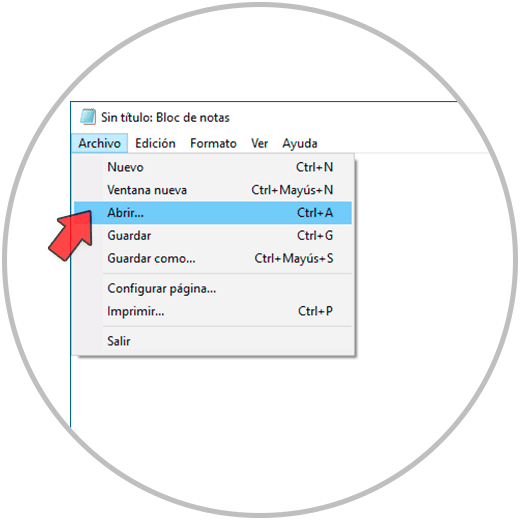
Then, in notepad, we go to “File – Open”:
Step 5
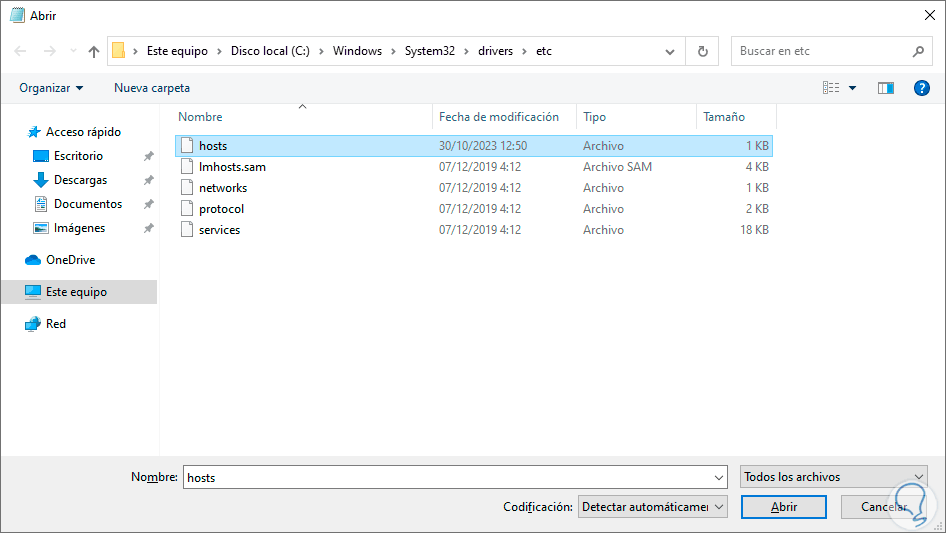
Now let's go to the route:
C:\Windows\System32\drivers\etc
Step 6
There, we select the “All files” option, click on the hosts file:
Step 7
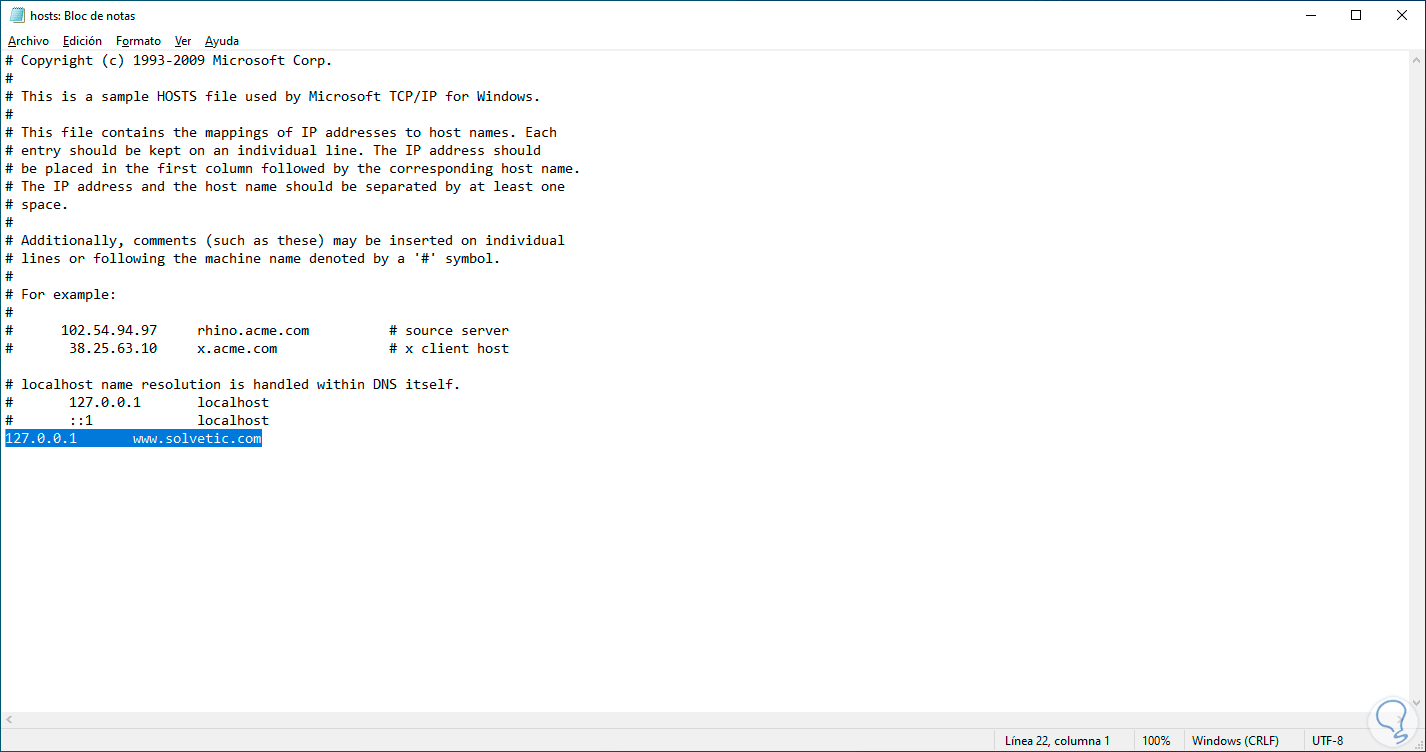
Click on “Open” to access its content:
Step 8
We are going to delete the line where our domain is after the local IP 127.0.0.1:
Step 9
We save the changes and refresh the website to check access:

3 Check proxy and firewall from CMD Windows 10
Step 1
Another cause of this error is a load or accumulation of local cache, this originates as we access the websites, we can see the error generated:

Step 2
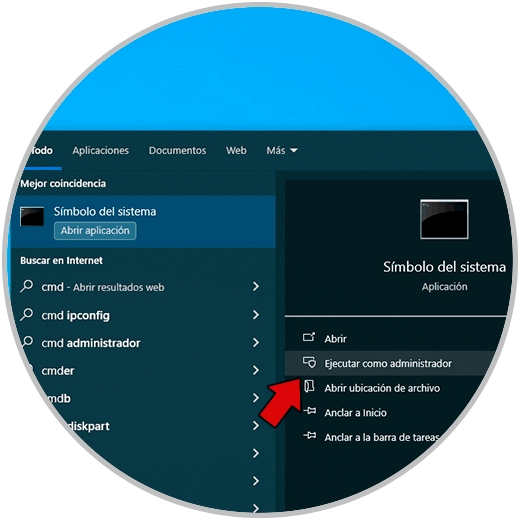
Now, in the search box we enter “cmd”, click on “Run as administrator”:
Step 3
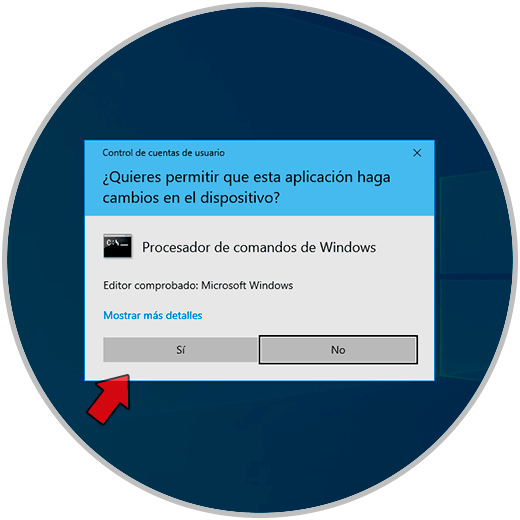
We accept UAC permissions:
Step 4
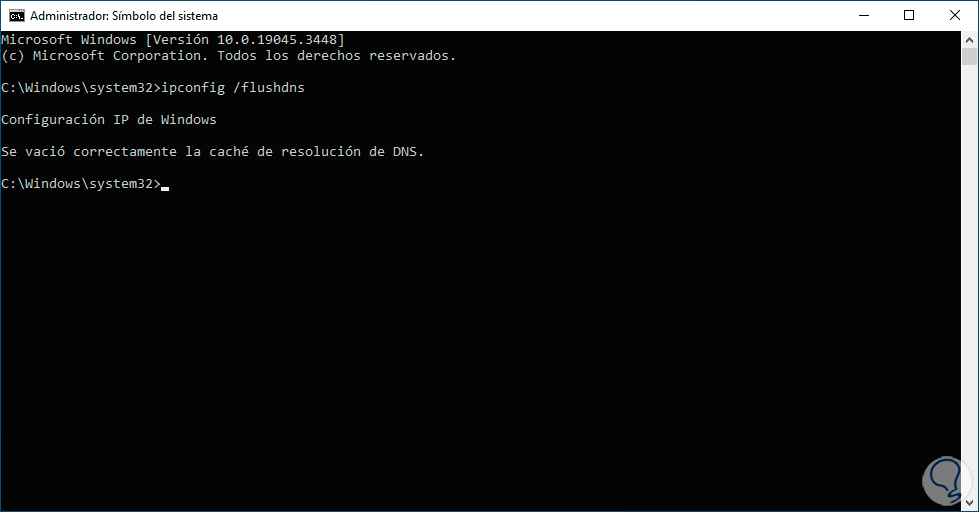
In the console, we execute the following command to release the DNS cache:
ipconfig /flushdns
Step 5
We may update the website to confirm your access:

4 Check proxy and firewall from Chrome Windows 10
Step 1
One option that Google Chrome offers us is to have the possibility of freeing the browser cache if we use a large part of it, we review the error of not accessing the website:

Step 2
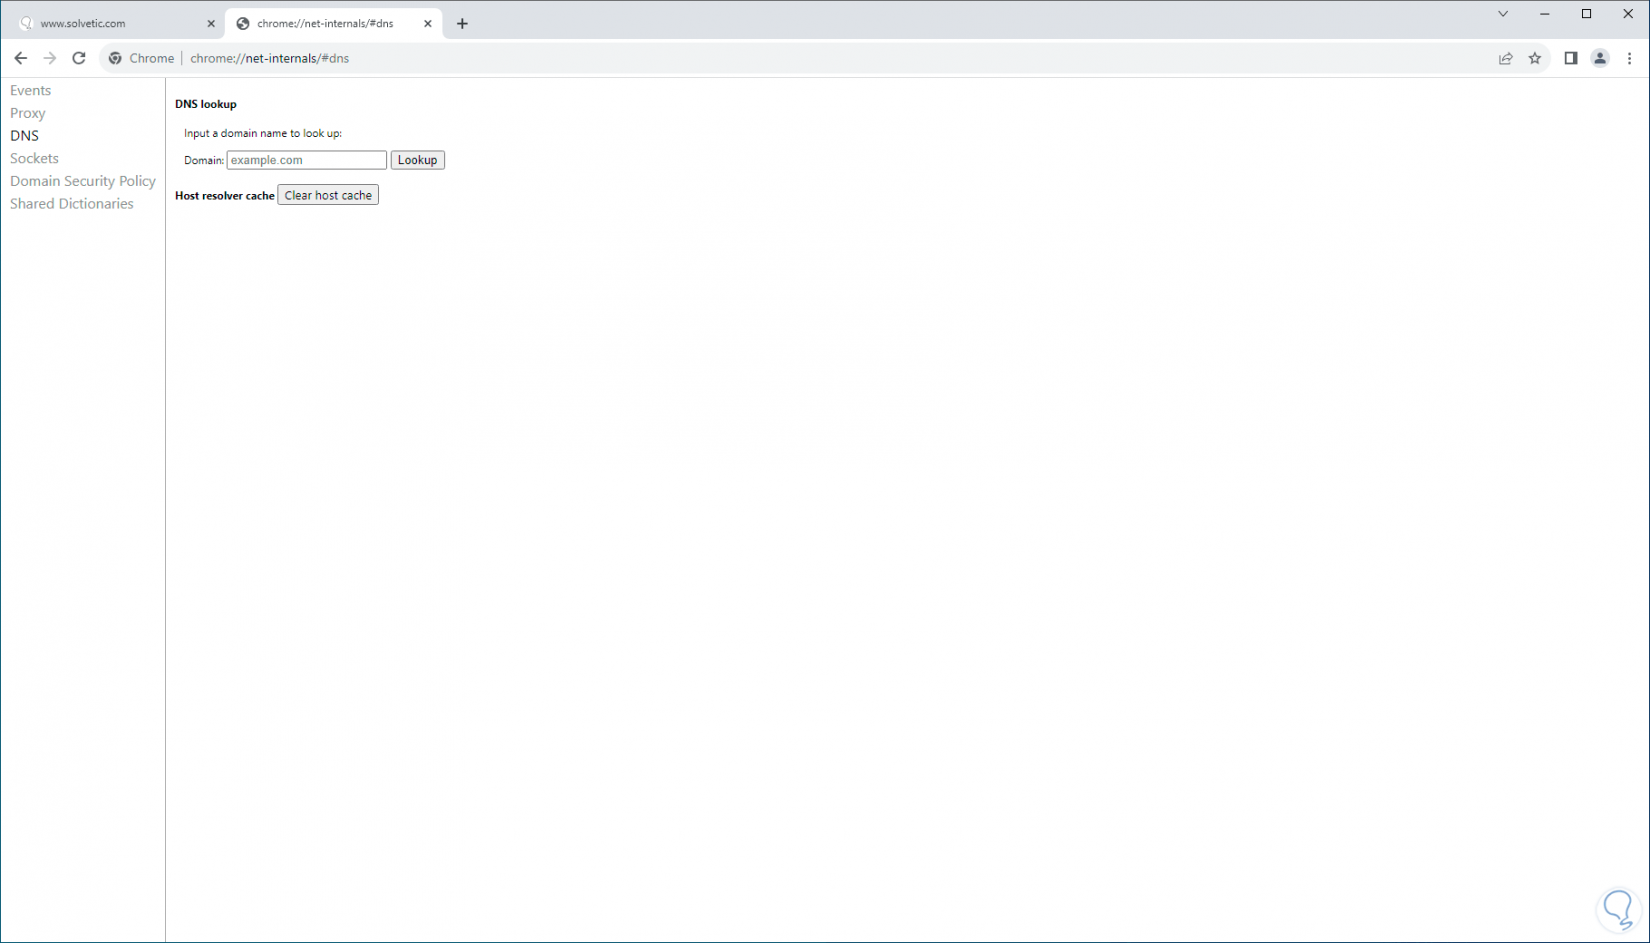
Now, we open a new tab and enter the following:
chrome://net-internals/#dns
Step 3
By pressing Enter, we click on “Clear host cache”, this will make the website load correctly:

5 Check proxy and firewall by configuring proxy Windows 10
Step 1
Finally, we can make the adjustments at the local proxy level since if we use these services since they can affect access to the websites, we can see the access error:

Step 2
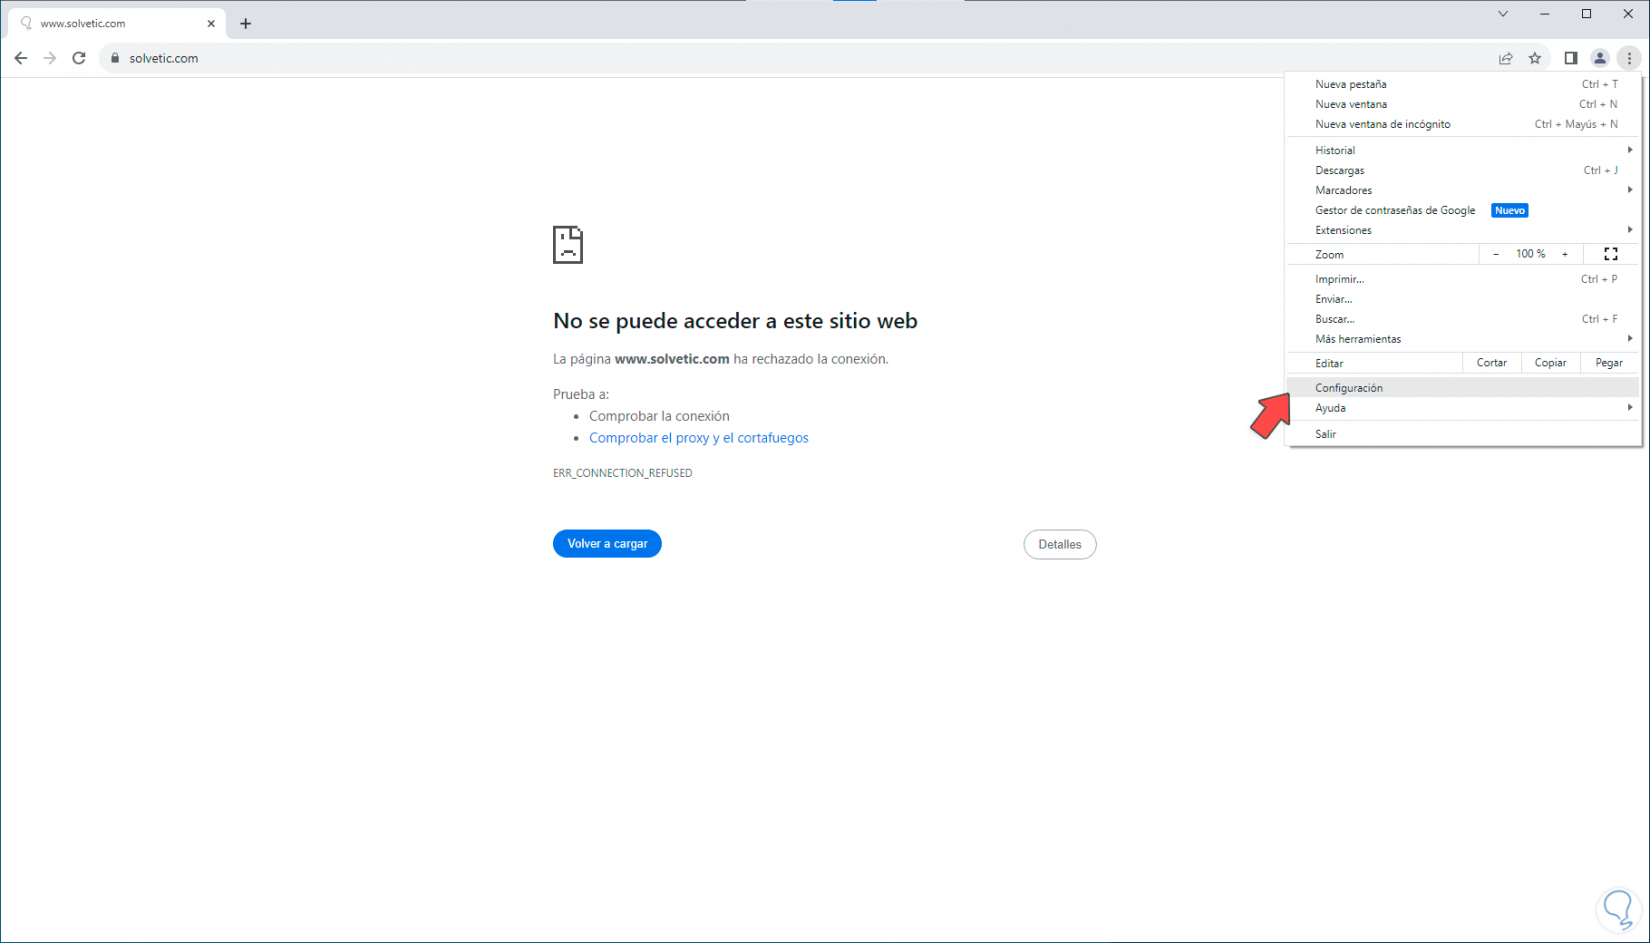
To check the proxy, click on the Google menu and click on “Settings”:
Step 3
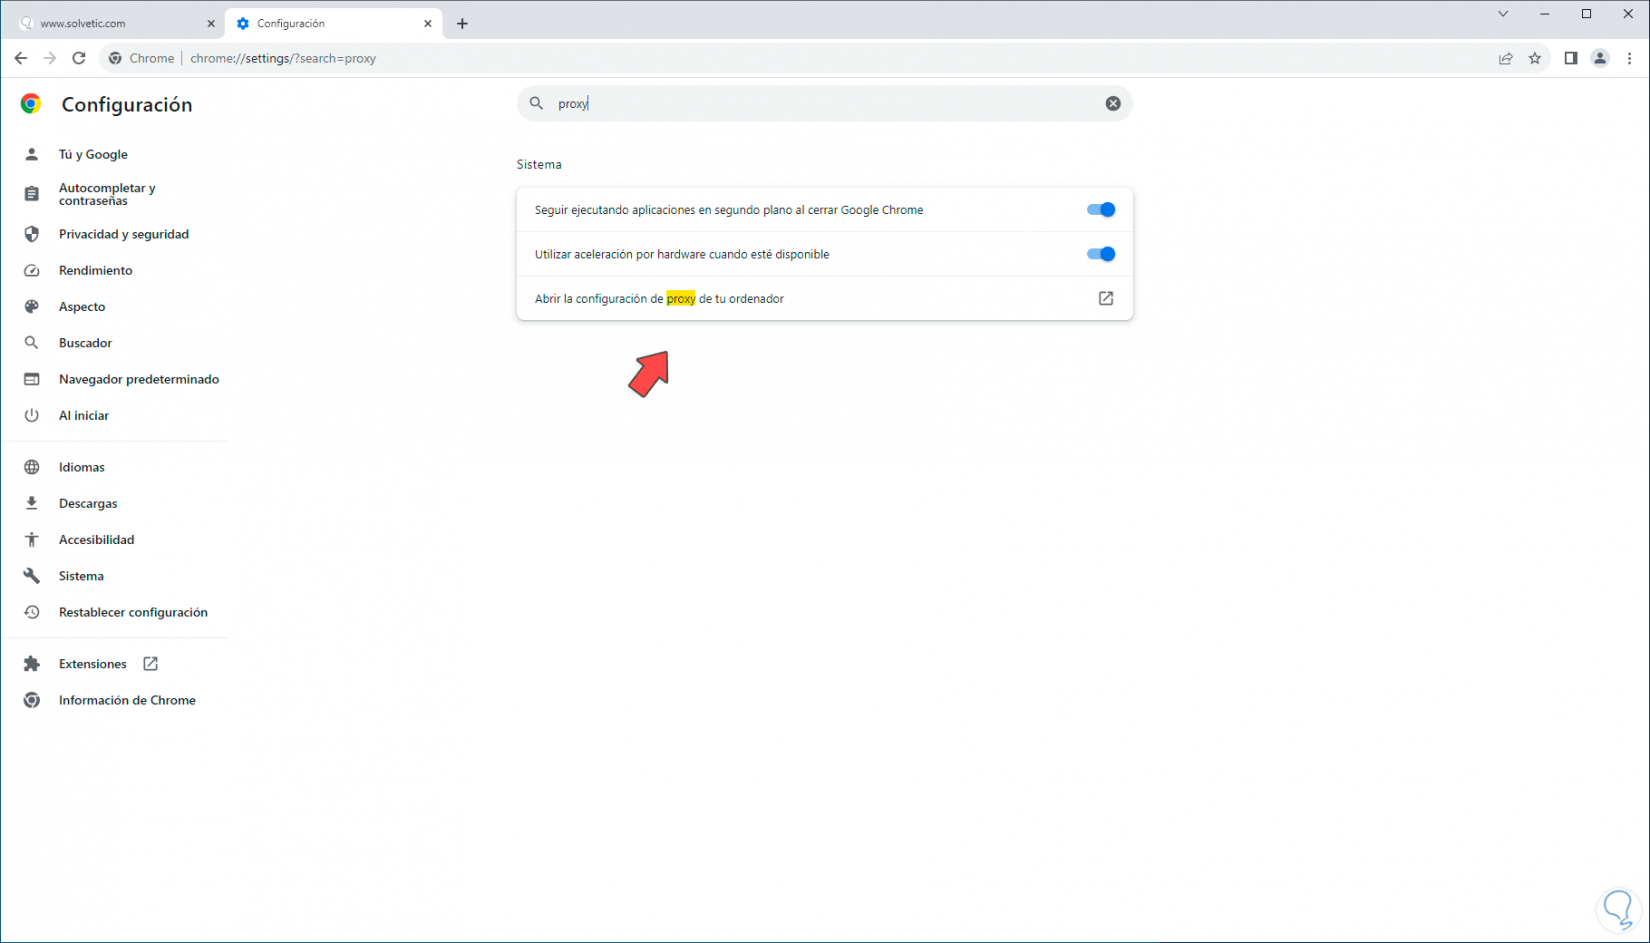
Then, in the search box we enter “proxy”: We click on “Open your computer's proxy settings”,
Step 4
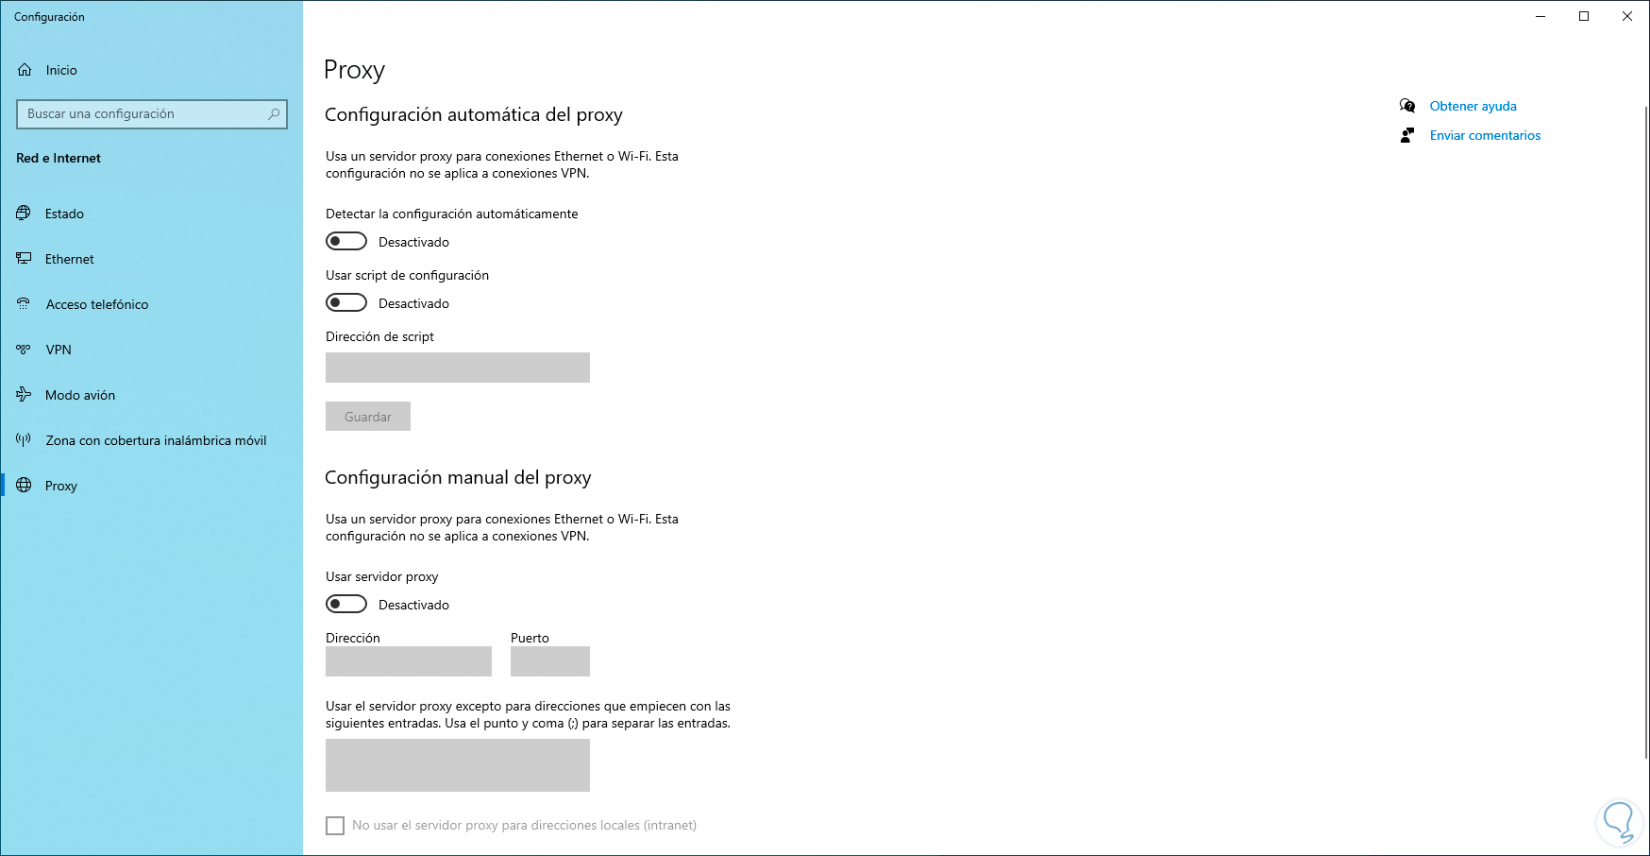
The following will open: We deactivate the “Automatically detect settings” switch:
Step 5
We validate that we have access:

These ways allow us to regain access to websites with this error..