As users of any operating system, we access websites on a daily basis to check news, see our emails, use study or educational platforms or simply as a way to pass the time, but many times when we open a website we find the error “ This website cannot be accessed”, we are logically unable to see the content of the site and we can validate if said domain is correctly written or if the web page is active by checking from another device..
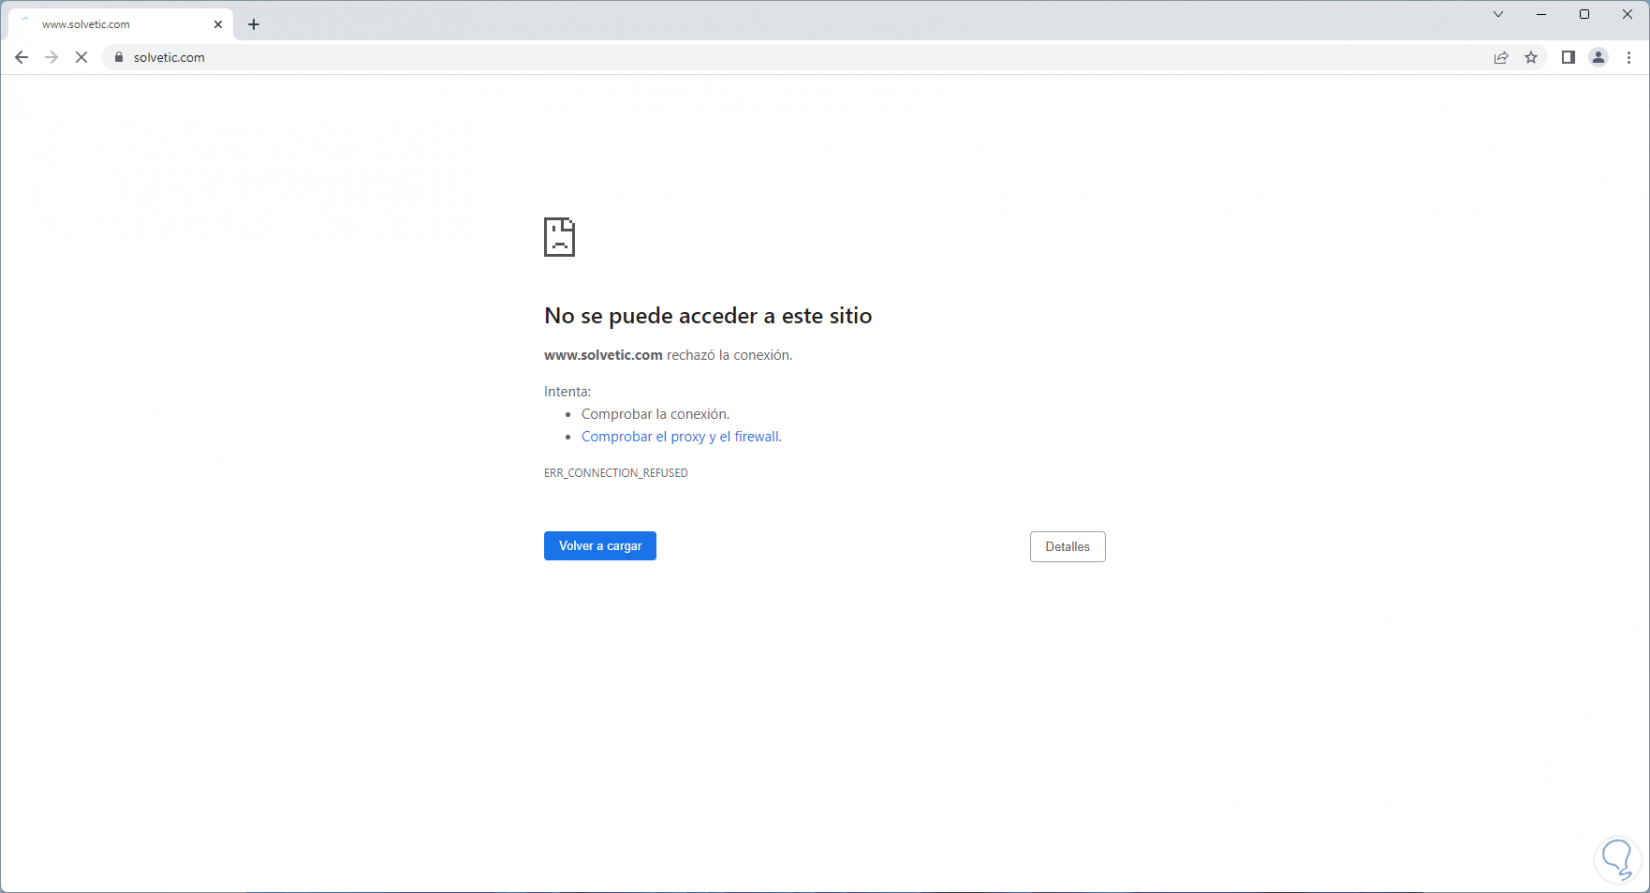
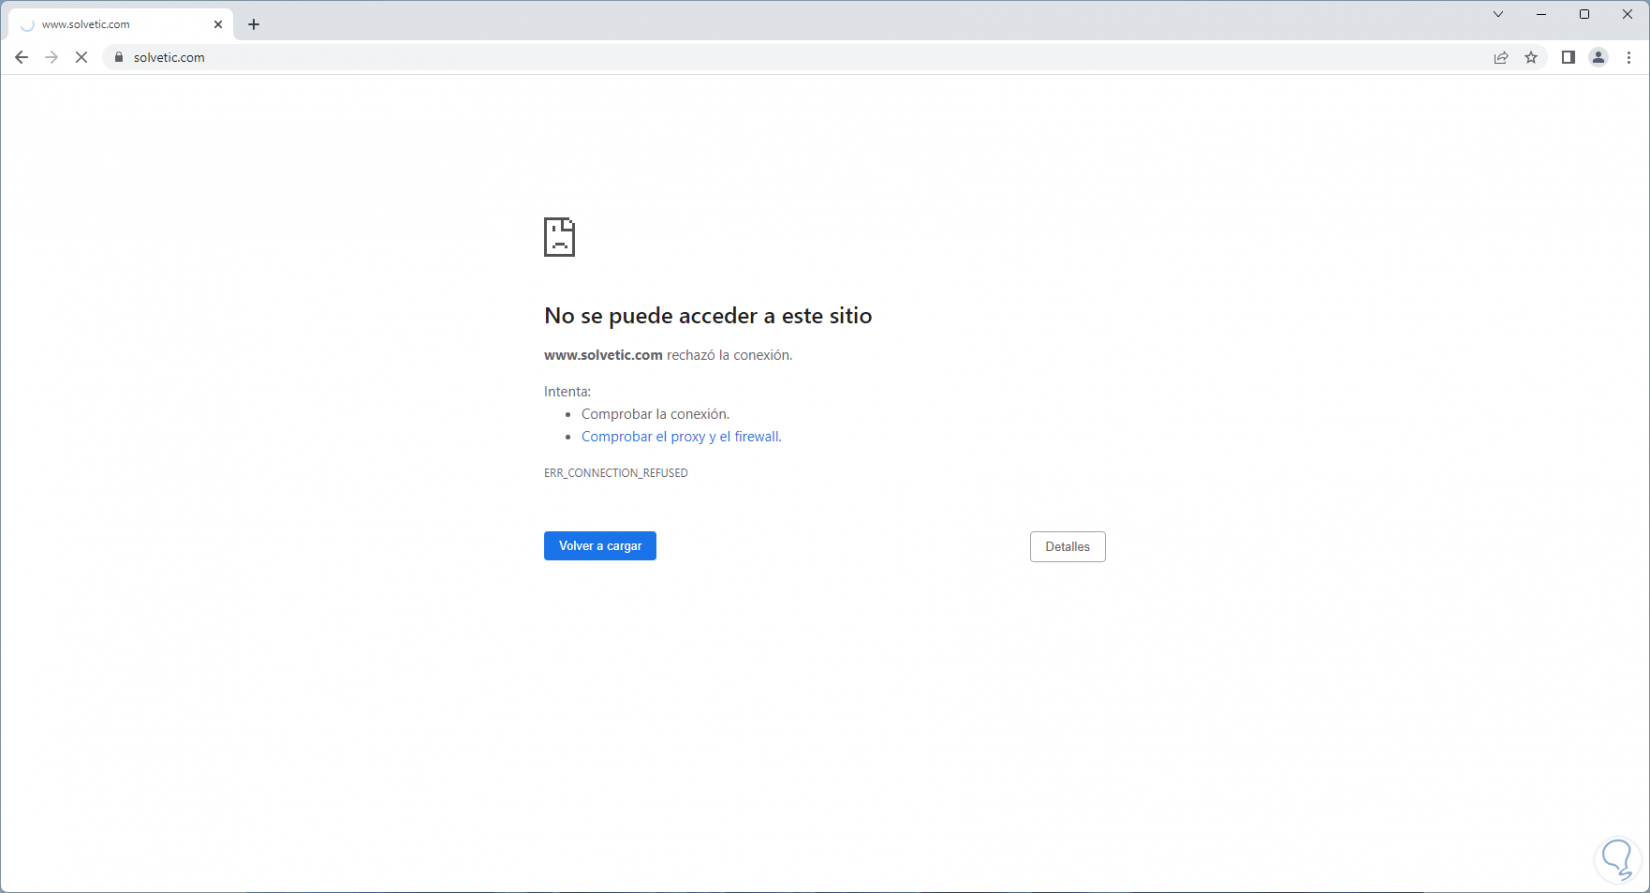
But this specific error can occur for reasons ranging from failures in the Internet connection, some remote error with the website's server, direct failures of the web browser or even that our operating system fails. The error generates a cause called "ERR_CONNECTION_REFUSED" which indicates that the connection to said site was simply rejected. TechnoWikis has a series of solutions for you that will correct this error.
To stay up to date, remember to subscribe to our YouTube channel!
SUBSCRIBE ON YOUTUBE
1 Configure DNS manually
The DNS (Domain Name System) is responsible for converting IP addresses into domain names, which is why we can enter TechnoWikis.com and not an IP address, but the default DNS is provided by our provider and it can become saturated giving rise to this error..
Step 1
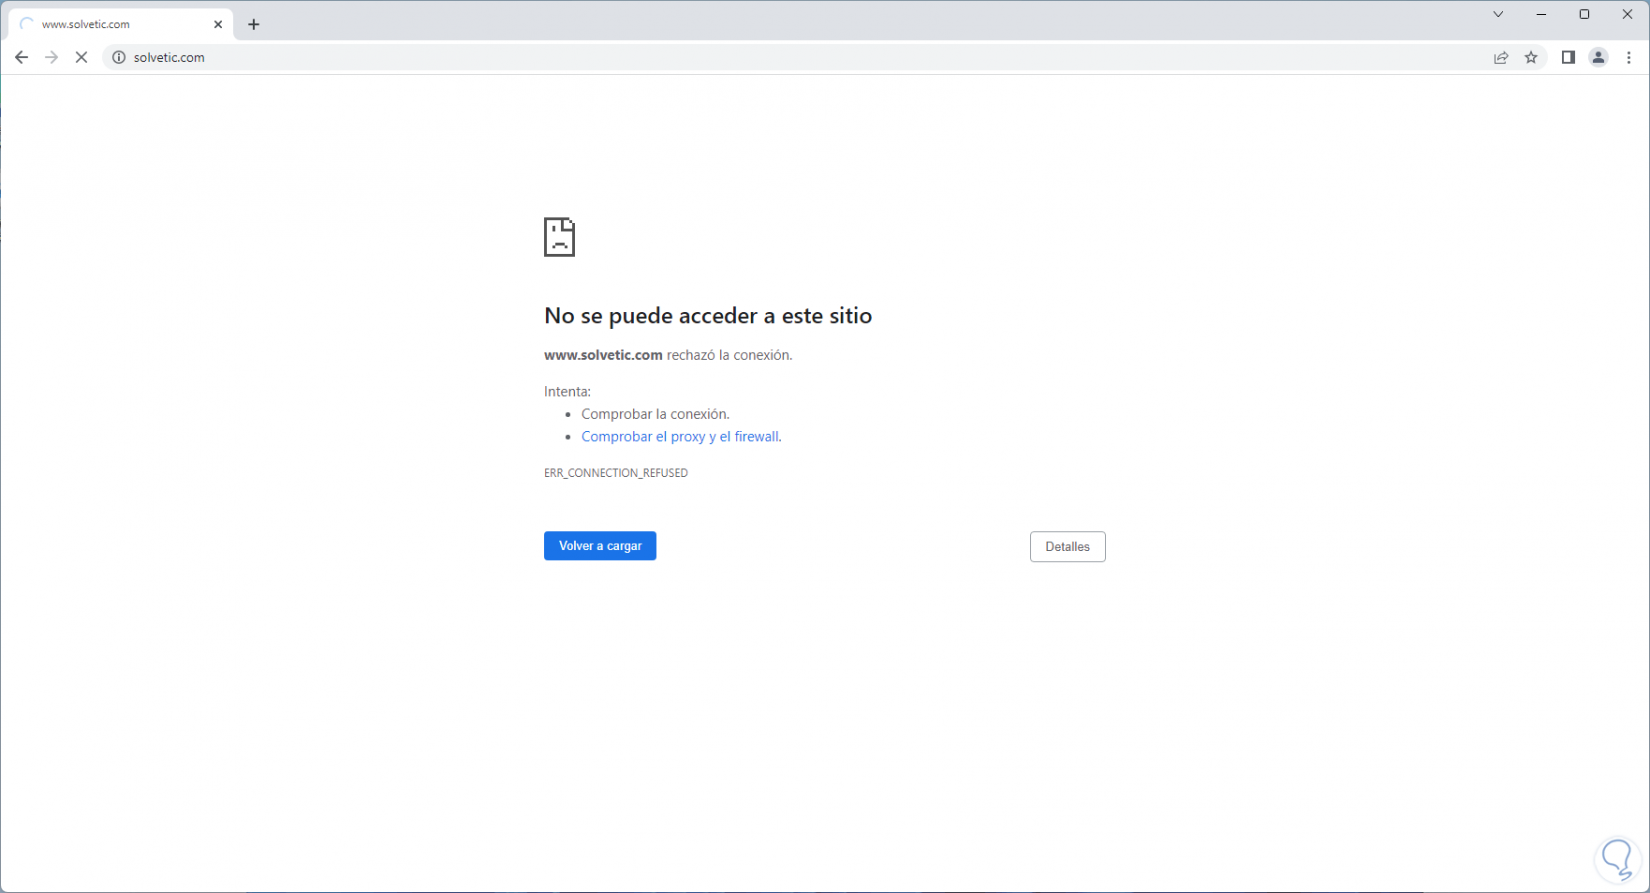
To rule out this cause we open a browser to check the mentioned error:
Step 2
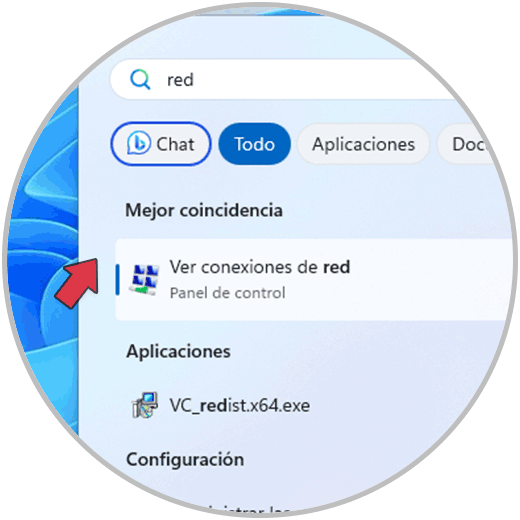
In the Start search engine we enter "network" and click on "View network connections":
Step 3
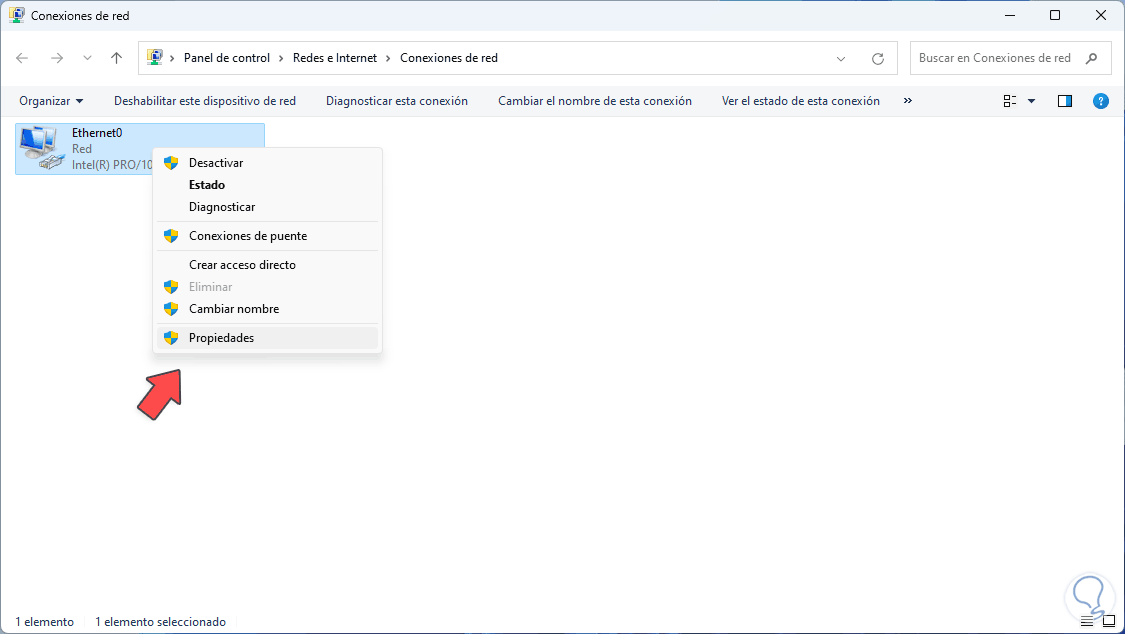
Now we right click on the network adapter and there we select "Properties":
Step 4
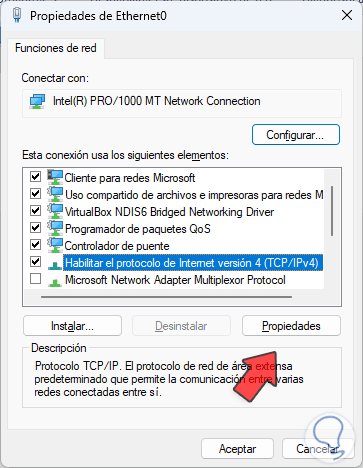
In the pop-up window we select "Internet Protocol version 4" and click on "Properties":
step 5
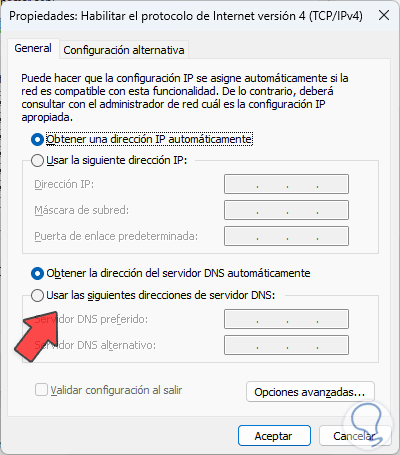
We will see the following configuration:
step 6
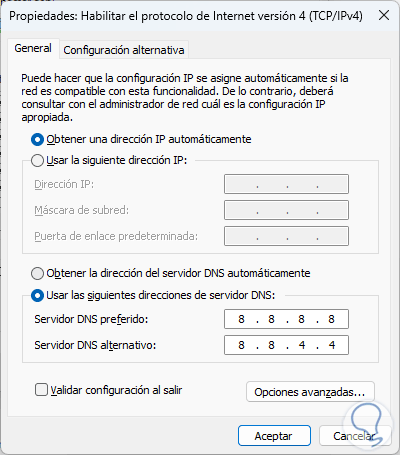
Activate the "Use the following DNS server addresses" box and enter the desired IPs:
step 7
For this case we can make use of public DNS servers that are more powerful servers and open to users, some of the options to use are:
Primary IPv4: 8.8.8.8 Secondary IPv4: 8.8.4.4
Primary IPv4: 208.67.222.222 Secondary IPv4: 208.67.220.220
Primary IPv4: 1.1.1.1 Secondary IPv4: 1.0.0.1
Primary IPv4: 9.9.9.9 Secondary IPv4: 149.112.112.112
Primary IPv4: 8.26.56.26 Secondary IPv4: 8.20.247.20
Apply the changes.
step 8
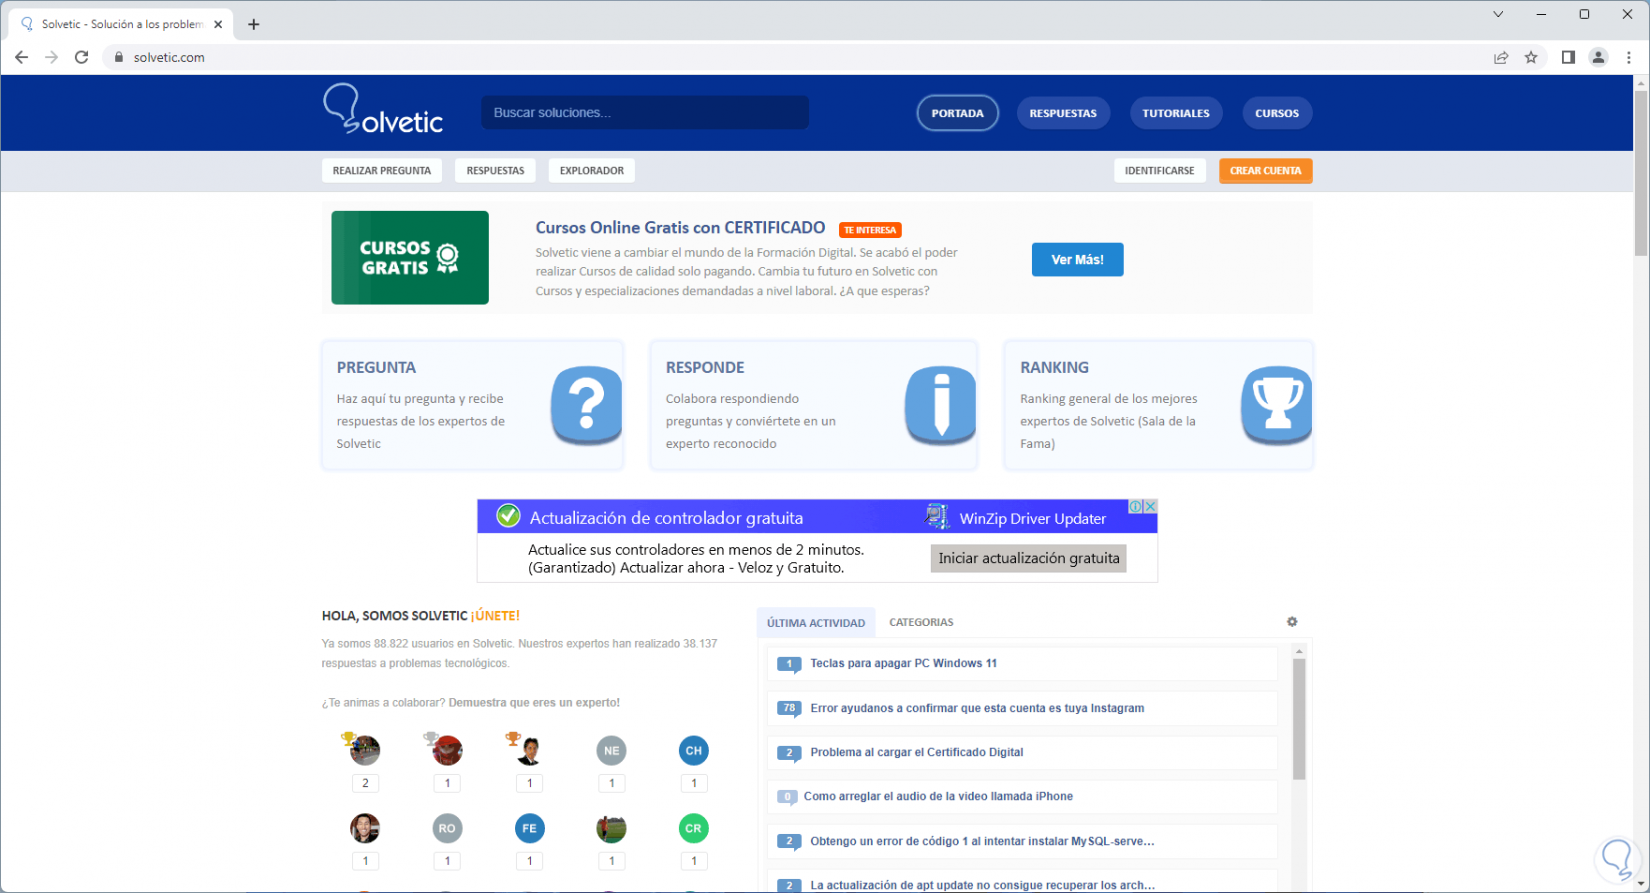
Refresh the website to validate that it works:
2 Edit Hosts file
In most operating systems there is a protected file called hosts, this is a plain text file with which it is possible to associate host names with specific IP addresses, thus when entering a web address in any browser, the system will look in the hosts file in order to check if the basket IP address is linked to the domain name, in case the IP is not in the hosts file, the system will look for that IP address using the DNS servers.
Step 1
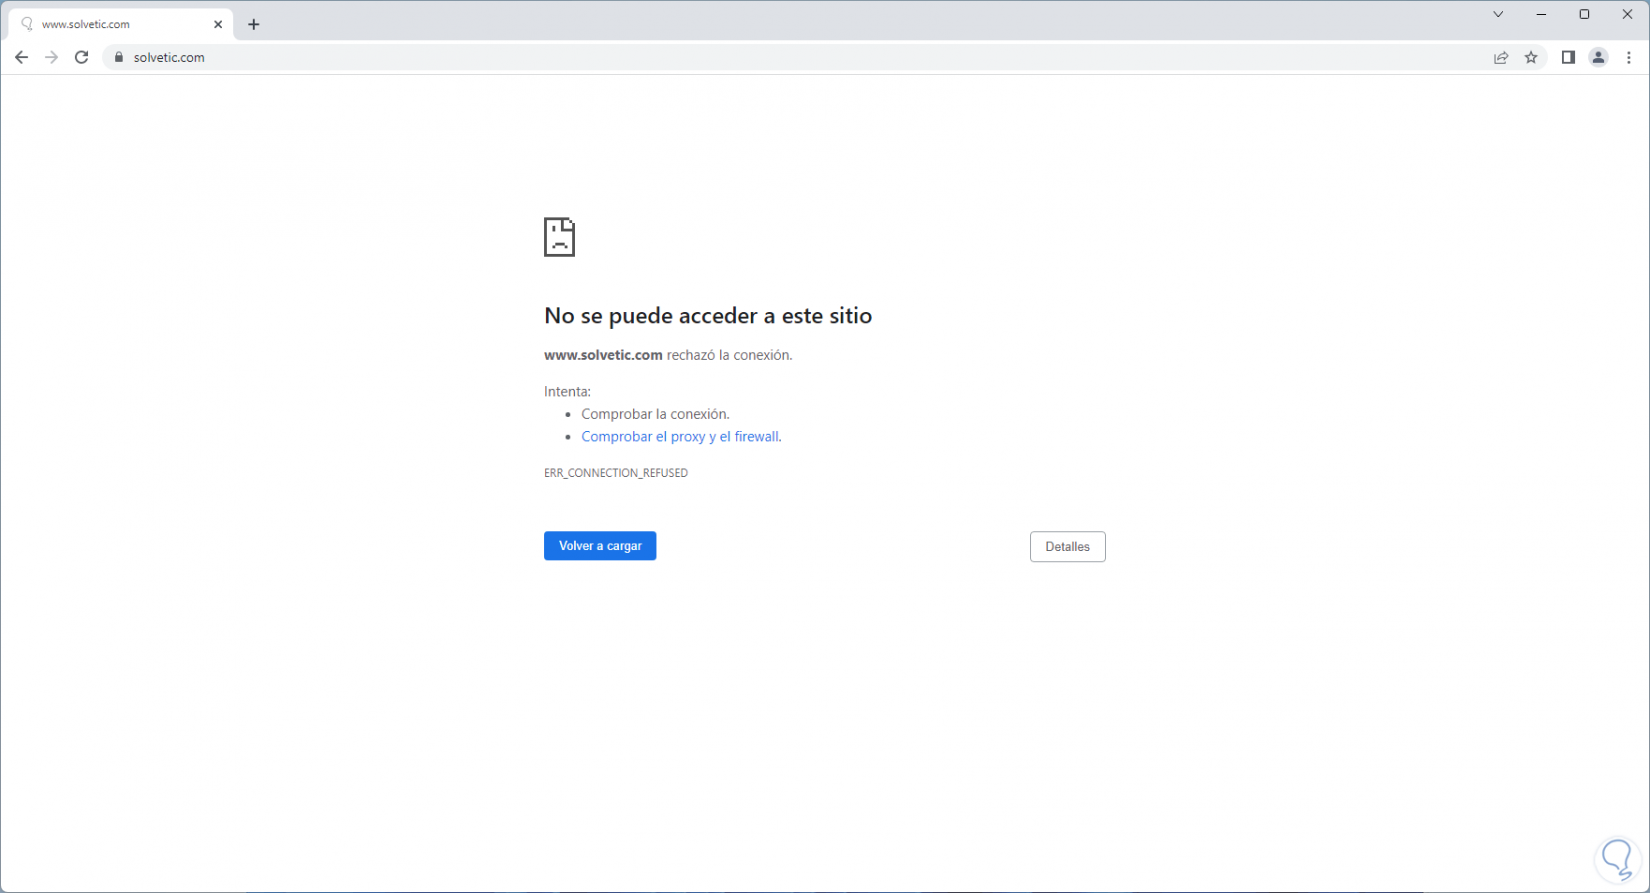
In some cases, access to a website can be blocked in the hosts file, which means that this may be the cause of the error in question, to validate it we open a browser to check the error:
Step 2
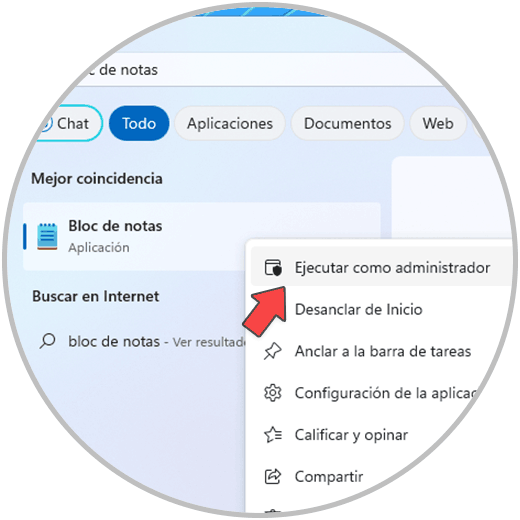
Open Notepad as administrator:
Step 3
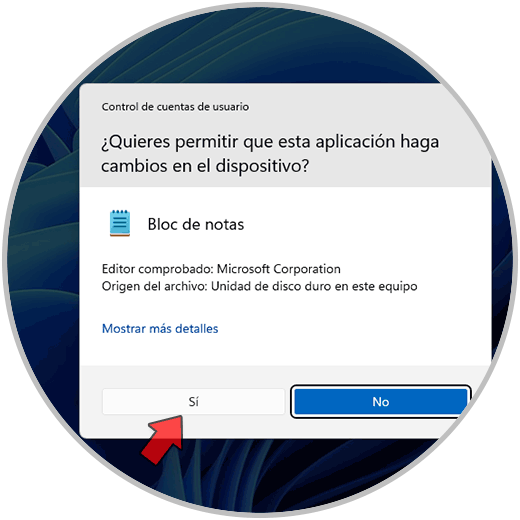
We accept UAC permissions:
Step 4
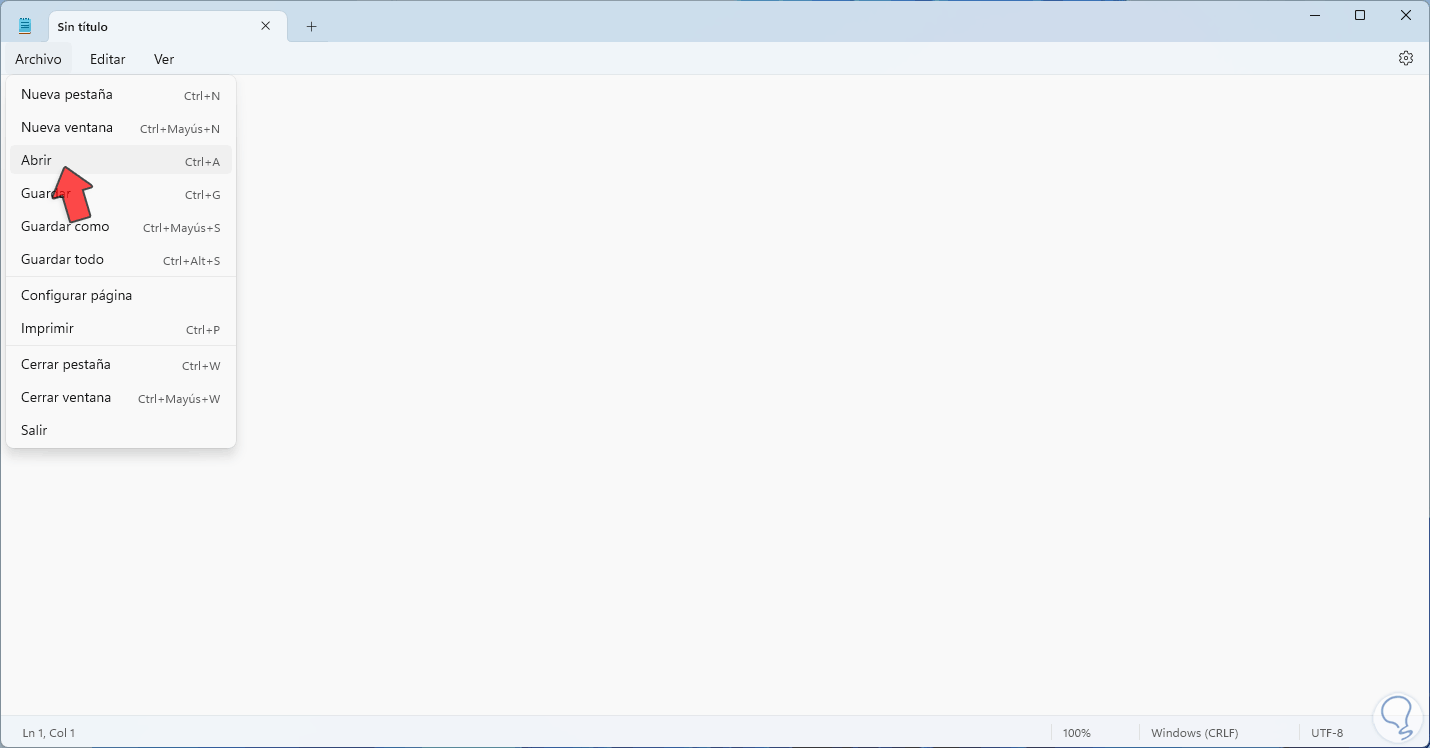
Now we will go to the "File - Open" menu:
step 5
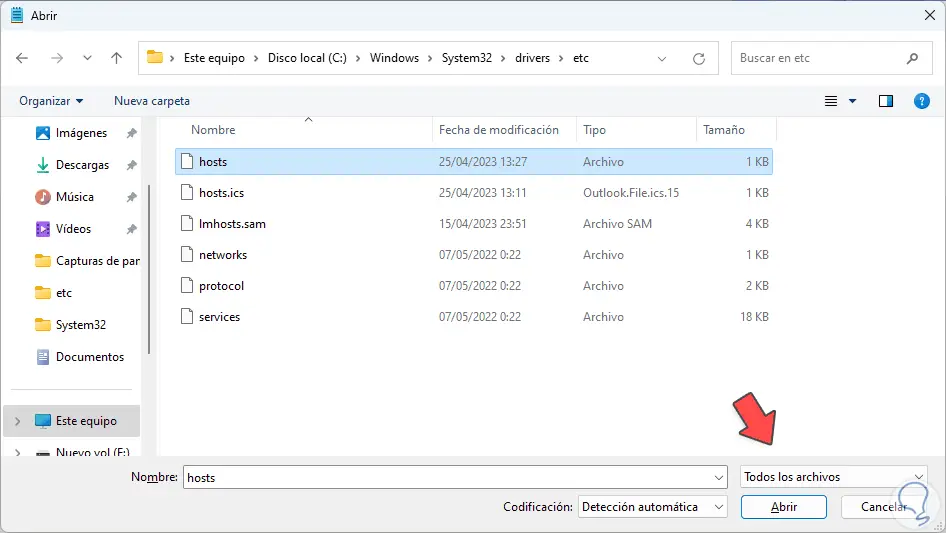
Let's go to the route:
C:\Windows\System32\drivers\etc
step 6
We set "All files" and select to open the hosts file:
step 7
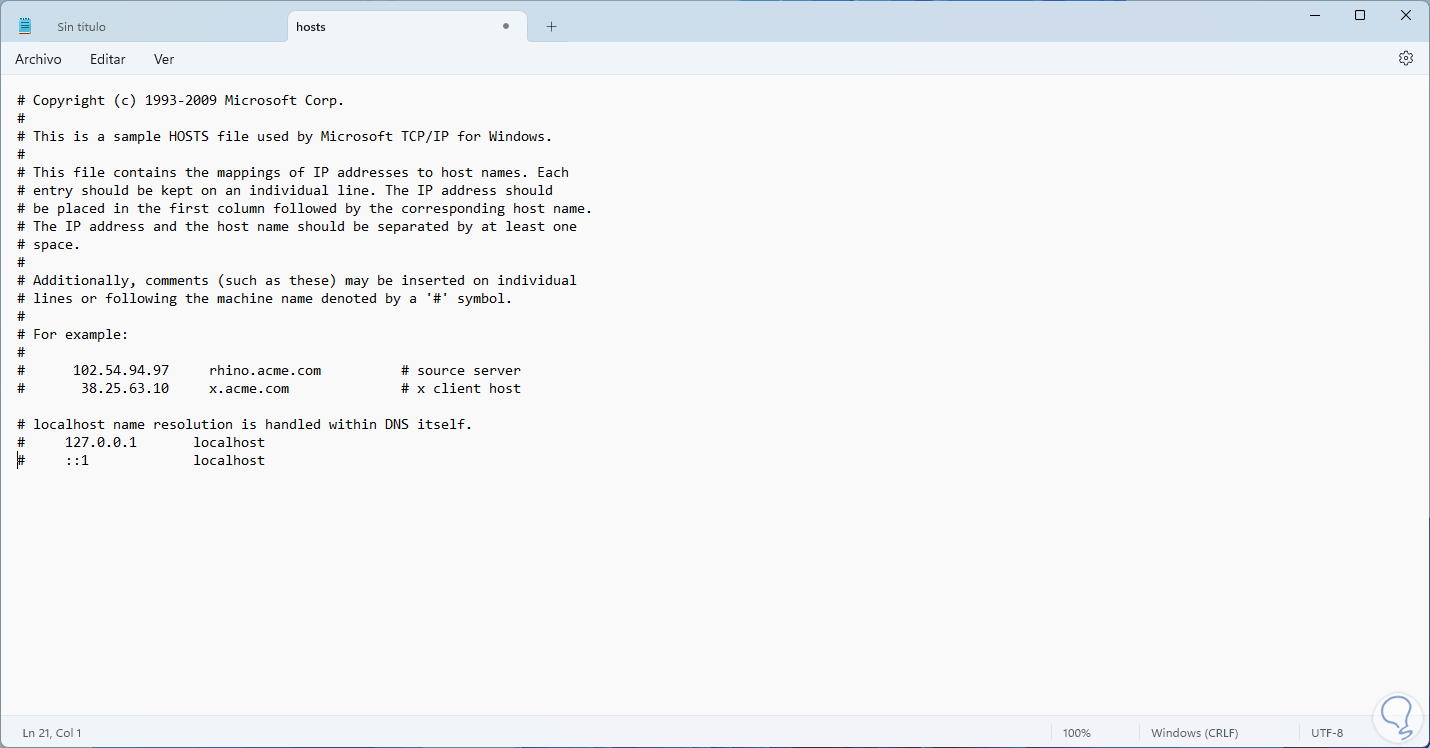
We will see the content of the file:

step 8
There we can find the page that is generating an error, we must delete the line that contains the syntax:
127.0.0.1 (website)
step 9
127.0.01 is an IP that is associated with the local computer and with it it will make possible the communication of network applications with local services that are executed locally.
step 10
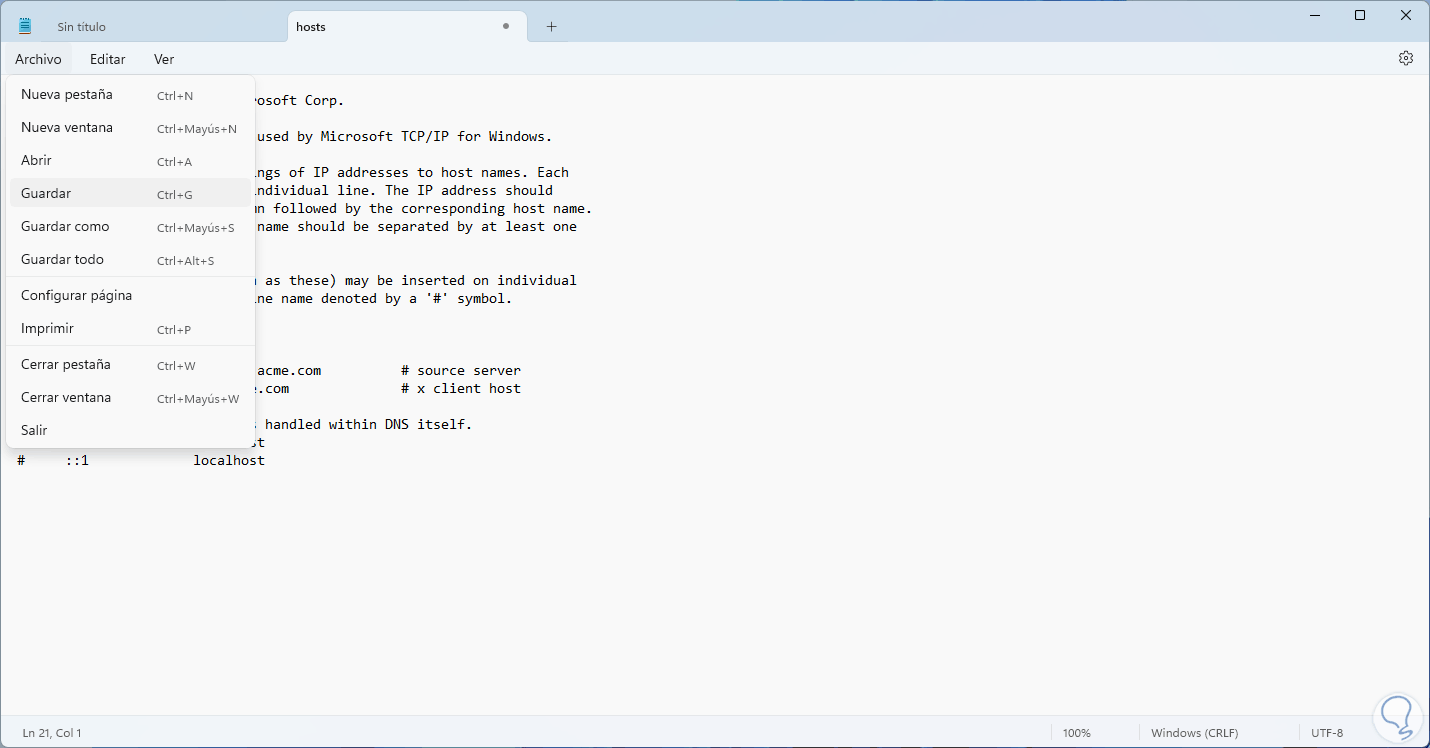
Apply the changes:
step 11
Check that the website opens:

3 Clear DNS cache with CMD
Step 1
With this step we seek to empty the DNS cache that is hosted every time we visit a website, these are fragments that allow faster access in future accesses, we try to open the website to see the error:
Step 2
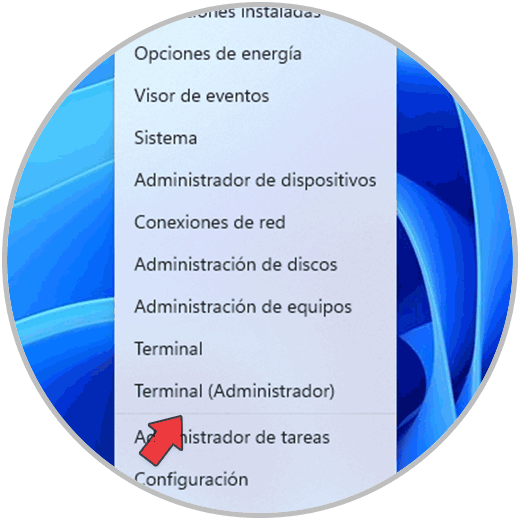
Open the terminal as administrator:
Step 3
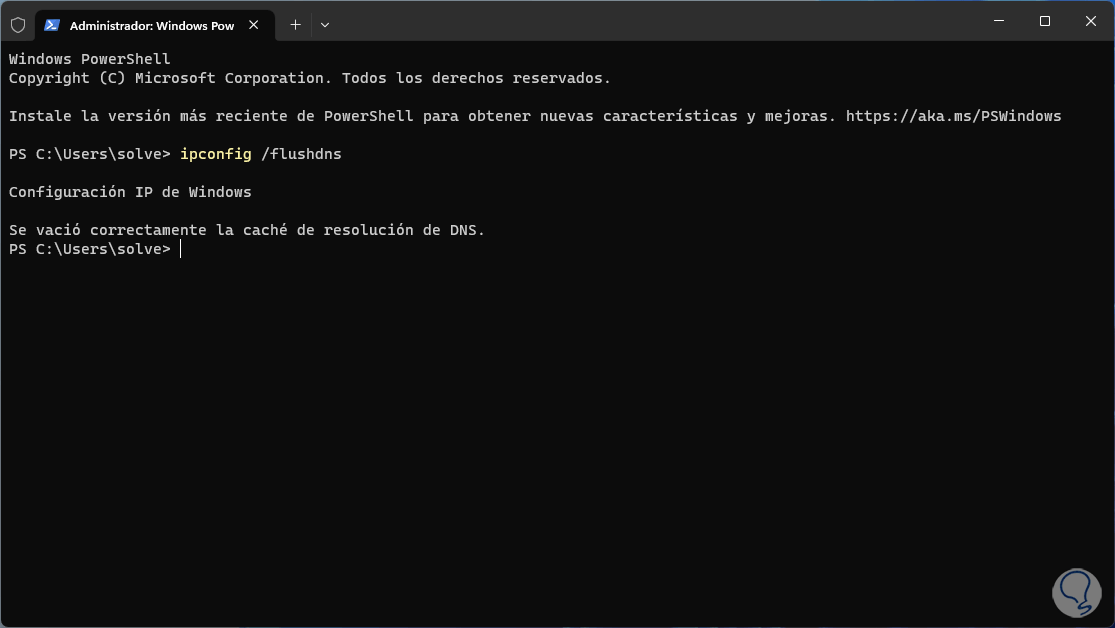
We execute:
ipconfig /flusdns
Step 4
The cache will be cleared locally:
step 5
Verify that the website works by updating it:

4 Clear Chrome DNS Cache
Step 1
This step applies when the error is visible in Google Chrome:
Step 2
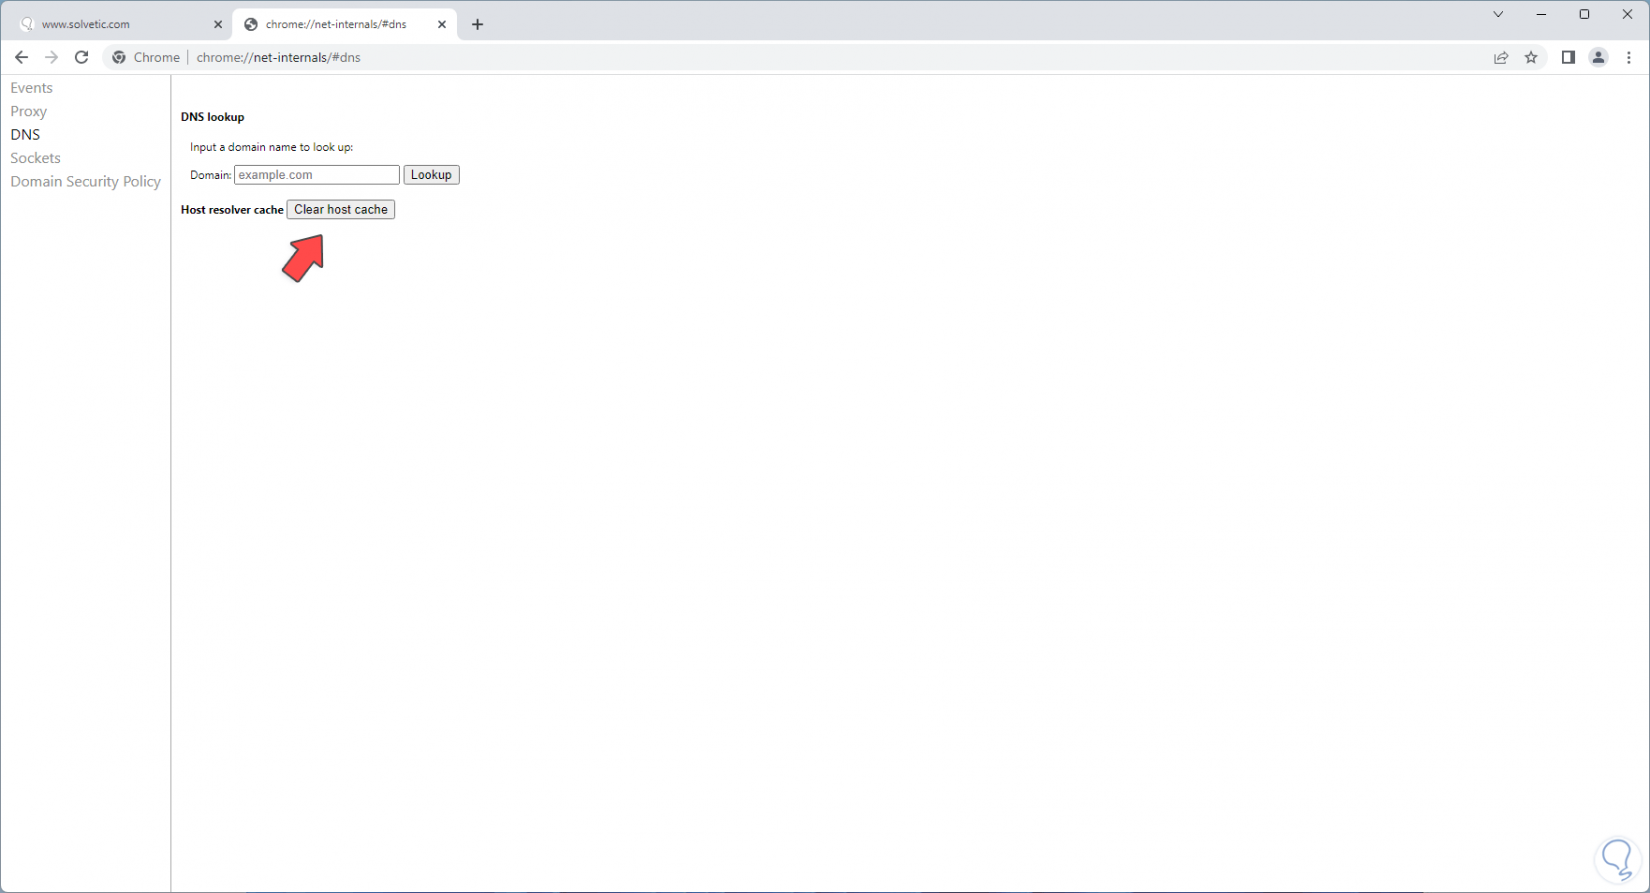
We open a new tab and there we enter:
chrome://net-internals/#dns
Step 3
We click on "Clear host cache" and then refresh the page to see what it loads:

These steps are functional to help correct this error so that you can open the content of the website and perform the required tasks..