Linux is one of the most dynamic and scalable operating systems because being open source lends itself to developing many other operating systems and also so that thousands of applications can be used and implemented optimally..
Some of the distributions of Linux are focused on an aspect of each user and therefore we find distributions for developers, for scientists, for players, etc., where each of them has the necessary services for this purpose. This is why on this occasion TechnoWikis will talk about AryaLinux which is a distribution specifically for Linux-based desktop From Scratch.
What is AryaLinux
This AryaLinux system is composed of development scripts which can be used to build a complete and comprehensive GNU / Linux system by taking its available source code for free. These compilation scripts have been designed based on the instructions provided in the LFS and BLFS libraries.
AryaLinux is available in two environments that are Mate and XFCE and is fully compatible with the i686 (Intel 32 bit) and x86_64 (Intel 64 bit) platform which helps it be distributed more globally and is available to more users because most current distributions are only available in 64-bit versions..
In addition to the basic Mate desktop environment, AryaLinux includes applications for Office productivity, simple graphics packages, network utilities and browsers, as well as system tools which make it a great work solution, but we are in the ability to install many more utilities using ALPS (AryaLinux Packaging System) in AryaLinux.
AryaLinux 1.0 is currently released, which is the first compilation version from Gnome Spin and is also the first version to be merged with the new version control system
This edition of AryaLinux offers us features like
- Gnome 3.28 desktop environment is included
- It has a new set of installer scripts of alps packages rewritten from scratch for better functionality
- Application packages and libraries such as gcc, glibc, vlc, libreoffice, Gnome desktop, Firefox, Transmission, Rhythmbox and Chromium have been updated
- Support for flatpak applications
- The dracut command has replaced initrd
- New options in the compilation script
- ALPS is based on Python 3.x
- The default browser in this version is Chromium
- Compatibility with Beta editions
- New set of wallpapers and themes specifically created for the Gnome desktop environment
This version of AryaLinux has been launched on July 2, 2018 and its free download is available at the following link.
AryaLinux
Now we will see how to install this distribution of Linux and know in depth its benefits.
1. How to prepare the equipment to install AryaLinux
Step 1
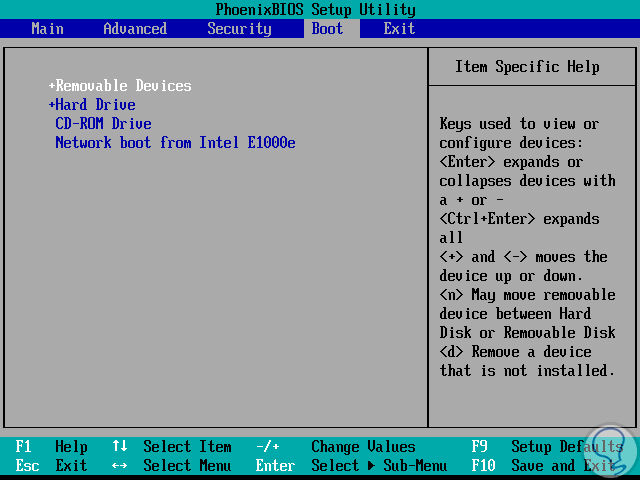
Once we have downloaded the ISO image of AryaLinux, we will burn it to a bootable DVD or USB for its respective installation. After this, we go to the computer where it has to be installed and there we access the BIOS or UEFI to define where this image will start:
Step 2
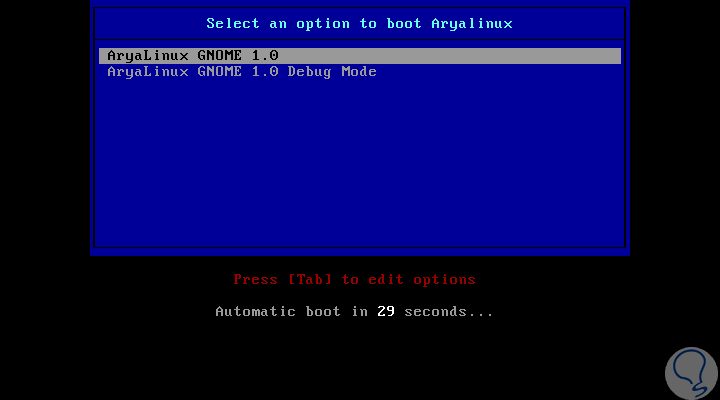
Once this is defined, we can start the installation process which will give us the following initial window. There we have two options to use:
AryaLinux GNOME 1.0
With this option we directly access the AyraLinux test environment
AryaLinux GNOME 1.0 Debug Mode
By selecting this option we execute the problem correction mode to rule out any failure with the system.
Step 3
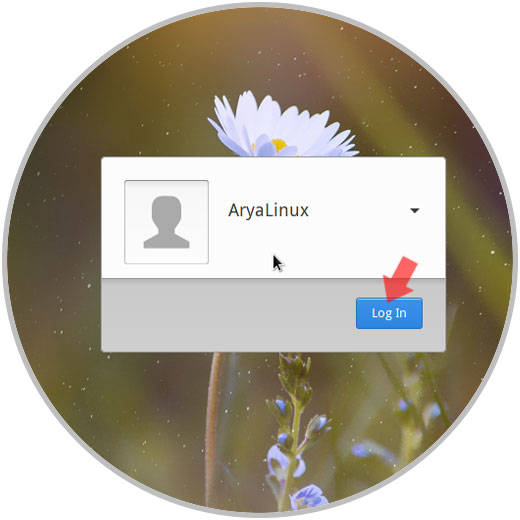
By selecting the first option we will be redirected to the following. There we click on the Log In button to access the AyraLinux test environment.
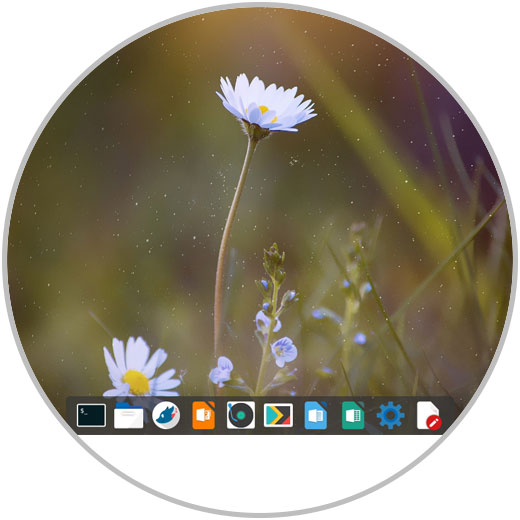
Here we can know their applications, specifications and others before proceeding with any local installation. If we choose to test the system, everything we do will be deleted once the session is closed..
2. How to install the AryaLinux 1.0 Arayna operating system
Step 1
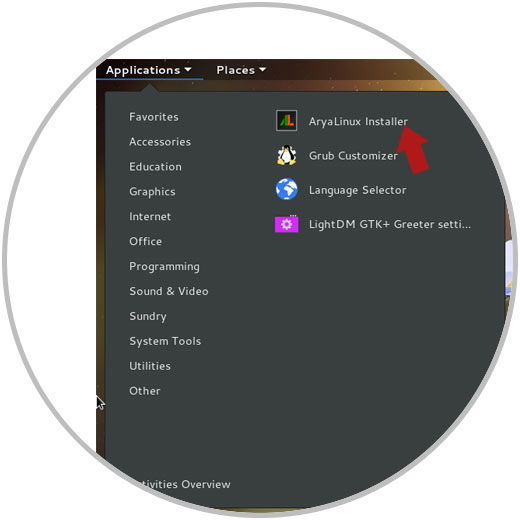
Now, to start this process, click on the Applications / Other menu and select the AyraLinux Installer option:
Step 2
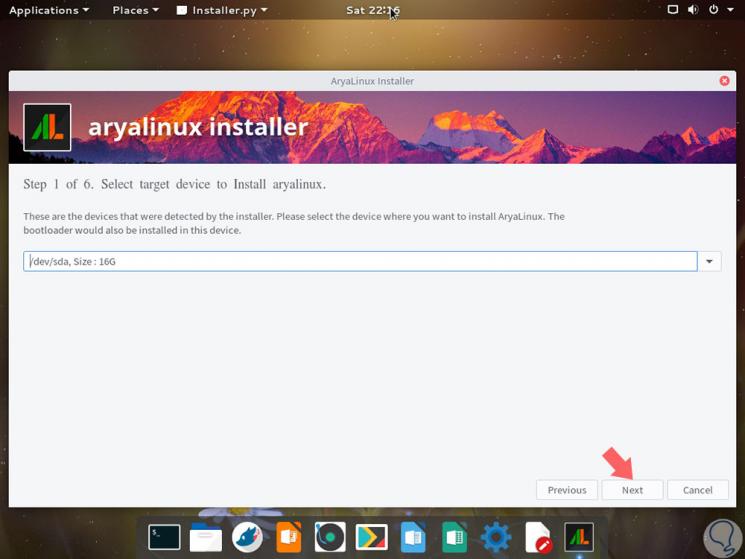
Clicking on this wizard will display the following window where we will select the hard disk drive where AyraLinux is to be installed. Click on the Next button
Step 3
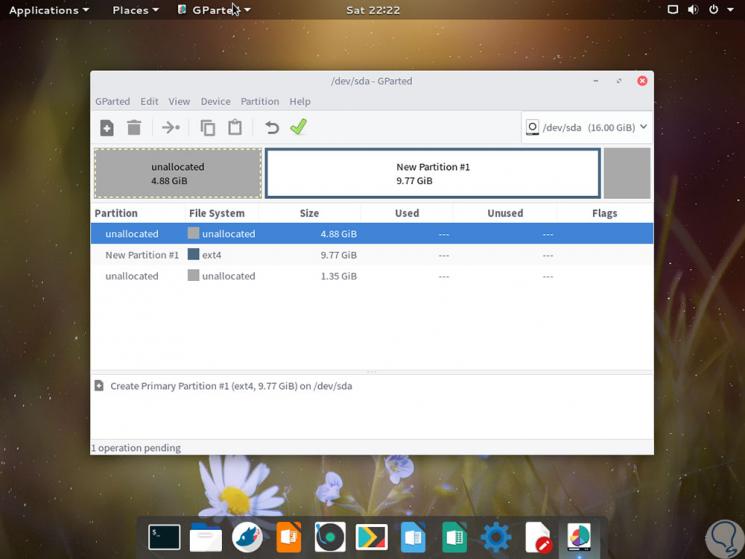
At this point we must take into account the following, AyraLinux must have at least one partition and have separate partitions for / home, to achieve this partition we can use GParted which is included in the system.
Step 4
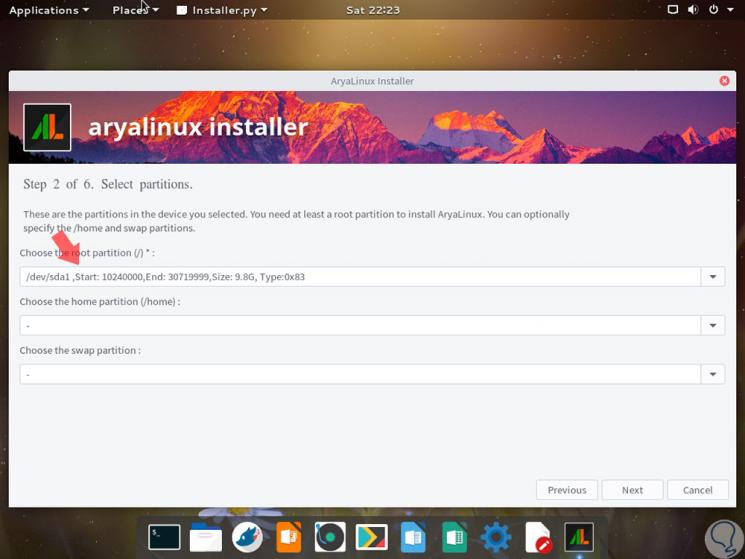
Once the partition is created, we can select the path / dev / sda1 from the field menu associated with the root partition. Click on "Next" again
Step 5
We must enter the user details, password and team name:
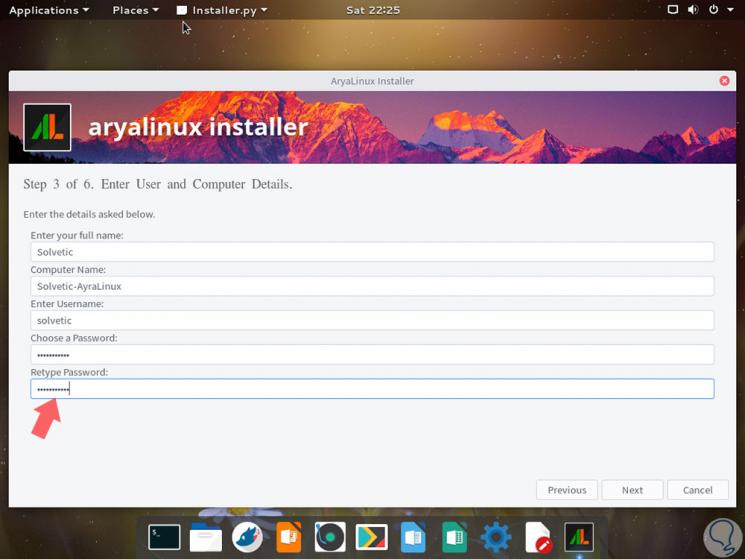
Step 6
In the next window we will enter the administrator password. Click on "Next" again
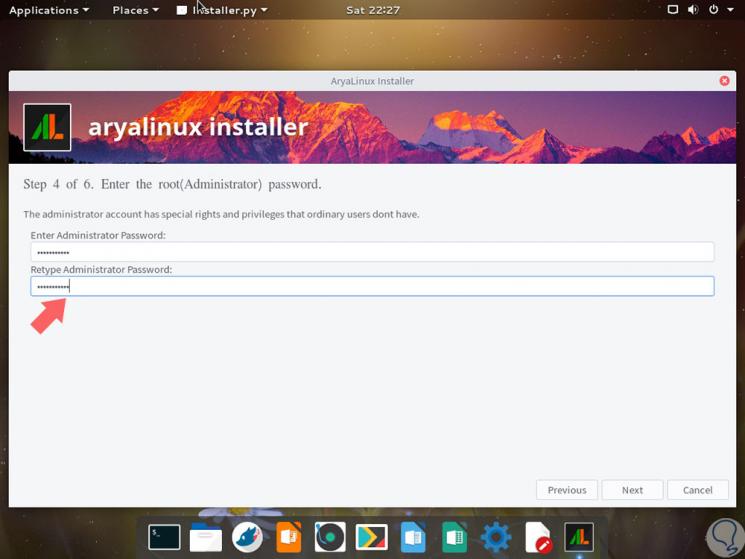
Step 7
Now we will define our geographical location and the keyboard language:
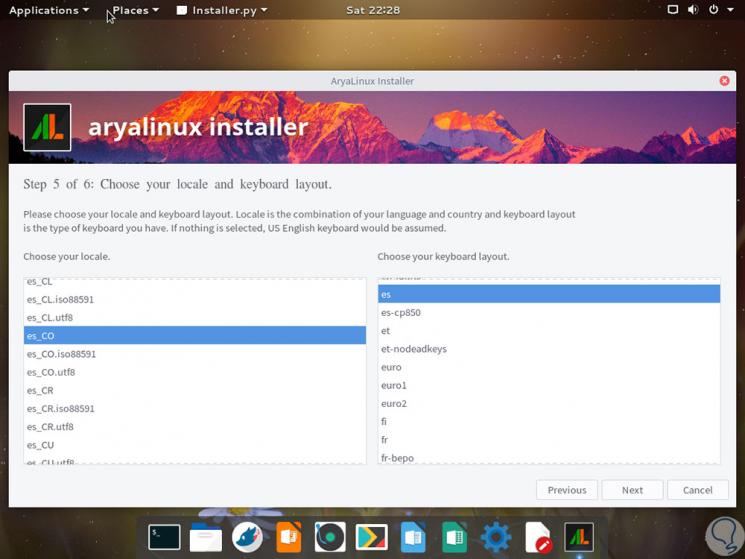
Step 8
Later we select the time zone. Click on "Next"
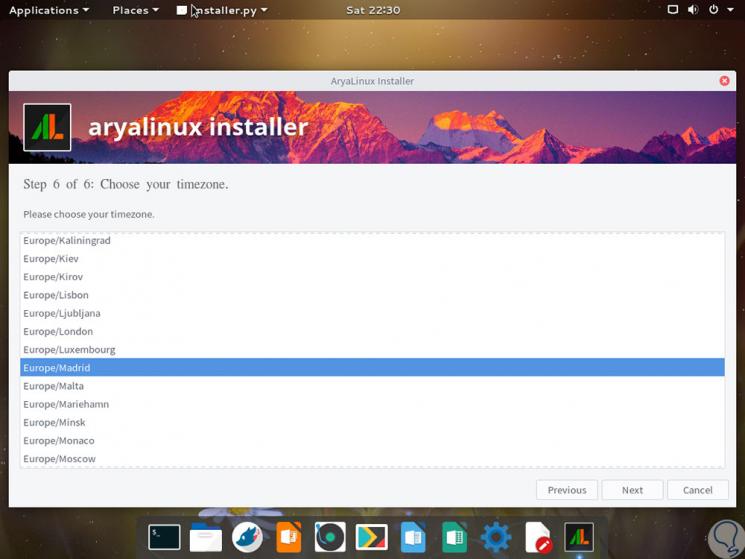
Step 9
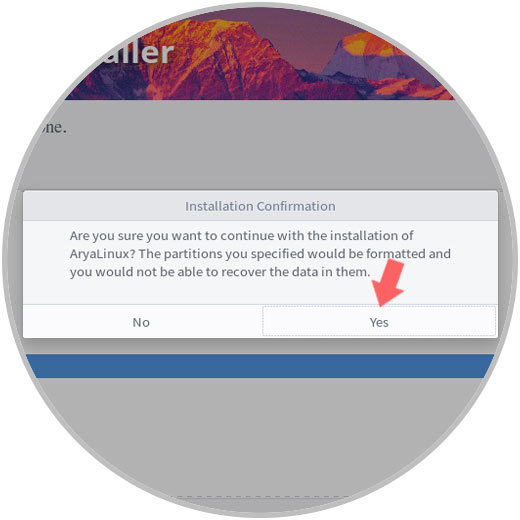
Now we will see the following message, There we click on the "Yes" button
Step 10
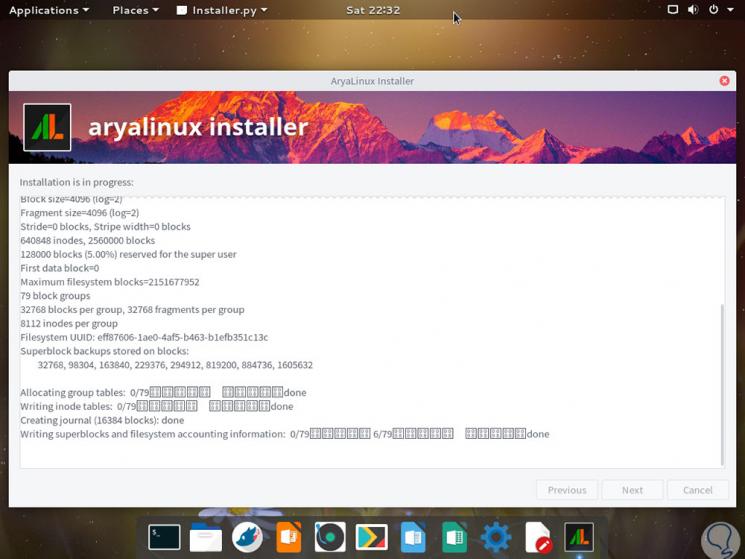
This is how we will continue with the installation of AyraLinux:
Step 11
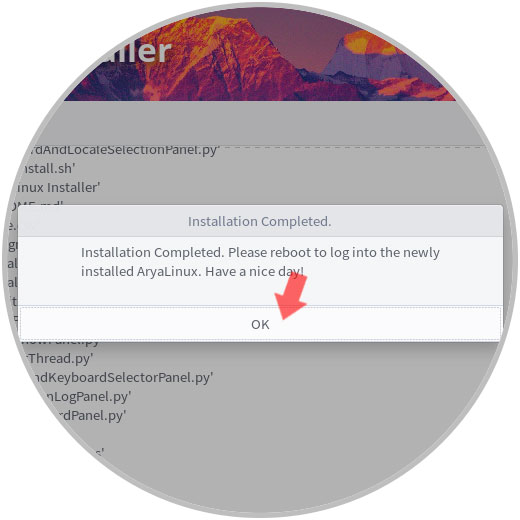
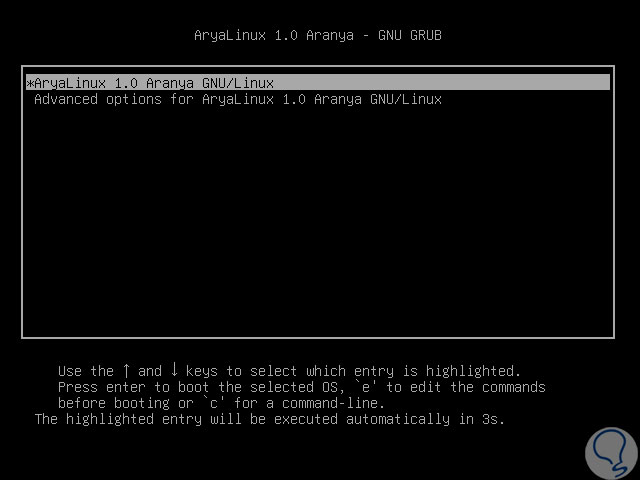
Once this process is finished, we will see the following message. Click on the "OK" button, the system will restart and we must remove the USB drive or DVD with the ISO image of AryaLinux, and there we will select our AyraLinux system from the GRUB or let this process be done automatically:
Step 12
We access the login window where we will enter the username and password created above and we can access AyraLinux to see details of it:
Thus we will have logged in to AyraLinux to get the maximum benefit from each of its functionalities.