Security should always be one of the premises on which administrators, management and support personnel and, in general, all users of any current operating system should work due to the multiple threats that are present in the network..
In the case of Linux distributions, most of them have the advanced tools to apply a filter to the network packets both at the level of network packet control processing in entry, displacement, control and exit of the stack of networks within the kernel of the system used, therefore, starting with kernel 2.4, the iptables were introduced, which are also called netfilter and these have a higher level of security and practical functionalities for system protection.
iptables is responsible for managing IPv4 filtering while ip6tables handles IPv6 filtering on current networks.
TechnoWikis will analyze how iptables works and some of the most practical commands we can take from it..
1. Filtering packages in Linux
The kernel of the Linux distributions makes use of the Netfilter tool to carry out the process of filtering packages, and thereby carrying out the tasks that these are received or stopped.
Rules built into Netfilter
Netfilter is incorporated by default in the Linux kernel and has three tables or lists of rules integrated as follows:
- filter: Refers to the default table designed for package management.
- nat: Its function is to alter packets that have been created in a new connection being used primarily by NAT.
- Mangrove: Its use applies when specific network packets must be altered.
Now, each table has a group of built-in chains that are related to the actions that can be carried out by netfilter, these are:
Rules for filter tables
The built-in chains for the filter table are:
- INPUT: It is related to the packages that have been destined to the host.
- OUTPUT: This works on the network packets that have been generated locally.
- FORWARD: Associates packets that have been routed through the main host.
Rules for nat tables
The built-in strings for the nat table are:
- PREROUTING: Its function is to alter network packets as soon as they arrive.
- OUTPUT: It has been designed to alter network packets that are created locally and is activated before they are sent.
- POSTROUTING: Created to alter packages before being sent globally.
Rules for mangrove tables
The built-in chains for the mangrove table are:
- INPUT: Designed to modify the network packets destined for the main host.
- OUTPUT: Created to alter locally created network packets and works before they are sent.
- FORWARD: Alters packets that have been routed through the main host.
- PREROUTING: Your task is to modify the packets that are entering before they are routed.
- POSTROUTING: Alters the network packets before the sending process is carried out.
Each network packet received or sent from the Linux operating system is always subject to at least one table. Now, let's understand some of the most useful commands we can use with iptables.
2. Display the firewall status
Step 1
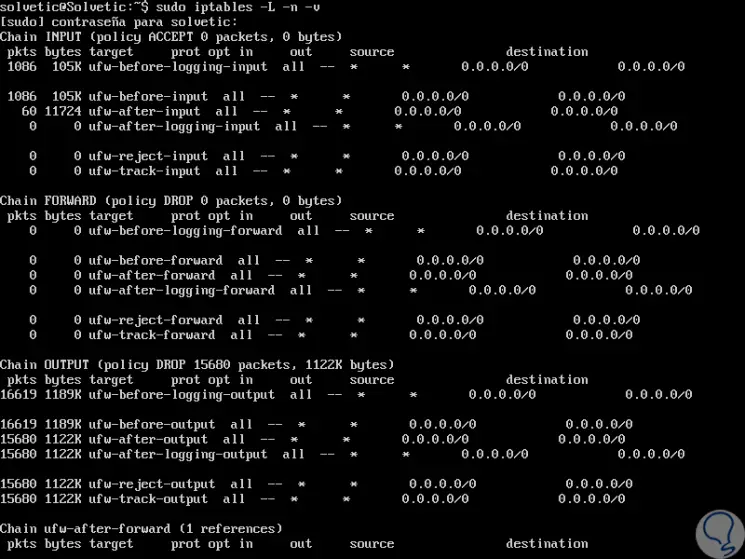
To know the current state of the firewall, we execute the following line:
sudo iptables -L -n -v
Step 2
There we can validate each chain with their respective levels of managed packages, the parameters used in this command are:
-L
Display the list rules.
-v
It generates detailed information such as the interface name, more rule options, plus packet and byte counters are also listed, with suffix 'K', 'M' or 'G' for options of 1000, 1,000,000 and 1,000,000,000, respectively .
-n
Display the IP address and port in numerical format.
Step 3
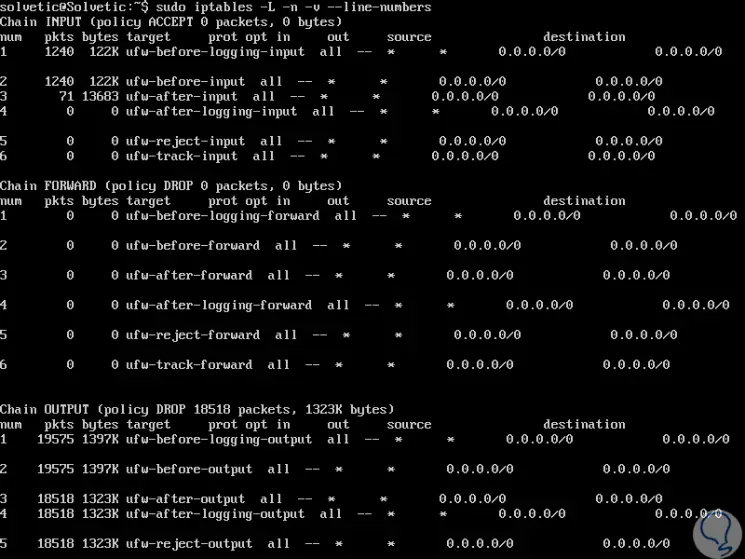
If you want to see this result with number of lines we can execute the following:
iptables -n -L -v --line-numbers
3. Stop, restart or start iptables on Linux
Step 1
The main commands to manage iptables tasks at the start or stop level are:
service iptables stop service iptables start service iptables restart
Step 2
It will also be possible to use the iptables command to stop the firewall and eliminate all the rules like this:
iptables -F iptables -X iptables -t nat -F iptables -t nat -X iptables -t mangle -F iptables -t mangle -X iptables -P INPUT ACCEPT iptables -P OUTPUT ACCEPT iptables -P FORWARD ACCEPT
Step 3
The defined parameters are:
-F
Eliminate all the rules.
-t
table_name: Select the table (called nat or mangle) and delete or discard the rules.
-P
Set the default policy such as DROP, REJECT or ACCEPT.
4. Add new firewall rules in Linux
Step 1
One of the most practical tasks of iptables is to create certain rules for the correct management of the packages, to insert one or more rules in the selected chain we will use the following syntax where you must first discover the line numbers:
iptables -L INPUT -n --line-numbers
Step 2
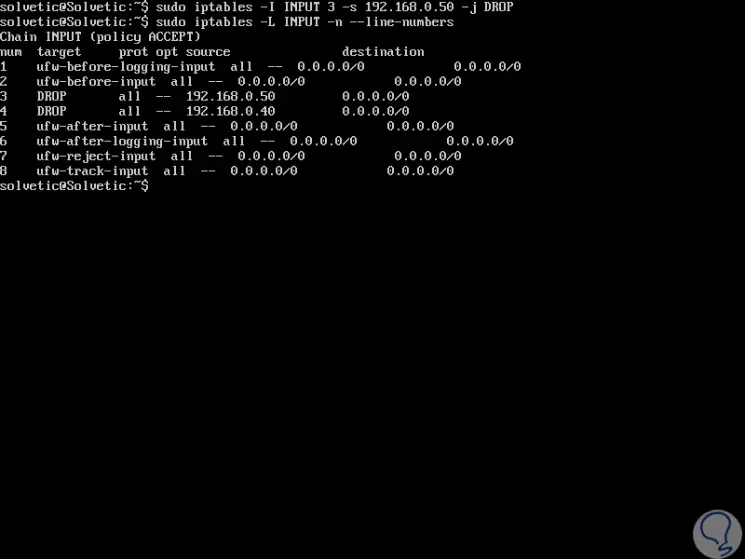
For example, we will add the following rule:
iptables -I INPUT 2 -s 192.168.0.50 -j DROP
Step 3
Then, we will see the rules using the command indicated above. There we see that the rule created has been added on line 3 as indicated.
5. Remove a firewall rule in Linux
Step 1
First, we must deploy the rules that are created to determine exactly which one should be eliminated, to obtain this information we have the following options:
iptables -L INPUT -n --line-numbers iptables -L OUTPUT -n --line-numbers iptables -L OUTPUT -n --line-numbers | less
Step 2
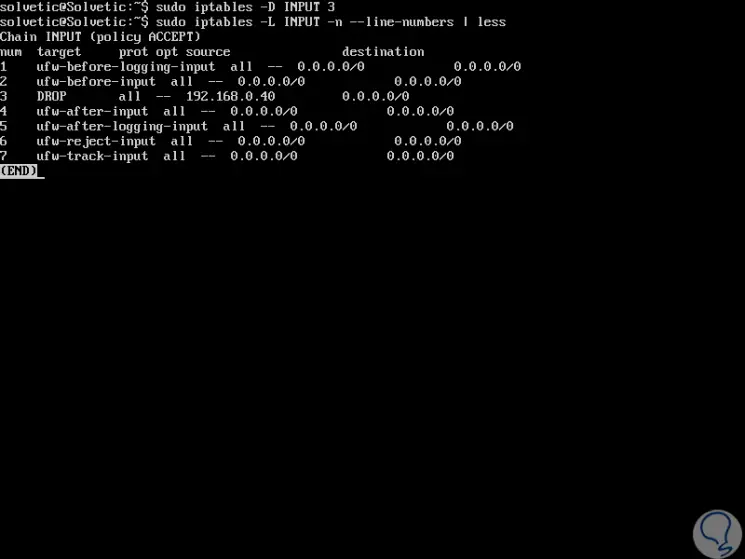
Now, to delete rule 3 created earlier, let's execute the following:
iptables -D INPUT 3
6. Store and restore iptables rules on Linux

Step 1
Every time we make any changes to the iptables rules we must proceed to save those changes, for this it is enough to execute the following line:
iptables service knows
Step 2
We can restore in a simple way those rules that we have stored by executing the following:
service iptables restart
7. Set the default rules in Linux
With iptables it will be possible to allow or deny the default rules to be applied to the entire system as follows.
Step 1
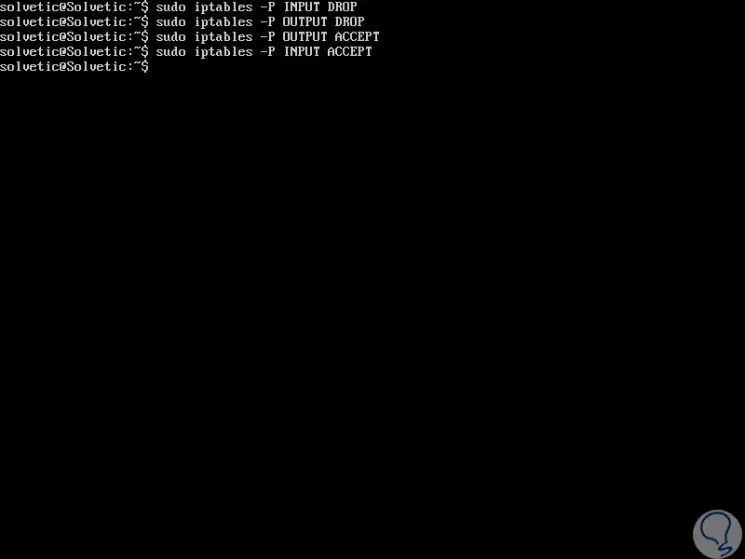
To eliminate all traffic we execute:
iptables -P INPUT DROP iptables -P OUTPUT DROP iptables -P FORWARD DROP
Step 2
To eliminate all incoming traffic:
iptables -P INPUT DROP iptables -P FORWARD DROP iptables -P OUTPUT ACCEPT iptables -A INPUT -m state - NEW, ESTABLISHED -j ACCEPT
8. Block an IP address in Linux

With iptables it will be possible to block a particular IP address to prevent it from accessing network packets to the system. For this task we have the following options:
iptables -A INPUT -s 192.168.0.14 -j DROP (specific IP) iptables -A INPUT -s 192.168.0.0/24 -j DROP (Address range)
9. Block incoming port requests on Linux
Step 1
Another typical security task is to restrict packet access through a specific port, with iptables we have the following options:
Block all actions
Block all actions by a specific port by executing:
iptables -A INPUT -p tcp --dport 80 -j DROP iptables -A INPUT -i eth1 -p tcp --dport 80 -j DROP
Block a port
Block a port for a specific IP address:
iptables -A INPUT -p tcp -s 192.168.0.14 --dport 80 -j DROP iptables -A INPUT -i eth1 -p tcp -s 192.168.0.1/24 --dport 80 -j DROP
Block outgoing IP address
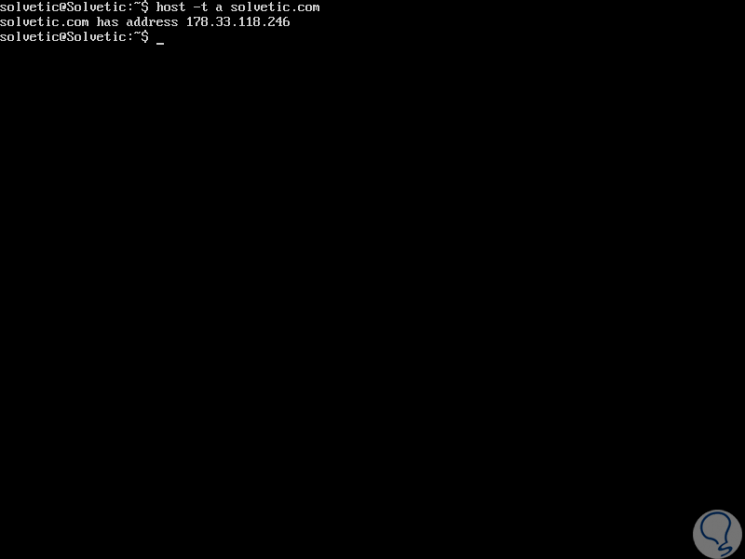
It is possible to block outbound traffic to a specific host or domain, for example TechnoWikis.com, for this we execute the following:
host -ta solvetic.com
Step 2
Now, with this IP address we proceed to blocking:
iptables -A OUTPUT -d 178.33.118.246 -j DROP
Step 3
It will also be possible to block the entire domain like this:
iptables -A OUTPUT -p tcp -d www.solvetic.com -j DROP
10. Support or not network traffic using the MAC address in Linux

Another of the possibilities to use is to restrict or allow the use of packets based on the MAC address of the selected device. For this we will use one of the following options:
iptables -A INPUT -m mac --mac-source 00: 2F: EF: 85: 04: 09 -j DROP (Denies traffic from the selected MAC address) iptables -A INPUT -p tcp --destination-port 22 -m mac --mac-source 00: 2F: EF: 85: 04: 09 -j ACCEPT (Supports packets from the address indicated only by port 22)
11. Block or allow ICMP requests on Linux
The ICMP protocol (Internet Control Message Protocol), is a protocol developed to manage information related to equipment errors in local networks, so that with this protocol remote requests can be made to verify availability of a team and this in terms of security can become delicate.
Step 1
We can run the following lines to avoid ICMP requests on Linux:
iptables -A INPUT -p icmp --icmp-type echo-request -j DROP iptables -A INPUT -i eth1 -p icmp --icmp-type echo-request -j DROP
Step 2
Ping responses can also be limited to certain networks or hosts like this:
iptables -A INPUT -s 192.168.0.1/24 -p icmp --icmp-type echo-request -j ACCEPT
Step 3
We can accept only a limited type of ICMP requests like this:
iptables -A INPUT -p icmp --icmp-type echo-reply -j ACCEPT iptables -A INPUT -p icmp --icmp-type destination-unreachable -j ACCEPT iptables -A INPUT -p icmp --icmp-type time-exceeded -j ACCEPT
12. Open a range of ports and IP addresses in Linux
Step 1
This is useful if we need to enable a defined range of ports to perform administrative or program execution actions:
iptables -A INPUT -m state --state NEW -m tcp -p tcp --dport 9000: 9020 -j ACCEPT
Thus we have opened the range of ports 9000 to 9020 for TCP connections.
Step 2
Another alternative is to enable a range of IP addresses by establishing a specific port as well. There we have authorized this range to use port 80.
iptables -A INPUT -p tcp --destination-port 80 -m iprange --src-range 192.168.0.70-192.168.0.80 -j ACCEPT
13. Restrict the number of parallel connections to a server per client IP on Linux
Step 1
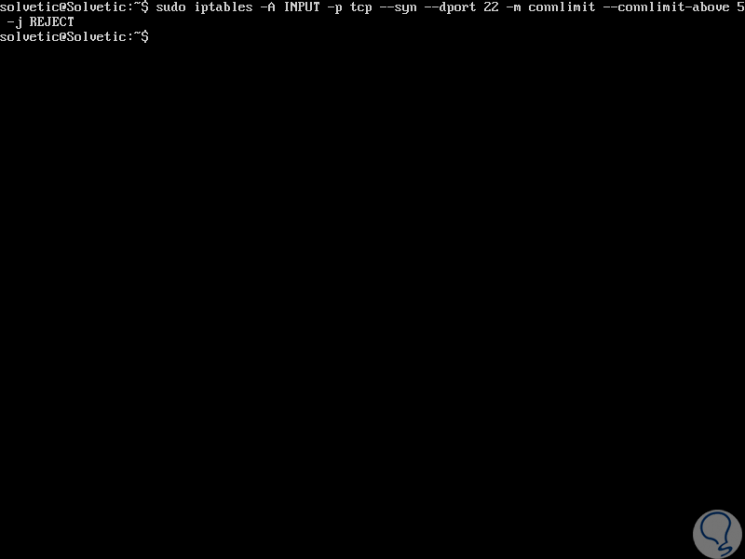
We can use the connlimit module to define these restrictions, for example, to allow 5 ssh connections per client, we enter the following:
iptables -A INPUT -p tcp --syn --dport 22 -m connlimit --connlimit-above 5 -j REJECT
Step 2
To restrict access by HTTP to 10:
iptables -p tcp --syn --dport 80 -m connlimit --connlimit-above 10 --connlimit-mask 24 -j DROP
Step 3
We have indicated the following:
- --connlimit-above 5: Matches if the number of existing connections is greater than 5.
- --connlimit-mask 24: They are the group hosts that use the prefix length. For IPv4, it must be a number between (included) 0 and 32.
14. Restrict the number of parallel connections to a server per client IP on Linux
Step 1
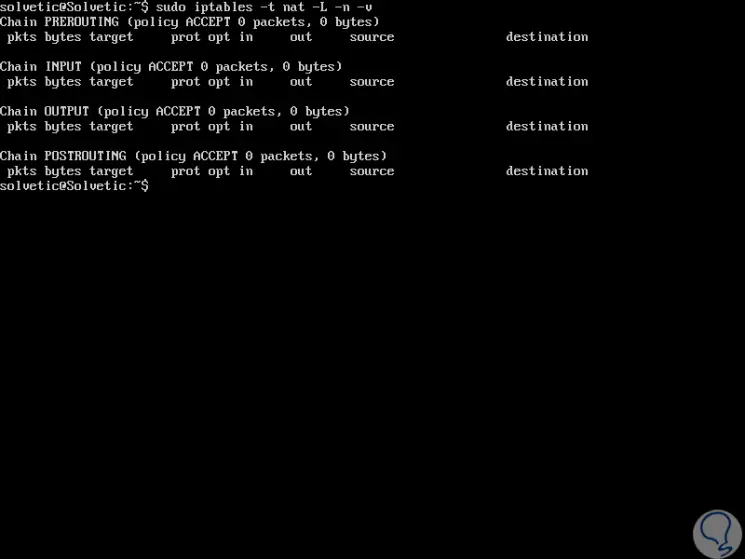
NAT (Network Address Translation) is a system to translate network addresses and thus facilitate navigation. To list these we will execute the following:
iptables -t nat -L -n -v
Step 2
It will be possible to see this result with their respective lines like this:
iptables -t nat -v -L -n --line-number
15. Clear NAT rules in Linux
Step 1
If we want to delete the established NAT rules we will execute the following:
iptables -t nat -v -L -n --line-number iptables -t nat -v -L PREROUTING -n --line-number iptables -t nat -v -L POSTROUTING -n --line-number
Step 2
To delete all the rules of "PREROUTING" we execute the following syntax:
iptables -t nat -D PREROUTING {Rule number} Step 3
To delete all the rules of "POSTROUTING" we execute:
iptables -t nat -D POSTROUTING {rule number}
16. Reset the package counters in Linux
First, we must execute the “iptables -L -n -v†command, which we saw earlier, to list the counters.
Step 1
To clear these counters, simply execute the following:
iptables -Z
Step 2
To reset the counters of only accesses we execute:
iptables -Z INPUT
17. Validate the firewall in Linux
Step 1
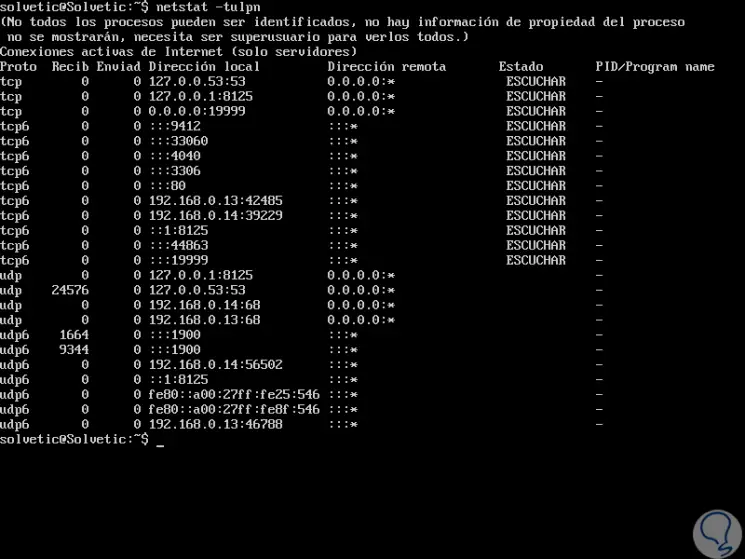
First, we must validate if the ports are open or not with the following command:
netstat -tulpn
Step 2
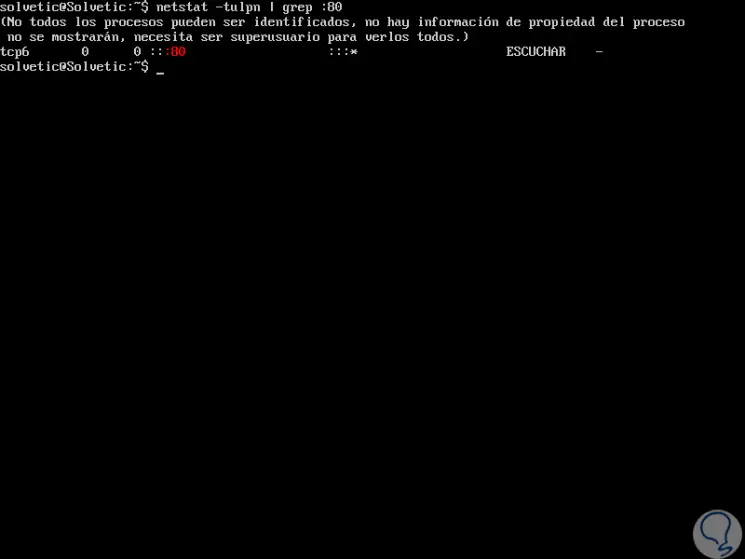
To validate a specific port we execute:
netstat -tulpn | grep: 80
Step 3
If the port is not open, we execute:
service httpd start
Step 4
Then we must ensure that iptables has access through that port:
iptables -L INPUT -v -n | grep 80
18. Allow loop access with iptables on Linux

The return loop access whose access is from IP 127.0.0.1 is important and should always be left active for administration and network management tasks. To enable it in iptables just run the following..
iptables -A INPUT -i lo -j ACCEPT iptables -A OUTPUT -o lo -j ACCEPT
19. Define new iptables strings in Linux
Step 1
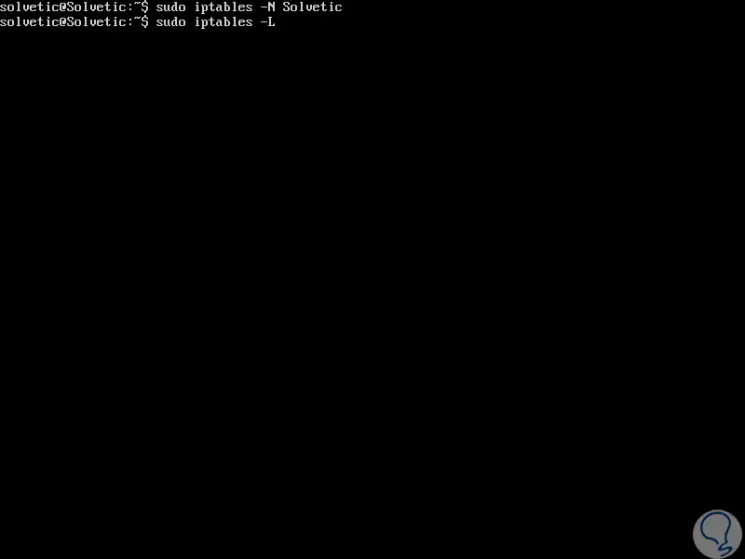
With iptables we have the possibility to define our own chain and store custom rules in it. To define a string, we execute the following:
iptables -N “String nameâ€
Step 2
Then we run "iptables -L" to list the iptables strings:
Step 3
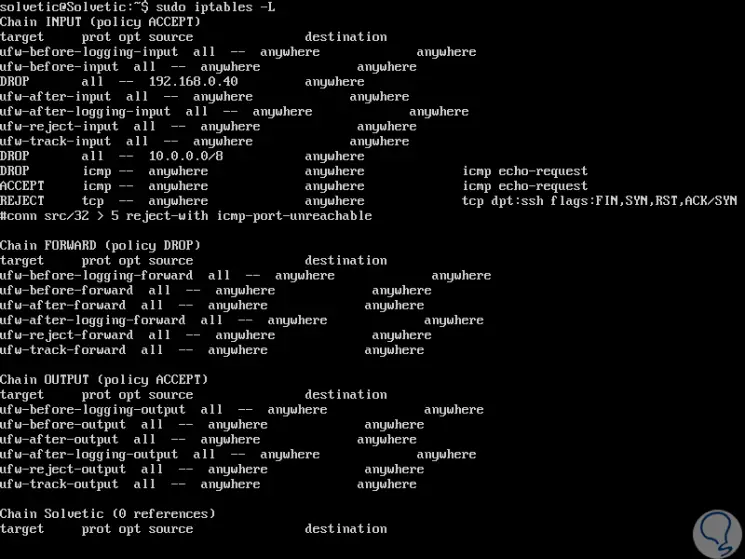
In the result we will see our chain created:
20. Clear the chains or firewall rules of iptables on Linux

To perform this deletion we must execute the following:
iptables -F
As we can see, iptables is a comprehensive solution to centrally manage various security aspects of Linux distributions to achieve improvements in everything related to privacy.