Security is a key piece in Linux systems since this fully covers everything we do as users at a personal level, at a service level and with the various applications and programs available. One of the most vulnerable forms in any Linux distribution is both incoming and outgoing network traffic because many of the threats in the network are present in this segment due to the high flow of data that comes and goes, to our advantage in Linux , in this case we will use Ubuntu, we have an essential tool to protect this type of traffic and it is Iptables..
Iptables is in charge of managing the packet filtering rules in the local network and this is achieved by configuring and controlling both incoming and outgoing network traffic, whether on servers or Linux client computers, this management is possible since Iptables analyzes each packet that is in the network traffic and based on the rules that are configured determines the action to be taken with that packet, whether or not it authorizes the equipment to continue.
Rules in Iptables
Rules in Iptables take criteria like:
- Source and destination IP addresses
When a packet is not reliable or does not pass the Iptables test, its IP address or IP ranges in case there are several will be blocked, this is redirected to NAT (Network Address Translation) so that traffic is redirected from there using behind interfaces network but preventing them from accessing our equipment.
Iptable Parameters
Iptables has some general parameters that are:
- -A (append): Adds a new rule to the end of an existing chain.
- -D (delete) – Allows you to remove an existing rule from a chain.
- -I (insert): Inserts a new rule within a specified position in a chain.
- -L (list): allows us to see all the rules of one or all the chains.
- -P (policy): Sets a default policy for a string.
- -F (flush): Flushes all rules from a chain.
- -N (new chain): is responsible for creating a new chain.
- -E (rename chain): Allows you to rename a chain.
- -s (source): Indicates the source IP address or range of IP addresses.
- -d (destination): Refers to the destination IP address or range of IP addresses.
- -p (protocol): tells us the network protocol to use TCP, UDP or ICMP.
- -m (match): Specifies an additional module to perform advanced matching.
Now we are going to see how to protect the traffic on our computers (servers / clients) through Iptables..
To stay up to date, remember to subscribe to our YouTube channel!
SUBSCRIBE ON YOUTUBE
How to use the Iptables firewall to protect traffic on Linux
Step 1
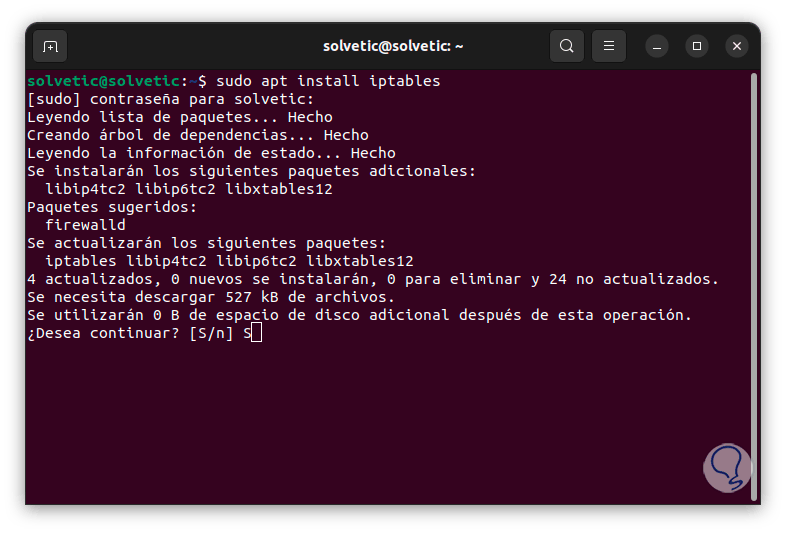
To begin we open the terminal and there we are going to install the Iptables packet filter manager using the following command:
sudo apt install iptables
Step 2
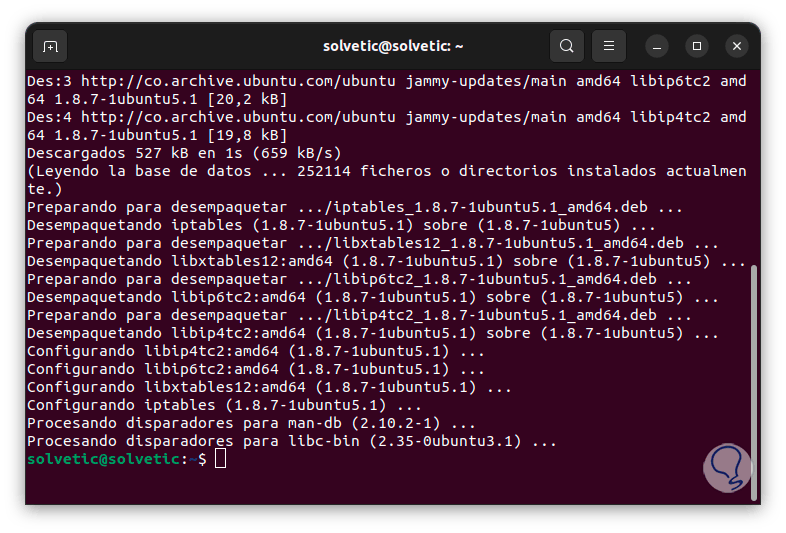
It will be necessary to enter the password and then confirm this process with the letter S:
Step 3
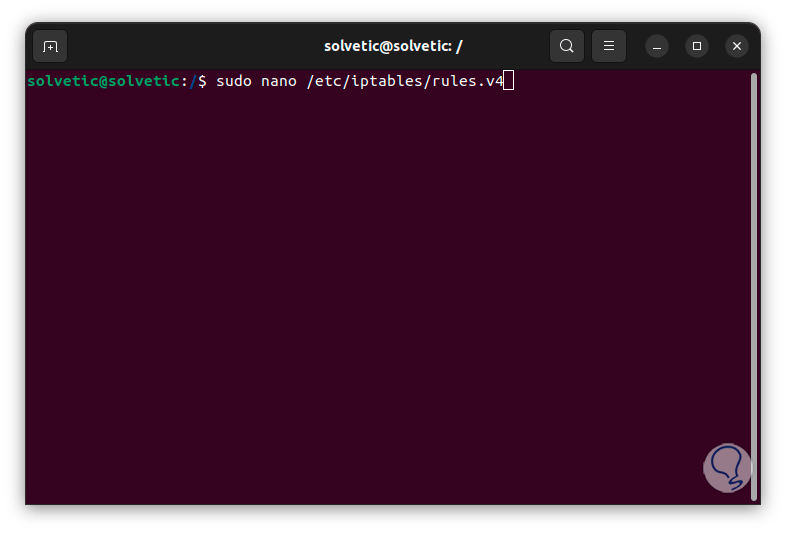
Once the utility has been installed, we are going to use an editor to access the IPv4 rules configuration file, in this case we execute the following command:
sudo nano /etc/iptables/rules.v4
Step 4
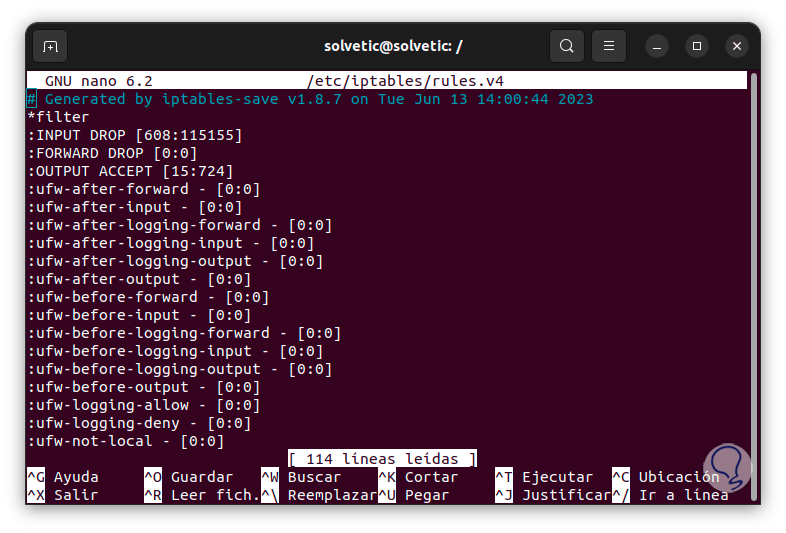
Press Enter and enter the password, in some cases we will already see some available content:
step 5
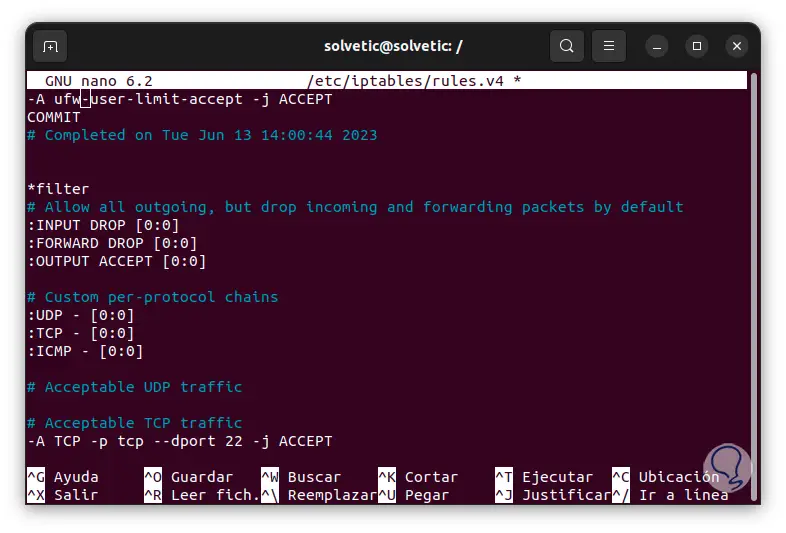
We are going to the final part of this file and there we are going to enter the following:
*filter # Allow all outgoing, but drop incoming and forwarding packets by default :INPUT DROP [0:0] :FORWARD DROP [0:0] :OUTPUT ACCEPT [0:0] # Custom per-protocol chains :UDP - [0 :0] :TCP - [0:0] :ICMP - [0:0] # Acceptable UDP traffic # Acceptable TCP traffic -A TCP -p tcp --dport 22 -j ACCEPT # Acceptable ICMP traffic # Boilerplate acceptance policy -A INPUT -m conntrack --ctstate ESTABLISHED,RELATED -j ACCEPT -A INPUT -i lo -j ACCEPT # Drop invalid packets -A INPUT -m conntrack --ctstate INVALID -j DROP # Pass traffic to protocol-specific chains ## Only allow new connections (established and related should already be handled) ## For TCP,additionally only allow new SYN packets since that is the only valid ## method for establishing a new TCP connection -A INPUT -p udp -m conntrack --ctstate NEW -j UDP -A INPUT -p tcp --syn -m conntrack - -ctstate NEW -j TCP -A INPUT -p icmp -m conntrack --ctstate NEW -j ICMP # Reject anything that's fallen through to this point ## Try to be protocol-specific w/ rejection message -A INPUT -p udp - j REJECT --reject-with icmp-port-unreachable -A INPUT -p tcp -j REJECT --reject-with tcp-reset -A INPUT -j REJECT --reject-with icmp-proto-unreachable # Commit the changes COMMIT *raw :PREROUTING ACCEPT [0:0] :OUTPUT ACCEPT [0:0] COMMIT *nat :PREROUTING ACCEPT [0:0] :INPUT ACCEPT [0:0] :OUTPUT ACCEPT [0:0] :POSTROUTING ACCEPT [0 :0] COMMIT *security :INPUT ACCEPT [0:0] :FORWARD ACCEPT [0:0] :OUTPUT ACCEPT [0:0] COMMIT *mangle :PREROUTING ACCEPT [0:0] :INPUT ACCEPT [0:0] :FORWARD ACCEPT [0:0] :OUTPUT ACCEPT [0:0] :POSTROUTING ACCEPT [0:0] COMMIT
step 6
With these lines we have added various permissions for the available protocols.
step 7
We save the changes using the following key combination:
Ctrl + O
We exit the editor using:
Ctrl + X
step 8
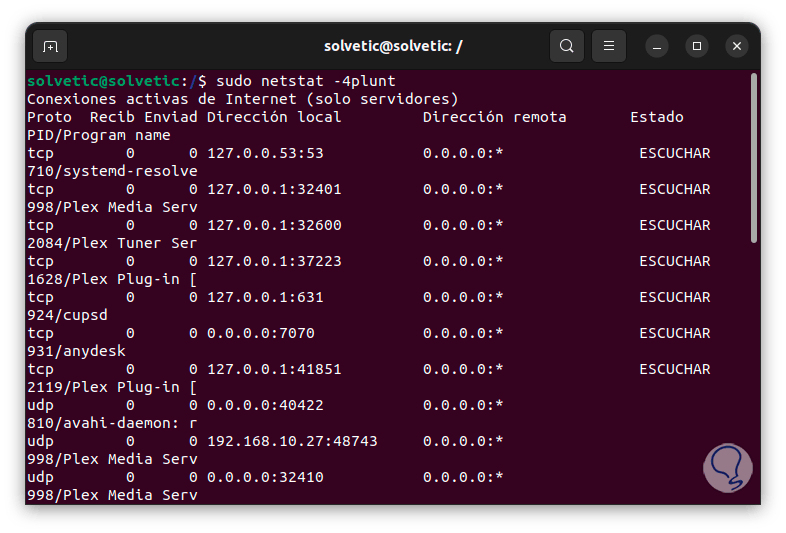
Now it is time to review the ports used in the system, for this we are going to execute the command "sudo netstat -4plunt" which will list all the necessary details:
step 9
The netstat parameters used are:
- -p: displays the PID and the name of the program associated with each socket.
- -l : show listening sockets
- -n: generate numeric output instead of service names
Note
The special address 0.0.0.0 indicates that the service is listening on all addresses that are available on the system.
step 10
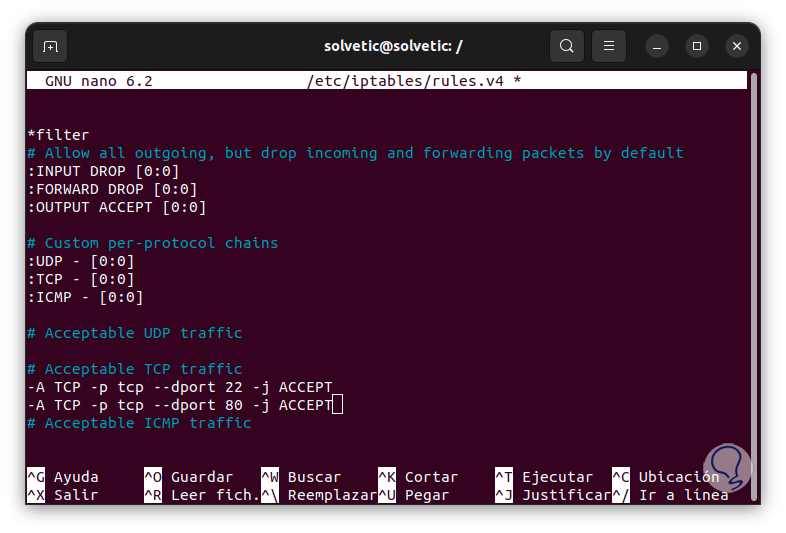
It is possible that it is necessary to authorize access to certain ports such as 80 and 22, for this we are going to access the rules configuration file again and in this file we will locate the section called "Acceptable TCP traffic", there already Port 22 is registered but we are going to add port 80 using the syntax:
-A TCP -p tcp –dport 80 -j ACCEPT
step 11
We apply the changes.
step 12
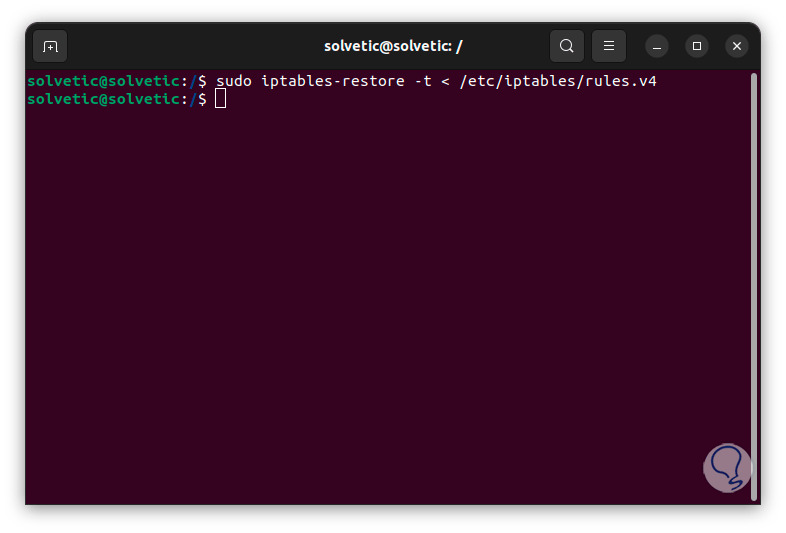
After this we are going to check that it is correctly configured, for this we are going to execute the command:
sudo iptables-restore -t < /etc/iptables/rules.v4
step 13
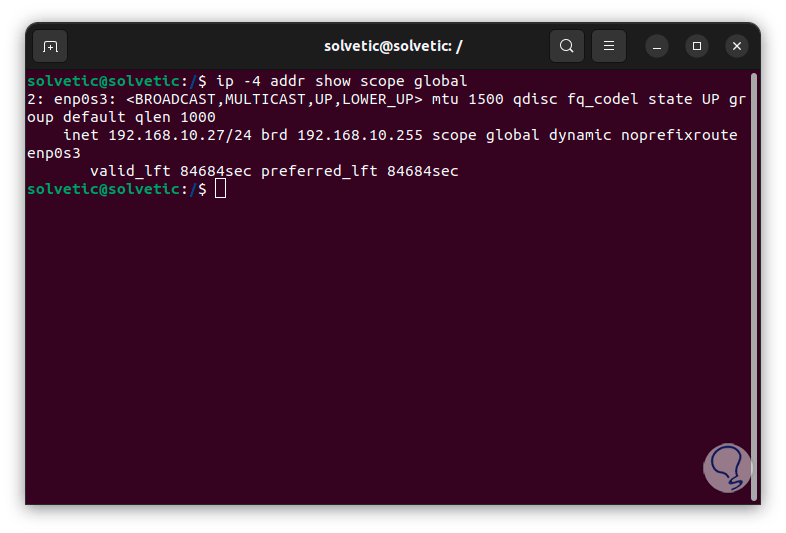
Now we are going to check the IP address of the system, we execute the command "ip -4 addr show scope global" and we must keep in mind both the IP address and the name of the network adapter:
step 14
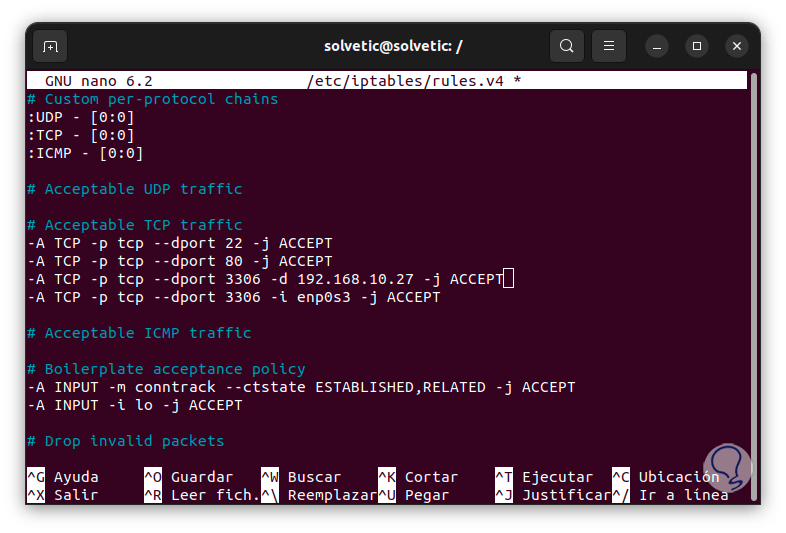
We open the configuration file again to add the IP and the name of the network adapter there in order to authorize access to them, these lines will go in the Acceptable TCP traffic section:
-A TCP -p tcp –dport # -d IP_Address -j ACCEPT -A TCP -p tcp –dport # -i Adapter -j ACCEPT
step 15
We apply the changes.
step 16
After this we must confirm that everything that has been entered is correct, we execute the command:
sudo iptables-restore -t < /etc/iptables/rules.v4

step 17
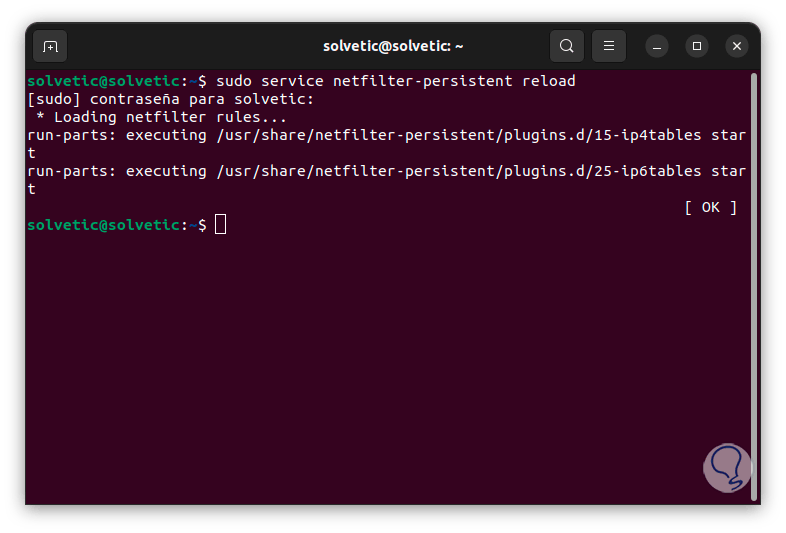
Finally, the entire configuration can be loaded using one of the following commands:
sudo service iptables-persistent reload sudo service netfilter-persistent reload
TechnoWikis has explained how to protect the traffic on your Linux computer through essential steps to have a reliable system.