To stay up to date, remember to subscribe to our YouTube channel!
SUBSCRIBE ON YOUTUBE
One of the elements that has a most relevant impact in Windows 11 is the Firewall, remember that this Firewall is responsible for protecting the computer from all incoming and outgoing network packets and data, it is ideal so that threats such as trojans or malware and applications that may contain malicious code inside..
Firewall Networks
The Windows 11 Firewall works on the networks that are available on the system, which are:
- Private network: it is a secure network and is ideal for use in our home or office, this network can be managed by the user, with this, Windows will allow all devices that are connected to the network to connect to each other.
- Public network: implies greater security since the user does not have full control of the configuration, this network is responsible for deactivating the visibility options of our device on the network, with this, not all peripherals will be visible from the external.
- Domain Network: As the name suggests, it is a network used within a domain, it can be Windows Server or Linux systems.
TechnoWikis will explain some steps to configure the Windows 11 Firewall.
1 Set Firewall Windows 11 enable or disable
Step 1
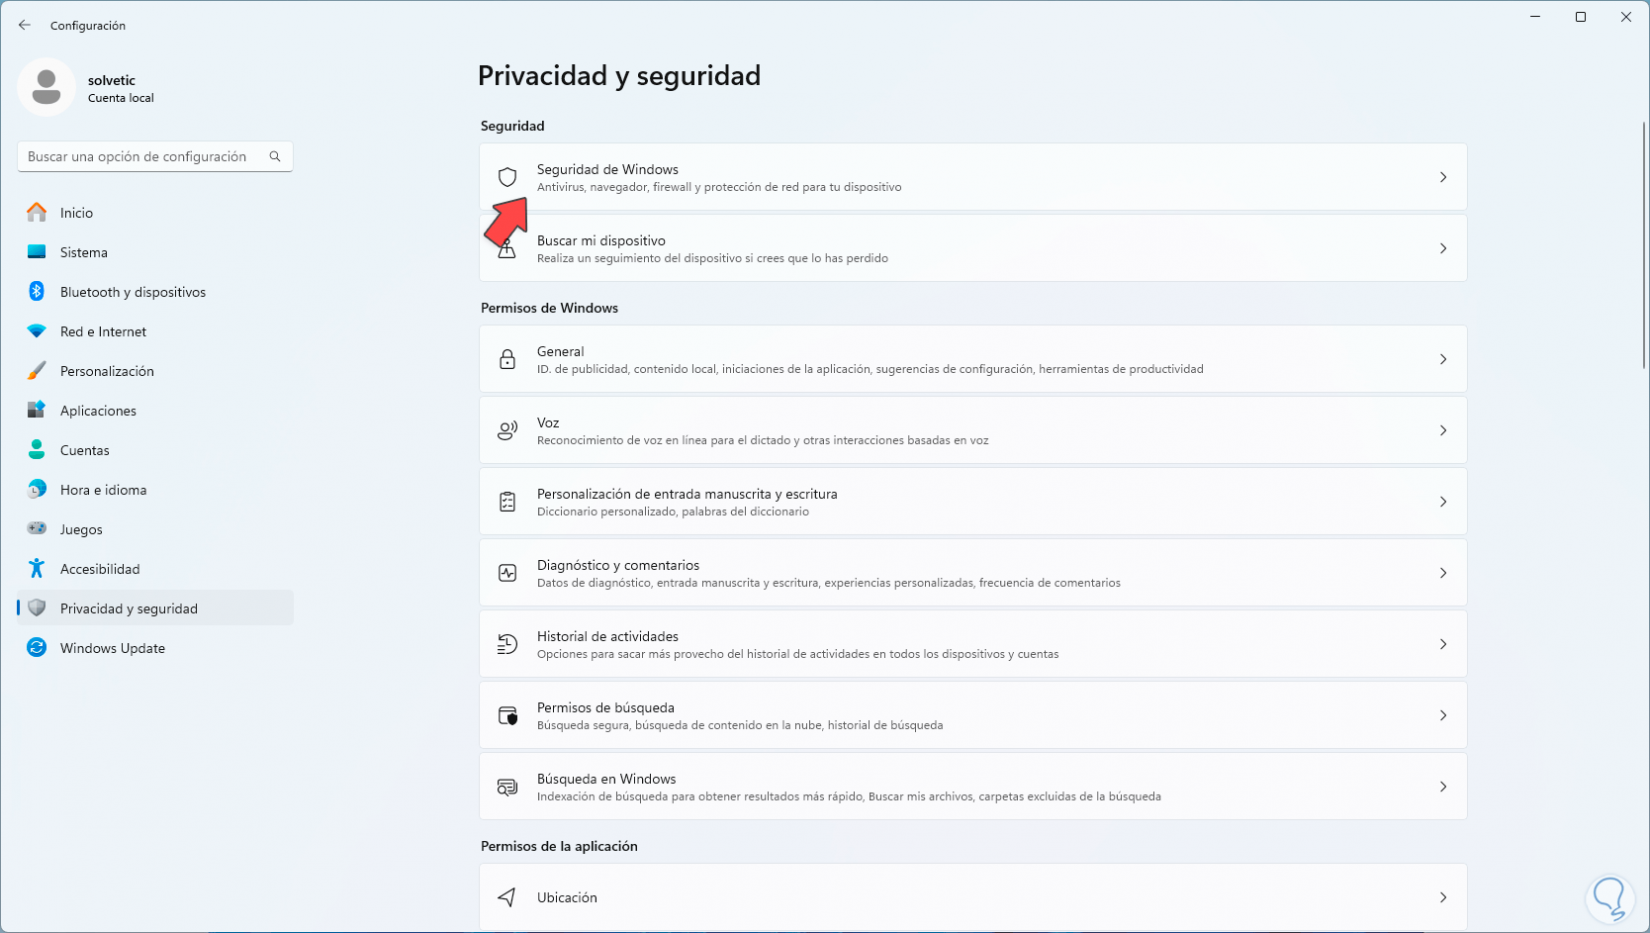
This first option allows us to activate or not activate the Firewall on one network, or on all of them if necessary. For this, we go to the route:
Step 2
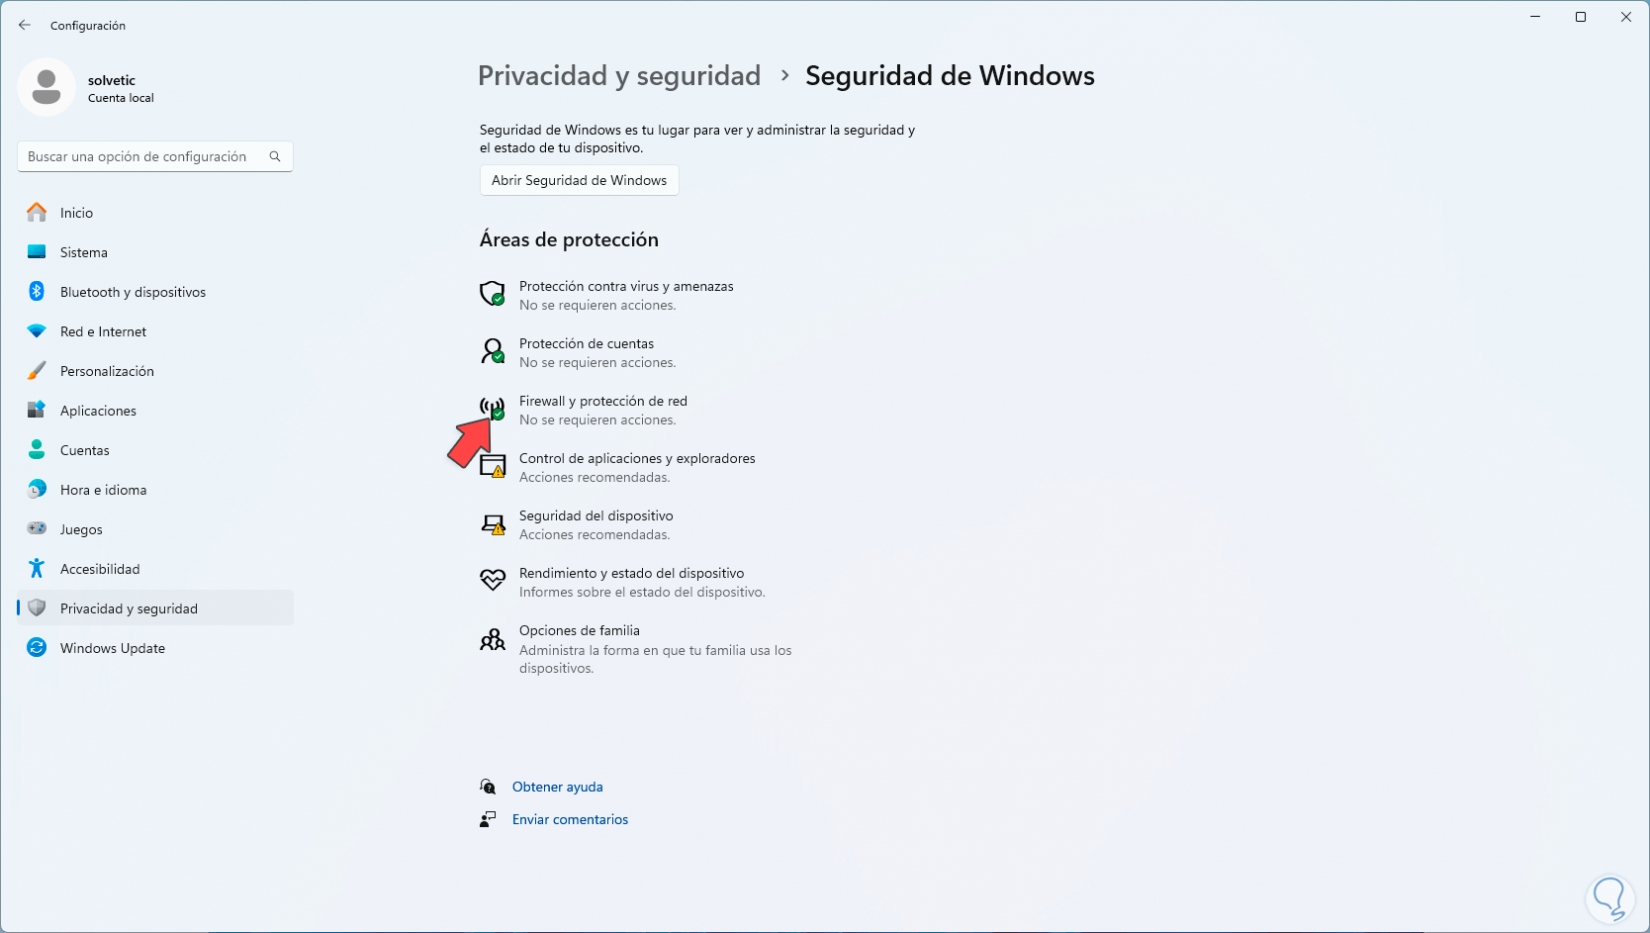
By clicking there we will see the following. We click on “Firewall and network protection”, this will give us access to the different networks and their current configuration in Windows 11:
Step 3
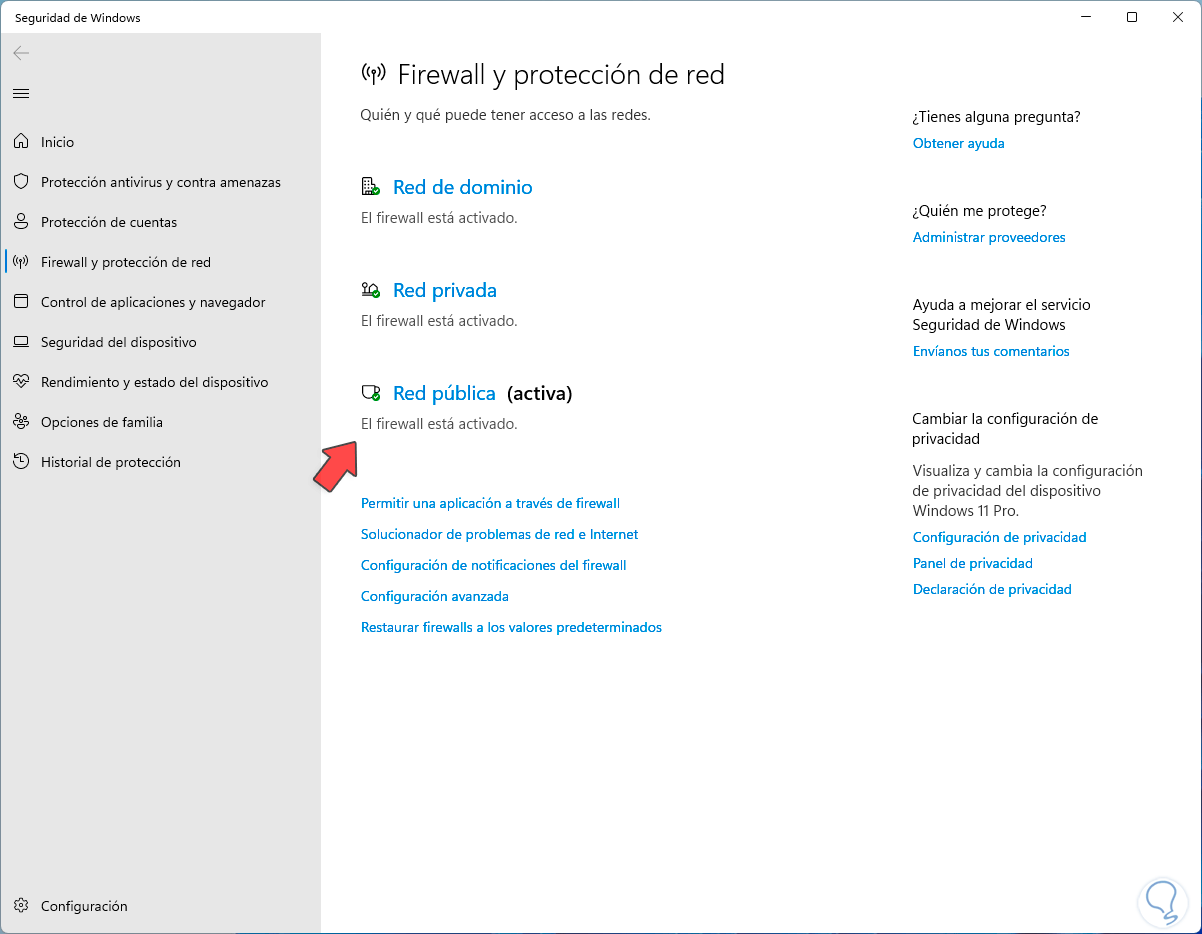
We see the network that is currently configured in Windows 11, which has the legend “active”, now, to deactivate a network, we click on it to see the following:
Step 4
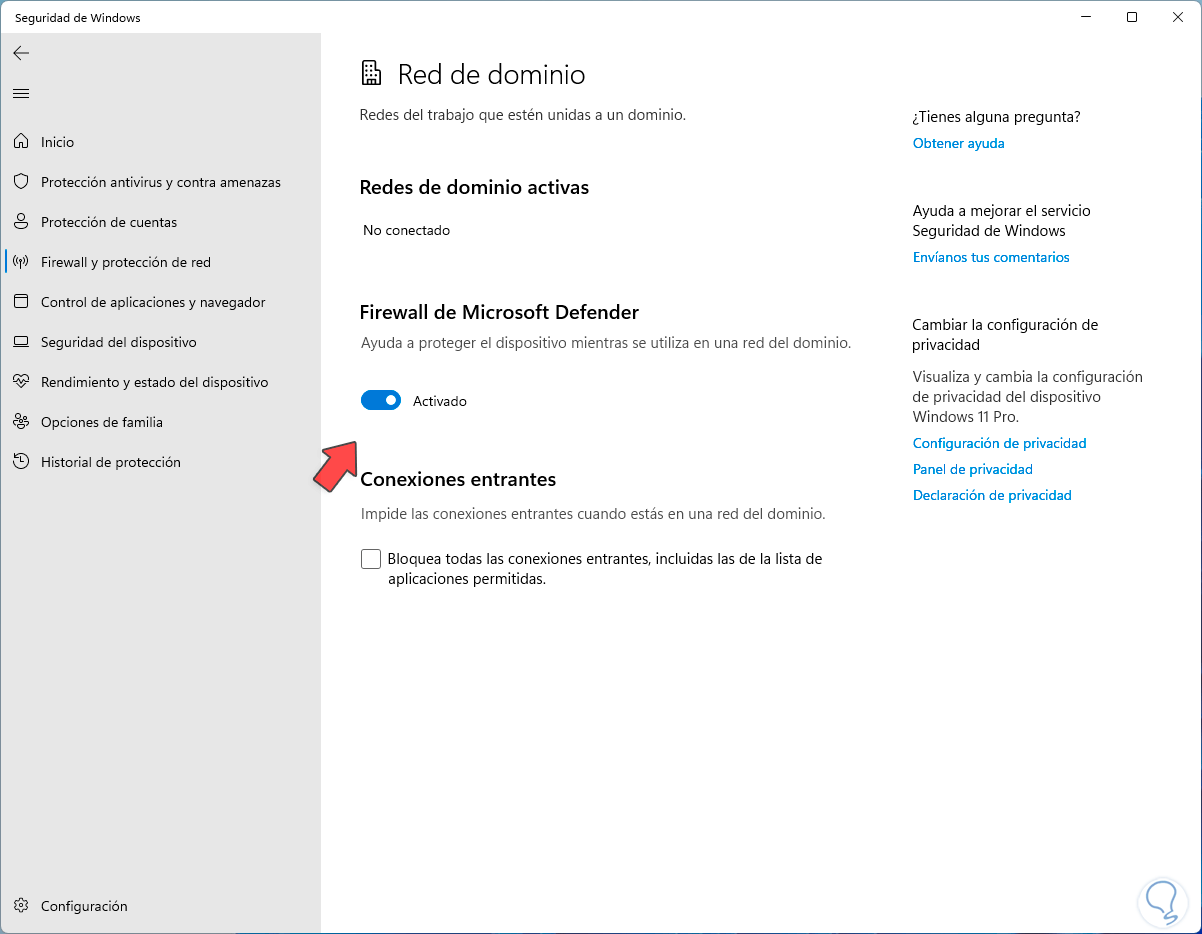
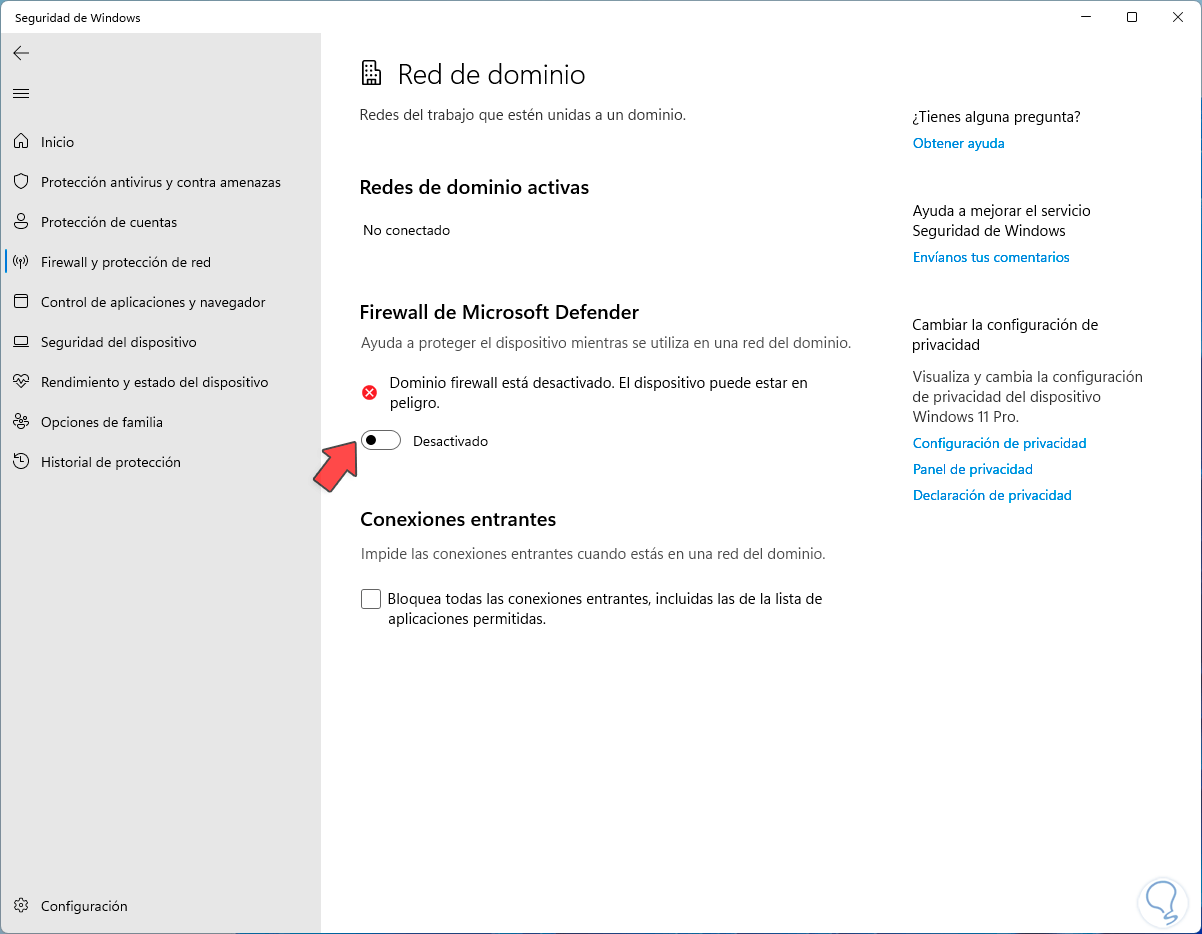
Here we are going to deactivate the “Microsoft Defender Firewall” switch and we see that this action is carried out:
Step 5
We see the option disabled. If you want to activate the Firewall again on that network you must activate this switch.
Note
Let us remember that it is not advisable to leave the computer unprotected since threats are present every second.
Step 6
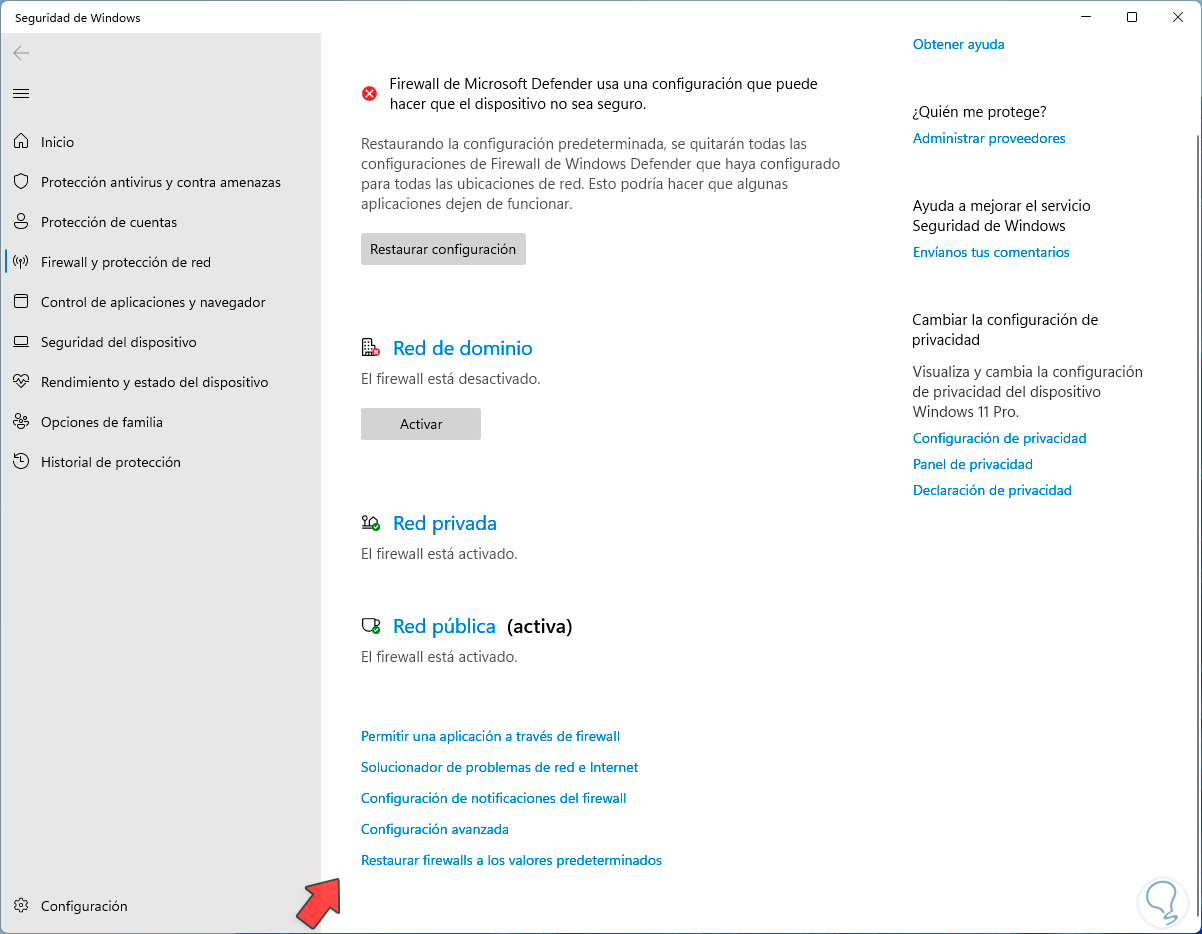
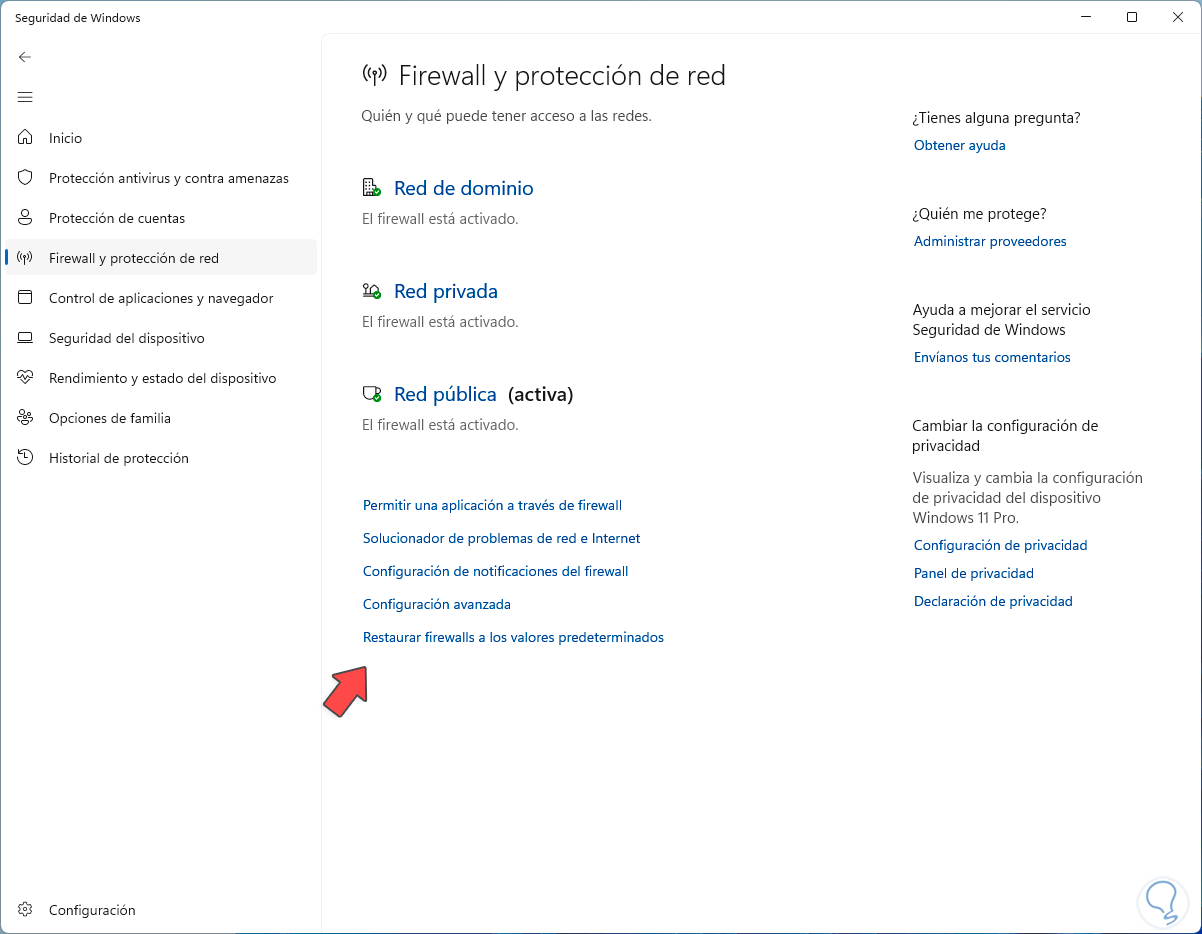
To revert any changes, in the main menu we click on “Restore firewalls to default values”:
Step 7
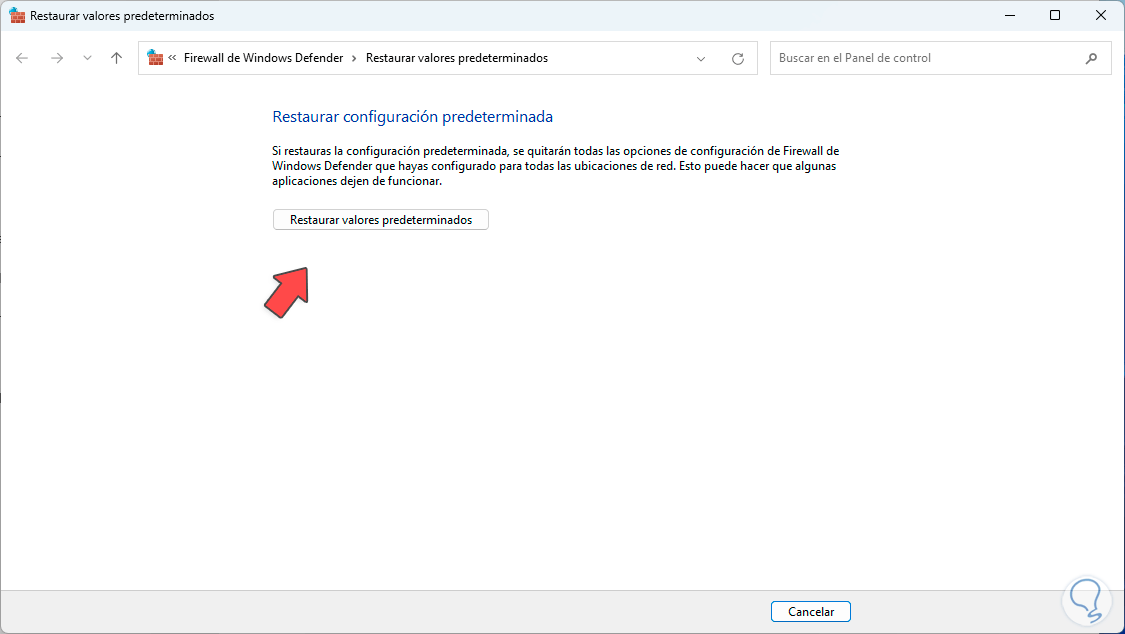
Clicking there will open the Control Panel window:
Step 8
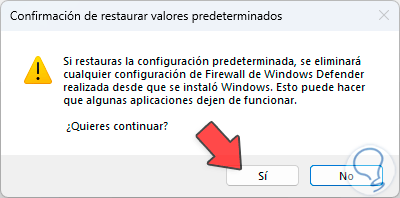
We click on “Restore defaults” and the following window will open. We click “Yes” to confirm this process.
2 Configure Windows 11 Firewall by activating protection
Step 1
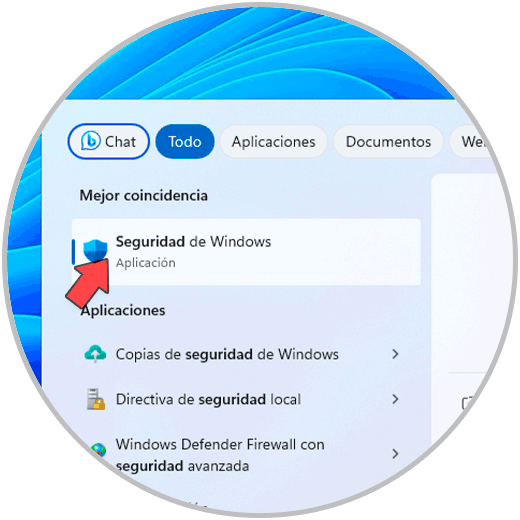
With this step we seek to activate the protection levels in Windows 11, to achieve this, in the search engine we enter “security” and click on “Windows Security”:
Step 2
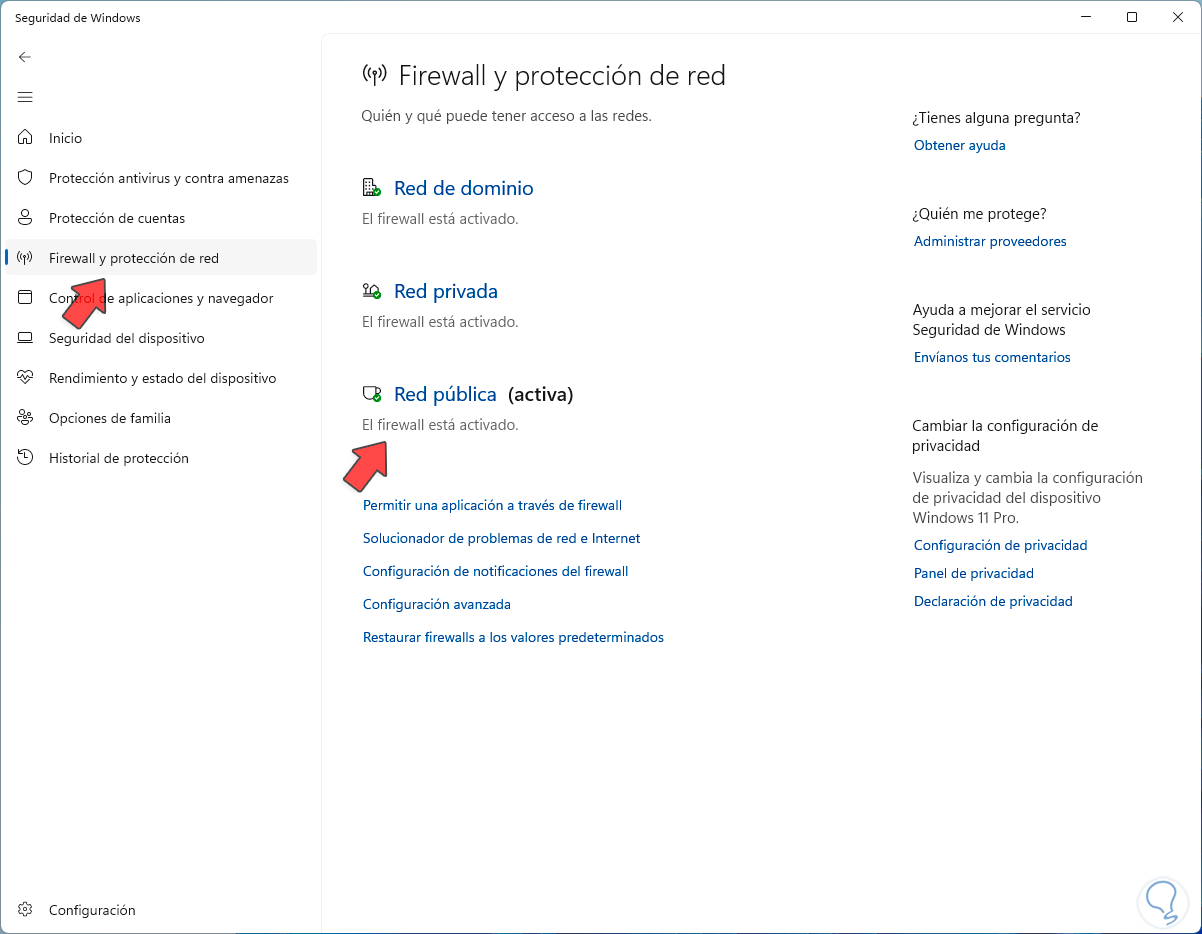
The administration console will open, there we go to “Firewall and network protection”:
Step 3
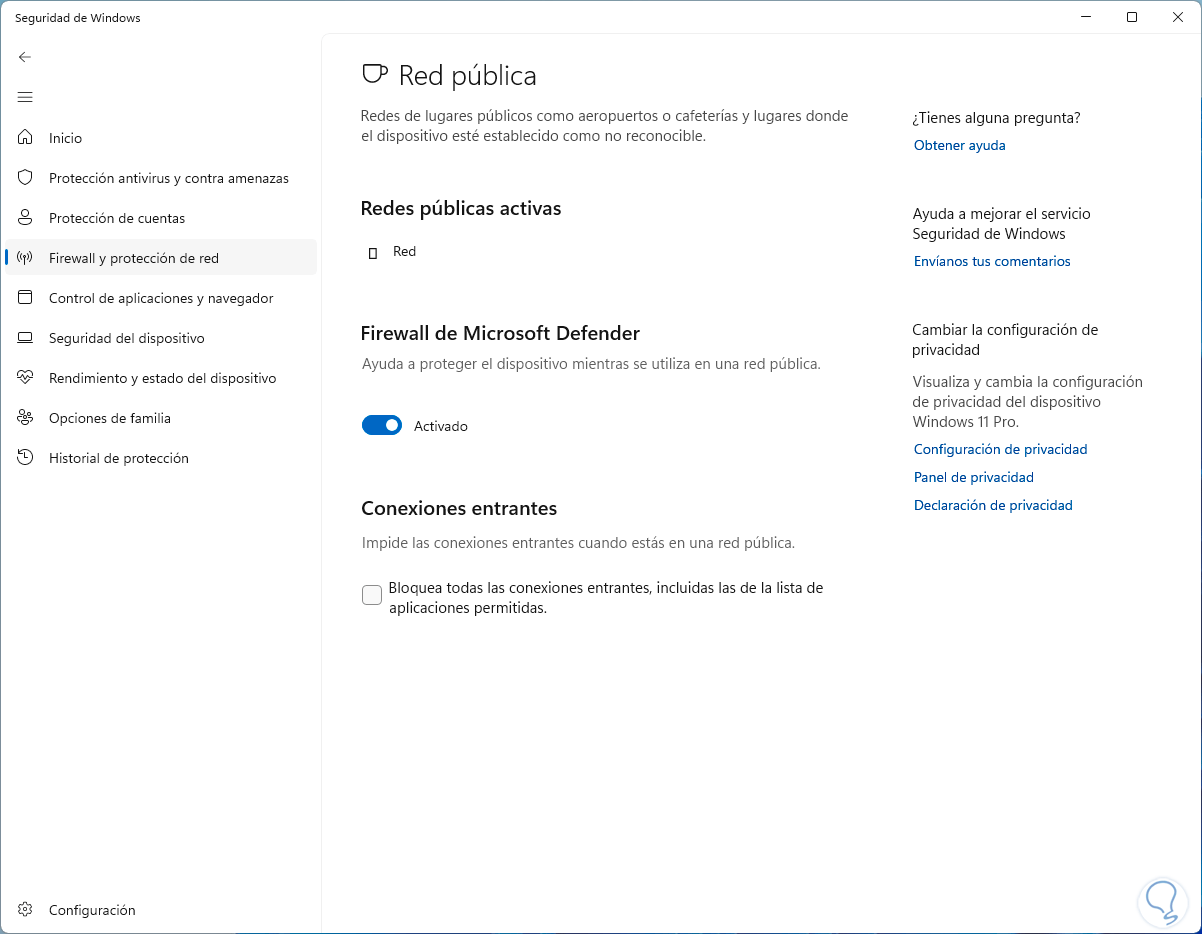
Now, we click on the current network, or on the network to configure, to see the following:
Step 4
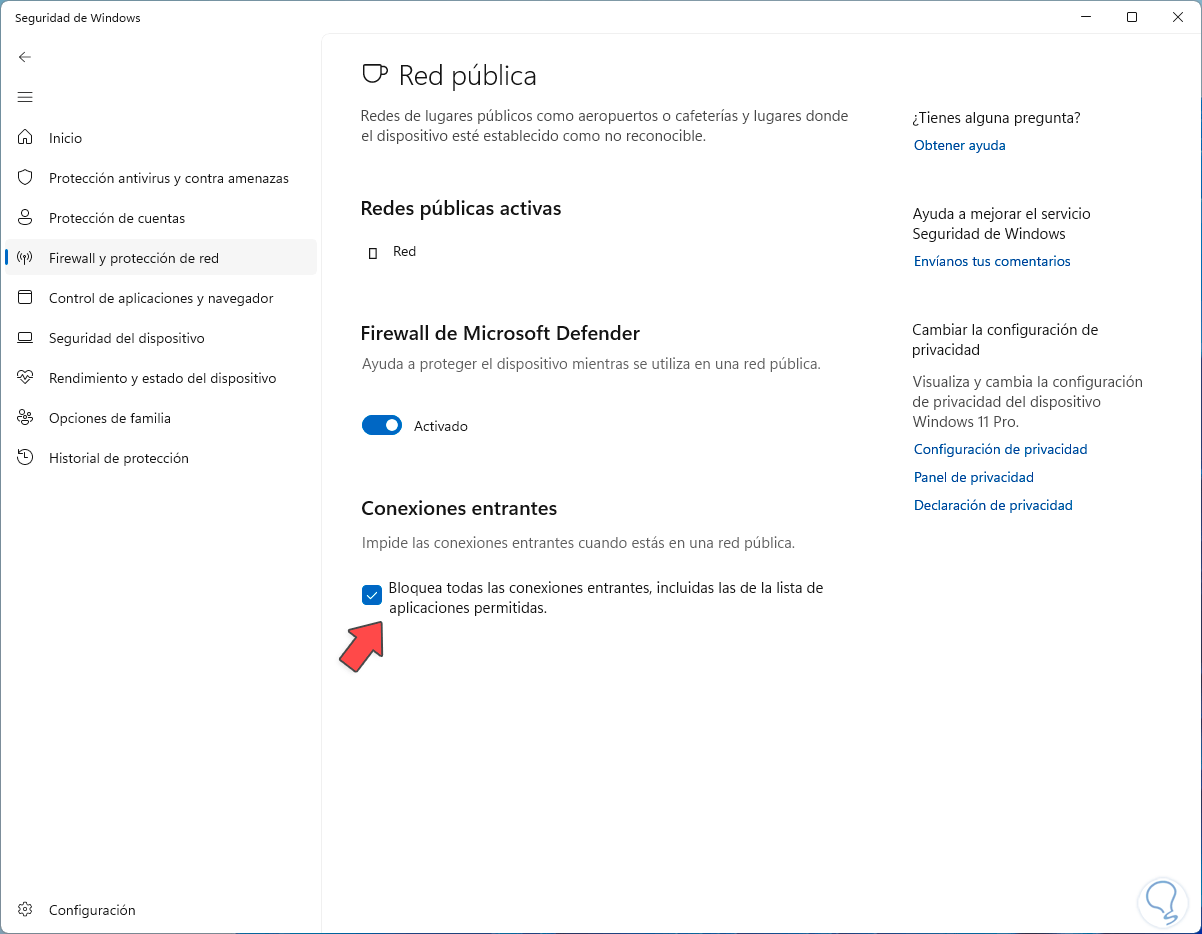
Here, we are going to activate the “Block all incoming applications, including those in the allowed applications list” box:
Step 5
Another way to achieve this same operation is to enter “firewall” in the search engine, then click on “Windows Defender Firewall”:
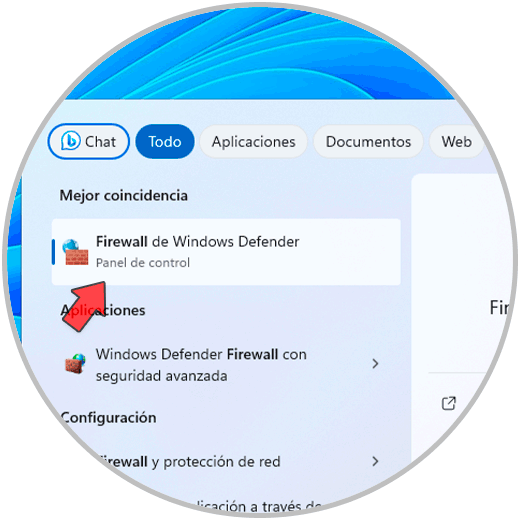
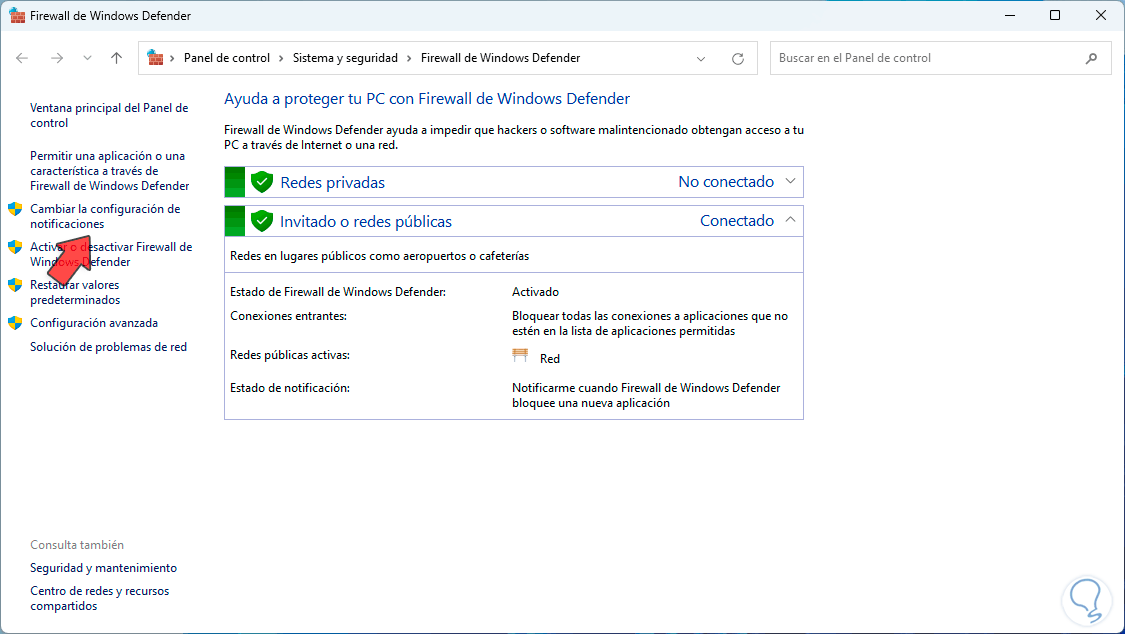
Step 6
We click there to see the following. In this window we click on “Change notification settings” to open the following:
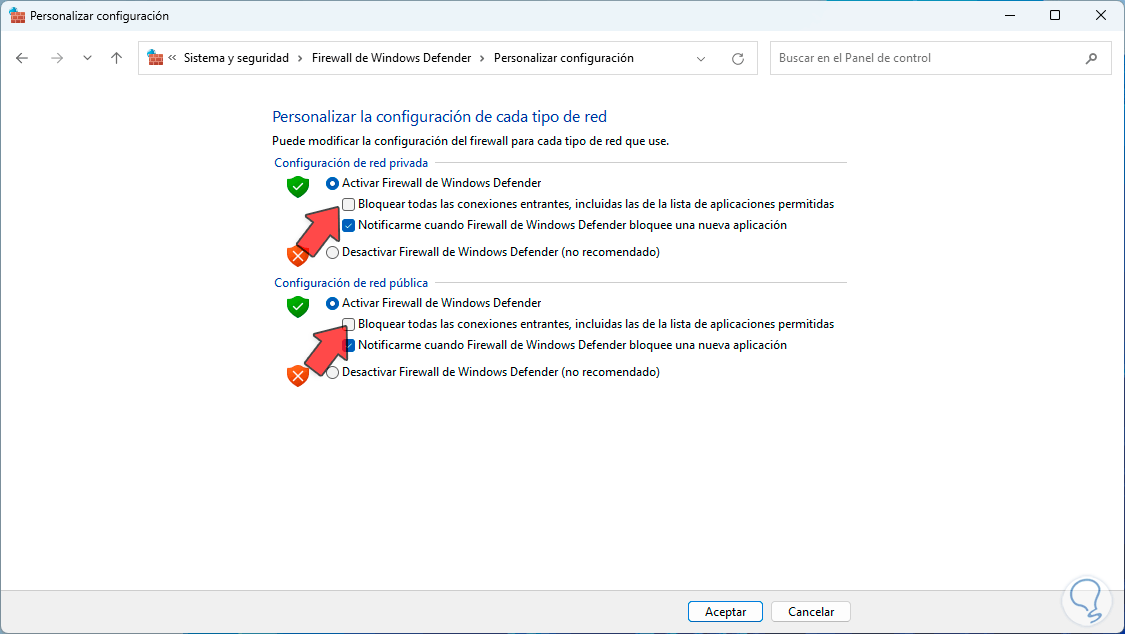
Step 7
Here, we are going to activate the “Block all incoming applications, including those in the allowed applications list” boxes located on the private network and on the public network:
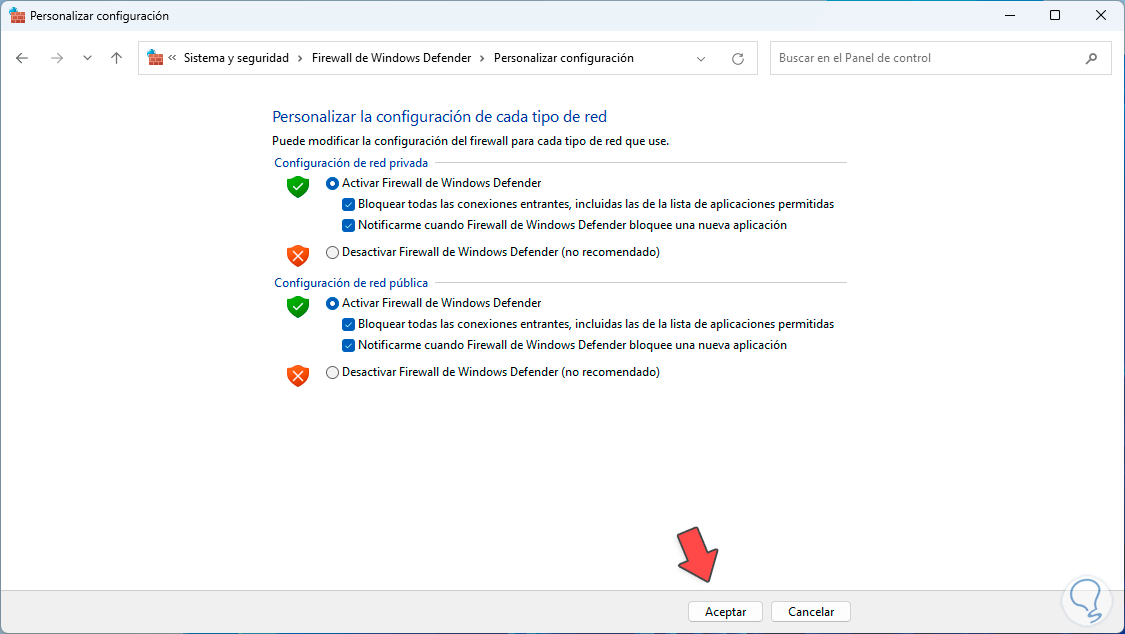
Step 8
We click “Accept” to apply these changes:
Step 9
This process seeks to block any application that wants to access the system, it is ideal for network monitoring and administrative tasks.
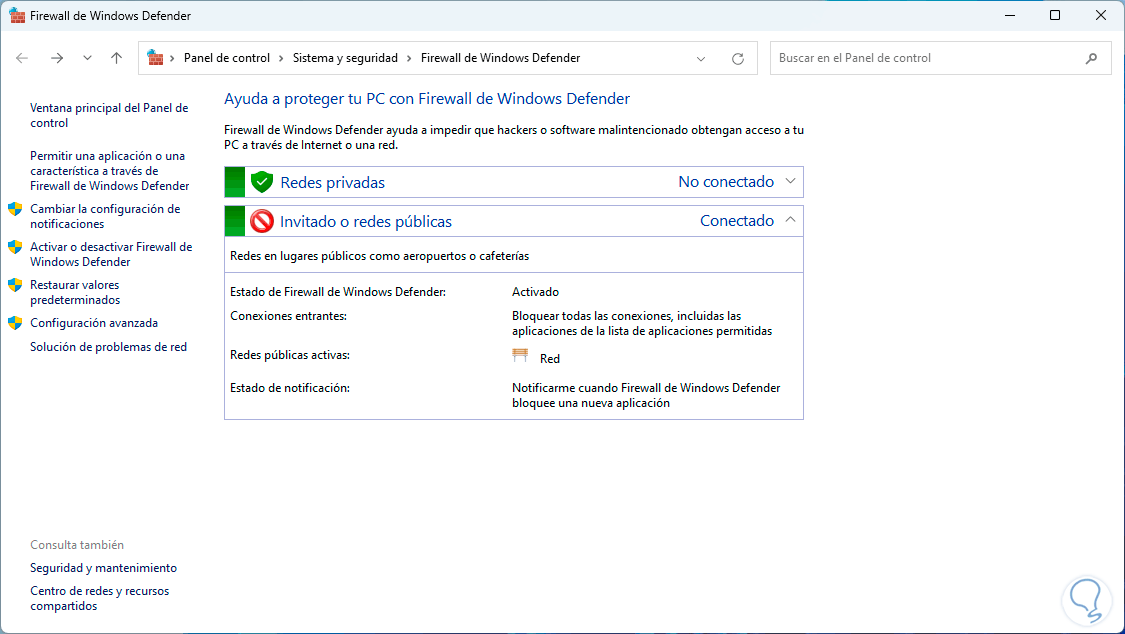
3 Configure Windows 11 Firewall allowing applications
Step 1
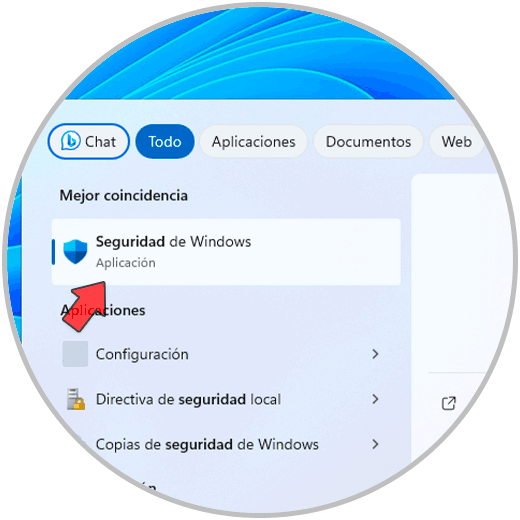
Now we will see the opposite case and that is to allow applications using the Firewall, for this in the search engine we enter “firewall” and click on “Windows Defender Firewall”:
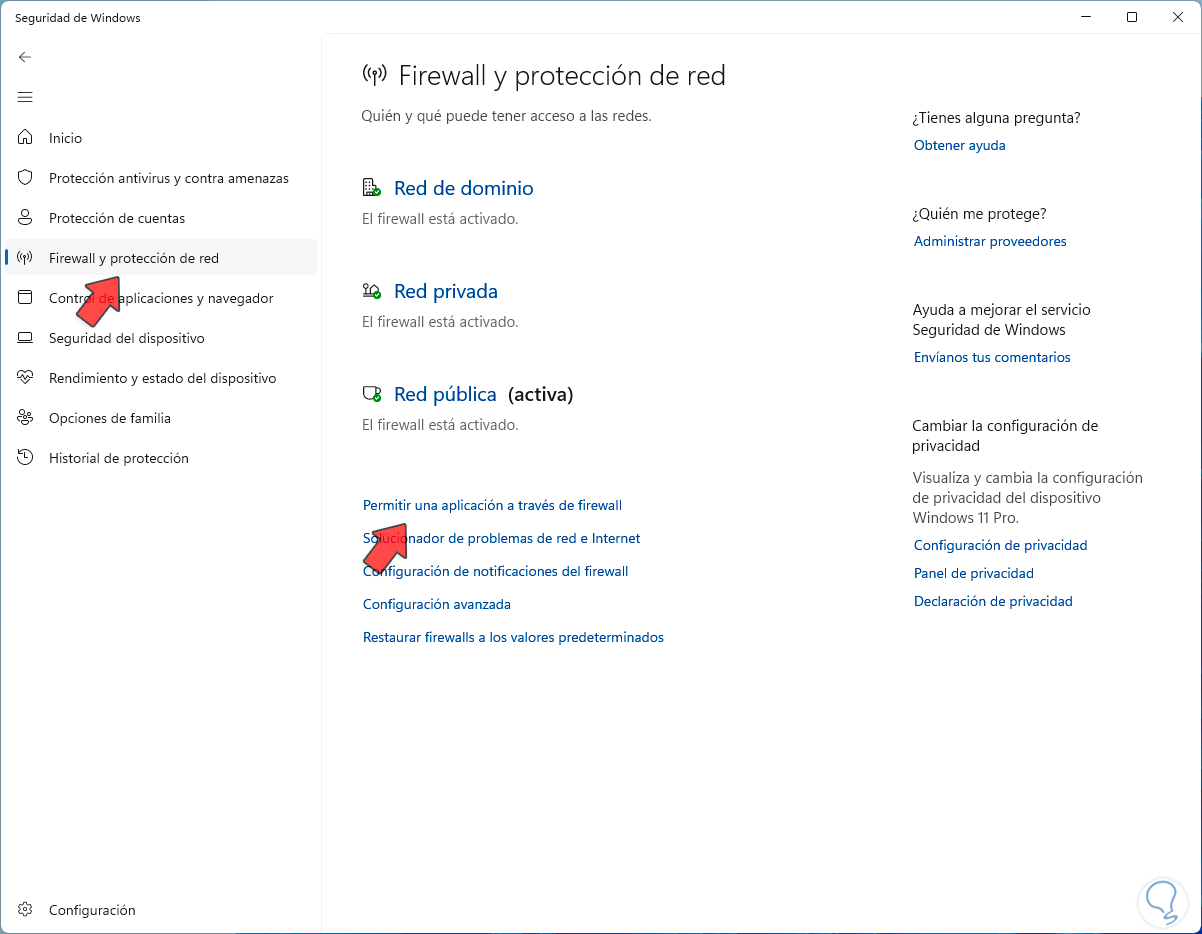
Step 2
Let's go to "Firewall and network protection":
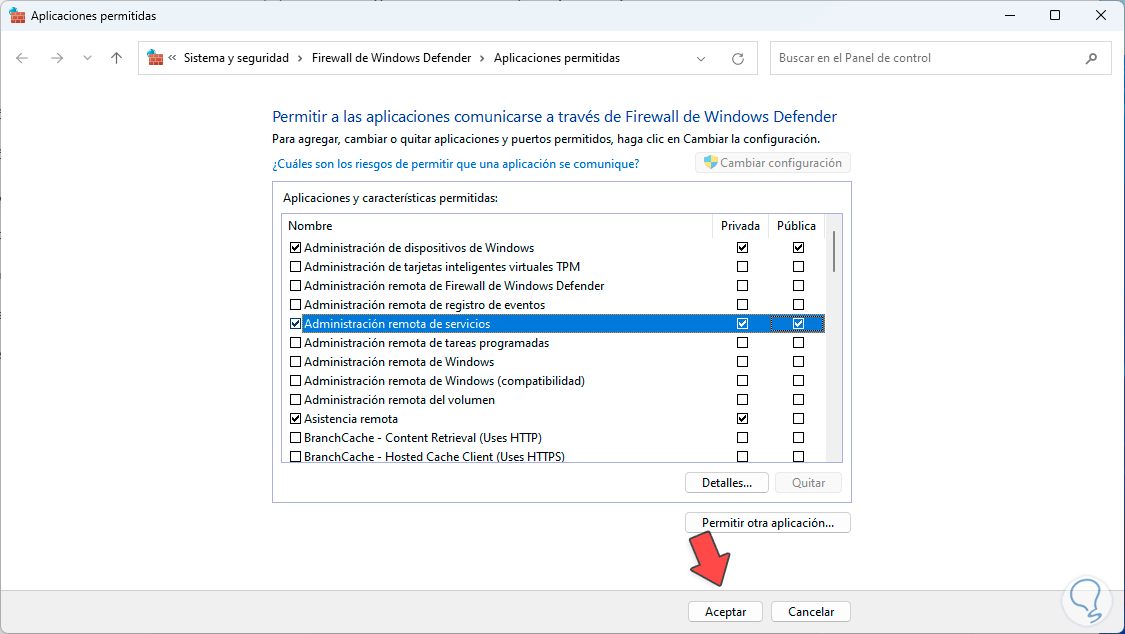
Here we will click on the line "Allow an application through Firewall", the following pop-up window will open:
Step 3
To make changes, click on “Change settings”.
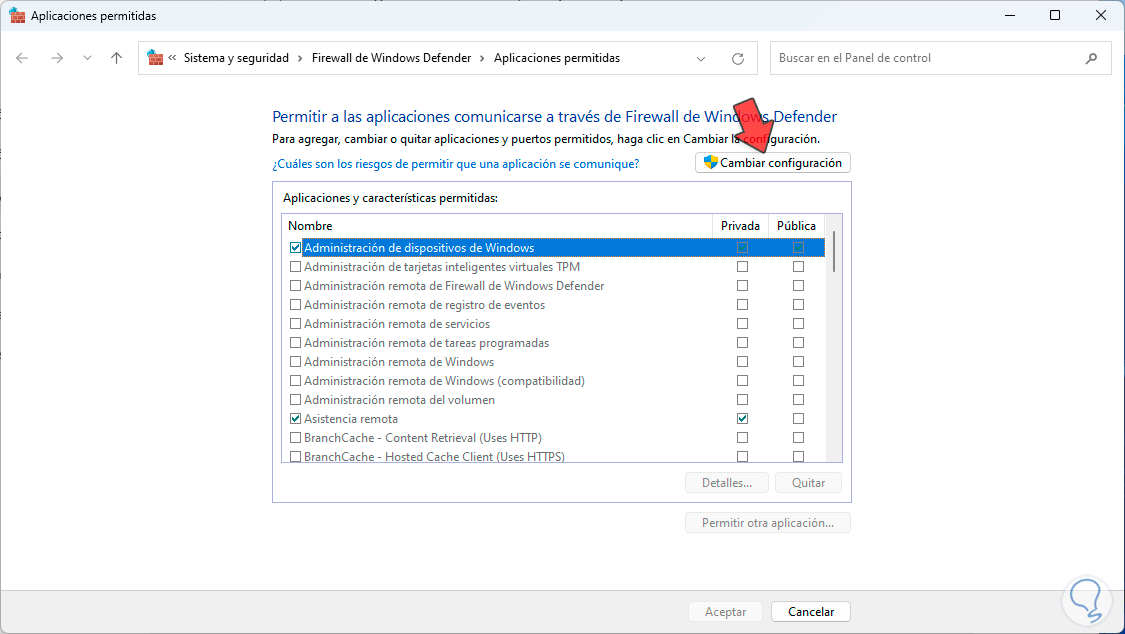
Step 4
Then we can activate the boxes for the desired application, if it does not have them active, in the network that we want to grant permission (private or public):
Note
If the application is not in the list, we can click on “Allow another application” and then search for its executable directly.
Step 5
We click “OK” to save the changes.
4 Configure Firewall Windows 11 restore to default
Step 1
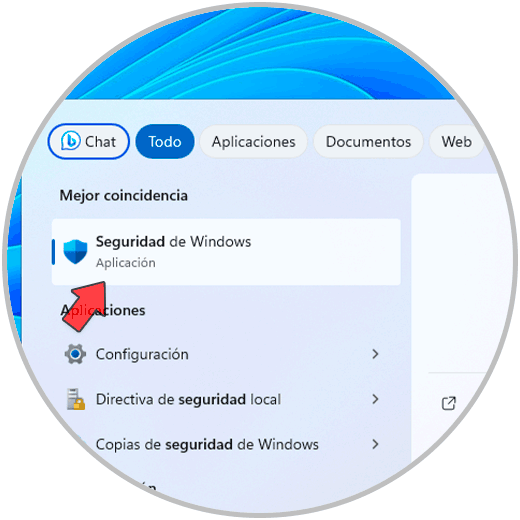
Finally, it is possible to reset all the values in case of an error or inconsistency. To achieve this, we open Windows Security:
Step 2
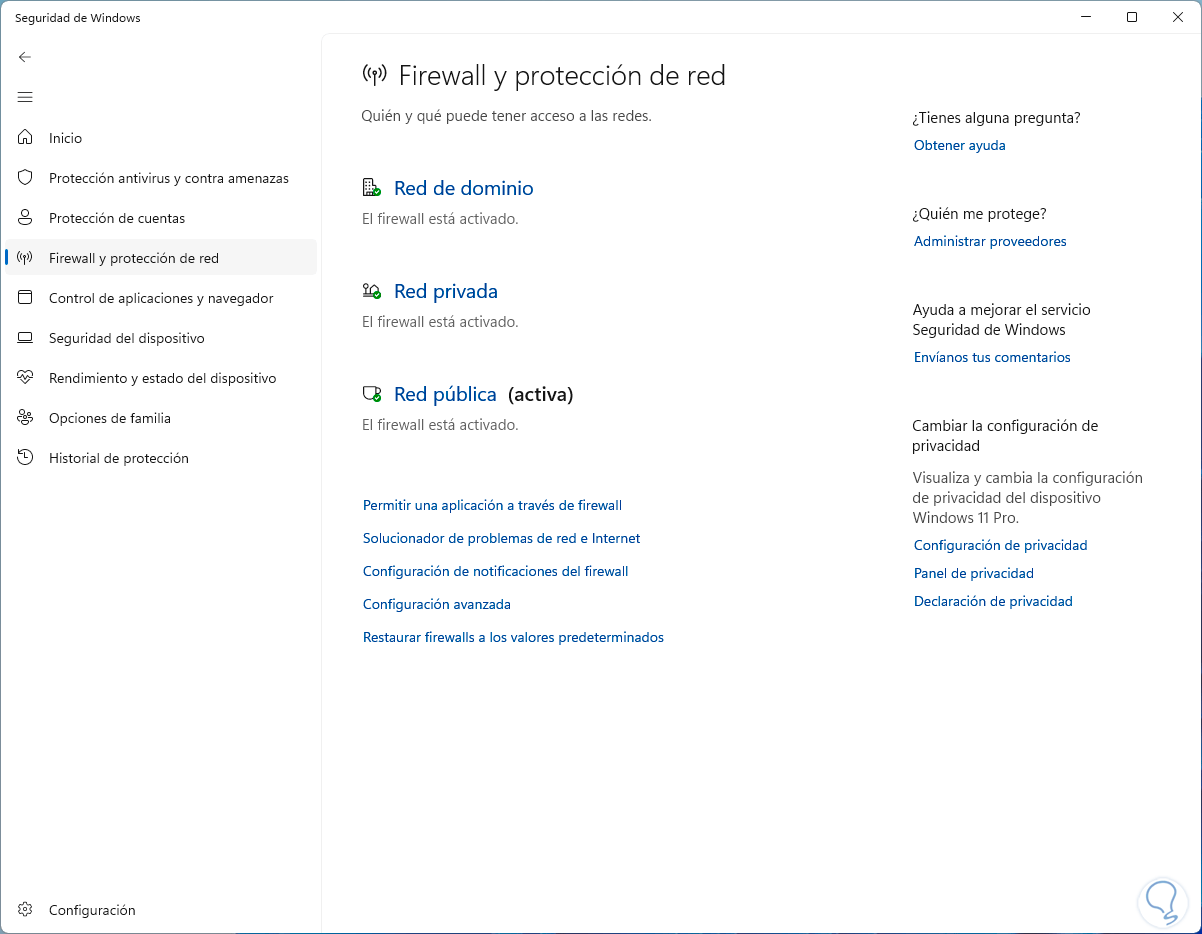
Let's go to “Firewall and network protection”:
Step 3
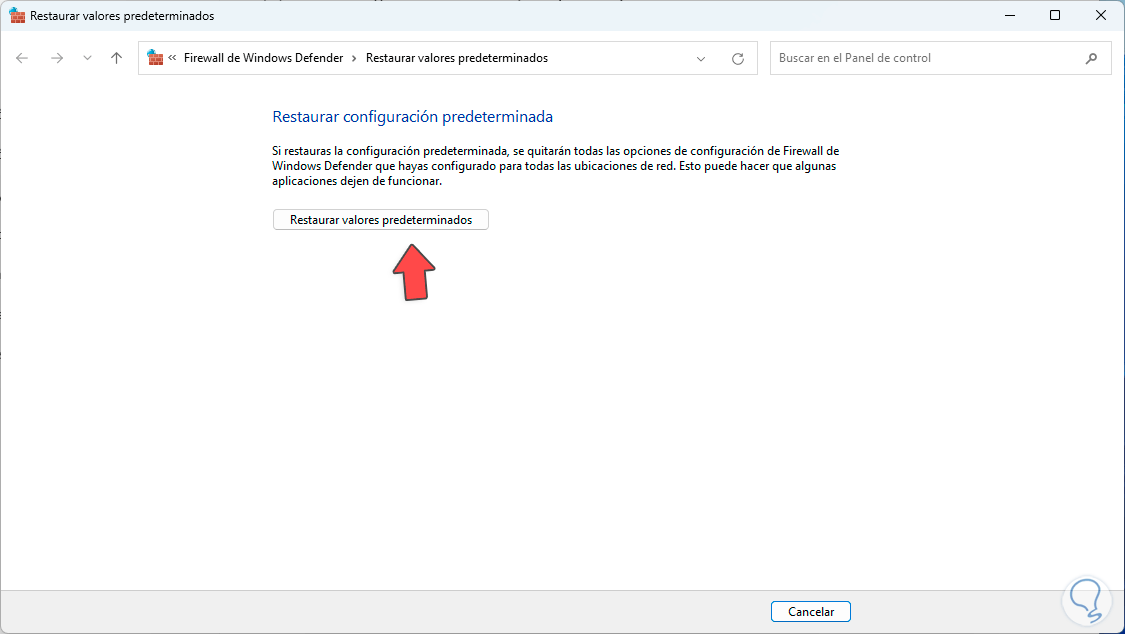
We click on “Restore firewalls to default values” and the following will open:
Step 4
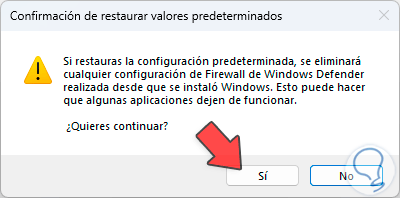
We click on “Restore default values” and the following window will appear:
Step 5
We click on “Yes” to proceed with the reset:
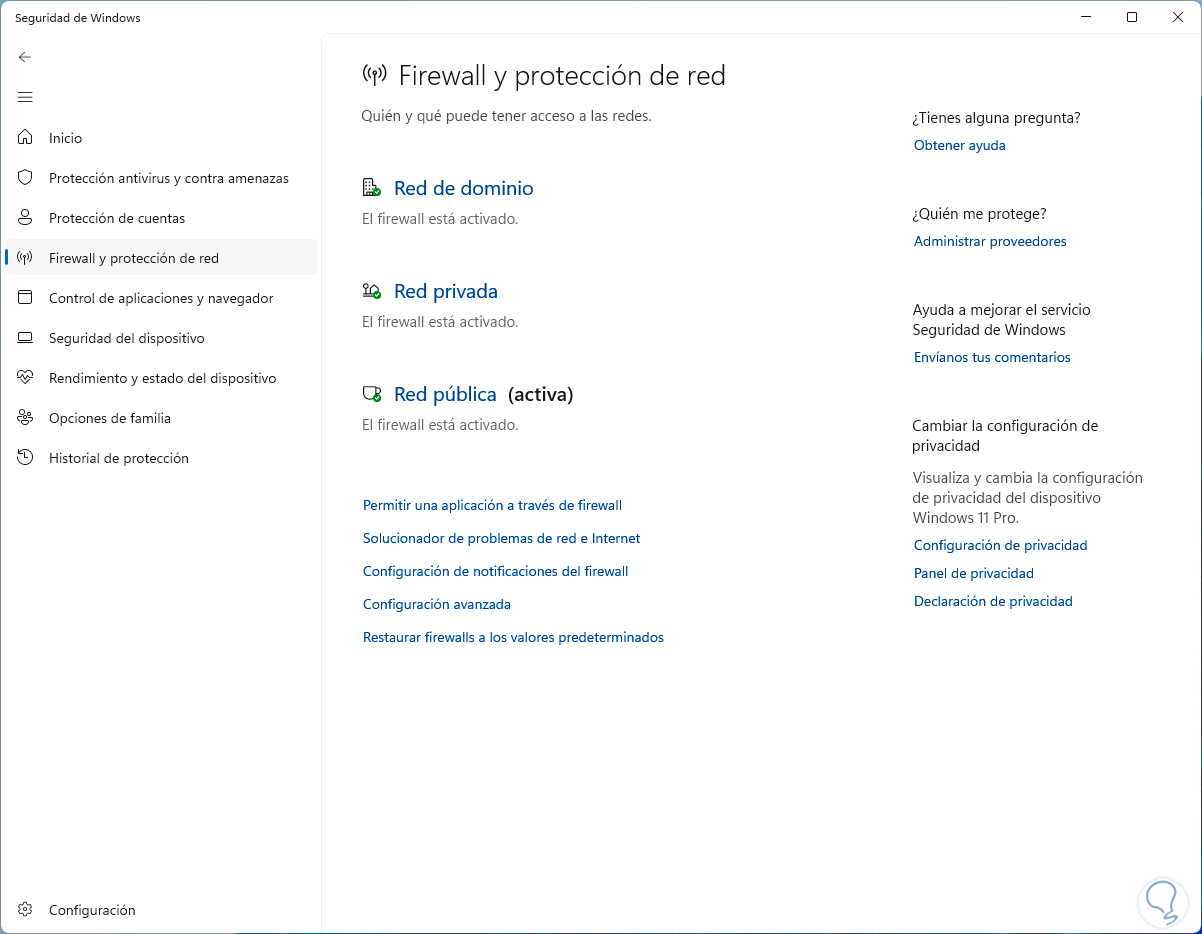
As we see, managing the Windows 11 Firewall is key to increasing security and privacy..