In the Windows 10 operating system there are a number of services that are executed in the background and therefore can go unnoticed and many others have become so common that we do not understand its importance. One of these is the system time, that clock that we see in the taskbar, is much more than this information, since the system time in Windows 10 is also used to set certain data when creating or editing files, when we perform synchronization tasks if the equipment is connected to a domain or to access applications that use the time system for its operation..
Under normal conditions, the clock in Windows 10 automatically synchronizes with the Internet time once a week, this only if we are connected to the Internet, but it also offers the possibility to synchronize the clock with the Internet time manual when necessary.
Through this tutorial we will learn to synchronize the clock in Windows 10 in different ways..
To keep up, remember to subscribe to our YouTube channel! SUBSCRIBE
1. Synchronize the Windows 10 clock using the Configuration utility
Windows 10 has introduced the Configuration utility in order to have a central point for the entire process of management and administration of various system elements in a simple way.
Step 1
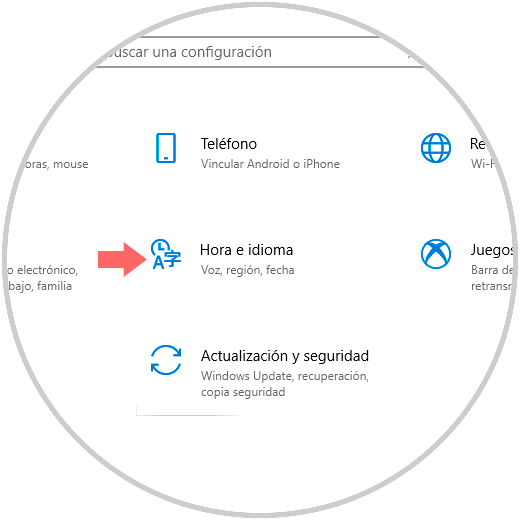
To access this option, we go to the Start menu and click on the “Configuration†utility and the following will be displayed:
Step 2
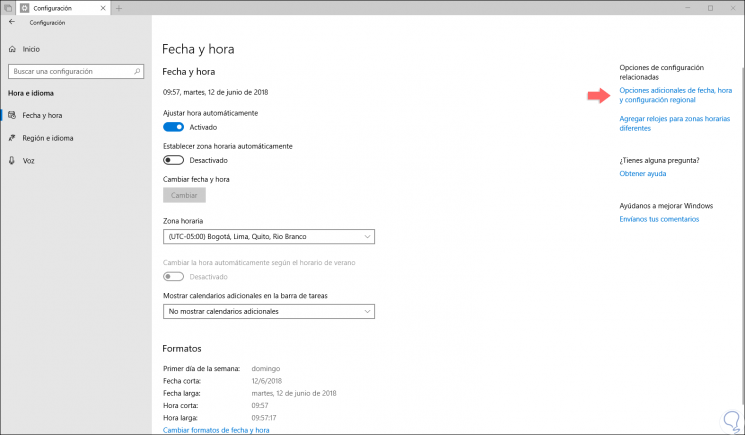
There we click on the category called "Time and Language" where the following will be displayed:
Step 3
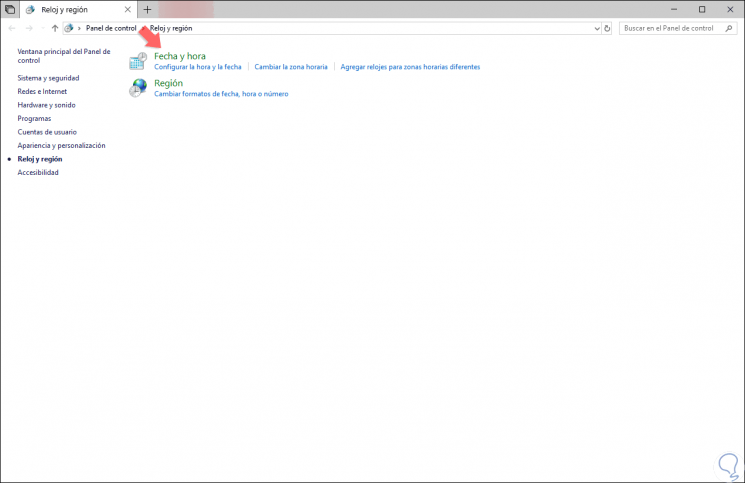
There we click on the “Additional date, time and regional settings†line located in the upper right and the following window will open:
Note
It will also be possible to access using the following route:
Step 4
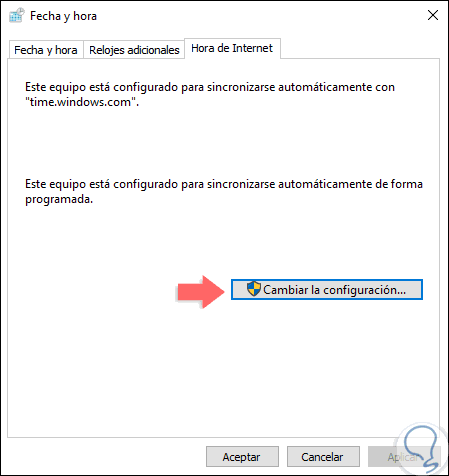
There we click on the “Date and time†option and in the new window we go to the “Internet Time†tab where we will see the following:
Step 5
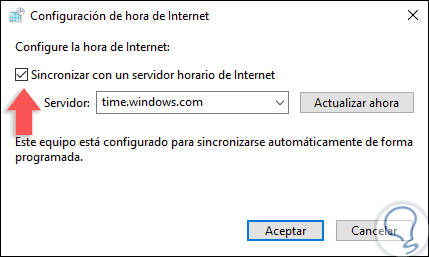
We click on the "Change settings" and in the "Configure Internet time" section, check the "Synchronize with an Internet time server" box:
Step 6
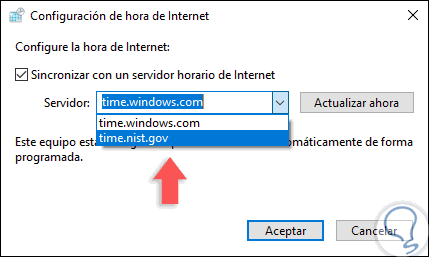
The default value of Windows 10 is “time.windows.com†and we can click on the drop-down list to select a new Internet time server:
Step 7
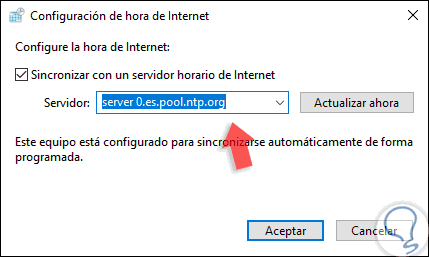
In case the server we want to use is not available or active, you can write the name of an Internet time server and for this we can go to the following link where we will see the list of Microsoft time servers.
Once we enter the new server, click on the "Update now" button to complete the action.
Internet time servers
2. Synchronize the Windows 10 clock using the command line
Through this option we will use the command prompt to perform synchronization tasks.
Step 1
To do this, we will access the command prompt as administrators by right clicking on CMD and selecting the option "Run as administrator". Then, in the deployed console, we will execute the following line:
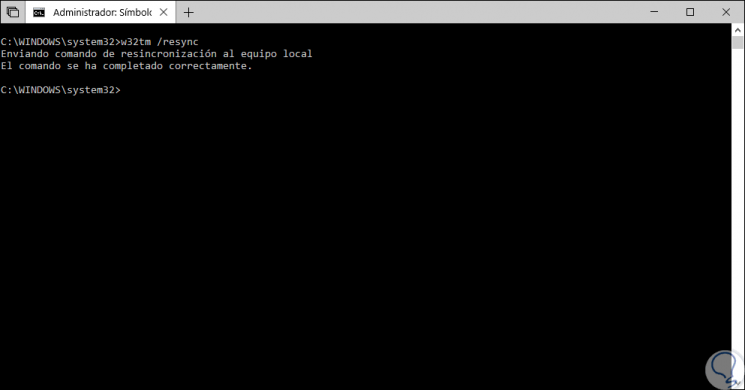
w32tm / resync
Step 2
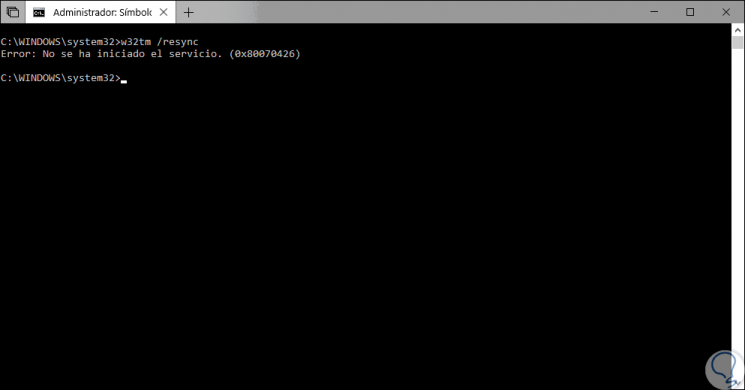
When executing this line we are likely to see the following error:
Step 3
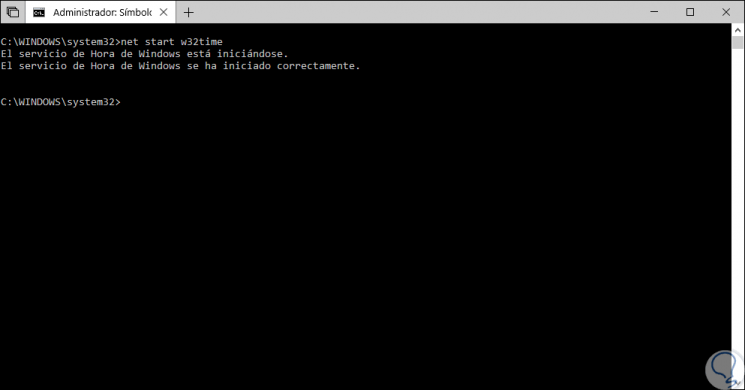
For its correction, we will execute the following:
net start w32time
Step 4
Now we can execute the previous command again to try to synchronize the clock, it is possible that an error is displayed indicating that the equipment has not been synchronized again because there was no time data available, there we can continue executing the command "w32tm / resync "until the command is executed correctly.
With any of the above actions it will be possible to recover the synchronization of our clock in Windows 10 and thus allow all the tasks that depend on it to be executed correctly.