The storage on our hard disk must be an issue to consider because, if we reach its limit, we will not be able to install any application or save our files and the operating system in general will present errors such as unexpected restarts, crashes or shutdowns..
Although hard drives have good capacity , speaking of HDDs, little by little the space is reduced. It is more pronounced on solid state drives, SDDs, which come in lower capacities (128, 256 GB, etc.) where the issue of storage is even more critical, although the speed is much better. That is why it is important that we always keep in mind how to free up this space and in the case of Windows operating systems it is essential that we frequently clean it from our C drive.
Although we delete the temporary files, clean the trash or uninstall programs or applications, the space is still limited and we may not understand where the disk filling is generated, but TechnoWikis will indicate how we can help free space on our computer in a simple way..
We have talked about previous issues of tools created to free up space, but we must understand that Windows 10 is frequently updating its system both at the level of features and new versions and each of these updates occupies a space on the hard disk in a specific path.
Therefore, we will learn to move this folder to another location, the use of a partition on the hard disk being preferred..
Move the download folder for Windows 10 updates
Step 1
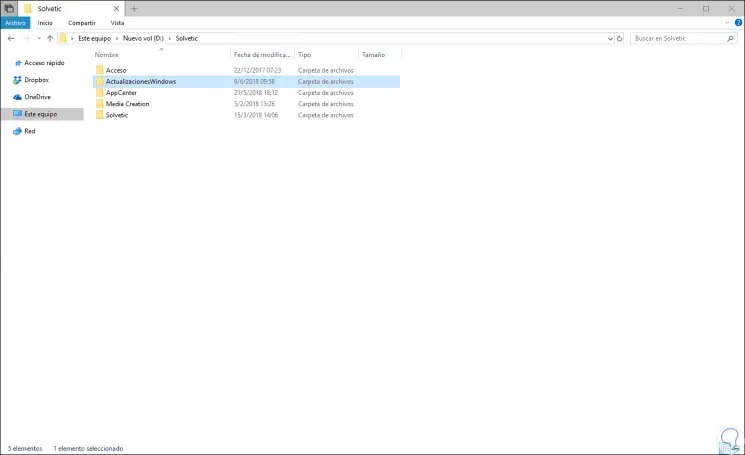
For this purpose we have created a new folder in partition D of our Windows 10 and that is where we will move the local folder by default where the updates are hosted:
Step 2
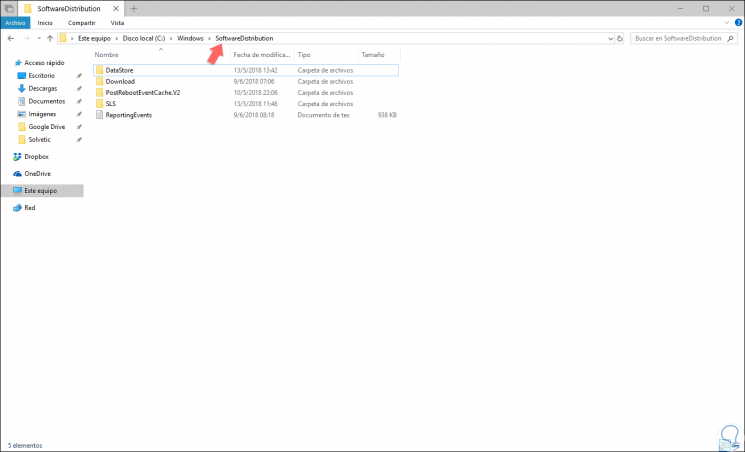
Now, the default route where Windows 10 stores its updates is as follows:
C: \ Windows \ SoftwareDistribution
Step 3
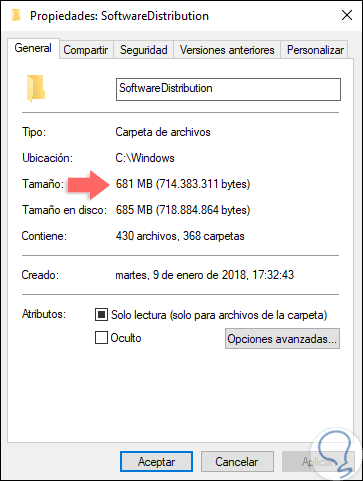
There we found a series of downloads, we can check the space that this folder occupies on the local disk by accessing its properties:
Step 4
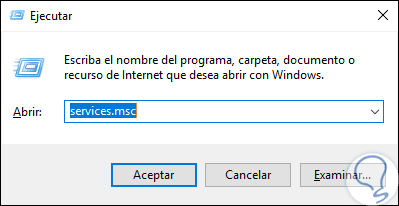
In this case we can see that it occupies 685 MB. To start the process of moving this folder, we will go to the Windows 10 services using the following key combination and executing the "services.msc" command:
+ R
Step 5
Click on OK or the Enter keys and in the new window displayed, locate the service called "Windows Update", right click on it and select the "Stop" option:
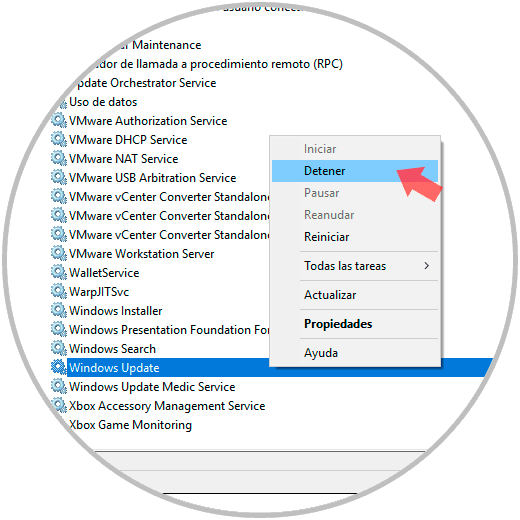
Step 6
Once the Windows Update service is stopped, we go to the C: \ Windows path and rename the “SoftwareDistribution†folder as “SoftwareDistribution.oldâ€:
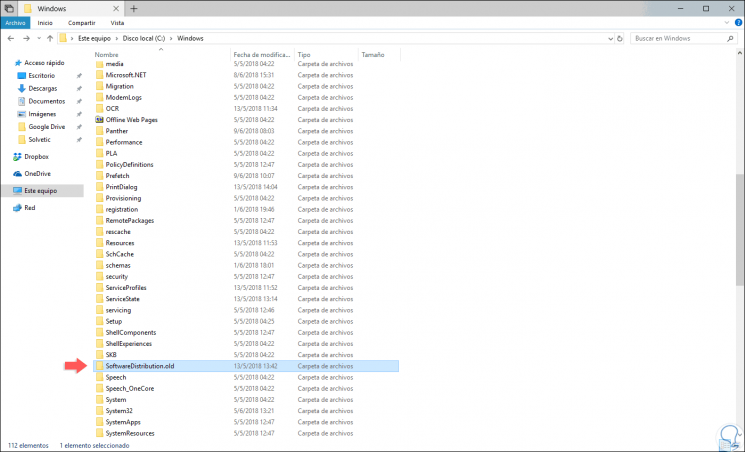
Step 7
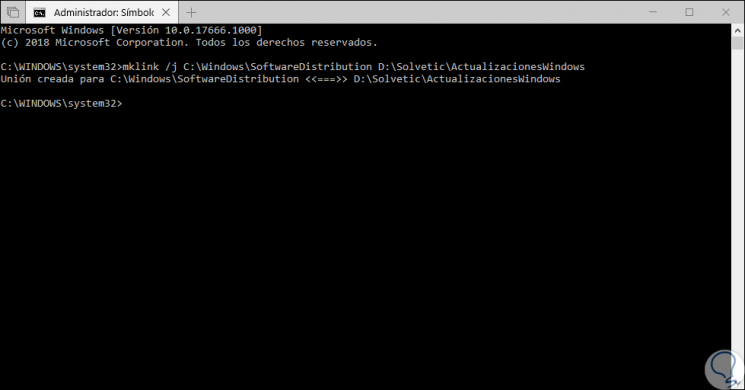
Once this is done, we will access the command prompt as administrators and there we will execute the following line:
mklink / j C: \ Windows \ Software Distribution D: \ TechnoWikis \ Updates Windows
Step 8
We can see that the respective link is created. Now, we can go back to the path C: \ Windows and we will see that the SoftwareDistribution folder has been created with a shortcut:
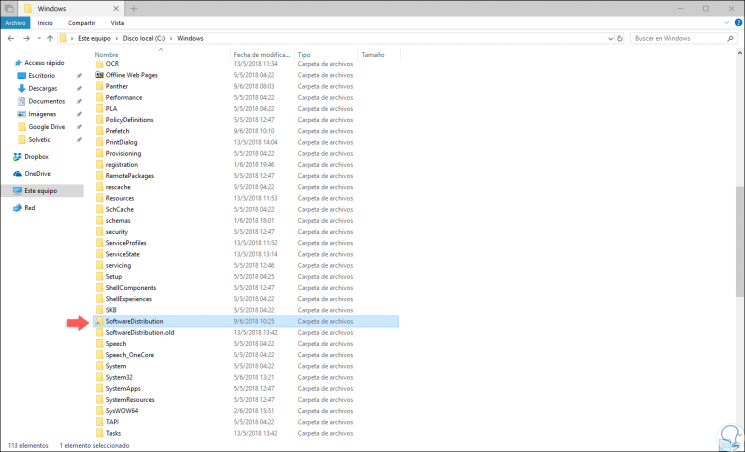
Step 9
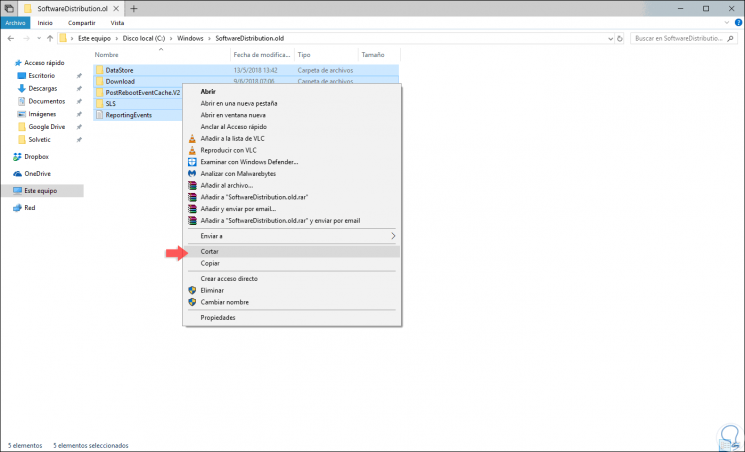
After this, we proceed to cut the contents of the “SotwareDistribution.old†folder and paste it into the folder that we have created on drive D, for this we select this content, right click and select Cut:
Step 10
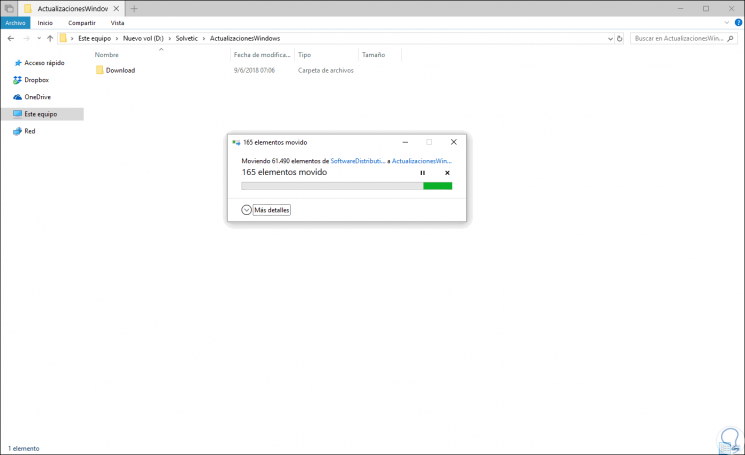
Then we will paste it in the destination folder:
Step 11
Once this process is finished, we can remove the SoftwareDistribution.old folder from drive C.
When this has been done, we will go back to the Windows services, next keys and execute "services.msc".
+ R
Services.msc
Step 12
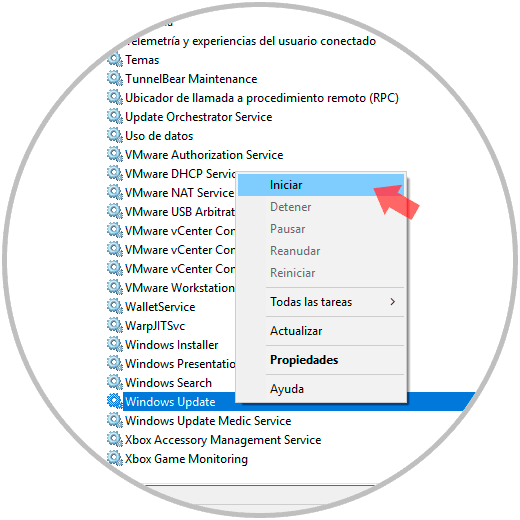
There we right click on the service called "Windows Update" and select the "Start" option:
Step 13
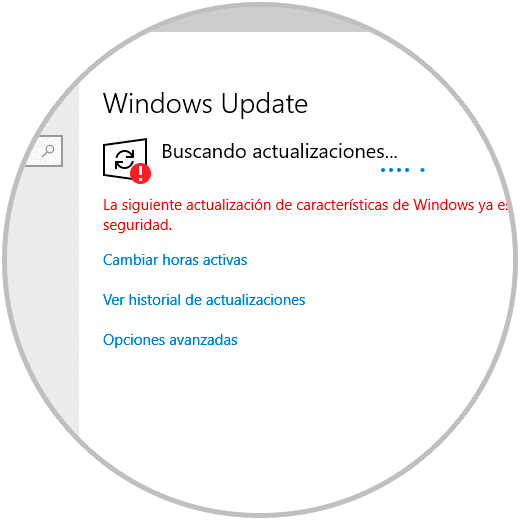
Once the service is started, we can go back to Windows Update and download the updates available for the system:
With this simple method, it will be possible to free space on the Windows 10 C drive and use that space for more important tasks.