In a world where every technology must be at the forefront of every advance that is developed, which are undoubtedly numerous, each company must think about offering solutions that match these changes..
One of the systems that should be more adjusting to these changes is Android which is developed by Google and is available for millions of mobile devices around the world. Android stands out for its versatility for developers and for the news and environment for the millions of users who enjoy this system.
Android periodically launches new versions of its operating systems which are full of special functions and new features that have been designed to meet the expectations of its users and thus position itself as one of the most used mobile operating systems in the world. Currently, Android has launched its Android P version , which has new features and capabilities for both users and developers..
Through this tutorial we will analyze all the news and how to install Android P through Android Studio.
What is Android P and how to download beta
Android P has been recently announced as the latest version that will be released for Android devices after Oreo and therefore from this month of May we can try the beta version to discover all its news and features.
This beta will be available for devices such as Xiaomi, Oppo, Sony, Nokia, Essential and OnePlus with your OnePlus 6, but we must always keep in mind how delicate it can be to officially use a beta since, as the name implies, It is a trial version and may present some bugs..
Android P is integrated with Project Treble, which has developed as an important architect within the framework of the Android operating system, and its main function is to allow devices to be easier, faster and with less cost when it comes to being updated to A new version of Android.
The betas of each device can be downloaded at the following links:
Android P Features

Android P is loaded with numerous features which we can find in more detail on the official Android site at the following link:
Android P
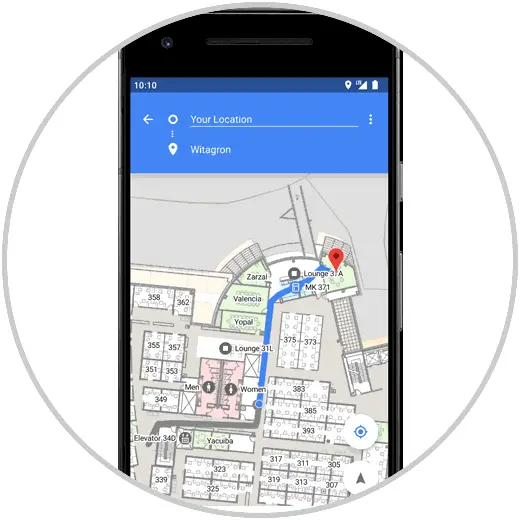
Indoor positioning with Wi-Fi RTT
Android P has been added with platform support for the IEEE 802.11mc Wi-Fi protocol, which is known as Wi-Fi Round-Trip-Time (RTT), this in order to take advantage of the internal positioning in the applications.
This allows Android P devices that have hardware support, applications can use the new RTT APIs in order to measure the distance to Wi-Fi access points (AP) suitable for RTT and for this you must have the ACCESS_FINE_LOCATION permission.
Enhanced Messaging Experience
In Android P it is now possible to add an action in order to reply to messages or enter other text directly from a notification to simplify messaging tasks.
Additionally, within the messaging segment, a new simplified support for conversation participants is added, that is, with the new Person class it will be possible to identify the people who are part of a conversation, including their avatars and URIs. We also have a new support for images since Android P now shows images in message notifications on phones.
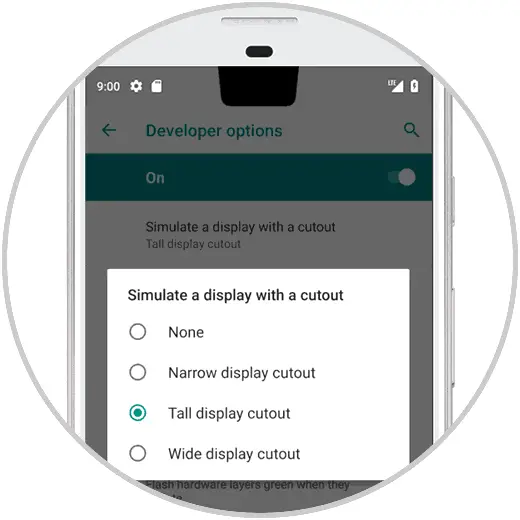
Screen clipping support
Android P now offers us a new support for the latest designed screens which are edge-to-edge style and we can apply the screen cutout for camera and speaker.
Volume, tone, do not disturb and power button controls
In Android P the volume controls are tilted to the right edge this in order to improve the management of these controls.
Also, from the volume menu displayed when pressing any of the buttons, it will be possible to view the Bluetooth devices and perform actions such as connecting or disconnecting.
If we press and hold the power button, the menu will give us the option to take a general screenshot simplifying this action.
VP9 HDR video, HEIF image compression and multimedia API
The new Android P integrates support for High Dynamic Range (HDR) VP9 Profile 2, which allows us to enjoy HDR-enabled movies directly from YouTube, Play Movies and more sources on devices with HDR capability.
Android P is able to have support for encoding HEIF (heic) images.
Rotation
It is one of the issues that annoys many users, but with Android P, involuntary rotations have been eliminated, since a new mode was added to set the current orientation even when the position of the device is changed. As Android users it will be possible to activate rotation manually when necessary by pressing a new button in the system bar.

Navigation bar improvements
One of the most used elements in Android is the navigation bar and now in the Android P version the navigation bar can be replaced using gestures which can be represented with a simple line. This line allows us to slide it once up to open a new screen of recent apps or we can slide it again to open the app drawer. In addition to this, by pressing it once we can go to Start or swipe to navigate through the different recent apps that we have used on the device.
Some of the other functions in general that we will find in Android P will be
- The icons in the configuration section will be much more vivid and round, so that each icon has a new color and some icons have been redesigned globally.
- It will now be possible to write to screenshots taken and edit them before sharing with other users.
- In the selection of text offers greater precision and zoom
- Do not disturb mode can be activated by simply flipping the mobile, which simplifies this process.
- Now it is possible to control the use of the Wi-Fi network to reduce consumption in the background, which can sometimes lead to high network resources.
- The battery saver mode can be programmed at any time when the battery is 5 to 70 percent and not only 5 and 15 percent as it currently is.
- In Android P, applications cannot use the microphone and camera unless they are in use by the user.
- Applications in Android P will not be able to access the GPS unless they are being actively used.
- An Android Dashboard is included, which is a new board that displays the time we have used the applications, how many times they have been unlocked and much more information. Likewise, it is allowed to select the use time limit to deactivate an App.
- The Adaptive battery function is included, which has been developed to save battery by limiting the use of the battery by applications that are not used regularly and thus not incurring unnecessary consumption.
- It has App Actions which are shortcuts to various actions that Android P can predict through the application drawer, thus, when showing all installed applications, Android P will give us suggestions of applications or actions that we frequently execute.
- At the rest level, Android P includes the Wind Down function which interacts with Google Assistant, to indicate what time we are going to sleep in order to automatically turn the screen black and white and thus help you fall asleep an effective form.
1. How to install Android P
Because Android P will be restricted for some time only for certain devices, something traditional in Android, we have a practical alternative to know in detail some of the functions and environment of the new versions of Android and this is through Android Studio.
Step 1
It will be possible to compile and test Android P applications with Android Studio 3.1 and its free download is available at the following link:
Android Studio
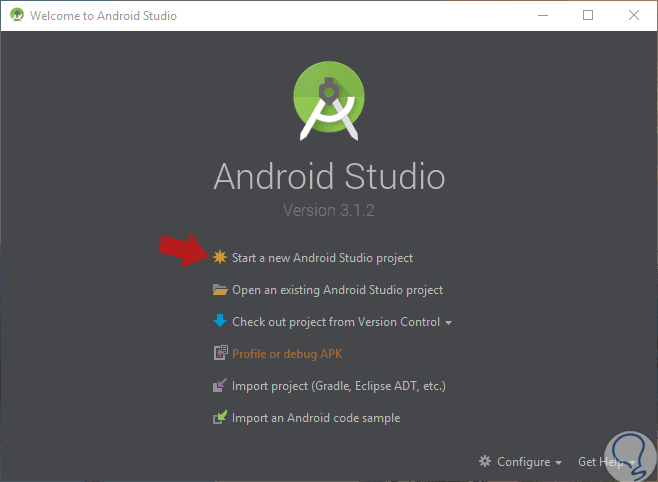
To make use of this function, we run the application and see the following. There we select the option "Start a new Android Studio Project"
Step 2
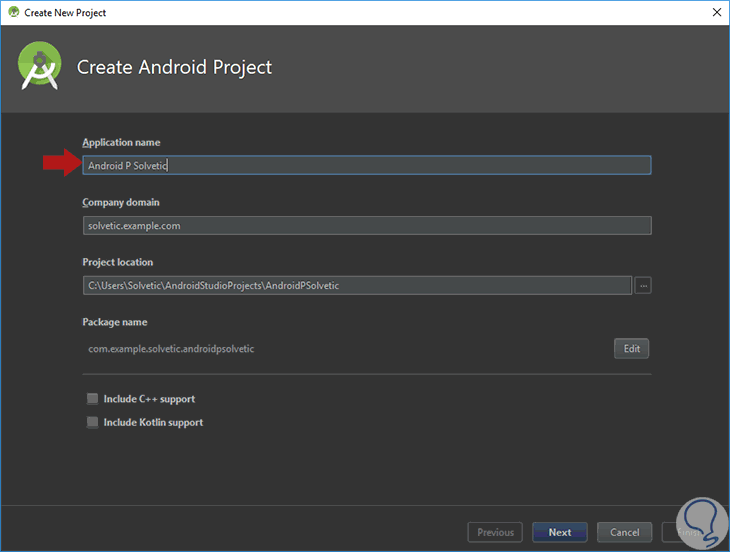
In the next window we will assign a name for that project. Click on "Next"
Step 3
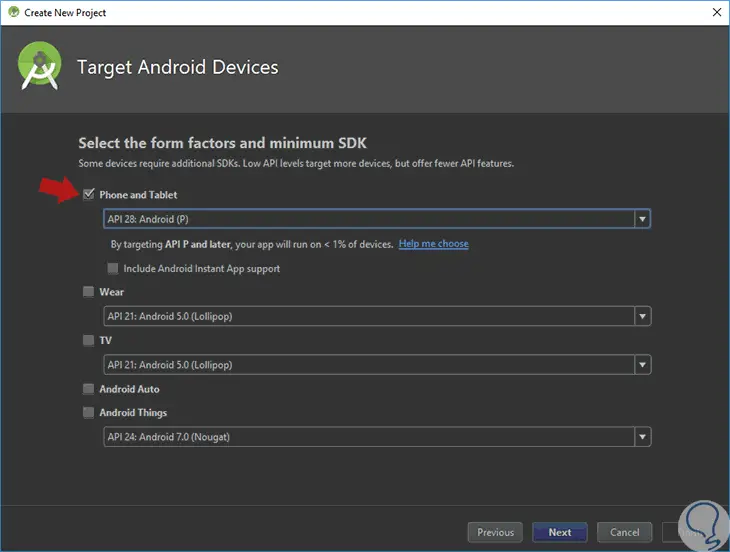
In the next window we will define the type of device to be emulated, we can select TVs, Tablets or mobiles, etc. In this case we select "Phone and Tablet"
Step 4
In the respective field we select the option API 28: Android (P). Click on "Next" and now we will define the type of activity to use:

Step 5
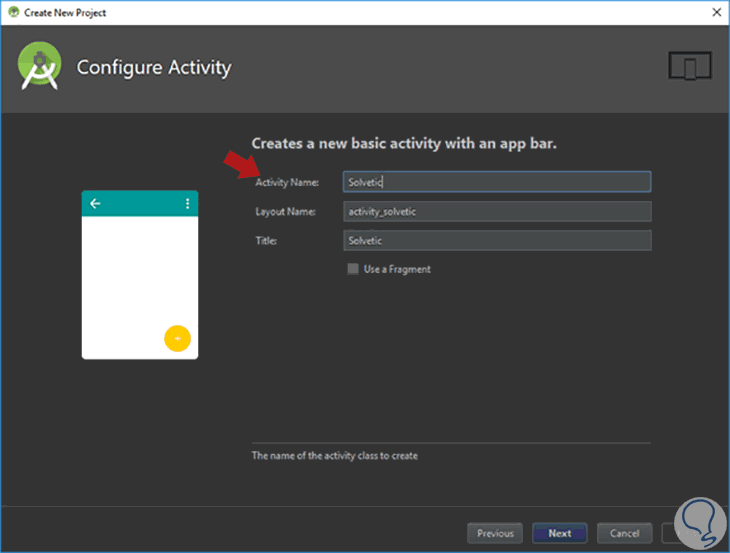
Once selected, we will assign a name to that activity:
Step 6
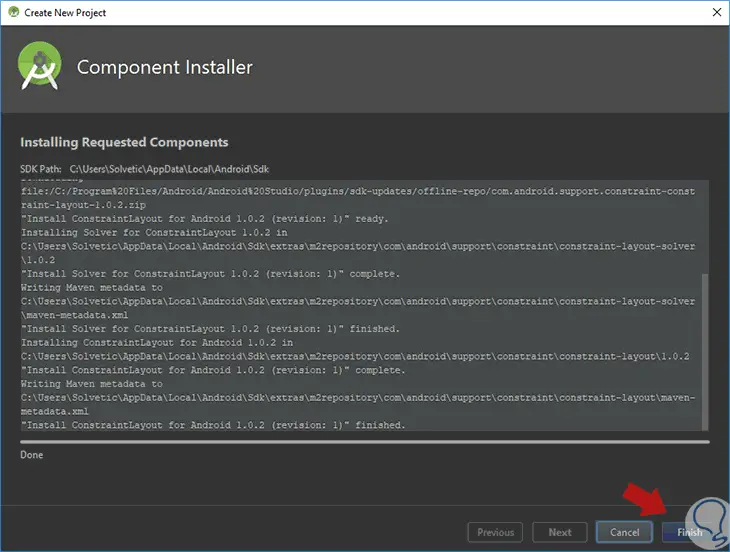
In the next window we will see that the necessary requirements for this action are installed: Click on the "Finish" button to exit the wizard.
Step 7
We can see that the process to apply the changes begins:

Step 8
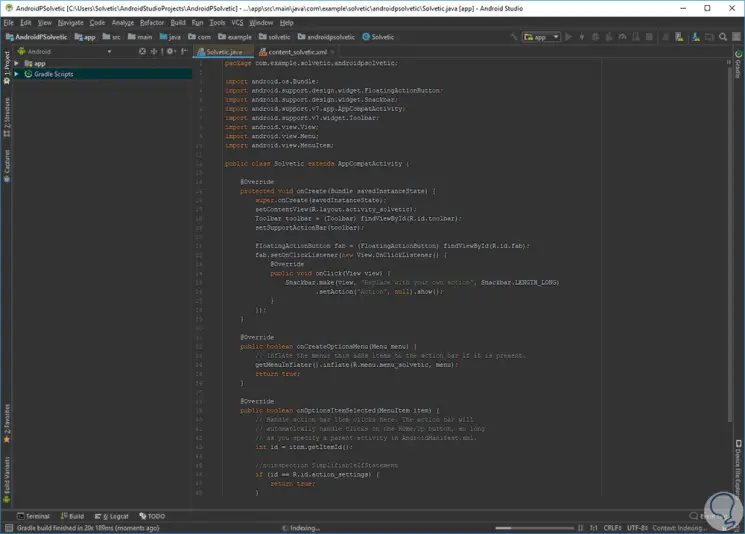
This will be what our new Android P project will look like:
2. How to set up Android P in Android Studio
The time has come to make certain configurations, for this, we will have to follow these steps:
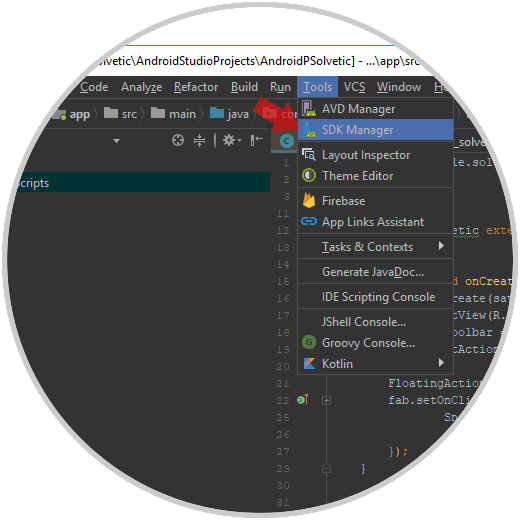
Step 1
We go to the "Tools" menu and there we select the "SDK Manager" option:
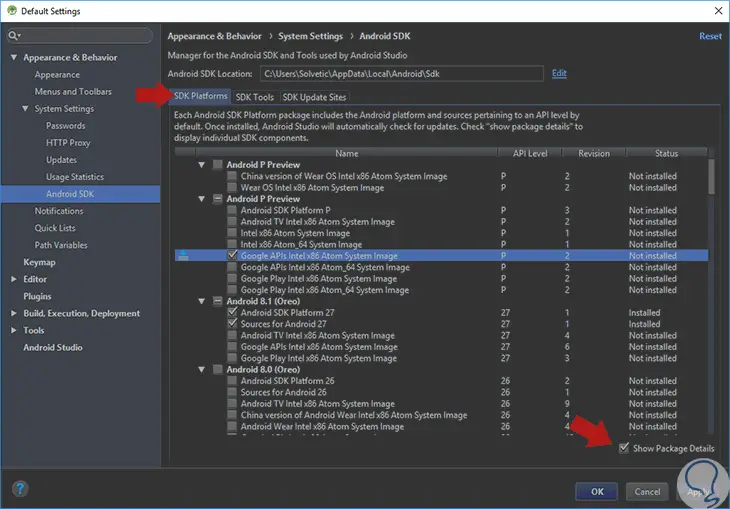
Step 2
On the SDK Platforms tab we activate the "Show Package Details" box located at the bottom and in the Android P Preview section we will select an image such as "Google APIs Intel x86 Atom System Image":
Step 3
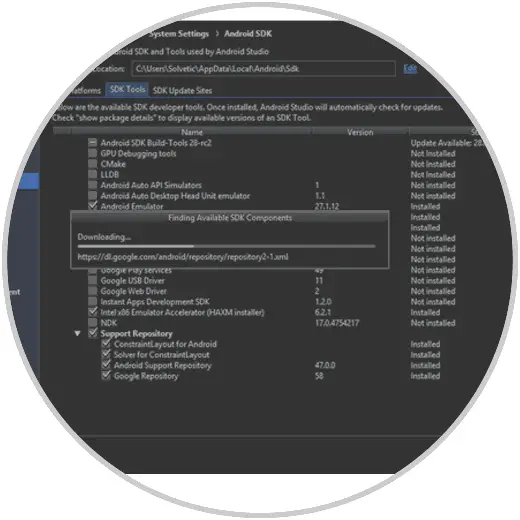
Now, let's go to the SDK Tools tab and activate the latest version of Android Emulator. Click on the "Ok" button
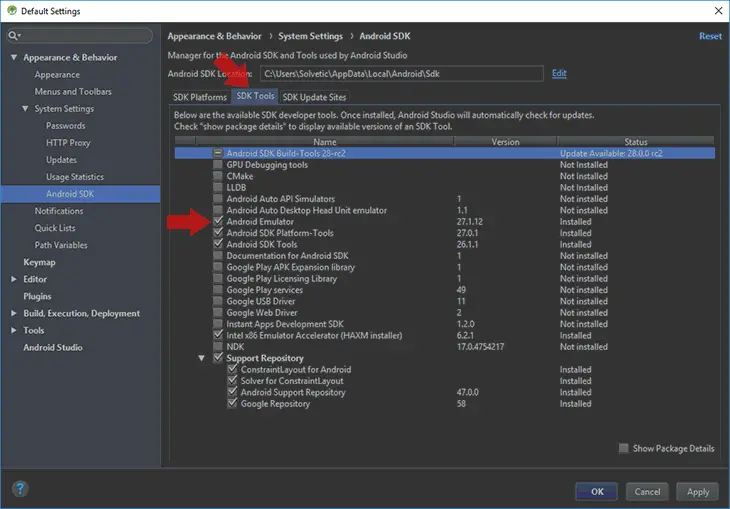
Note
It is advisable to select from version 27.1.12 onwards.
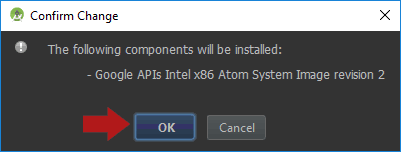
Step 4
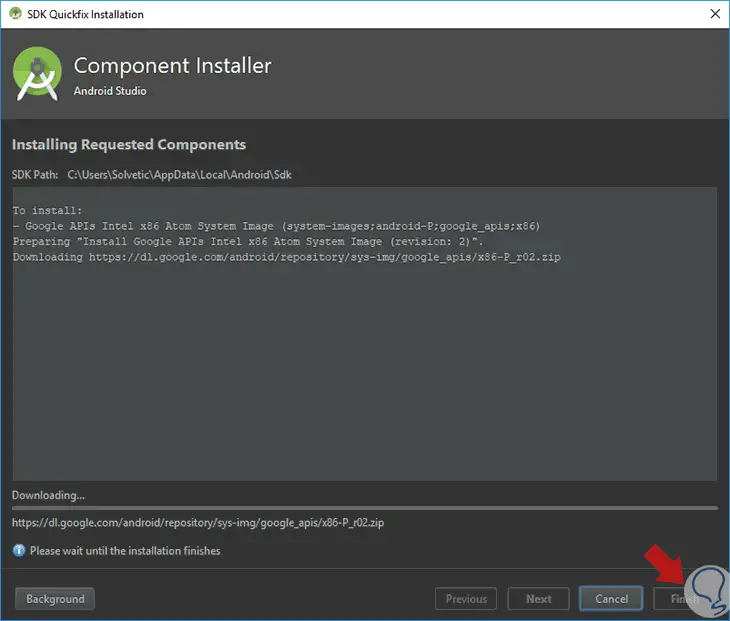
The following message will be displayed: Click again on "Ok"
The installation process will begin:
Step 5
Once the download is finished we will see the following window. There we activate the "Accept" box to confirm the license

Subsequently, the download and installation process will begin. Once finished, click on the "Finish" button to exit the assistant.
Step 6
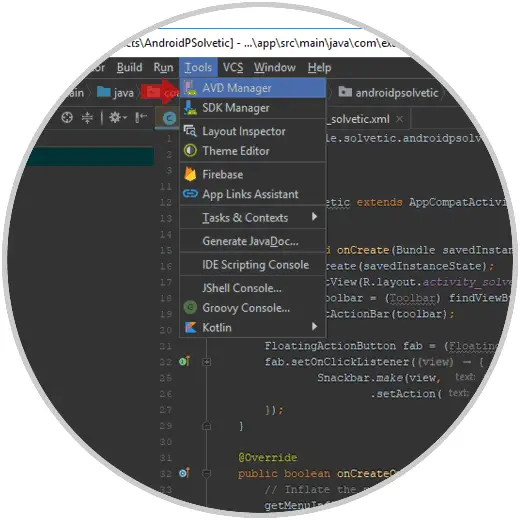
Now we must create the virtual device to check the use of Android P, for this we go to the "Tools / AVD Manager" path:
Step 7
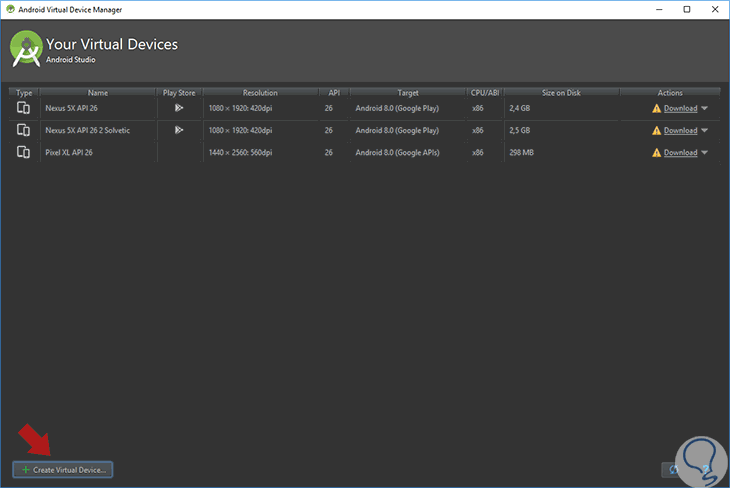
The following window will be displayed. There we click on the "Create Virtual Device" button located at the bottom
Step 8
In the next window we select the type of equipment to emulate: Click on "Next"
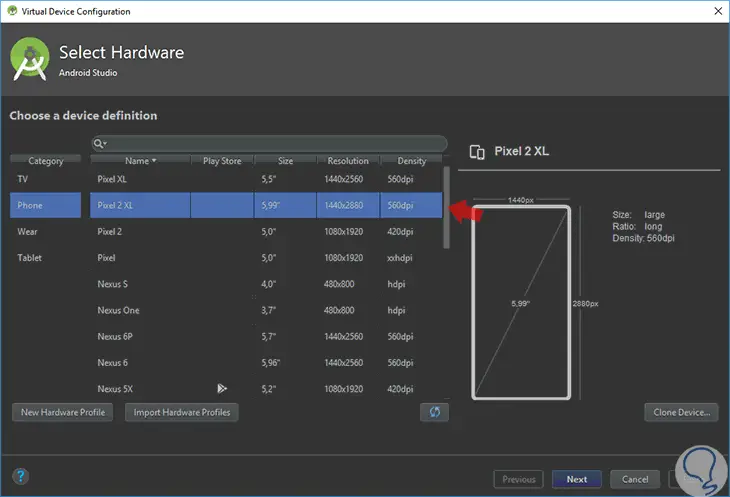
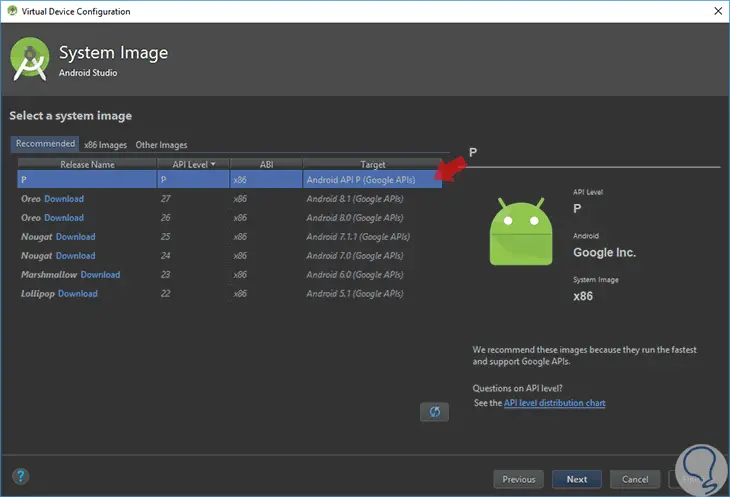
Step 9
Next we select the image to use which in this case is P:
Step 10
In the next window it will be possible to set some configuration parameters for the equipment if we wish. Click on "Finish" button

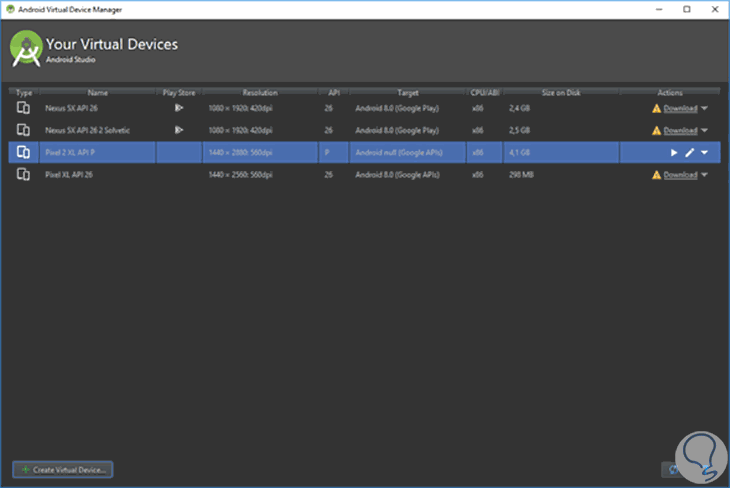
Step 11
We can see our team created and ready for use:
Step 12
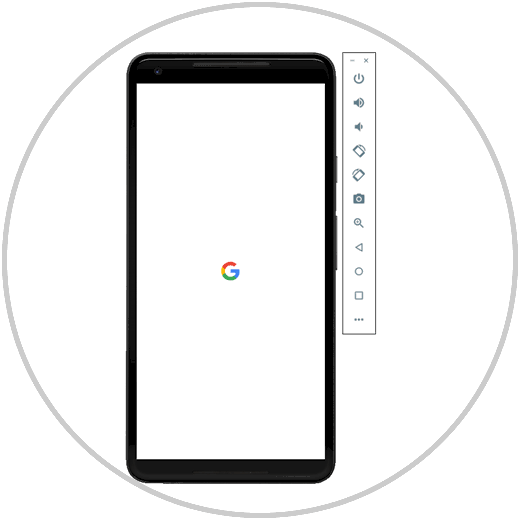
Click on the play button and Android P charging will begin on the selected device:
Step 13
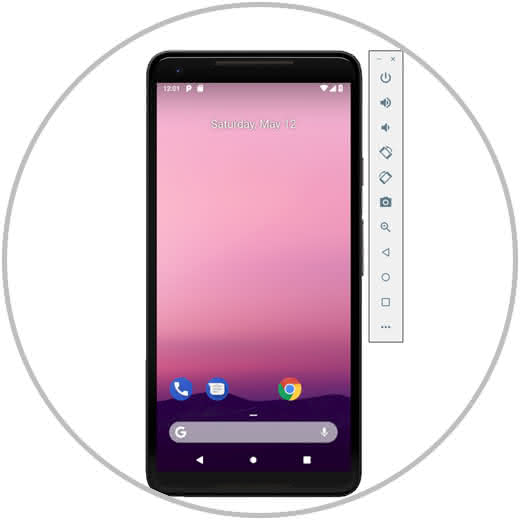
We can see the sidebar which is designed to carry out actions on the equipment such as:
- Turn off or on the device
Once the system is loaded we will see the following:
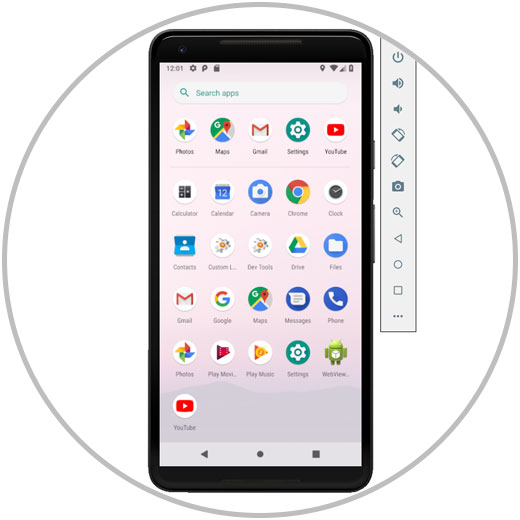
When accessing we can go to the available Android P applications:
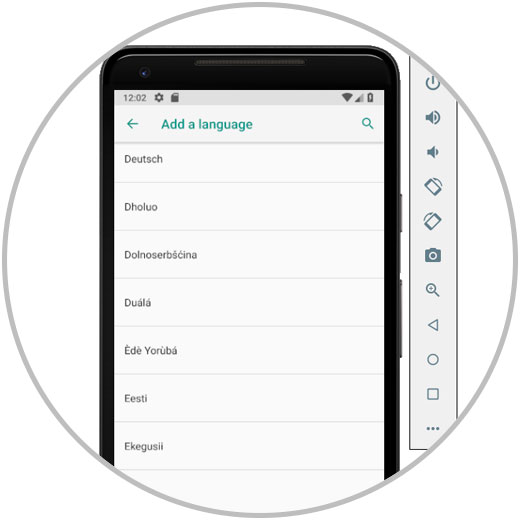
It is even possible to modify your language:
It's that simple we have the option to know in advance the new versions of Android and know in detail what awaits us when they are available in our country and for our devices.