Something that will remain in effect for a long time is email . Although communication between people every day is more online and through social media platforms, mail has been, is and will continue to be a practical alternative for both personal and business communication..
In Windows 10, thousands of users do not make the most of the "Mail" application, which is integrated into the system and is part of the universal family of applications. In addition, the Email application is linked to Calendar , in order to have an excellent alternative to receive updates in our email, manage various schedules and stay in touch with thousands of users.
These applications are aimed at a general public, as they have been designed for both personal and professional use. In addition to this, these applications are compatible with Office 365, Exchange, Outlook.com, Gmail, Yahoo! and other popular accounts thus allowing the centralization of accounts to be much more special if we work not only one account and be able to access all from a single central point. It is for this reason that today TechnoWikis will make a complete analysis on how to use this application in Windows 10..
1. How to set up the Windows 10 Mail account
We have mentioned that the Mail application is compatible with all major webmail services, such as Outlook, Gmail, Yahoo! or iCloud but it will also be possible to configure standard POP and IMAP services.
Step 1
When accessing the Mail application in Windows 10 we will see the following window where we click on the "Add account" line:
Step 2
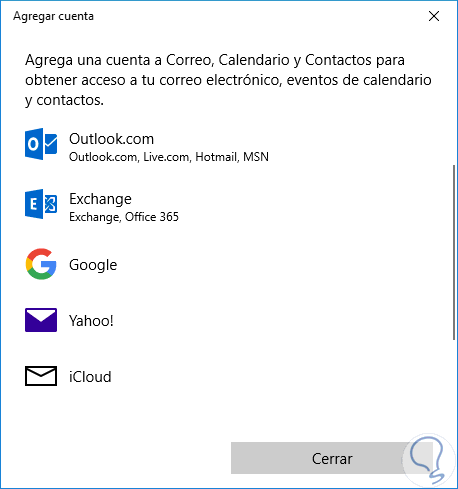
Then we must select the provider of the email account that we will configure in Windows 10:
Step 3
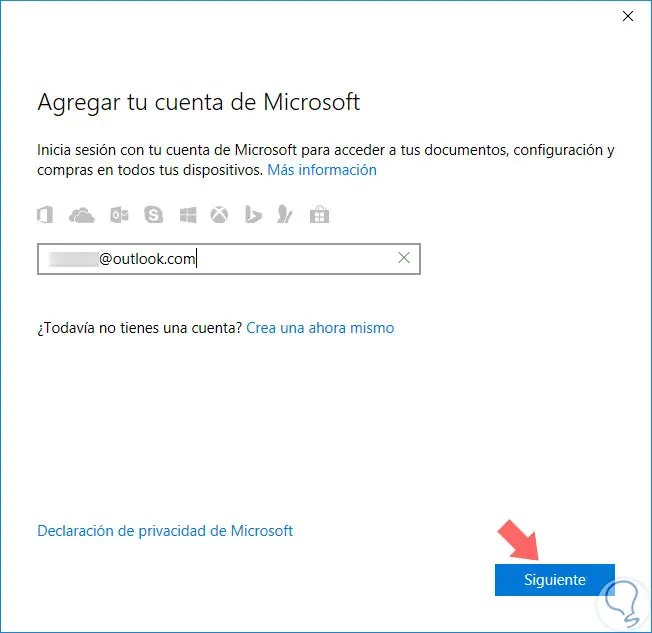
When selecting the provider, we will need to enter the email account to use: Click on "Next"
Step 4
Now we will enter the password:
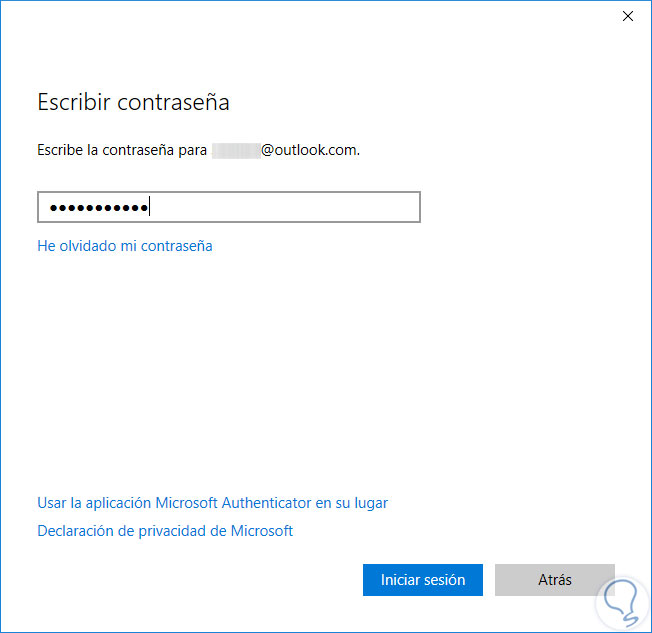
Note
In the case of an Outlook account we can use password or the Authenticator Mobile Application.
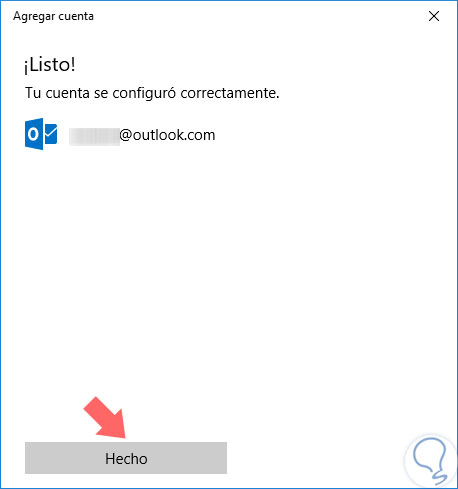
Step 5
Once confirmed we will see that the account has been added correctly. Click on the "Done" button
Step 6
We will access our inbox:
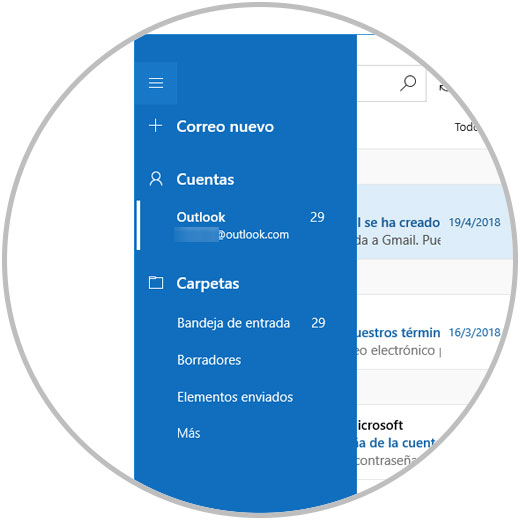
There we can click on the menu icon to see details such as
- Number of unread messages
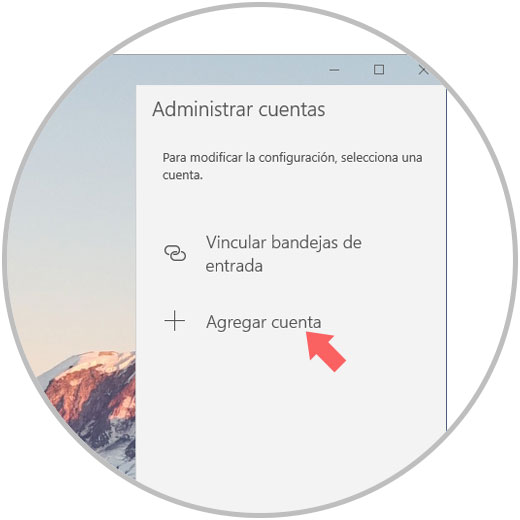
2. How to add a new Mail account in Windows 10
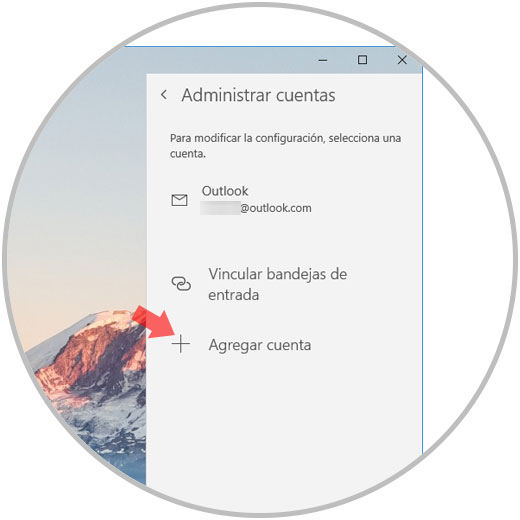
In case we have multiple email accounts, they can be added to the Email application to manage them all in one place.
Step 1
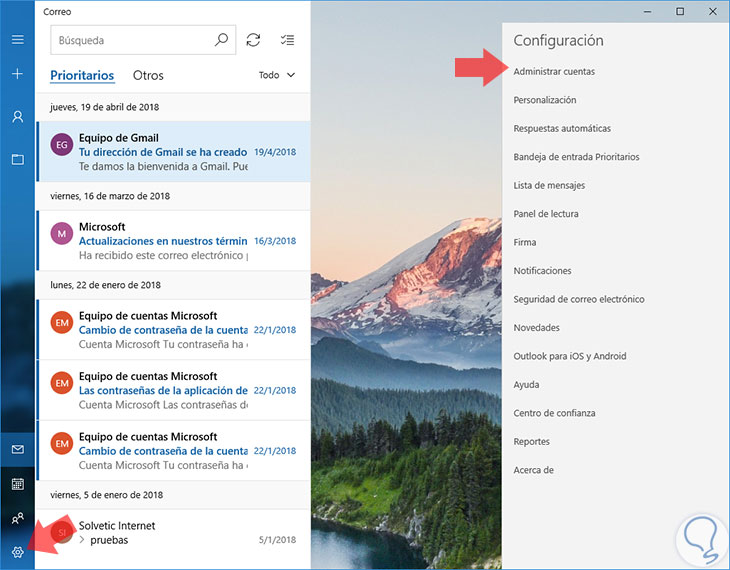
For this, click on the gear icon at the bottom and on the right side select the option "Manage accounts":
Step 2
The following will be displayed. We click on the "Add account" line
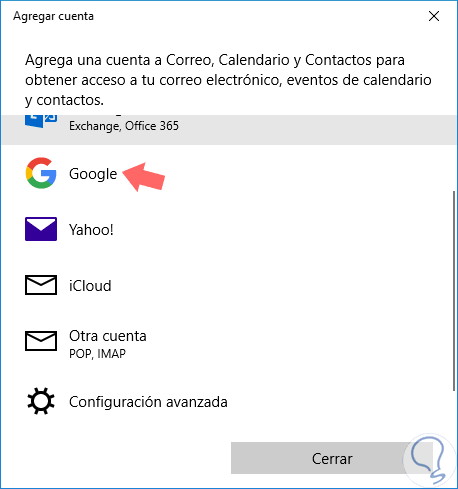
Step 3
We will select the desired mail provider that in this case will be Google.
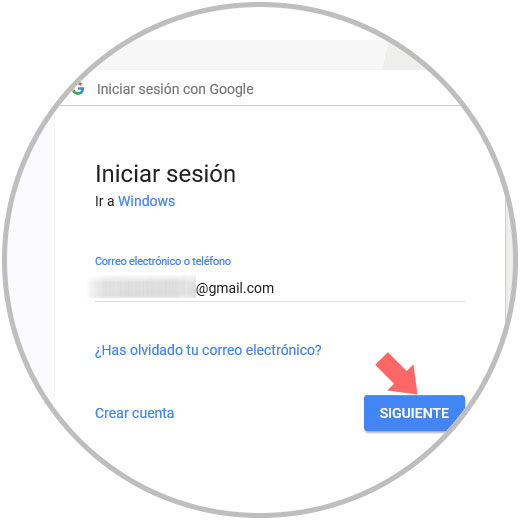
Step 4
We proceed to register the email account and click on "Next"
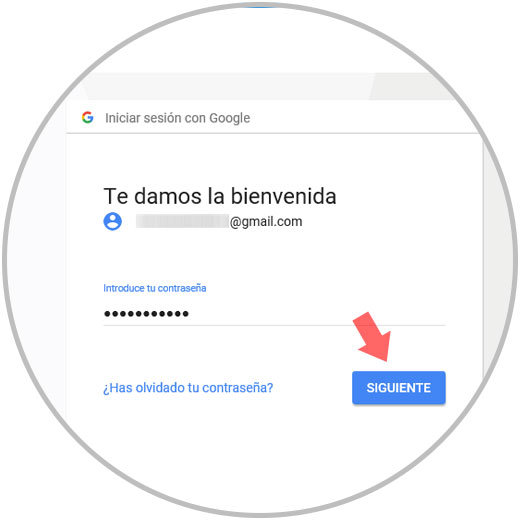
Step 5
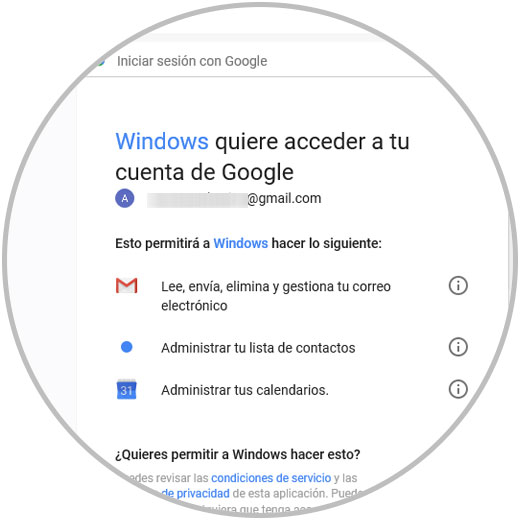
We will enter the account password:
In the case of Google accounts it will be necessary to allow access: Click on "Allow"
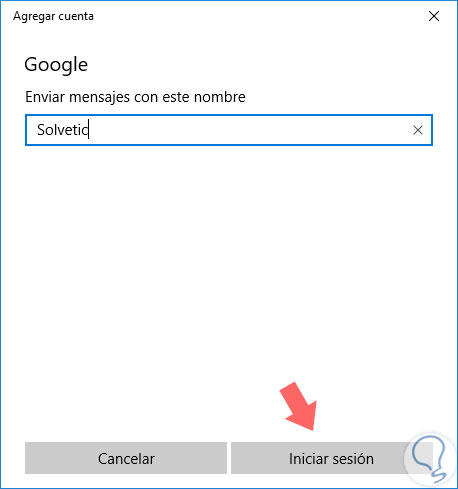
Step 6
We will see the following message where it will be indicated how we want to send the emails. Click on "Login"
Step 7
The Google account will be set up. Click on "Done" to exit

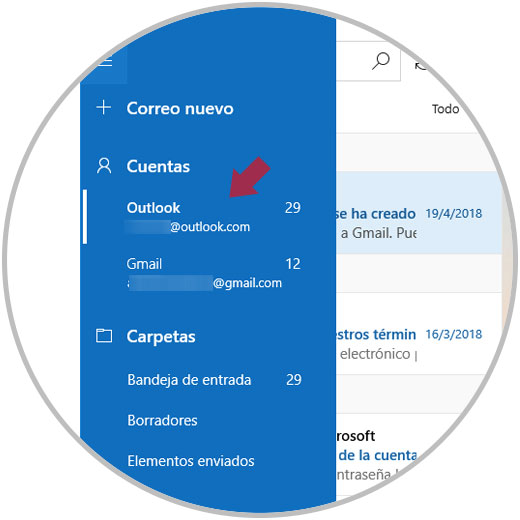
Step 8
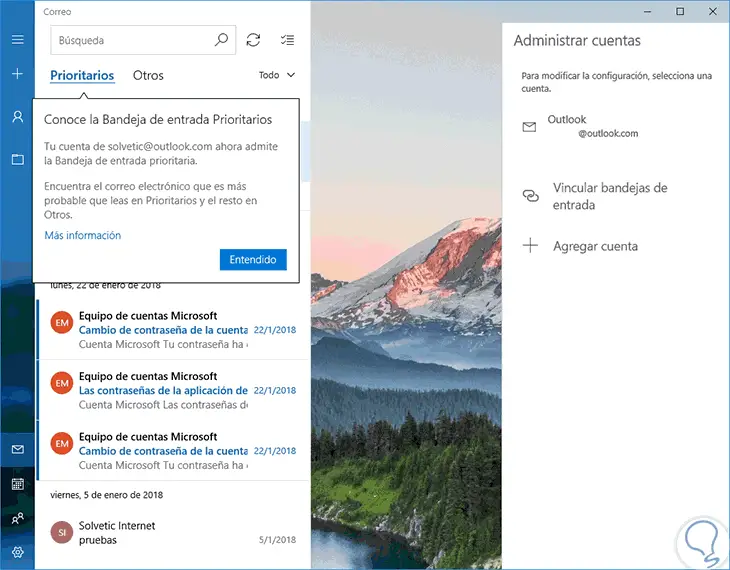
Now we can see both accounts simultaneously in the "Mail" application:
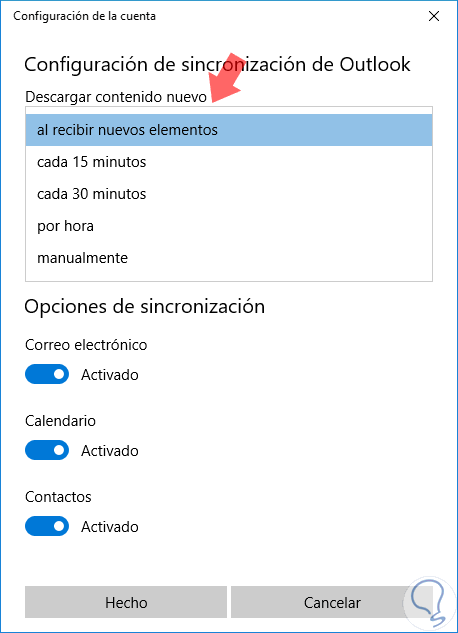
3. How to change the frequency of new email messages in Windows 10
Depending on the account and the use we give to it, we can receive few or many emails, some logically more important than others. Therefore, it is a key point to know how to define the frequency with which we will receive new mail messages, since, if the frequency is very slow, we can stop responding to priority emails and if it is very often we will be attacked by numerous emails and their respective notifications
Step 1
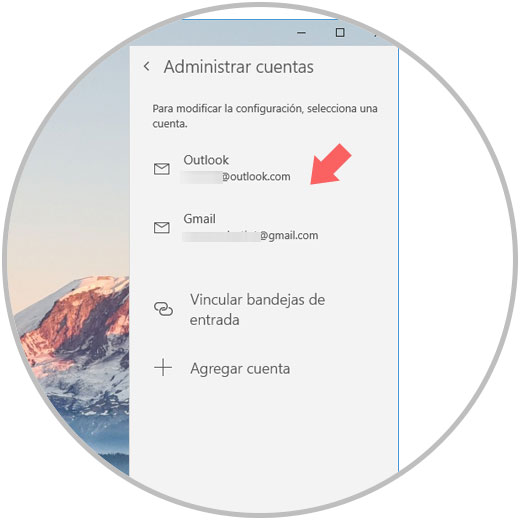
To do this we go back to the "Manage accounts" section where we will see the following. There we click on the account to configure
Step 2
The following pop-up window will be displayed. We click on the line "Options to synchronize the content"
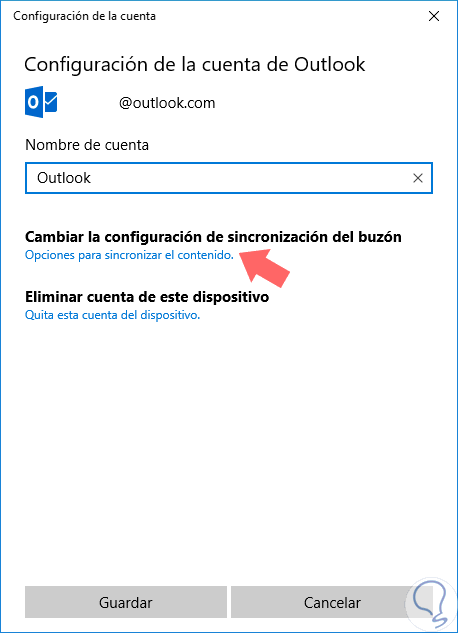
Step 3
In the new window we display the options in the "Download new content" field and select the desired frequency to receive new emails. Once the change is made, click on "Accept".
4. How to compose a new message in Windows 10 Mail
One of the frequent tasks at the email level, actually the purpose for which it was created, is to send messages to other users.
Step 1
The "Mail" application of Windows 10 facilitates this action.
We have two options
- Click on the menu and select the option "New mail"
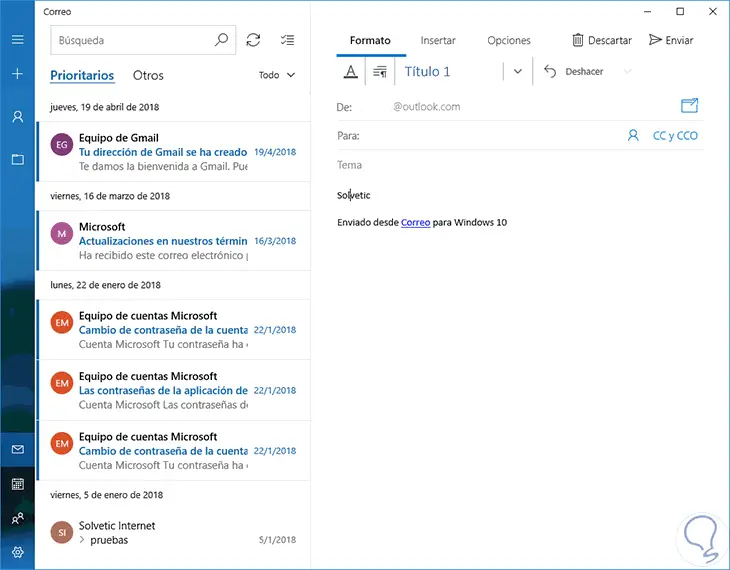
This will display the side window where we define the recipient and message to write:
Step 2
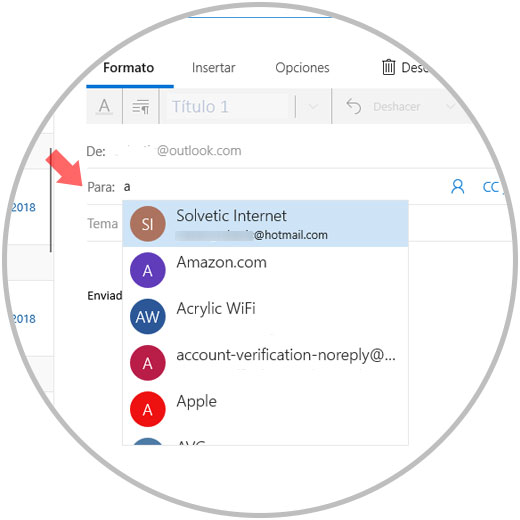
In the "To" field, simply enter the initial letter of the recipient to see the various options to use:
Step 3
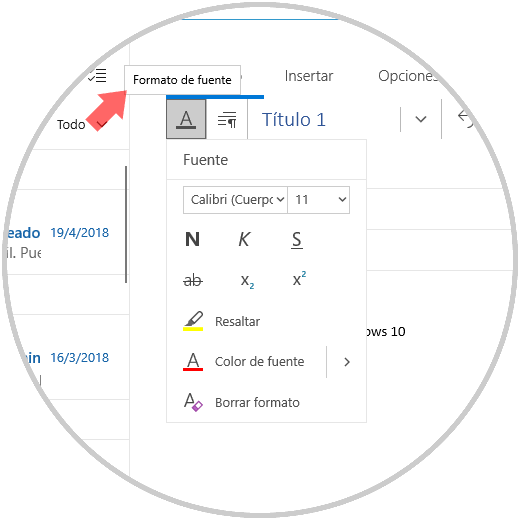
Now, each email section allows us to perform different tasks on the message to be sent, we have the following:
Format
It is possible to perform actions such as:
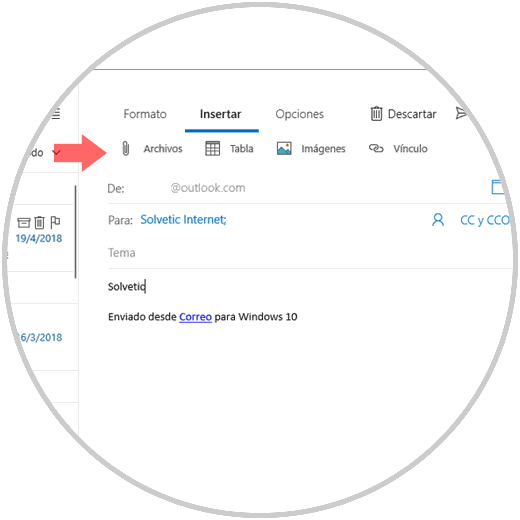
Insert
In this section we can attach elements such as images, audio or videos:
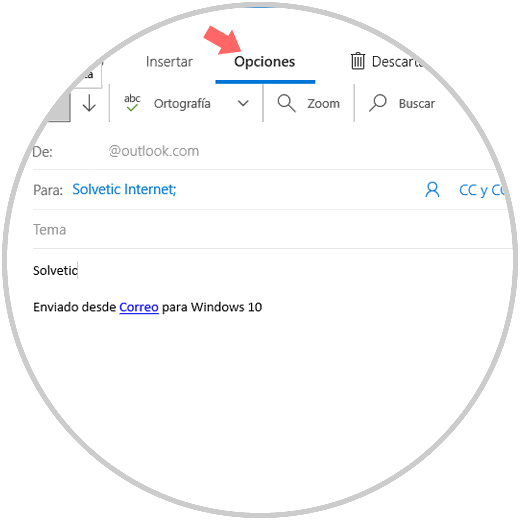
Options
From this section it will be possible to carry out tasks such as:
- Define the importance of mail (high priority)
Finally we have two buttons that are:
Undo
It does not send mail and does not save it in drafts
Send
Send the email as it was written
5. How to search for an email in Windows 10 Mail
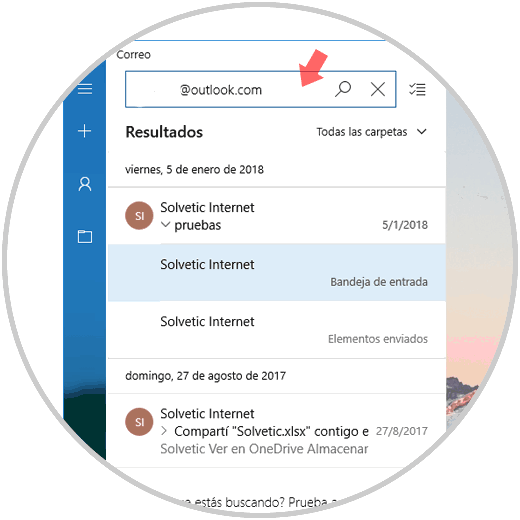
Something that happens to all of us is that due to the amount of emails we can receive, it is necessary to look for a specific one, either by sender, subject, etc.
Mail facilitates this task thanks to its Search field located on the upper left side, just enter the search parameters to get the best results:
6. How to configure mail messages in Windows 10 Mail
The Mail application of Windows 10 gives us the possibility of managing emails in a comprehensive and total way, this implies carrying out actions on them for a better view and access to them.
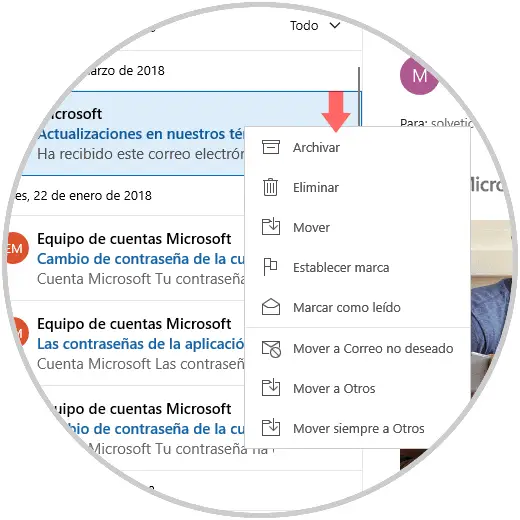
Just right click on a message to access options such as
- Archive: Host mail in another location for later reading
- Delete: Deletes the selected message
- Move: move the message from one folder to another
- Set brand: Mark mail for better visibility of this
- Mark as read: Even if it has not been read, mark it as read so that it is not available as unread
- Move to spam; When the sender is not trusted we can use this option
- Move to others: Move mail to this folder
- Always move to Other: Set so that the emails from this sender reach the Other folder and not the inbox
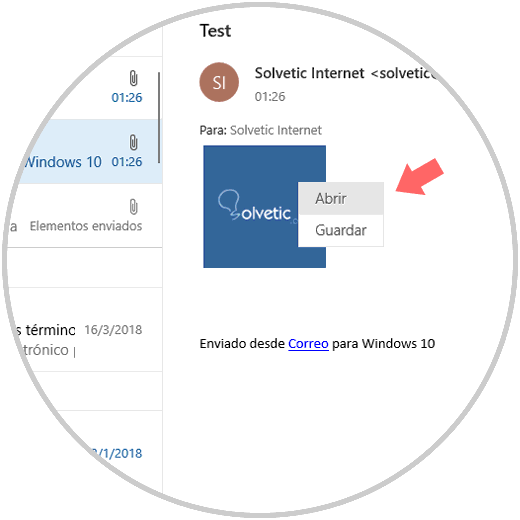
7. How to open and save attachments in Windows 10 Mail
It is normal that we receive attachments of any kind in our email and the Mail application offers two elementary options for this attachment management:
Open
Open the attachment directly according to its type
save
Store the attachment locally
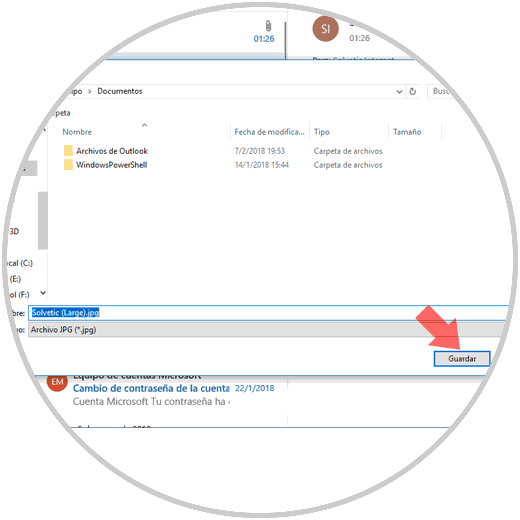
To do this we right click on the attachment and select the respective option: Select the "Save" option
We will see the following pop-up window where we will define the storage path: There we click on the "Save" button to complete the process.
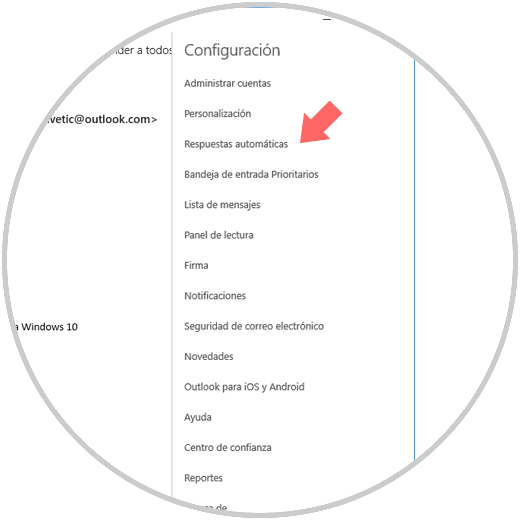
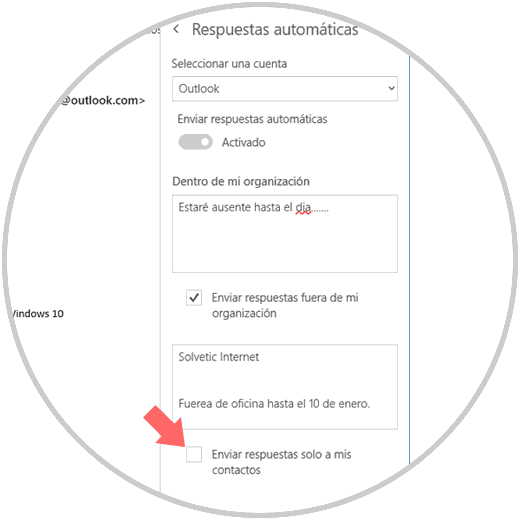
8. How to configure automatic replies in Windows 10 Mail
Automatic replies are the best option to indicate to others when we will be absent for some reason and we do not want important emails to arrive, or if the senders are already notified that we are not ready to respond.
Step 1
To activate and configure the automatic responses, click on the gear icon and in the window displayed on the right side select "Automatic answers":
Step 2
Now, in the new window we will do the following:
- Activate the "Send automatic responses" switch
- Define the message with two possible options, inside or outside the organization
Alternatively, we can activate the "Send answers" box only to my contacts so that they are the only ones who receive those answers.
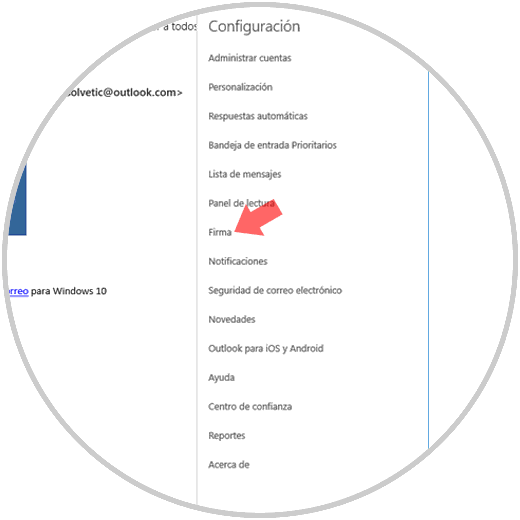
9. How to add signatures to Windows 10 Mail
We all like to personalize our emails and what better way to do it with a signature that identifies our name, position or what we want and the Mail application facilitates this.
Step 1
To do this, click again on the gear icon at the bottom and in the pop-up window select "Signatures":
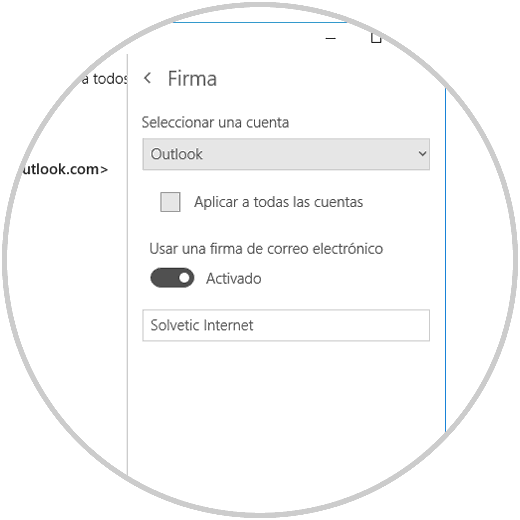
Step 2
Now, we will do the following:
- Activate the "Use an email signature" switch
- Define to which accounts this signature should be applied
- Enter the desired signature in the respective field
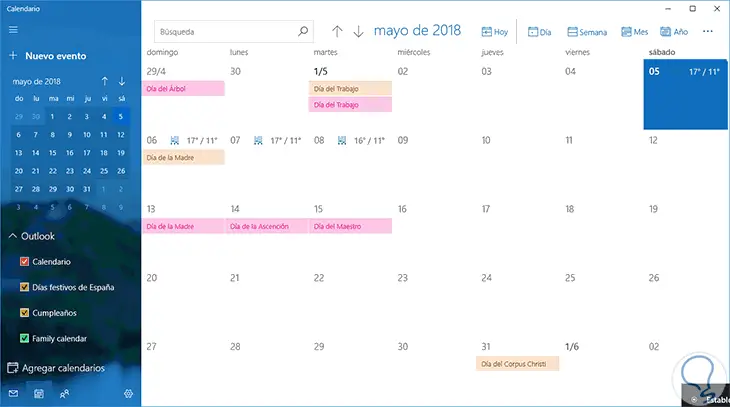
10. How to access the calendar in Windows 10 Mail
The Mail application is linked to the calendar for topics of meeting management, events and special dates, to access the calendar just click on the calendar icon at the bottom and from there configure the desired dates:
We can see how the mail application is much more than a utility to send and receive emails since its use options are wide..