Today there are a number of terms of both technologies and applications in the IT world and each one fulfills a series of specific functions, at the network level one of the most named, and used, is the term VPN..
A VPN (Virtual Private Network), is a technology that gives us the opportunity to create a local network without it being necessary for all members to be physically connected to each other , but for the connection using the Internet , hence the name "Virtual" and with the VPNs we will have the advantages of the local network already known.
The use of a VPN gives us security, simplicity in transmission and ease of interconnection between users..
VPN features and functions
Some types of use of VPN networks are:
- Ensure greater security in public connections
- Evade various types of blockages on the Internet
- Extend connectivity at geographic level
- Avoid restrictions of our ISP (Internet Provider)
- Add extra layers of security
Advantages
When using VPN networks we will have the following advantages:
- Compatibility with all applications
Types of VPN networks
There are some types of VPN that are:
- Network-based VPNs: This allows you to connect different networks to each other using a network that is not secure through IPSec tunnels.
- Client-based VPNs: With this type of VPN, there is the possibility of having a user connected to a remote network, using an application that is responsible for establishing communication and activating the VPN.
VPN networks, independent of the provider, execute a process called tunneling, which creates an encrypted communication tunnel or channel within an equipment network thus ensuring their reliability. Today in TechnoWikis we will learn to create and configure a VPN network in Windows 10.
1. Create a VPN network in Windows 10
Step 1
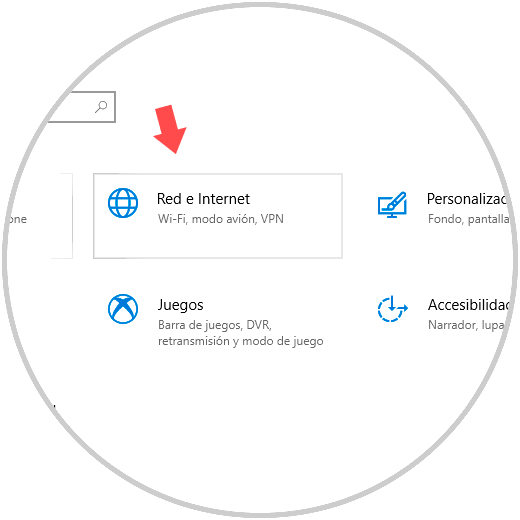
For this, we go to the Start menu and there we select the “Configuration†utility where we will see the following:
Step 2
There we click on the "Network and Internet" section and in the new window we will go to the "VPN" section:
Step 3
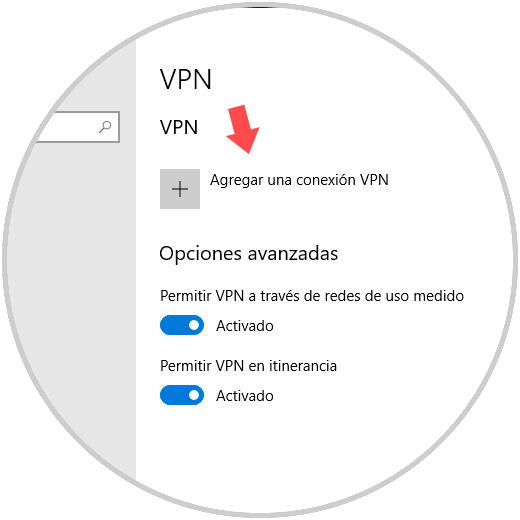
Click on the "Add a VPN connection" button and the following wizard will be displayed:

Step 4
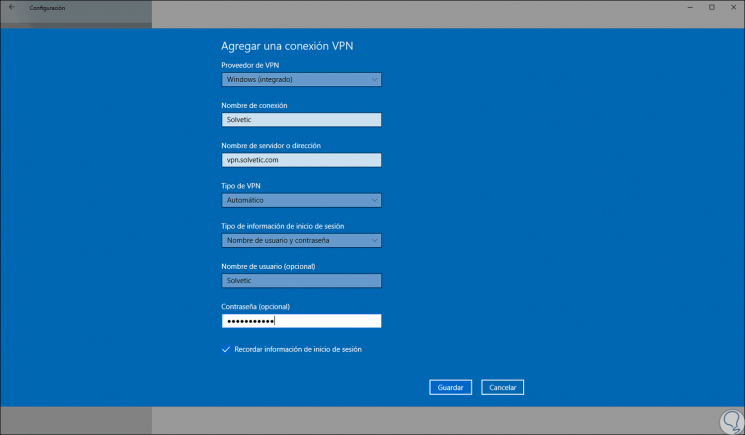
As we see, there will be necessary to complete certain fields such as:
- In the "VPN Provider" field we select the "Windows (Integrated)" option.
- In the "Connection name" field we define a name for the new connection to be created.
- In the "Server name or address" field we must set the server name or IP address of the VPN server which must be supplied by the VPN provider.
- “Type of VPNâ€: There we have a list of options to be used being SSTP (Secure Socket Tunneling Protocol) one of the most used to implement virtual private networks in Windows due to its security levels, but in case of not knowing with certainty which to select we can leave this option set to Automatic.
- "Type of login information": All current VPN providers require that we use a predefined authentication method to connect to virtual private networks for security reasons, there we have options such as username and password, smart card , certificate, etc.
Step 5
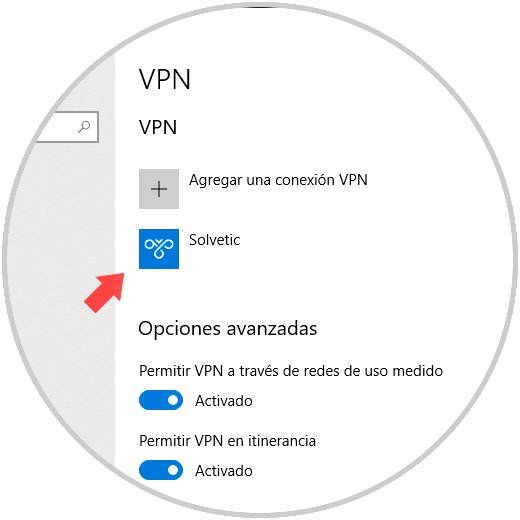
Once we define these values, click on the “Save†button to apply the changes. There, the VPN connection will be created and stored, by default we go back to Configuration where we will see the VPN network available there for use:
2. Use VPN in Windows 10
Step 1
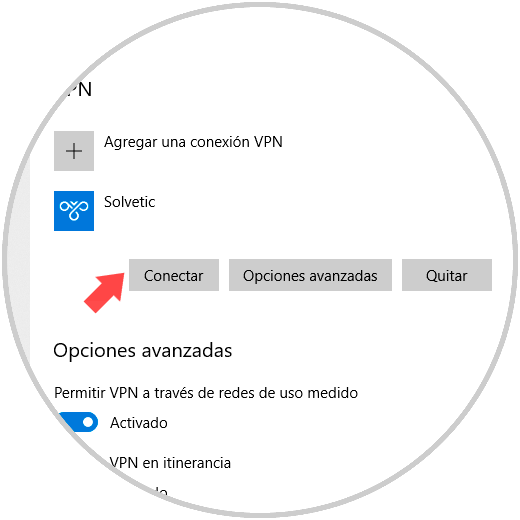
By clicking on the VPN network created we will see that the following buttons are displayed:
Step 2
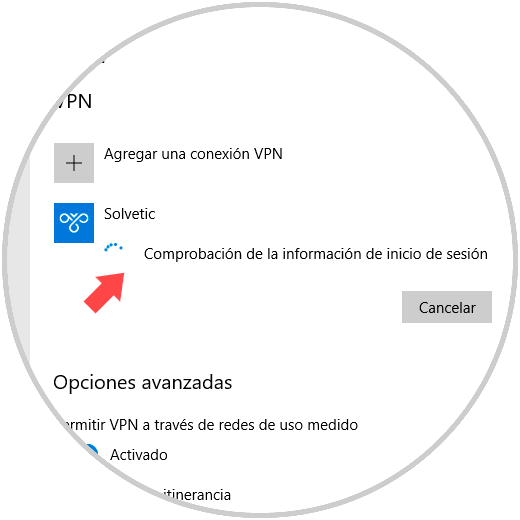
To connect to the VPN, click on the "Connect" button and we will see that the validation process begins according to the selected method:
Step 3
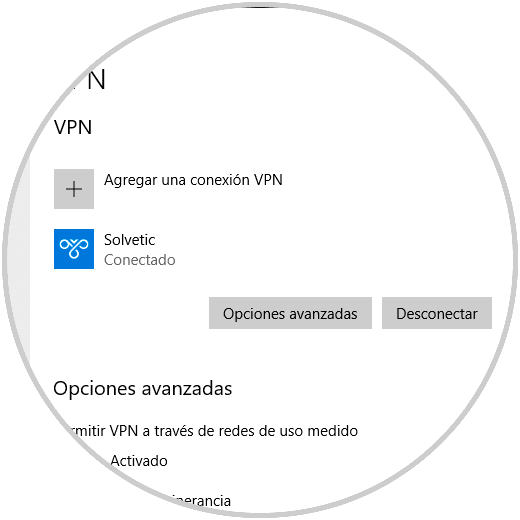
Once this is finished we will see that the connection has been established correctly:
Step 4
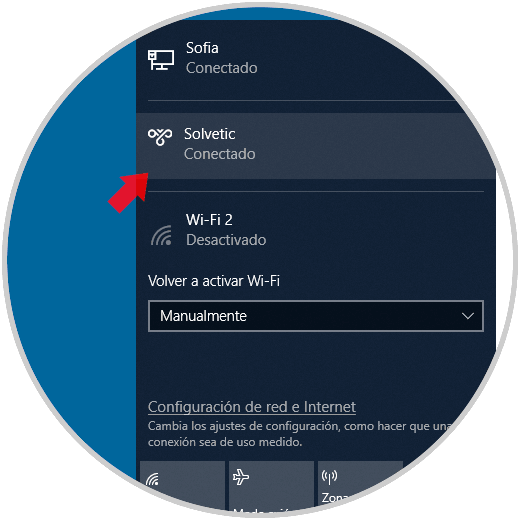
There we can disconnect from the network or access its advanced options. We can access this network even from the network access located in the Windows 10 taskbar:
3. Edit advanced options of a VPN network in Windows 10
Step 1
To access the editing options of the VPN network created, click on the "Advanced options" button where we can perform actions such as:
- Edit the network parameters such as username or password, server or IP of the VPN provider, etc.
- Define the proxy configuration of the VPN network with options use a configuration script, detect the configuration automatically or configure it manually
Step 2
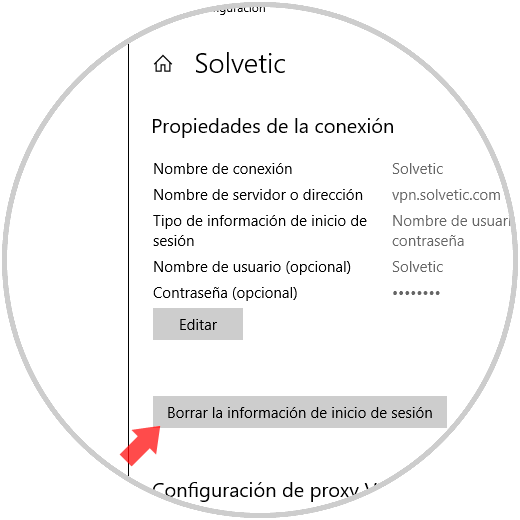
We can click on the "Delete login information" button to clean the stored data of the logins.
4. Delete a VPN network in Windows 10
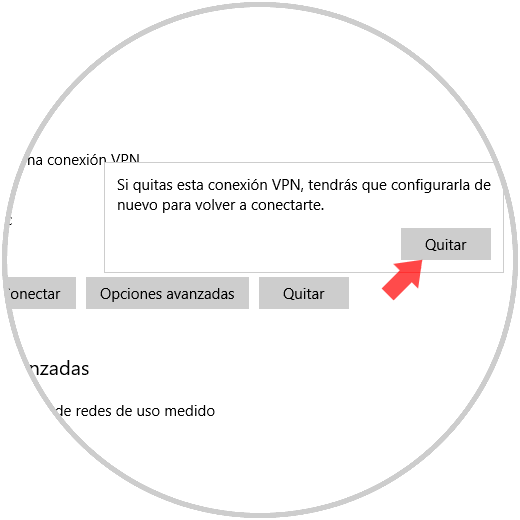
At the moment we want to remove a Windows 10 VPN, just click on the "Remove" button and the following message will be displayed. We confirm again by clicking on the Remove button and in this way we will remove the VPN from the system.
We have learned how to simply create and configure a VPN network in Windows 10..