One of the most common and natural tasks that we must carry out in Windows 10, especially in domain environments, is the creation and editing of users. Users are a fundamental part of Windows 10 as they have specific profiles to carry out administrative tasks such as installing or uninstalling programs, creating and running scripts, running maintenance tasks and more..
Windows 10 has local user accounts which become security elements in order to protect and manage access to the resources available on the computer. The default local user accounts are system integrated accounts that are created automatically when the operating system installation process is carried out and this account has administrative privileges.
The default local user accounts in Windows 10 and the local user accounts that we can create are located in the Users folder . By default we have different types of users such as:
Administrator account
Thanks to this account it will be possible to manage the operating system and it is, as we said, the account that is created in the process of installing Windows 10 and thanks to this account it will be possible to have total control of the files, directories, services and other resources of the system, as well as create local users and assign user rights and access control permissions to them. This default administrator account cannot be deleted or blocked, but it can be renamed or disabled.
Guest account
This guest account is disabled by default in the installation of Windows 190 and thanks to this account, temporary or temporary users, those who do not have their own account in the system, are allowed to temporarily log in to the computer with rights User limits for security reasons.
Integrated Administrator
This is a hidden Windows 10 account which has even more permissions than the administrator account mentioned above, with the activation of this account no permission is required to execute any action on the system which is delicate.
TechnoWikis will explain through this tutorial the practical way to create a user account in Windows 10 using PowerShell which is Microsoft's commitment as an administration console..
To keep up, remember to subscribe to our YouTube channel! SUBSCRIBE
Create user with Windows PowerShell in Windows 10
Step 1
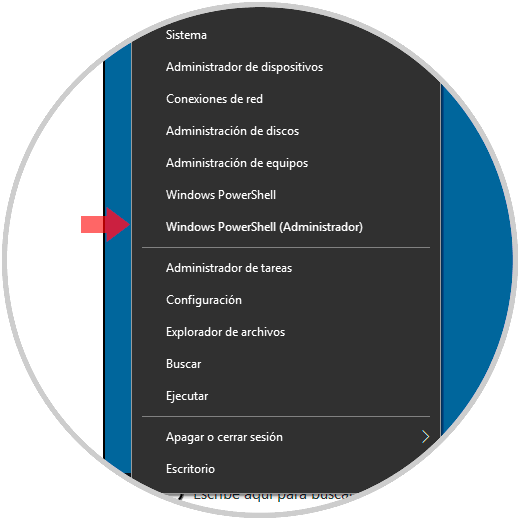
To perform this action we must access Windows PowerShell as administrators and for this we have the following options:
To keep up, remember to subscribe to our YouTube channel! SUBSCRIBE
Step 2
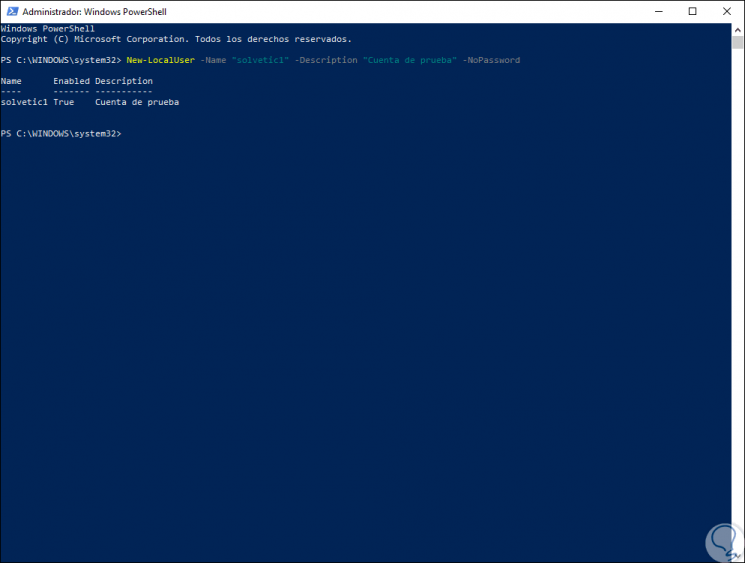
Once we access Windows PowerShell we will execute the following syntax for user creation:
New-LocalUser -Name "username" -Description "Account description" -NoPassword
Step 3
In this case we will execute the following. We can see that the account is created correctly:
Step 4
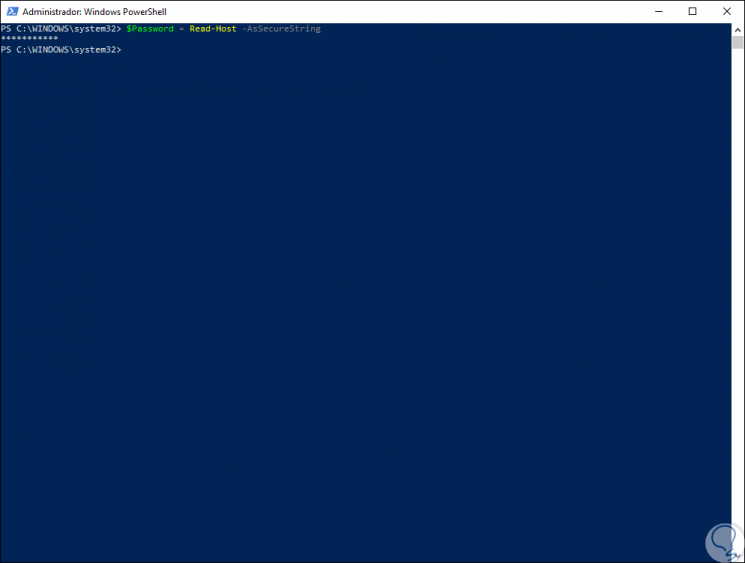
To create a user account that has a password, we must first run the following line in Windows PowerShell:
$ Password = Read-Host -AsSecureString
Step 5
Then we will enter the desired password, this will be processed by the Read-Host cmdlet and stored in the $ Password variable of Windows 10:
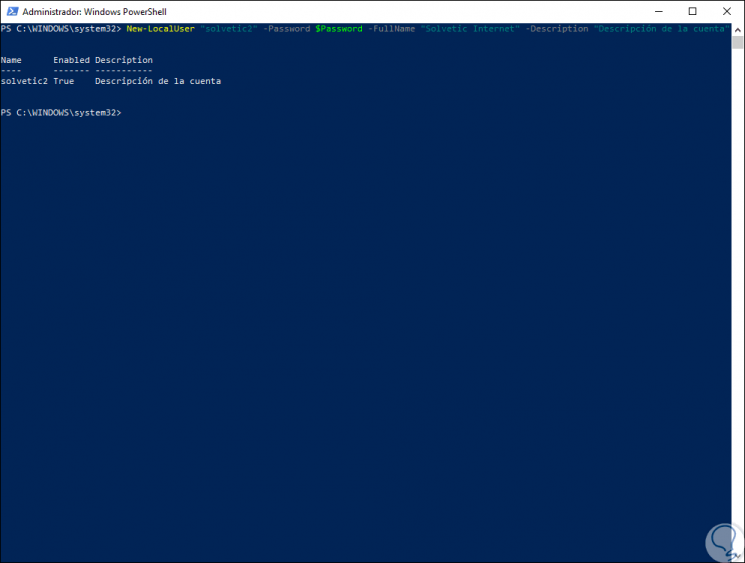
Step 6
Now, let's execute the following command. In this case, the password that has been stipulated in the $ Password variable has been assigned to the new user.
New-LocalUser "username" -Password $ Password -FullName "Full name" -Description "Account description"
Step 7
Now we are going to add the user to a local group using the following cmdlet:
Add-LocalGroupMember -Group "Administrators" -Member "username"
For this case we execute:
Add-LocalGroupMember -Group "Administrators" -Member "solvetic2"
Step 8
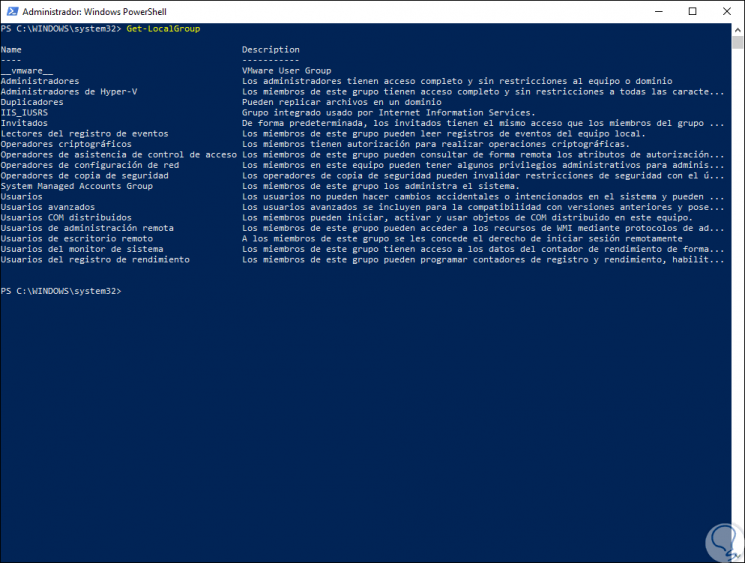
We can add users to the desired group and to see the available groups we can execute the following:
Get-LocalGroup
Step 9
We proceed to add the user in the indicated group:

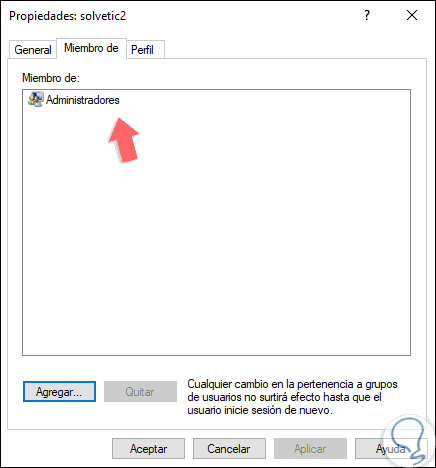
Step 10
We can validate that the user has been added correctly to the group:
Step 11
Finally, when we want to delete a user in Windows 10 using PowerShell we must execute the following:
Remove-LocalUser -Name "user"

We can see the practical way to add and manage users with Windows PowerShell in Windows 10.