Nowadays videos have become an essential element in the internet world. Platforms such as the famous YouTube or social networks, play millions of this type of content every day that can refer to almost anything. In addition, the possibilities of recording and editing video are increasing, since directly from our mobile phone we can record content, as well as from our computer etc..
The problem comes when we have a video which we want to convert to another format, but we don't know how to do it. That is why we will show you how to convert videos from Mac, thanks to the MacX Video Converter Pro program .
What is MacX Video Converter Pro?
It is a tool to convert 4K HD videos that guarantees the best processing quality and speed in the market, thanks to its hardware acceleration technique. Thanks to this tool we will be able to convert very bulky 4K videos that take up too much space to the format that interests us most since the options offered are immense.
Main features
- Convert 4K, HD videos to MP4, MOV and more than 200 formats
- Convert video formats compatible with Mac, iPhone, Android and more than 400 devices
- Compress large 4K videos at 1080P, 720P, H.265
- It has the fastest video processing speed on the market and lossless video quality based on Intel QSV / Nvidia / AMD hardware acceleration technology.
- Download 4K, HD videos from YouTube and more than 300 sites
- It incorporates camera to record the Mac screen.
1. How to download MacX Video Converter Pro and configuration options
The first thing to do is download this program at the following link:
MacX Video Converter Pro
Note
It is an exclusive program for Mac computers
Once we have it downloaded to our computer, we must transfer it to the applications folder. Next we must open it and we will see that the program has different options at the top..
Configuration options
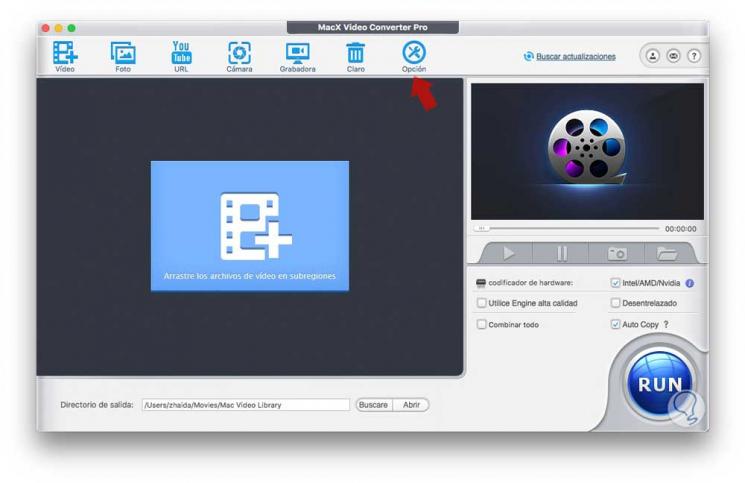
Once we have the program open, if we select at the top the "option" tab we will see different settings.
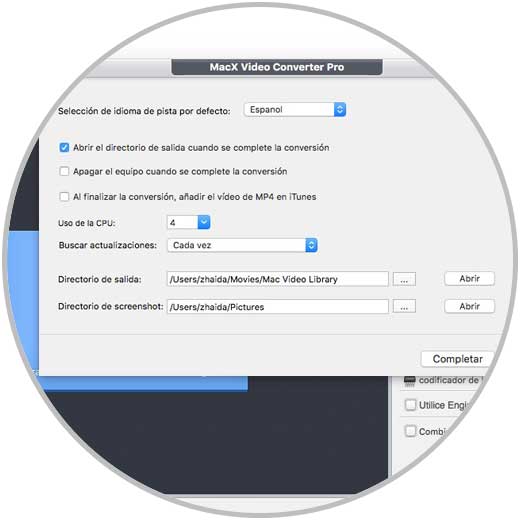
From here we can select the language, CPU usage, updates etc.
2. How to convert video with MacX Video Converter Pro
Step 1
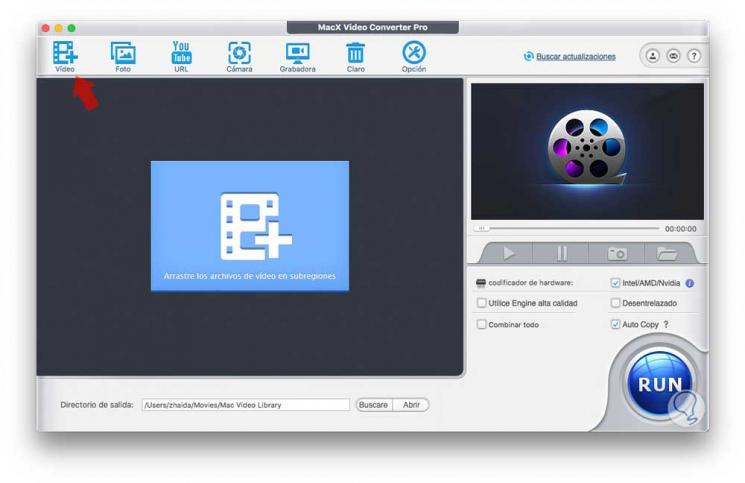
If we want to convert any video that we have downloaded on Mac, we must open MacX Video Converter Pro and select the “Video†tab at the top.
Step 2
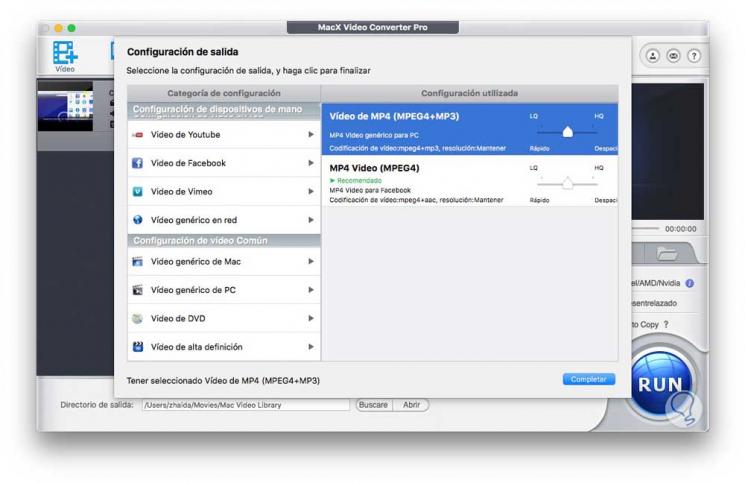
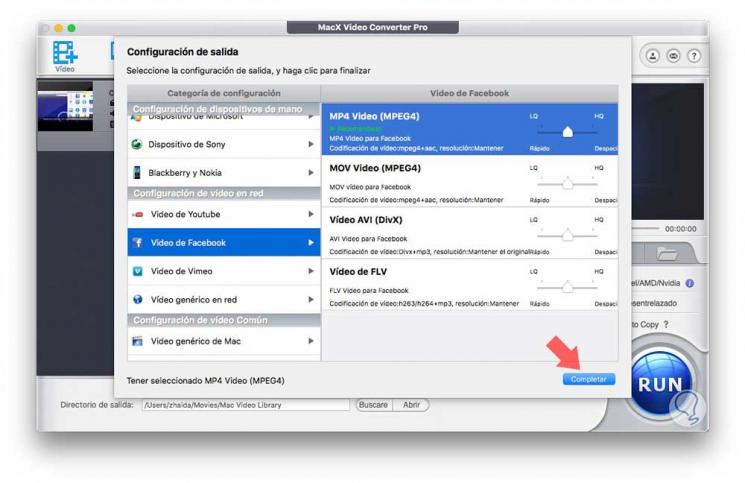
Once the video has loaded, you will see a series of new options appear. On the left side, we have different alternatives to convert our video. Depending on whether we need it, we must select one option or another of all those we find available.
- Configuration of handheld devices
Step 3
In this case we have selected that we want to convert it to upload to Facebook. Once here, we can choose the encoding speed. Once these adjustments have been completed, we click on the complete button.
Step 4
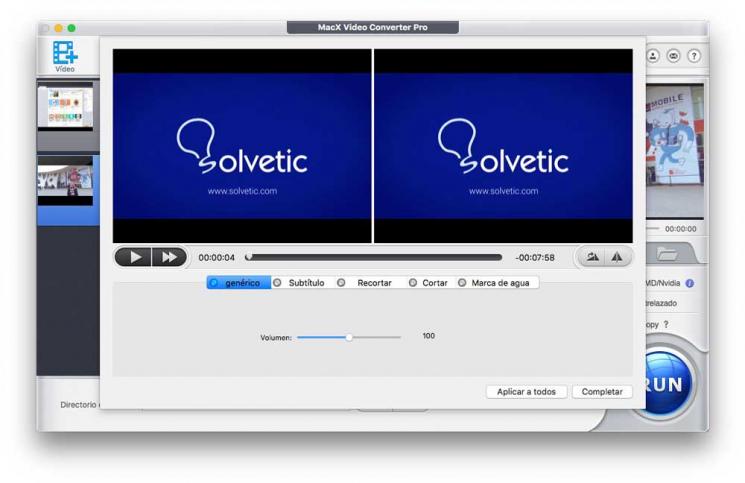
Now we will see that our video has been uploaded to the main part of the tool. If we select “Edit†we will be able to make different settings such as cutting the video, adding subtitles or watermark.
Step 5
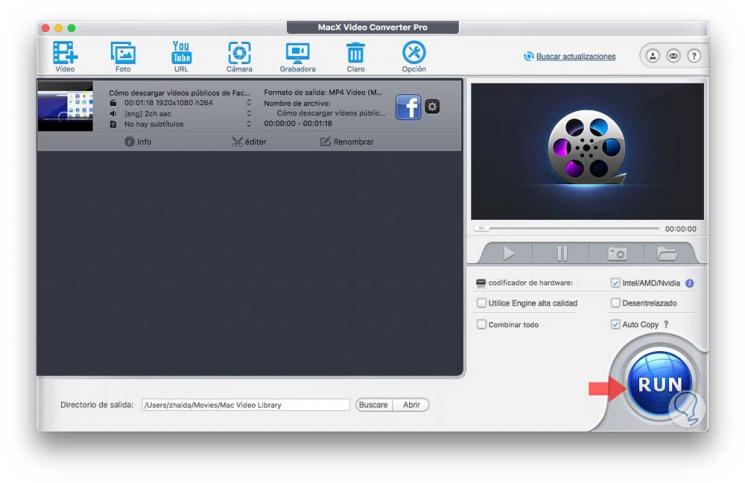
We will see on the right side a series of adjustments that we can make depending on our preferences. We have to select "Run."
Step 6
A process to convert our video will begin. We can see the progress of this conversion in the bar that appears in the new tab.
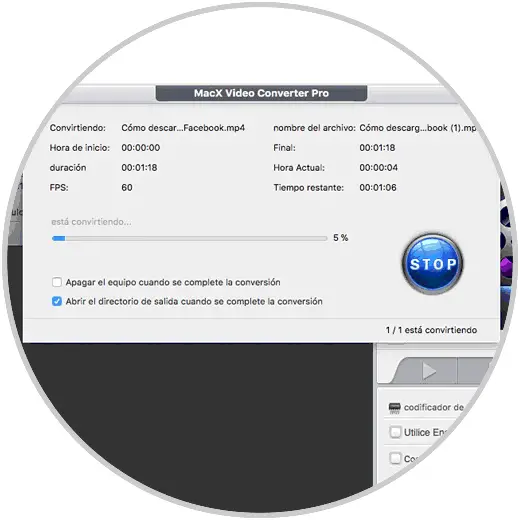
Once the process is finished, your video will have been quickly converted to the format you have selected..
3. How to make video with photos from MacX Video Converter Pro
Another option with this program, is that we can make a video with photos quickly.
Step 1
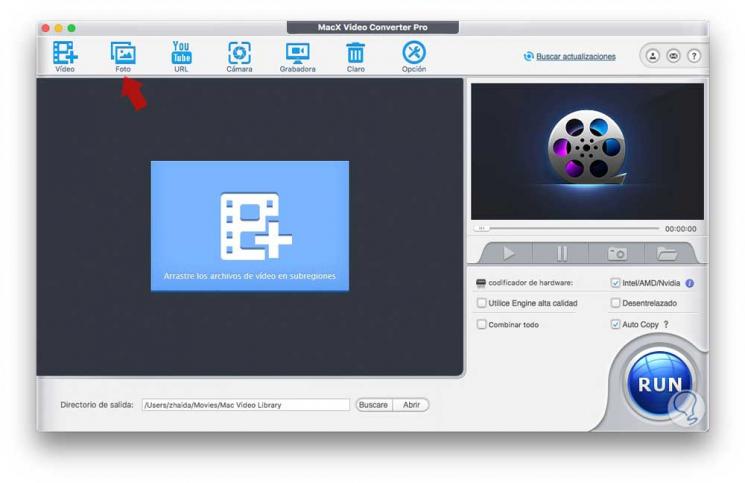
The first thing we should do is enter the program and select "Photo" from the options. Once selected, you must drag the folder containing the photos with which you want to make the video.
Step 2
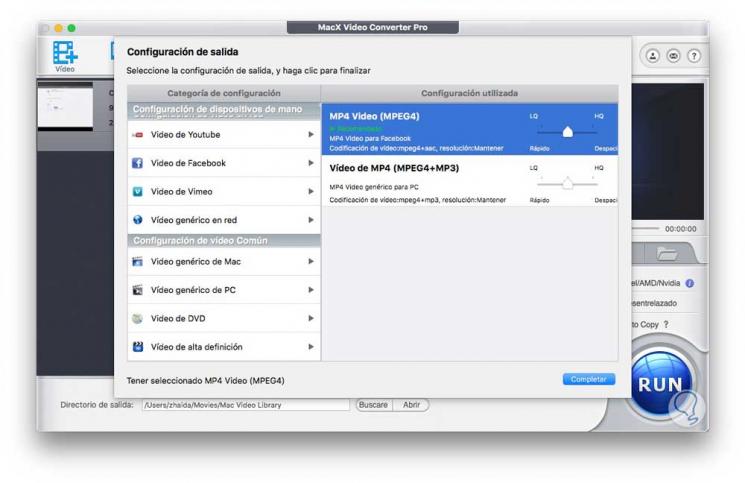
Once you have dragged the folder, the program will offer us the possibilities of video format that we can give to our photos. We choose the format that interests us most in each case.
Step 3
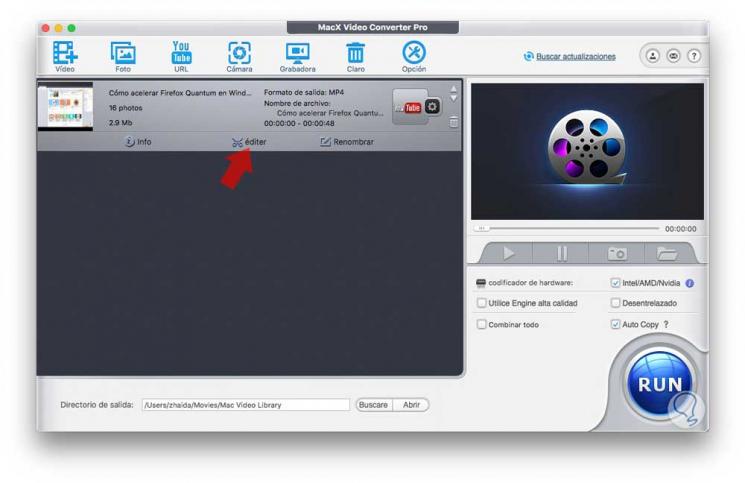
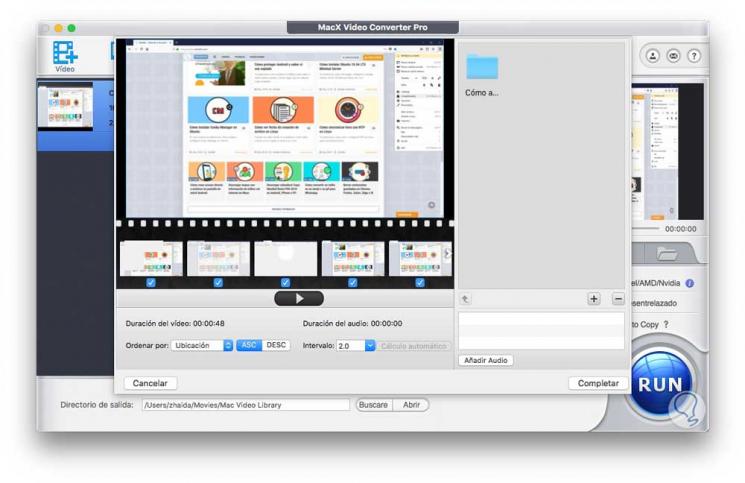
Once selected, the tool itself will be responsible for automatically creating a video with this content. Once created, we can select that we want to edit it in case it is so
Step 4
Finally, we click on “Run†and we will have created and downloaded a video with those photos that we have selected.
4. How to download YouTube video from MacX Video Converter Pro
Another option offered by this tool is the possibility to download videos from YouTube.
Step 1
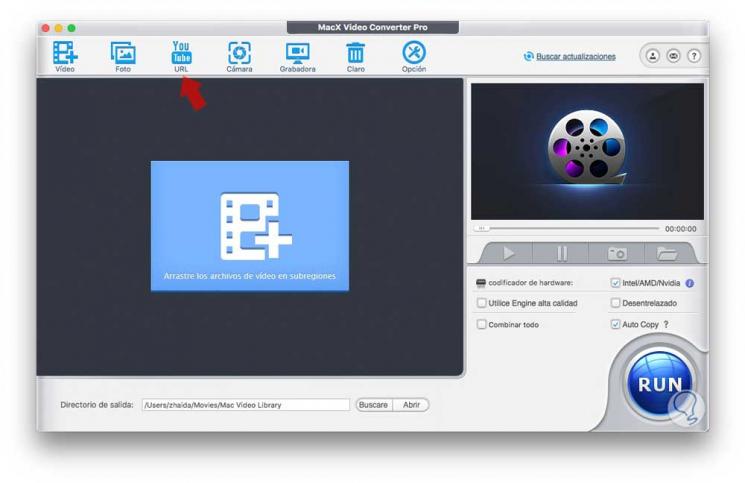
To do this we must select the YouTube option at the top.
Step 2
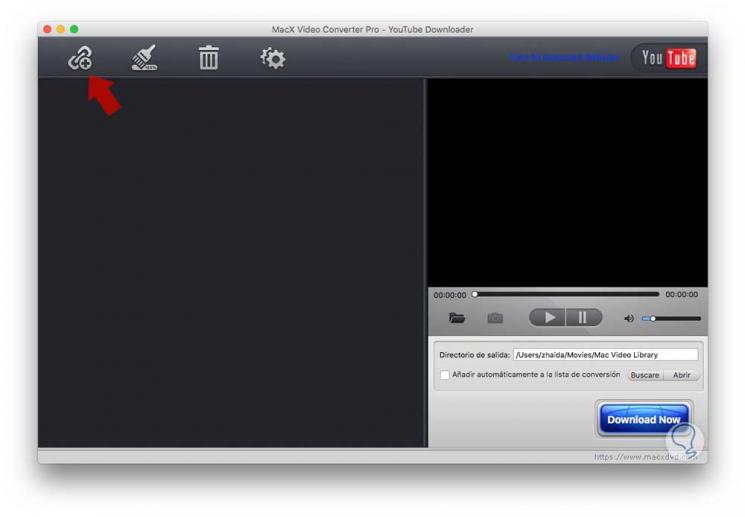
Once we are in this window, we have to select the share symbol located in the upper left corner
Step 3
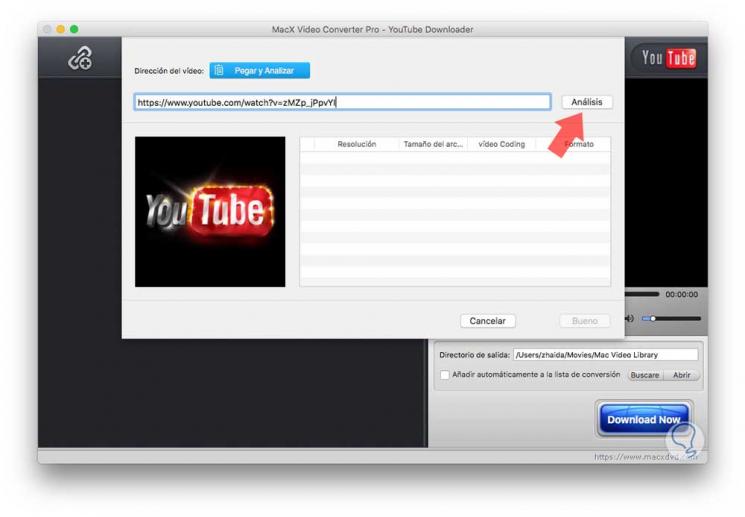
Next, we will see that a box appears in which we must paste the URL of the YouTube video that we want to download. Once pasted, we select “Analyzeâ€.
Step 4
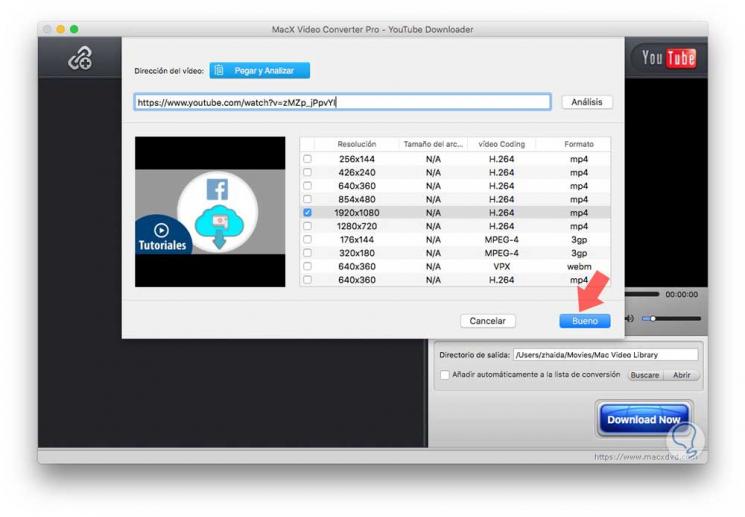
Finally we select the resolution, and click on the "Good" option.
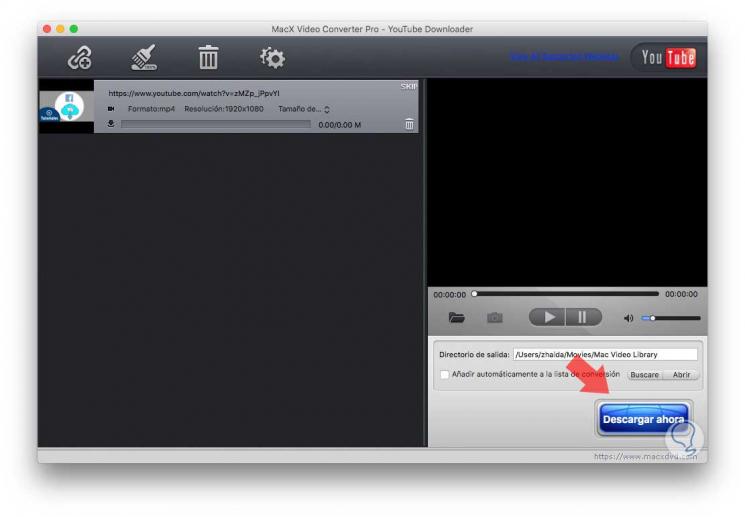
Step 5
Finally, to download the video, we have to select the option “Download now†in the lower right corner
5. How to record Mac screen with MacX Video Converter Pro
Another option offered by MacX Video Converter Pro is the possibility of recording the screen of our computer. To do this we must follow the following steps.
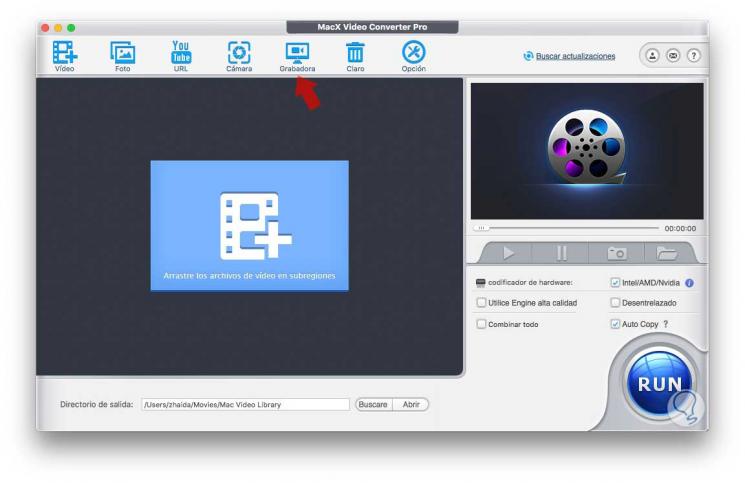
Step 1
The first thing we have to do is select the “Recorder†option at the top.
Step 2
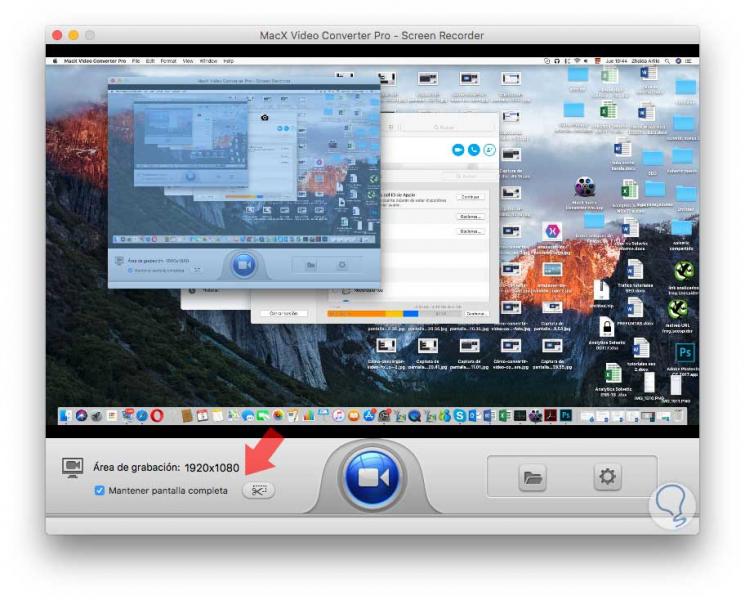
Now we can select either the full screen, or a certain screen space by clicking on the scissors button.
Step 3
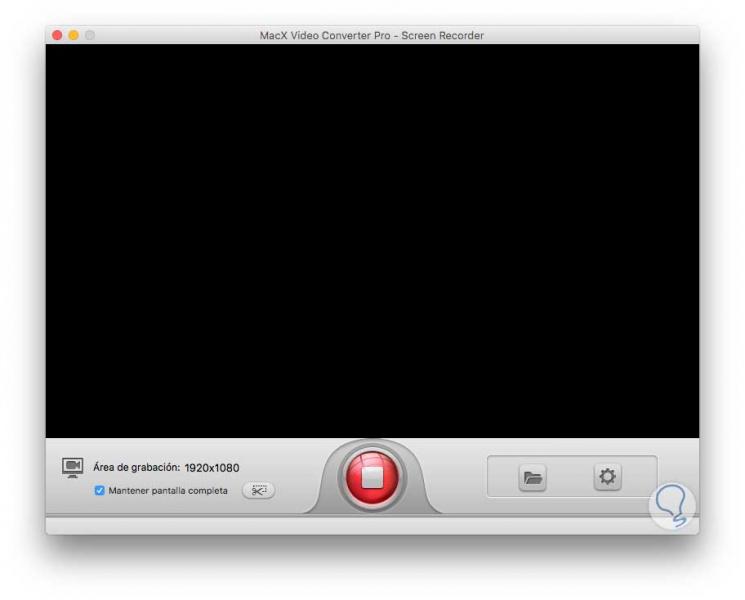
Once we have selected this, we have to click on the central button of the camera to start recording. We will see that after a countdown of 3 seconds, the program starts recording what is on the Mac screen.
These are the possibilities offered by the MacX Video Converter Pro program so that converting videos does not become a tedious task. We can use each of the options it offers, and make the most of this useful tool for Mac.