Information security must be one of the most important standards and tasks that as users and administrators we must take into account since the sensitive and private information of each user lies there, and although there are hundreds of tools and utilities focused on improving security , not all fully comply with it.
One of the best tools for this task is ionCube which is a PHP encoder with the ability to use intrusion detection on the site in real time and has an error reporting application to facilitate administration tasks..
What is ionCube
As we have indicated above, it is an application developed to protect, encrypt and manage PHP scripts, since ionCube is an extension used to load protected PHP files and encode them through the PHP encoder.
By using ionCube, we can allow PHP scripts to have the ability to control where PHP code is to run, so files can expire in time, and all non-PHP code , as in the case of XML, it can also be encrypted.
ionCube has three editions, Basic, Pro and Cerberus, and all of them offer compiled PHP coding using obfuscated bytecode, plus optional non-PHP file encryption, which increases the possibility of security..
ionCube can be used on Windows, Linux, FreeBSD and macOS systems, in this case Windows and macOS encoders have a graphical user interface with great benefits, and all editions include command line encoders for automation.
features
Among its characteristics we find:
- It has dynamic and external keys to offer a higher level of protection for compiled bytecode.
- Allows you to encrypt non-PHP files, such as XML and templates
- It supports the use of optional encryption keys that are not stored, but are generated only when it is really necessary (Dynamic keys)
- It allows to avoid the alteration of files using digital signatures
- Generate license files to restrict access to encrypted files
- We may create files to expire on a specific date or after a period of time
- Restrict files to run on specific MAC addresses
- Restrict files that can be executed in any combination of IP addresses and / or server names
Now we will see how to install this utility on CentOS 7..
1. Install Apache or Nginx Web Server with PHP on CentOS 7
Step 1
For the optimal use of ionCube, the server must have a running web server (Apache or Nginx) with PHP installed, if not, we can install it using one of the following options:
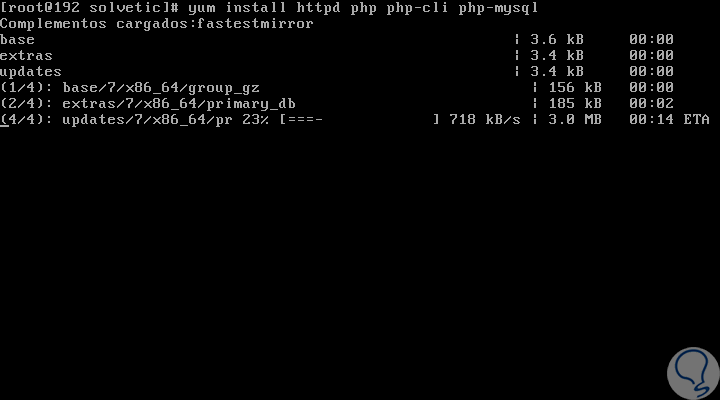
Install Apache with PHP: yum install httpd php php-cli php-mysql Install NGINX with PHP: yum install nginx php php-fpm php-cli php-mysql
Step 2
In this case we will install Apache with PHP:
Step 3
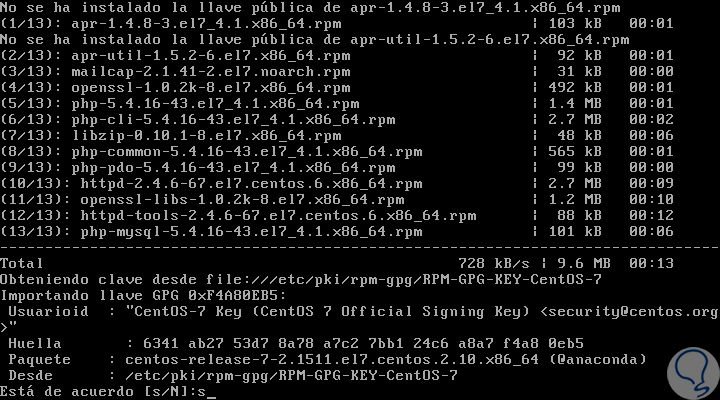
Now we will see the following:

Step 4
There we enter the letter Y to confirm the download and later we will accept the Apache key. Enter the letter S to confirm the action.
2. Enable the service at system startup in CentOS 7
Step 1
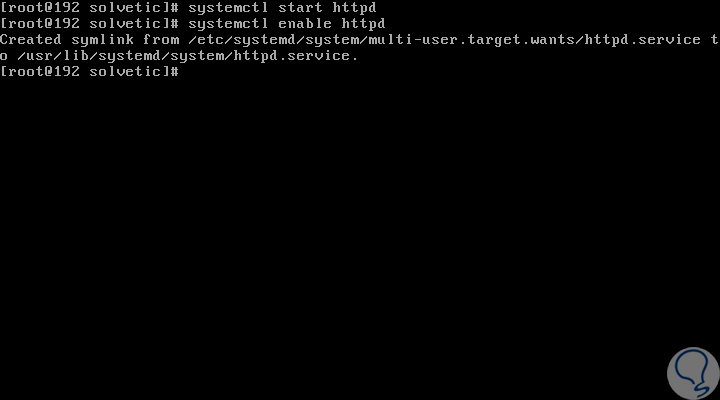
Once Apache is installed with PHP, we will start and enable the service at system startup by running the following:
Apache
systemctl start httpd systemctl enable httpd
NGINX
systemctl start nginx systemctl enable nginx systemctl start php-fpm systemctl enable php-fpm
3. Download ionCube in CentOS 7
Step 1
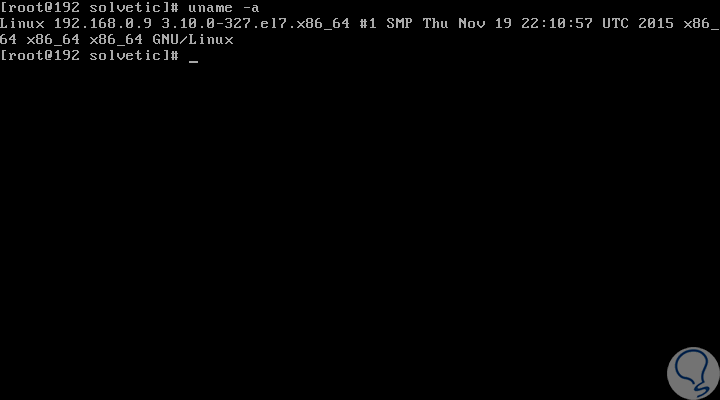
Before downloading the ionCube file we must know what kind of architecture we have in the system, for this we will execute the following. In this case it is 64 bits (X86_64).
join me
Step 2
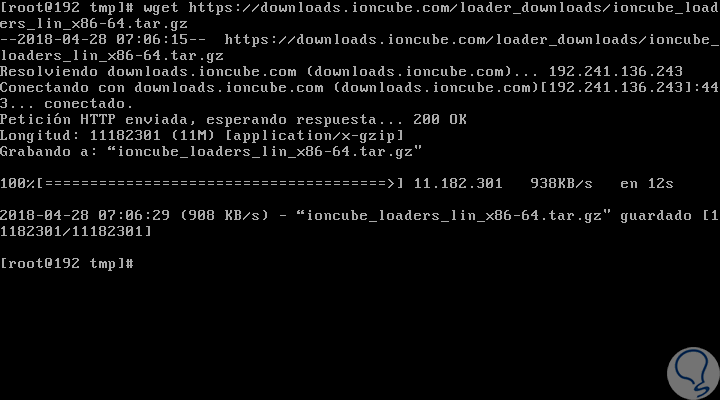
To download the file associated with this architecture, we will access the / tmp directory and execute the following:
cd / tmp wget https://downloads.ioncube.com/loader_downloads/ioncube_loaders_lin_x86-64.tar.gz
Step 3
In the case of having a 32-bit architecture, we will execute the following:
cd / tmp wget https://downloads.ioncube.com/loader_downloads/ioncube_loaders_lin_x86.tar.gz
Step 4
We proceed to extract the content:
tar -xvf ioncube_loaders_lin_x86 *

Step 5
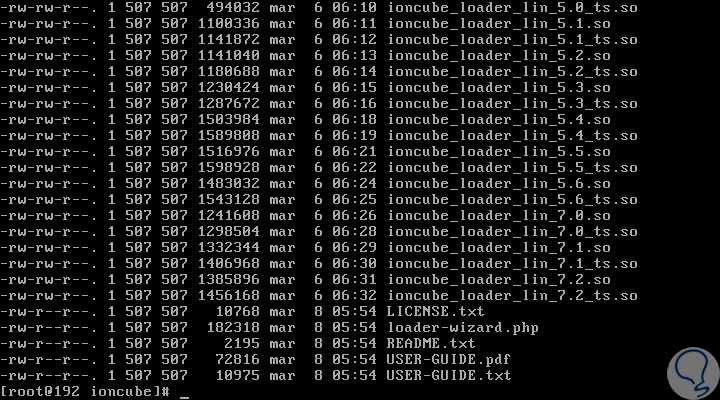
Then, we will access the ionCube folder and execute the following:
cd ioncube / ls -l
4. Install ionCube Loader for PHP on CentOS 7
Step 1
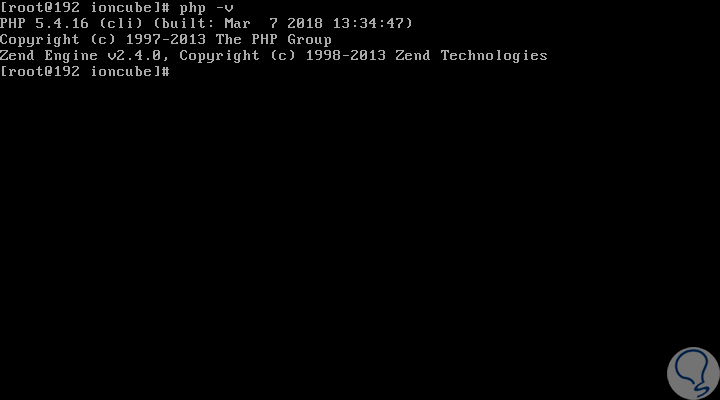
In this case we must select the appropriate ionCube charger for the version of PHP that we have in CentOS 7, to know the version of php installed we will execute the following:
php -v
Step 2
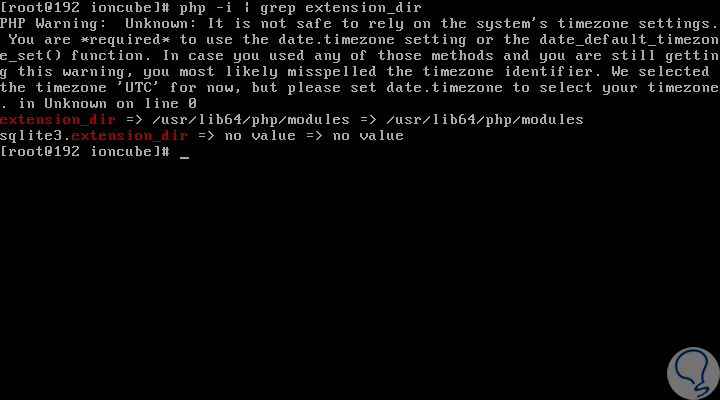
Now, we will know the location of the extension directory for PHP version 5.4, which is where the ionCube loader file will be installed, as a result we will see that the directory is / usr / lib64 / php / modules, we execute the following:
php -i | grep extension_dir
Step 3
Now, let's copy the ionCube charger there:
cp /tmp/ioncube/ioncube_loader_lin_5.4.so / usr / lib64 / php / modules IonCube charger configuration
Step 4
For this, we will access using the desired editor to the PHP configuration file like this:
nano /etc/php.ini
Step 5
There, we will add the following just below the first line of the configuration file:
zend_extension = /usr/lib64/php/modules/ioncube_loader_lin_5.4.so
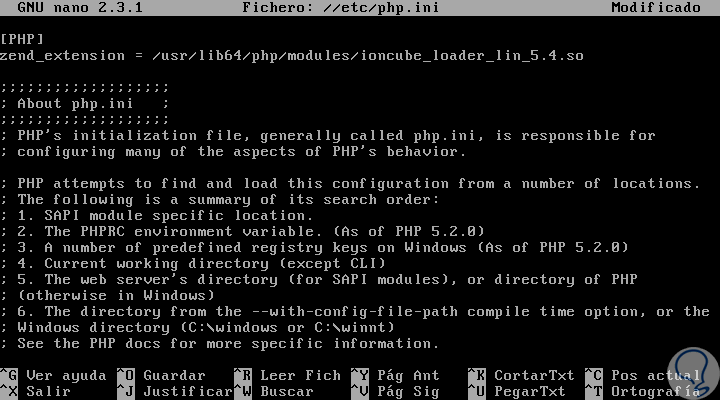
Step 6
We save the changes using the following key combination:
+ O Ctrl + O
We leave the editor using:
+ X Ctrl + X
Step 7
We proceed to restart the service like this:
NGINX
systemctl restart nginx systemctl restart php-fpm
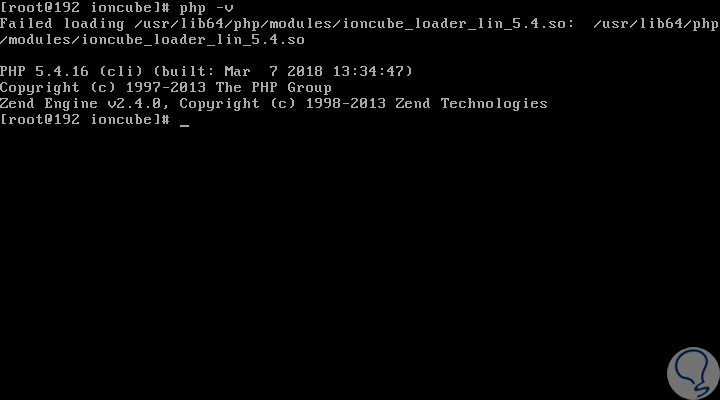
Step 8
Once this is done, we execute the “php -v†command again and the result will be as follows:
In this way we have installed ionCube and so all PHP tasks will be safe.