One of the most vital components in any operating system is audio, through which we can play our favorite songs, watch movies and receive alerts about new notifications. We must always have it properly installed with its correct drivers to be able to have a correct audio in our equipment..
In this world of audio, Realtek HD Audio Driver is one of the most common and used today thanks to its versatility, compatibility and performance in multiple operating systems and now we have Realtek High Definition Audio Manager, which is the one that brings packaging The Realtek audio driver by default with which the update and playback tasks will be much simpler and well executed to have a correct sound.
Realtek HD Audio has important developments where we highlight its compatibility with a six-channel digital to analog converter (DAC) which includes 16.20.24 bit pulse code modulation in the 5.1 audio channel, this offers a sound experience Better and with more quality..
If we see that our driver or audio driver generates errors we will not be able to listen to audio on the device , but do not worry everything has a solution and if you are in TechnoWikis you will solve it clearly and easily.
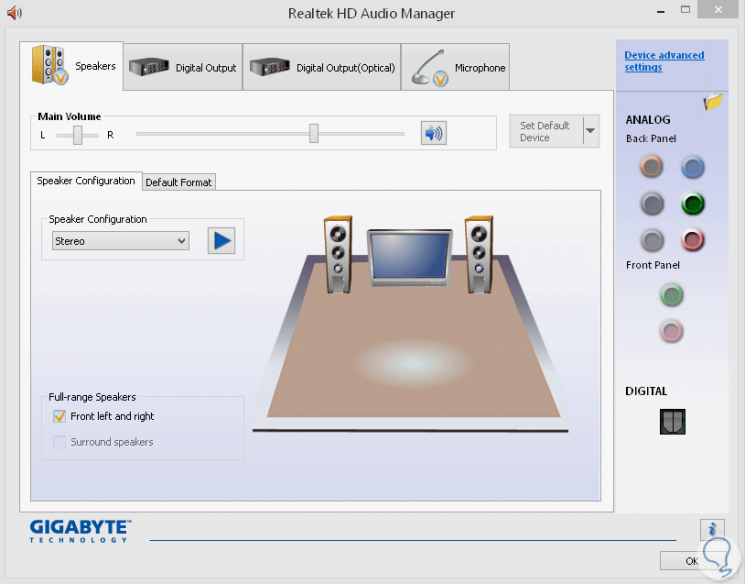
We now turn to see how to download and reinstall Realtek High Definition driver including Realtek HD Audio Manager that is integrated into the same driver. The important thing is to know the official site and how to install it, let's take action..
1. Download and reinstall Realtek HD Audio Manager driver
Before downloading the new Realtek drivers it will be necessary to uninstall all the current drivers in order to create duplicate conflicts between several drivers that are active on the computer.
For this we will access the Device Manager using one of the following options:
- You can enter by pressing the keys + R and executing the "devmgmt.msc" command and press Enter or OK.
- By right clicking on the Start menu, or using the keys + X , and in the drop-down list select Device Manager .
- In the Windows 10 search box enter the term "devices" and in the displayed results select Device Manager .
Now, in the window that appears, go to the "Audio inputs and outputs" section, right click on the Realtek Digital controller and select the option "Uninstall the device";
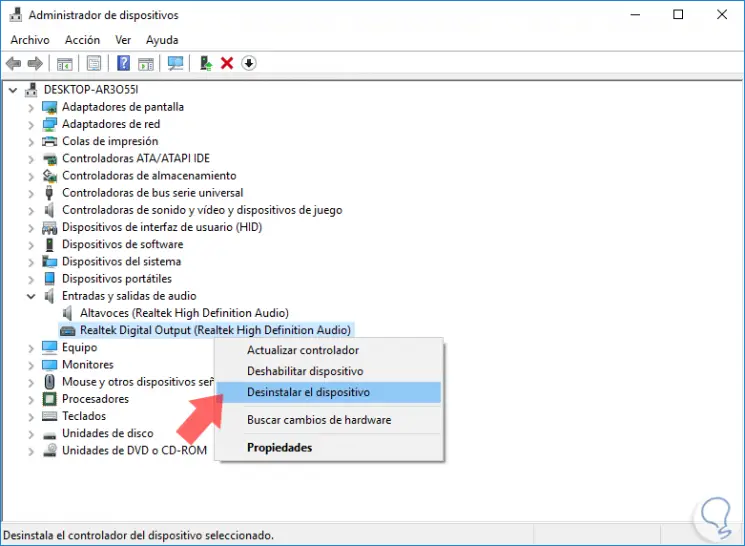
The following message will be displayed:
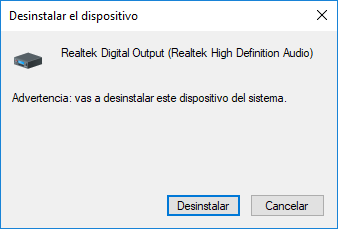
There we click on "Uninstall" to complete the action. Now, we will go to the menu "View and there we select the option" Show hidden devices ".
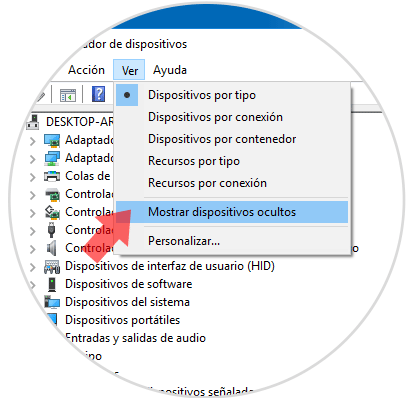
In this way we can see if there are duplicate audio drivers to proceed with their respective uninstallation.
Then, we will restart the system to apply the changes.
Now we will go to the following link where we will download the Realtek HD Audio Manager driver:
Realtek HD Audio Manager
We will see the following:
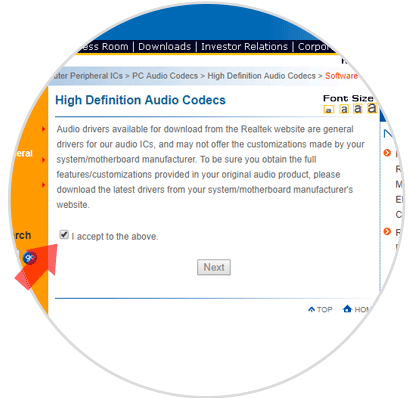
There we must activate the "I accept to above" box in order to accept the terms of the license. Now, we will be redirected to the following:
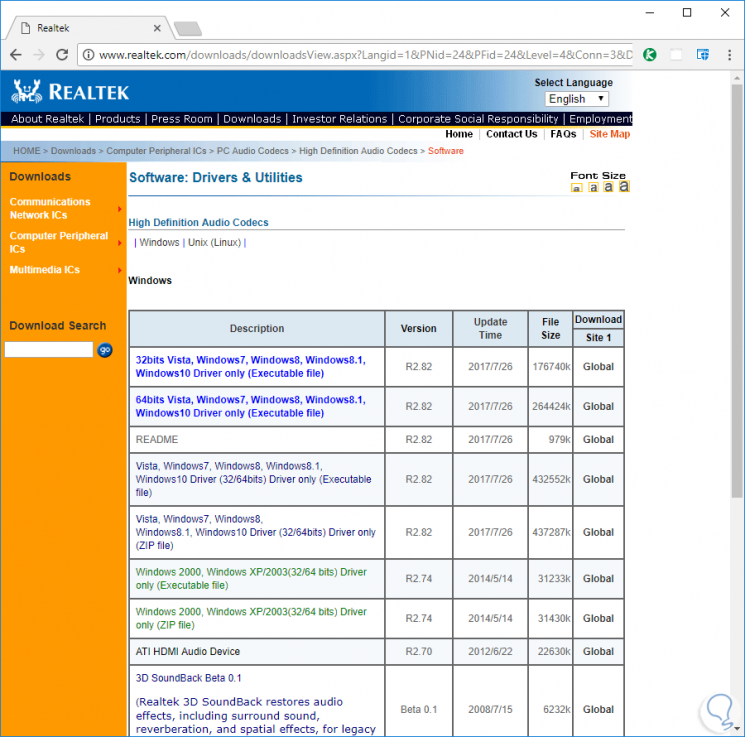
You can see the available drivers for download will be the blue ones. For systems with 32-bit architecture, we will select the 32-bit Vista, Windows 7, Windows 8, Windows 8.1, Windows 10 Driver only (Executable file) option and for systems whose architecture is 64-bit we will download the 64bits Vista file, Windows7, Windows8, Windows8.1, Windows10 Driver only (Executable file).
In both cases, click on the "Global" button to execute the download.
Once we download the executable file, we will double click on it and start the installation process of said driver:
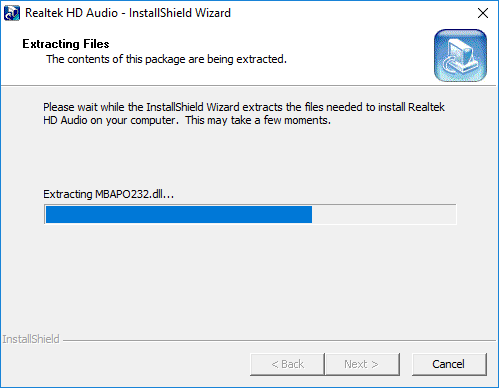
Once the extraction process is finished we will see the welcome screen and click on "Next". We will see the following message that indicates the procedure necessary to perform the reinstallation of the Realtek Audio driver.
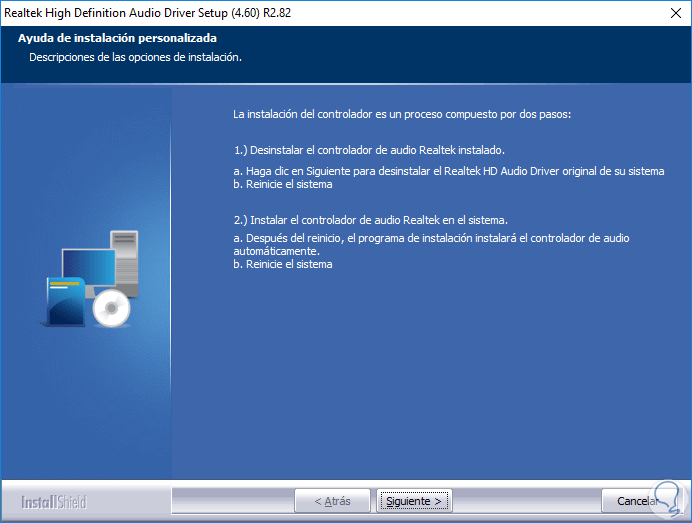
Click on "Next" and the driver installation process will begin:
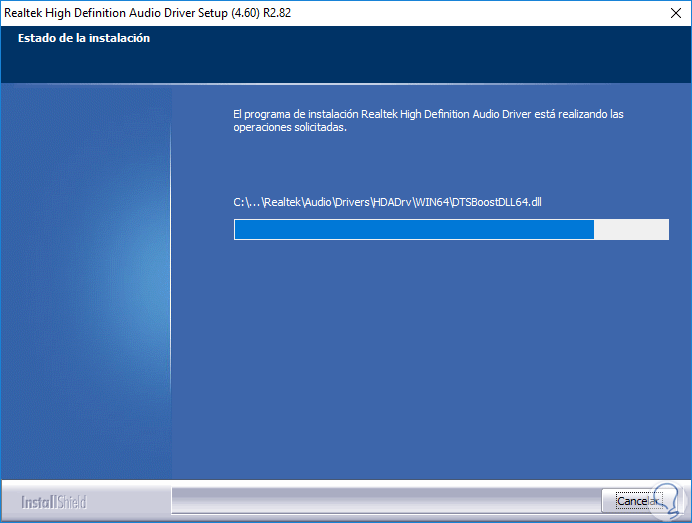
Once this process is finished, we can automatically restart the device or not:
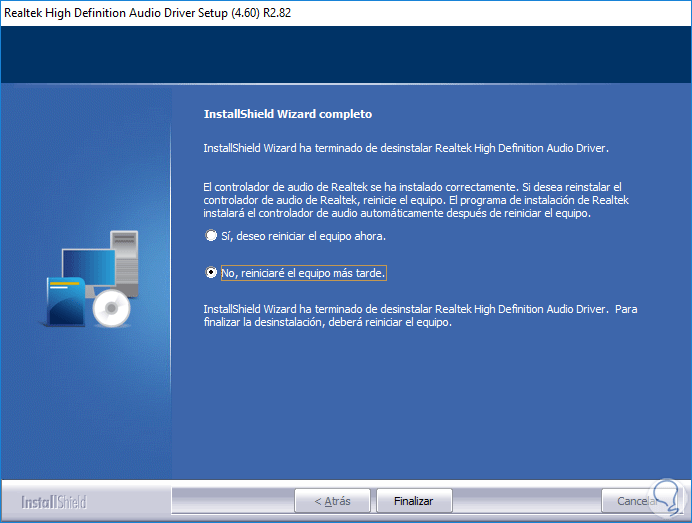
In this way we can have the Realtek driver installed in the system.
2. Troubleshooting Realtek HD Audio sound
There are a number of conflicts that can alter the optimal and correct operation of the controller and then we will see how to correct some of them.
Disable Microsoft UAA bus driver for HD Audio
There are times that you may be giving incompatibility in audio issues by having both enabled. To solve it we will go to the device manager and in the System Devices section we will locate the line "Microsoft UAA Bus Driver for High Definition Audio", we will right click on it and select the option "Disable the device".
Then, we go to the Start menu> Settings> Applications and in the "Applications and features" section we locate the Realtek High Definition Audio Driver application, select it and click on the Uninstall button.
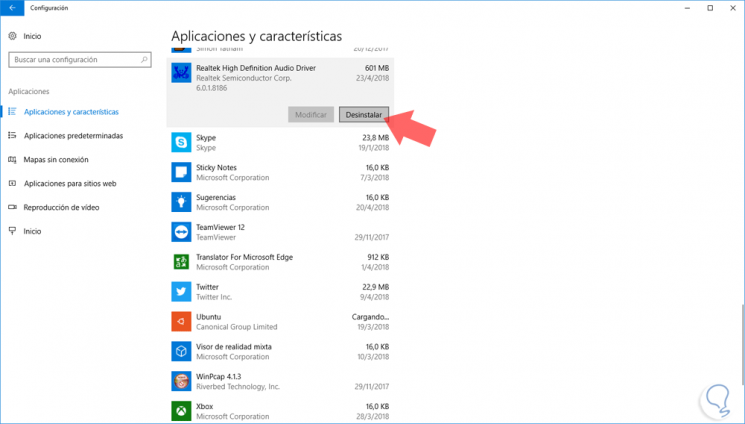
After removing it we will reinstall the Realtek HD Audio driver that you have the steps in chapter 1 of this same tutorial.
Enable startup of Realtek HD Audio Manager
For this, we will go to the Task Manager and in the Start tab we must validate, if it exists, Realtek HD Audio Manager and also right click on it by selecting the "Enable" option.
Update the Realtek HD Audio driver
To update to the most recent version of the Realtek driver, go to the device manager, right click on the driver and select the option "Update driver" as you see in the following image:
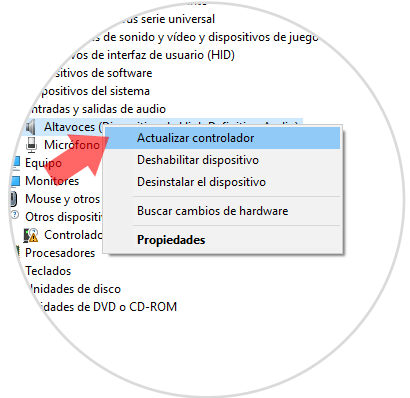
In the displayed window we can select the update locally or automatically.
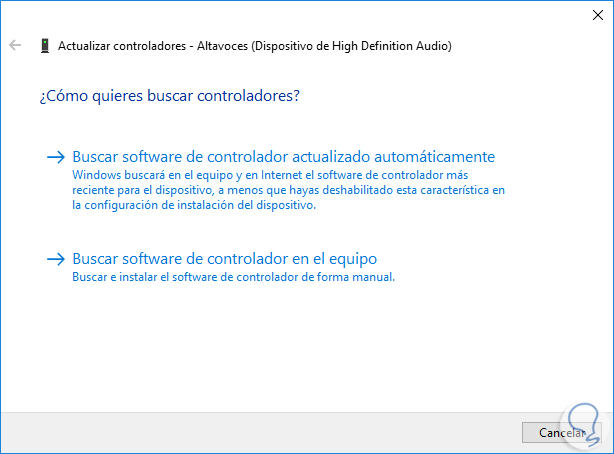
If you do not update you will always have the option to reinstall the driver. Removing it first and then installing the latest version downloaded.
Add legacy hardware
To do this we go to the Device Manager and in the "Action" menu we select the option "Add legacy hardware":
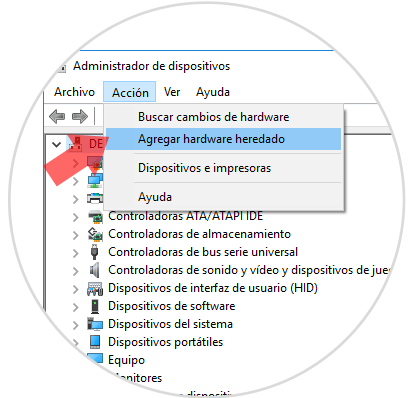
The following wizard will be displayed where we will activate the "Search and install hardware automatically" box:
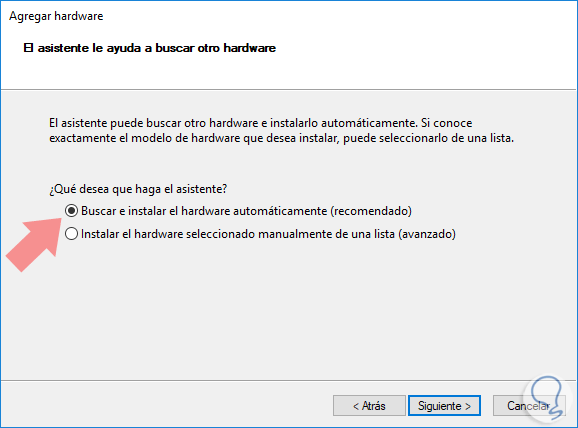
We follow the steps of the assistant and we will have it assembled.
Thus we have downloaded and configured the Realtek HD Audio driver with Realtek HD Audio Manager also completely and well done so that our equipment does not have audio errors and we are unable to enjoy the sound in a normal way.