File and system backups will always be one of the best backup and availability policies for information in any type of organization or for any user. The reason for this is that you should always ensure the integrity of this type of data since there are several factors that can influence errors and not access to information such as:
- Bad configuration and more.
There are several tools to create this type of backup , but today we will focus on a special called Timeshift and we will learn to install and use it in Linux Mint.
What is timeshift
Timeshift for Linux environments , is an application that has been developed to offer functionality similar to the System Restore function in Windows or the Time Machine tool in macOS.
By using Timeshift, it is possible to protect the operating system by taking incremental snapshots of the file system at regular intervals depending on the management needs and these snapshots can be restored at a later date to undo all changes in the system as is known by all at the level of restoration.
Timeshift has two modes of operation that are:
RSYNC mode
The RSYNC mode, in which snapshots are taken using rsync and hard-links, there, the common files are shared between the snapshots, which results in greater space savings on the hard disk. Each snapshot is a complete system backup which can be examined with a file manager.
BTRFS mode
BTRFS mode, all snapshots are taken using the built-in functions of the BTRFS file system. BTRFS snapshots are only supported on BTRFS systems that have an Ubuntu subvolume design (with subvolume @ and @home).
The Timeshift tool can be compared with applications such as rsnapshot, BackInTime and TimeVault, but only that it has different objectives, its design is focused to protect only files and system settings, but user files such as documents, images and music are excluded from backup which guarantees that the files will remain unchanged when we restore the system to an earlier date..
Timeshift features
Some of the features of Timeshift are:
- Timeshift requires very little configuration facilitating administrative tasks
- Snapshots are saved by default in the system partition (root) in the path / timeshift
- Multiple levels of snapshots can be enabled with values ​​such as time, day, week, month and boot
- You can specify the number of snapshots to retain for each selected level
- Boot snapshots offer an additional level of backup and are created every time the operating system starts, these boot snapshots are created with a 10-minute delay so that system startup is not affected in terms of performance
- Supports rsync snapshots on all systems
- Supports BTRFS snapshots on BTRFS systems
- Snapshots can be restored by selecting a snapshot from the main window and clicking the Restore button on the toolbar which is really simple to use.
- Snapshots can be restored from the running system (online restoration) or from another system that has Timeshift installed (offline restoration) which increases its range
- We can use an Ubuntu Live CD, install Timeshift on the live system and restore a snapshot on the main system
- Restoring backups from the running system requires a reboot to complete the restore process completely
System of compatible configurations
Timeshift is able to fully support the following configuration systems:
- Normal: operating system installed on unencrypted partitions
- LUKS Encrypted: operating system installed on LUKS encrypted partitions
- LVM2: operating system installed on LVM2 volumes (with or without LUKS)
- BTRFS: operating system installed on BTRFS volumes (with or without LUKS), only Ubuntu-type designs with subvolumens @ and @home are supported here
- GRUB2 - Bootloader must be GRUB2. The legacy of GRUB and other bootloaders are not supported.
- EFI - EFI systems are compatible. There we must validate that the / boot / efi partition is selected for mounting before restoring snapshots (the application will do it automatically)
- Encrypted Home: For users with an encrypted home (Encrypted Home), the files in /home/.ecryptfs/$USER will be backed up and restored. The contents deciphered in $ HOME will be excluded
- Encrypted private directory: for users with an encrypted private directory, files encrypted in $ HOME /.Private, as well as files decrypted in $ HOME / Private (as it contains user data) will be excluded
- Docker & Containers - Docker and containerized systems are not compatible.
1. How to install Timeshif on Linux Mint
Now let's see how to install Timeshif on Linux Mint. In case of having other distributions we must execute the following:
Step 1
On Ubuntu, Linux Mint, Elementary OS and other Ubuntu-based applications:
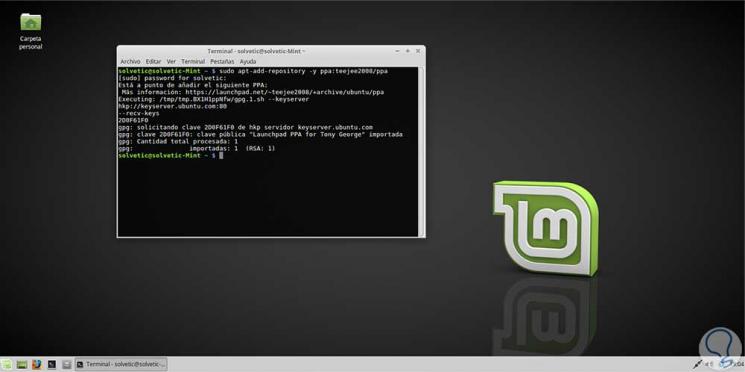
sudo add-apt-repository -y ppa: teejee2008 / ppa sudo apt-get update sudo apt-get install timeshift
For other Linux distributions, we will download the latest version in the following link.
Timeshift
Step 2
Then, we will execute the following:
sudo sh ./timeshift*amd64.run (64-bit systems) sudo sh ./timeshift*i386.run (32 bit systems)
In the case of Mint, we will first execute the following line to download the PPA repository:
sudo add-apt-repository -y ppa: teejee2008 / ppa
Step 3
Then, we will update the system using the following line:
sudo apt-get update

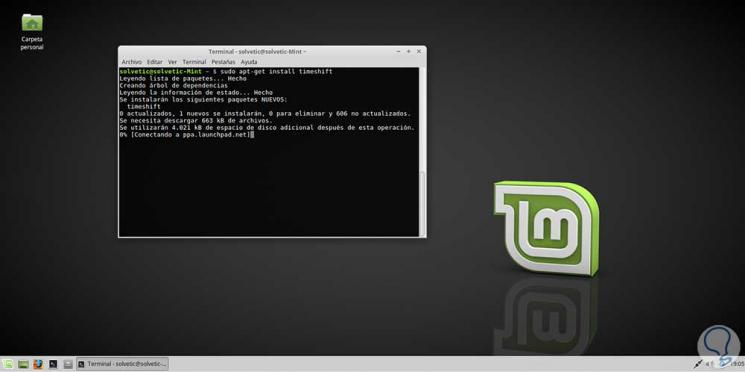
Step 4
Finally, we install Timeshift by running:
sudo apt-get install timeshift
2. How to use Timeshift in Linux Mint
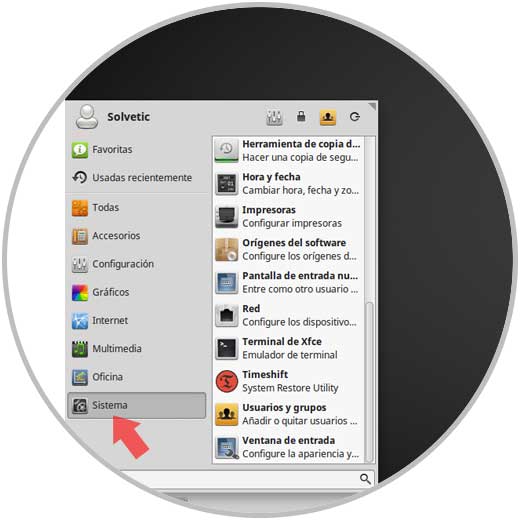
Step 1
Once Timeshift has been installed on the system, we will access it from the System section:
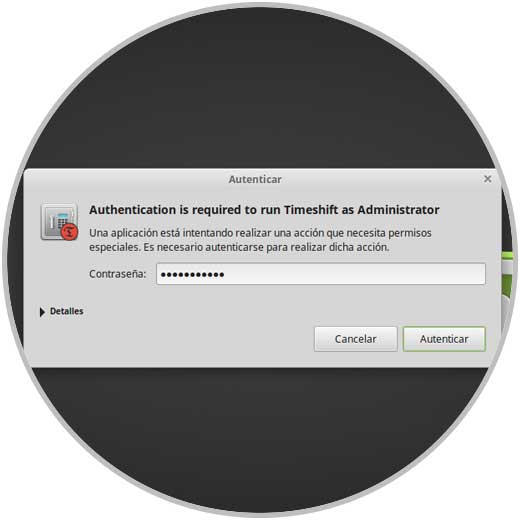
Step 2
To access it will be necessary to provide the administrator password:
Step 3
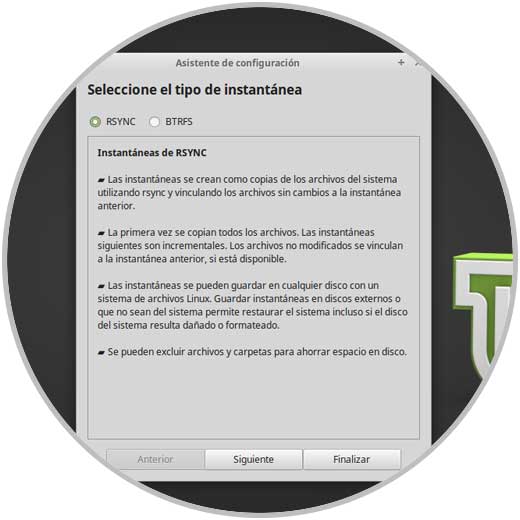
Click on Authenticate and the next assistant will be displayed. There we will first select the type of snapshot to use, RSYNC or BTRFS and once defined click on the Next button.
Step 4
We can see that the system analysis process begins:

Step 5
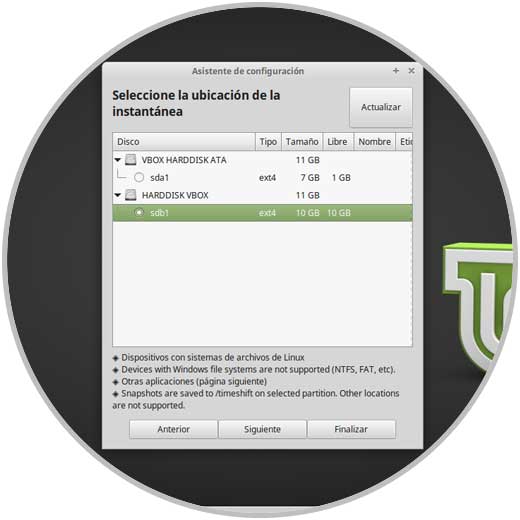
As soon as this process is finished, we will select the location where the snapshots will be hosted and that location should contain enough space for it:
Step 6
Once the location is defined, click on the Finish button and the following will be displayed:
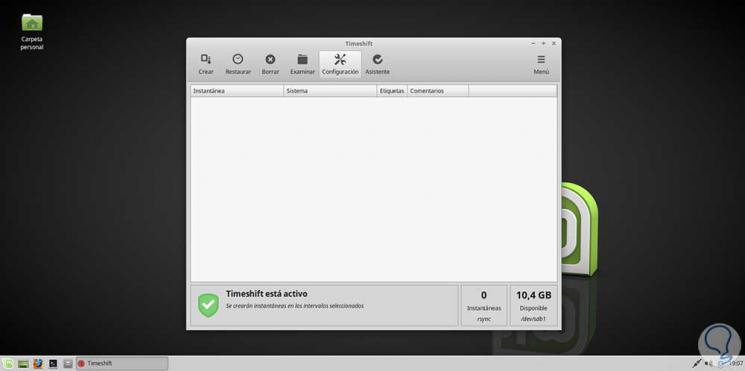
We can see that the Timeshift utility is active.
3. How to create the backup with Timeshift on Linux Mint
Step 1
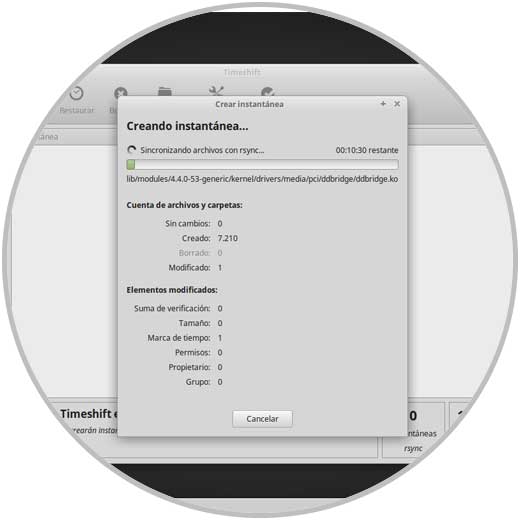
To start this process, just click on the Create button located at the top and we will see that the backup process begins:
Step 2
Once this process is finished we will be notified of it:
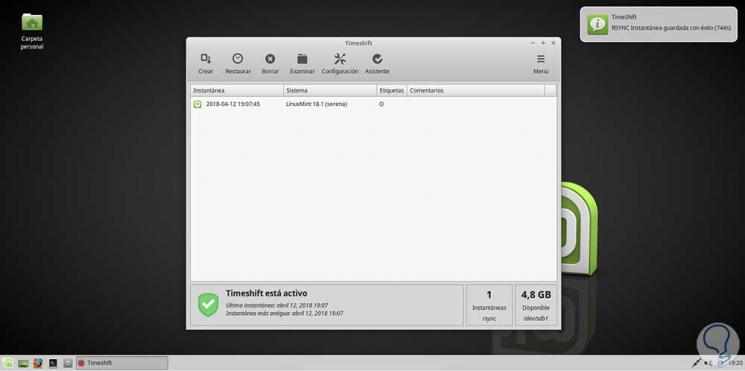
To restore a backup, simply select it in the center panel and click on the Restore button at the top..
Uninstalling Timeshift from the system
When we want to uninstall the Timeshift utility, just run one of the following commands:
sudo apt-get remove timeshift sudo timeshift-uninstall
We can see how Timeshift is a totally suitable tool for backup tasks of Linux systems. In this way we have at hand a comprehensive solution to back up system information in a secure way.