Access to Linux web browsers is one of the actions that as users we carry out daily and there we enter numerous types of data, both normal and personal, such as contact data, card numbers, bank accounts and others that if it were to fall into the wrong hands it can simply have critical consequences. There are two special Linux browsers for our daily browsing, one is very popular and the other is focused on security by being on the network, we are talking about Chrome and Tor..
Google Chrome features
Chrome is developed by Google and therefore it is the most popular mobile browser with more than 60% of global use, it is available in many languages and has functions such as:
- Incognito mode integration
- Option to start Chrome in guest mode
- In some systems it allows the sending of the screen
- Integrate YouTube controls
- Ability to reopen accidentally closed tabs
- Lets you drag and drop images and multimedia
- Password manager and more
In Chrome to increase browsing security is using incognito mode, but it is not 100% optimal.
Tor features
To overcome Chrome's security limitations, Tor has been developed by a specialized security company where they focus on pillars such as:
- Isolate the visited websites in order to prevent third-party trackers and advertisements from monitoring our actions, all cookies are automatically deleted when you close the browser.
- Tor prevents other users from seeing the visited websites by deleting the browsing history.
- All the traffic we send is encrypted three times over the Tor network, this network is made up of thousands of secure servers worldwide.
- Prevents the fingerprint function from being applied in navigation in order to optimize security policies.
It's time to learn how to install both Chrome and Tor in Linux Mint 20..
To stay up to date, remember to subscribe to our YouTube channel! SUBSCRIBE
1. How to install Chrome on Linux Mint 20
Step 1
The first step to take will be to go to the official Chrome link at the following web address:
Chrome

Step 2
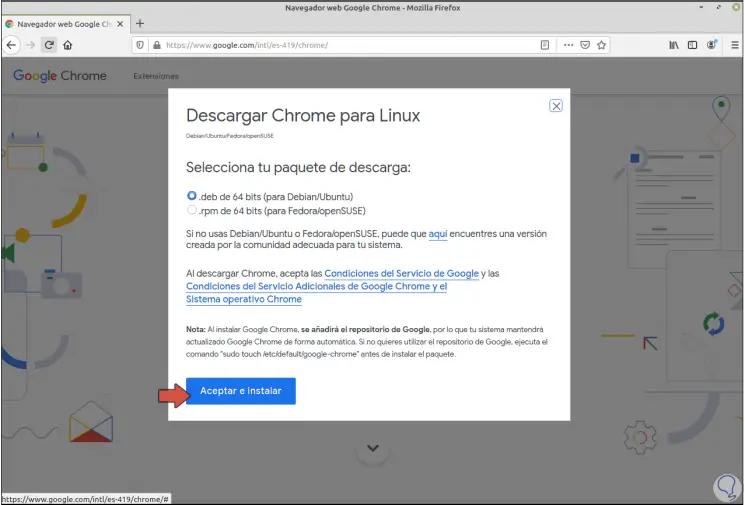
There we click on the "Download Chrome" button and the following will be displayed:
Step 3
In this case we must check the box “.deb 64 bit (for Debian / Ubuntu)” because Linux Mint is an operating system based on Ubuntu.
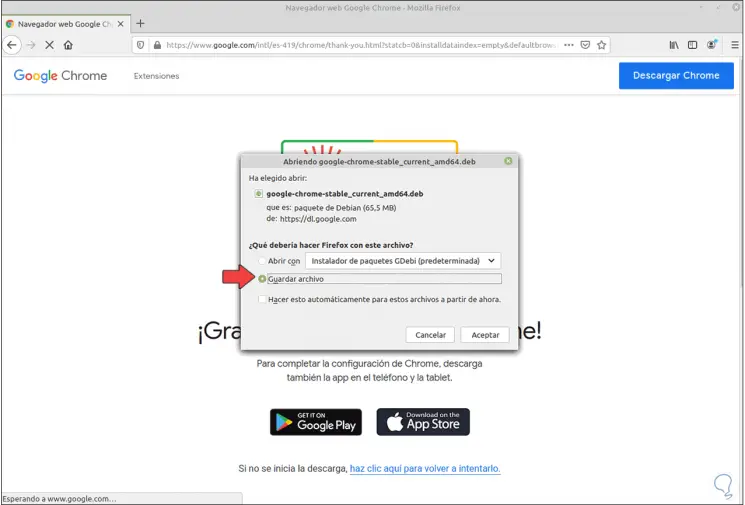
In the following window we must save the file locally:
Step 4
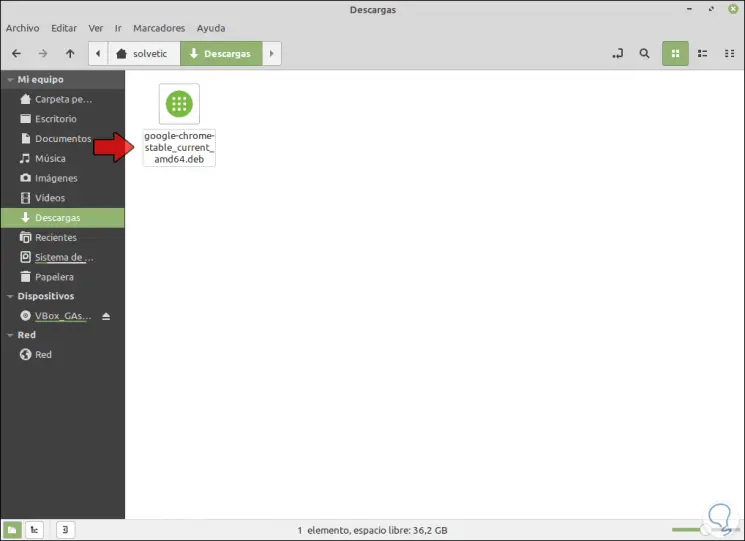
Once the download is complete, go to the "Download" folder to check that it is there:
Step 6
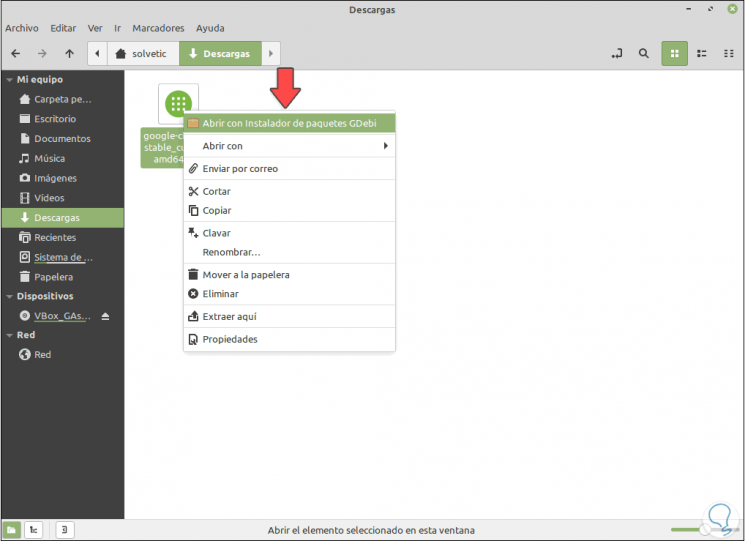
We right click on the downloaded file and select the option "Open with GDebi Package Installer":
Step 7
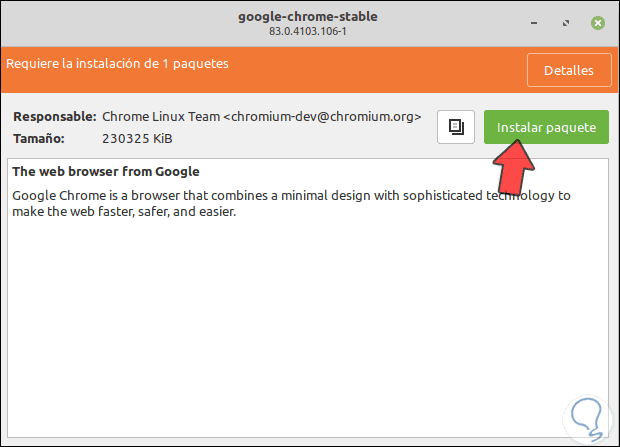
This will launch the following window:
Step 8
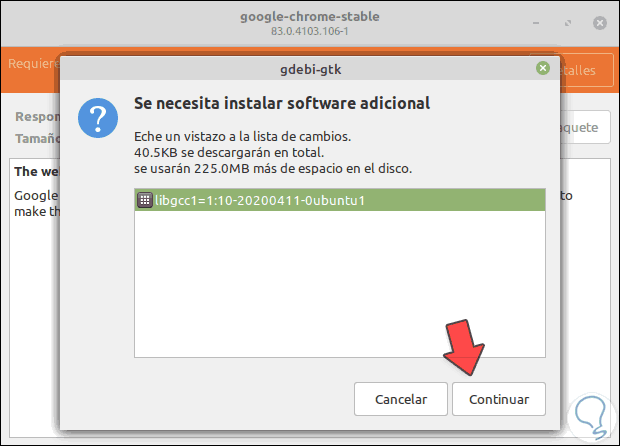
We click "Install package" to install Chrome Linux Team which allows us to complete the Chrome installation later, when we click there we will see the following:
Step 9
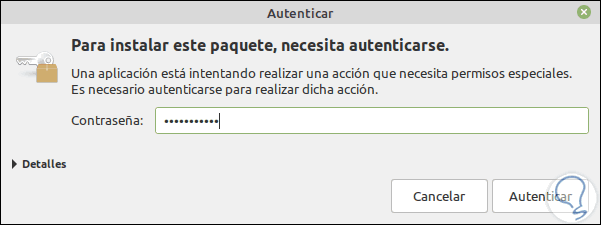
We click "Continue" and it will be necessary to enter the administrator password:
Step 10
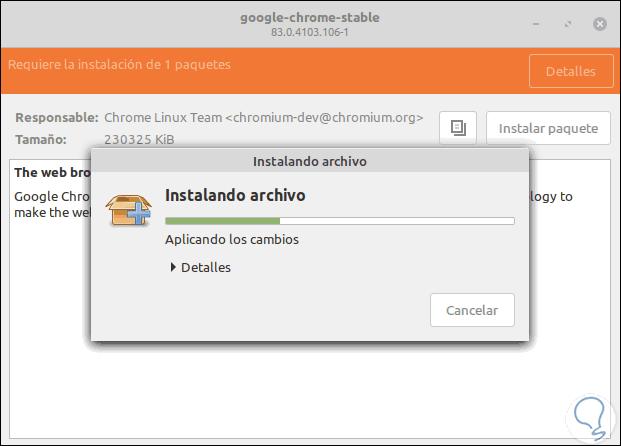
We authenticate the user and the required dependency will be installed:
Step 11
When this ends we will see the following. This dependency installs both the plugins and the browser at the same time.
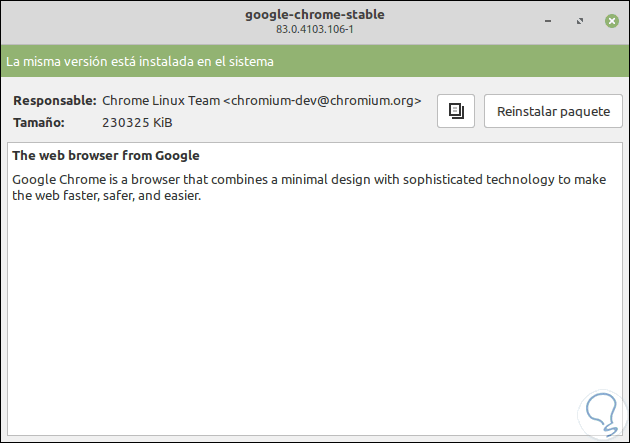
Step 12
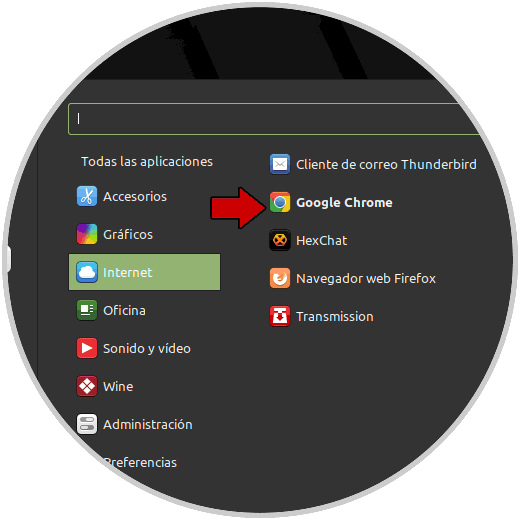
To validate this, we go to the Linux Mint 20 menu and in the “Internet” section we find Google Chrome available on the right side:
Step 13
When you open Google Chrome you will be asked:
- If we want Chrome to be the default browser
- If we want to send usage notifications

Step 14
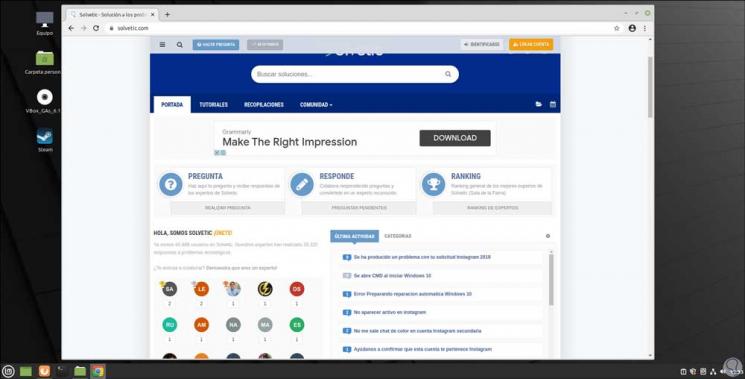
We click OK (having defined the above) and with this we access Google Chrome in Linux Mint 20:
2. How to install Tor in Linux Mint 20
Step 1
In the case of Tor we must go to the following link where the different download options for this are available:
Tor

Step 2
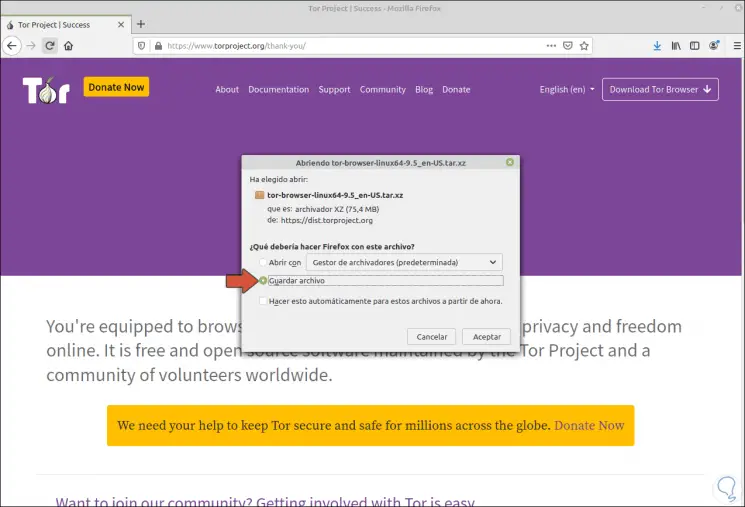
We click on the Linux version and in the pop-up window we must save the file locally:
Step 3
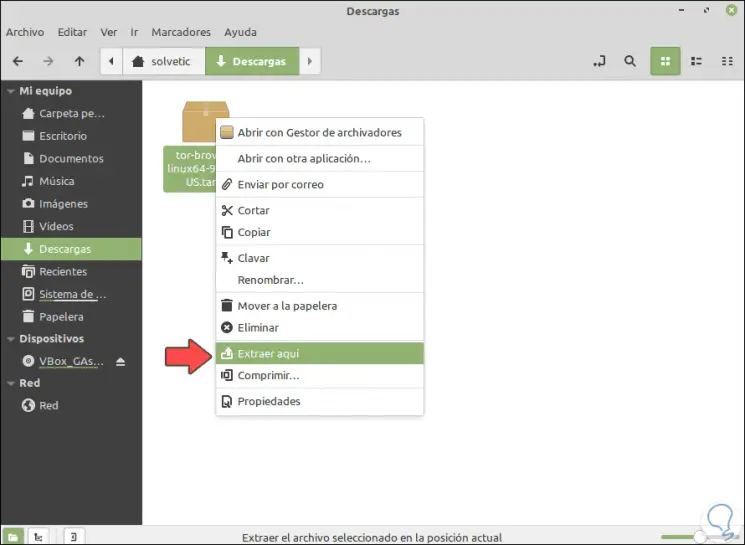
After this we will go to the Downloads folder, right click on the downloaded file and select "Extract here":
Step 4
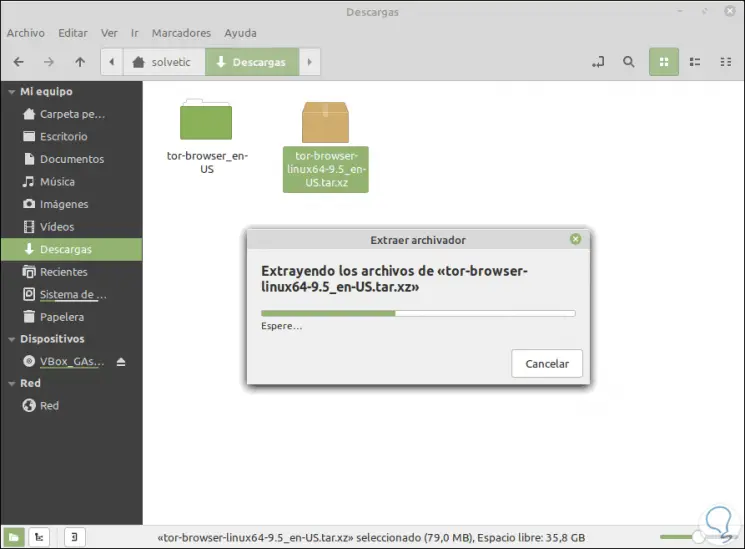
This takes care of extracting the content:
Step 5
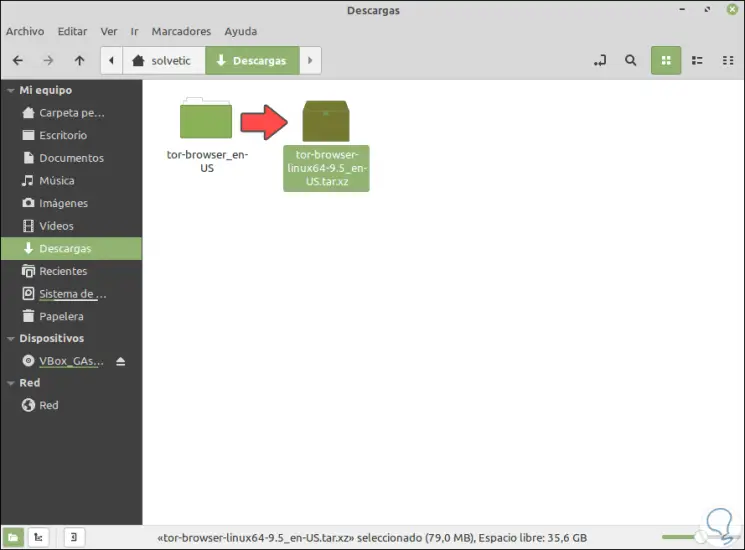
Once extracted we will see the containing folder there:
Step 6
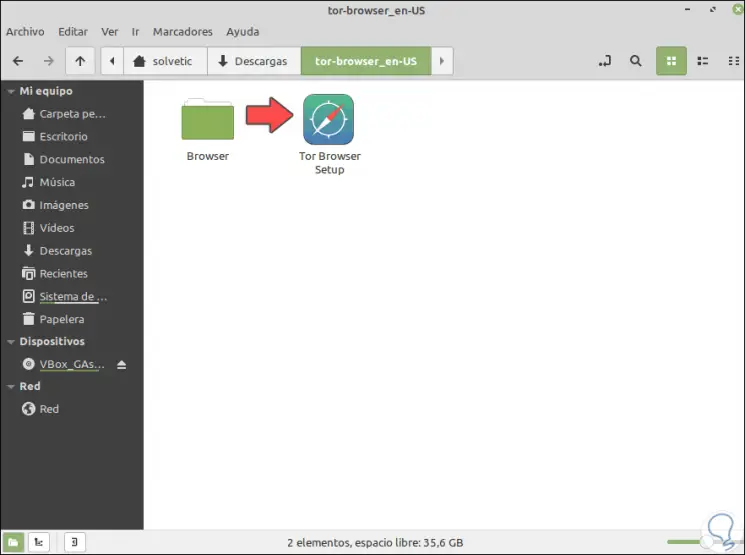
We access it and we will see the following:
Step 7
We open the "Browser" folder, right-click somewhere free and select "Open in a terminal":

Step 8
In the terminal we execute the following:
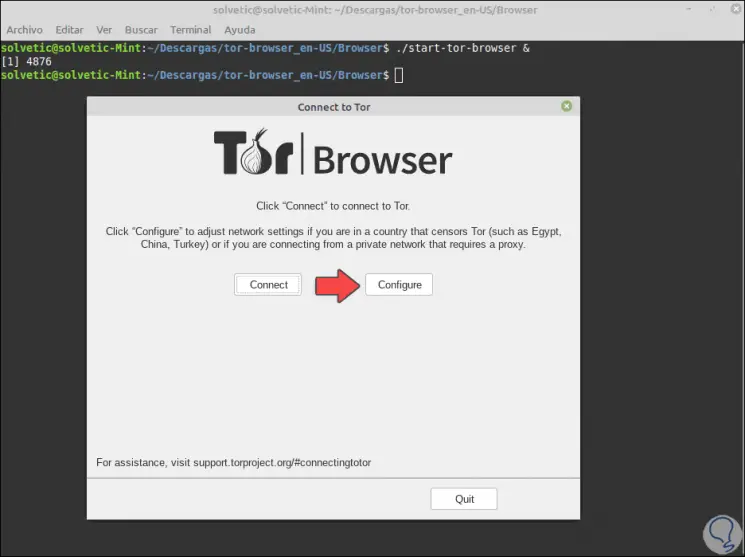
./start-tor-browser &
Step 9
Pressing Enter will generate an ID and launch the Tor installation wizard:
Step 10
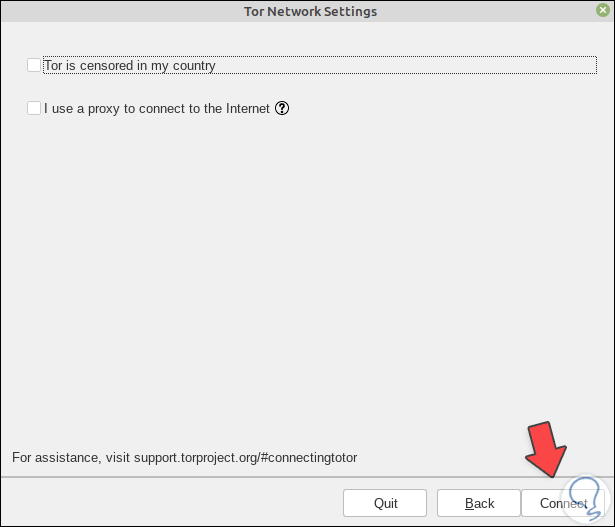
We can click on the “Configure” button and there it is possible to establish the following:
- Activate if Tor is censored in our country
- Define if we use proxy servers
Step 11
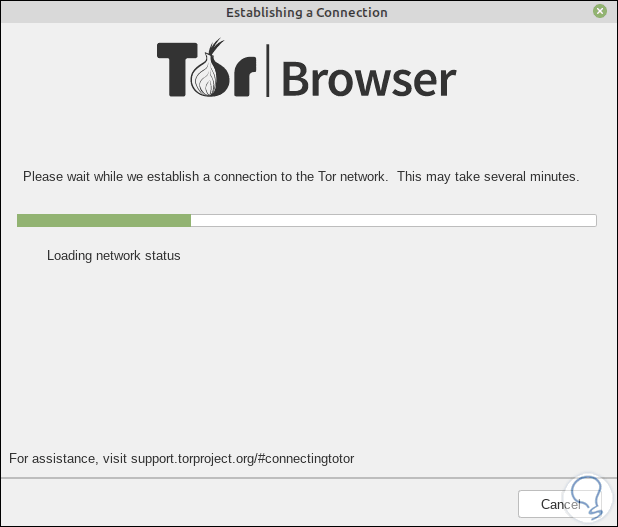
We click Back and now click on "Connect" to start the installation of Tor:
Step 12
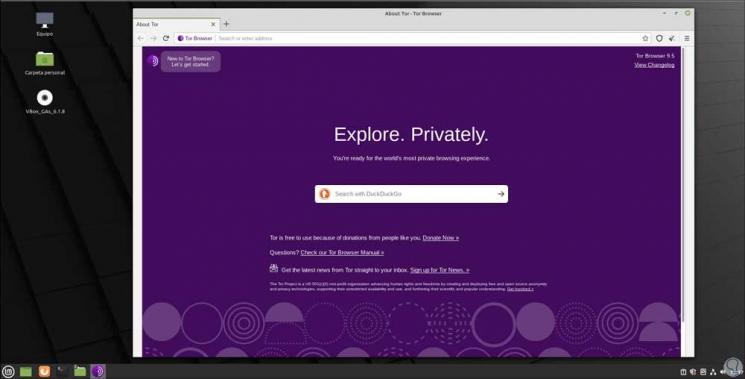
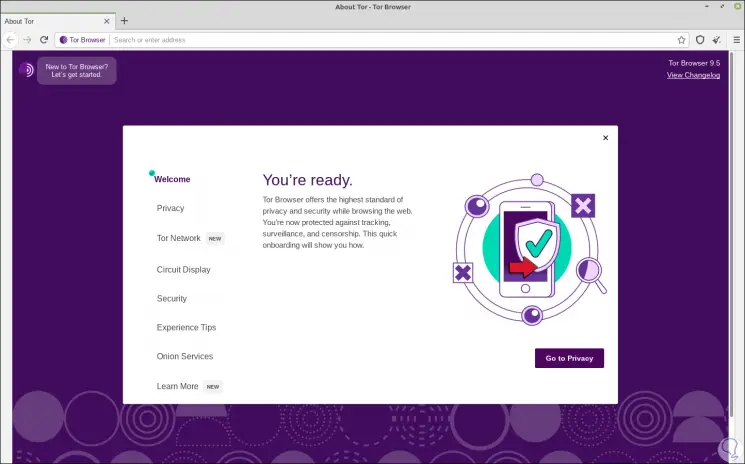
This will open the following browser:
Step 13
We can click the top button to access a brief summary of all that Tor has to offer:
Step 14
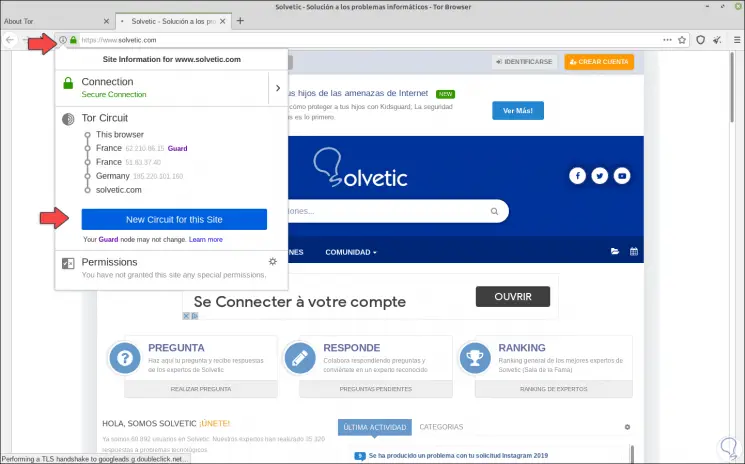
Tor makes use of a series of circuits which are secure servers for connection, we prove this by clicking on the information on the website and we will see the Onion Services. There we can create another circuit if we wish.
Step 15
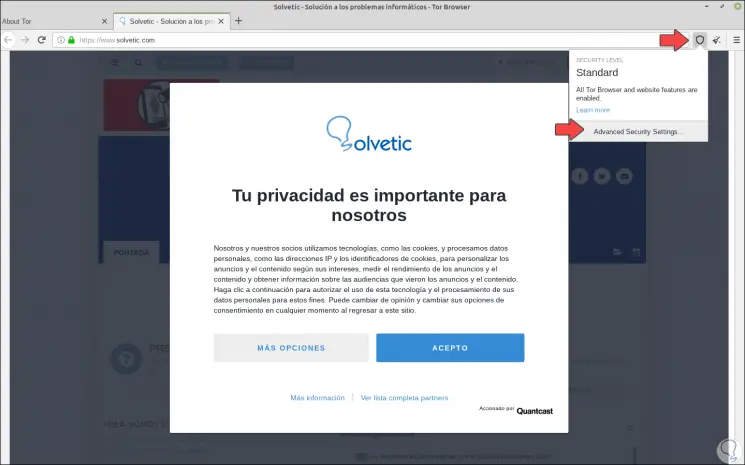
If we click on the "Security level" button we will see the following:
Step 16
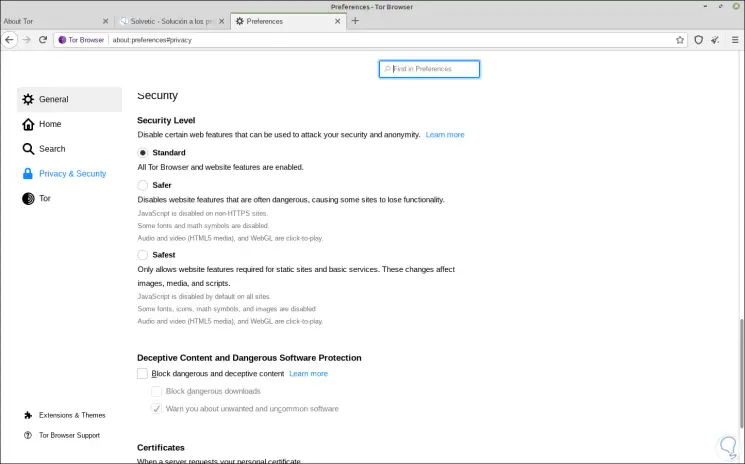
We click on "Advanced Security Settings" and we will be able to set different security variables for browsing in Tor:
With TechnoWikis you have learned to install two of the most functional browsers, one for popularity and the other for security in Linux Mint.