When we manage Windows operating systems we can face a series of errors that can affect both programs, applications, hardware or the system itself and if we do not have a clear concept of what aspect this error encompasses, we may face unpleasant situations..
One of these errors is DNS_PROBE_FINISHED_BAD_CONFIG is a network error , something vital in any system, which involves details such as:
- Faults in the DNS (Domain Name System)
- Internet connection failures
This error will prevent us from accessing the Internet and with it to our favorite websites and for this reason through this tutorial TechnoWikis will give a series of practical tips to give a total solution to this error.
1. Release and renew the IP address to fix DNS_PROBE_FINISHED_BAD_CONFIG error in Windows 10
As we access websites, the cache of these sites is hosted in the system so that the next time we visit them the process is much faster, but little by little we accumulate more chache memory which In the end it can be harmful to our use.
The reason for this is that, if for any reason the IP address of the desired website changes, we will not be able to access it because we have another IP address stored and therefore DNS-related errors are generated, such as the DNS_PROBE_FINISHED_BAD_CONFIG error..
To solve this error, we will empty the DNS cache and renew the Windows 10 IP address.
Step 1
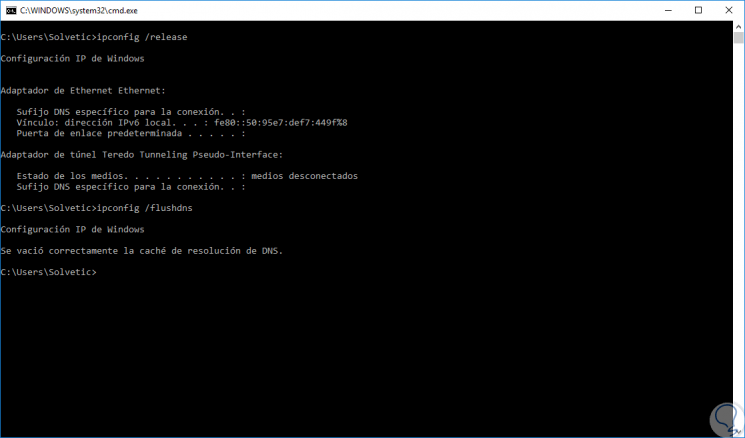
To perform this task, we will access the command prompt as administrators and there we will execute the following:
ipconfig / release (release the IP address) ipconfig / flushdns (empty DNS cache)
Step 2
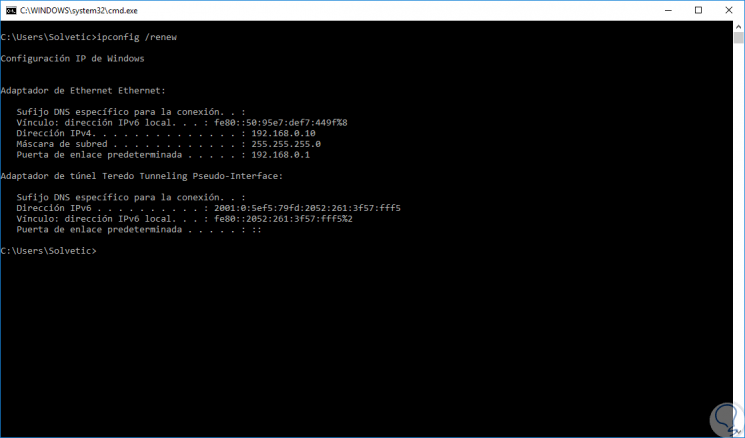
Once we have done this, we will renew the IP address by executing the following:
ipconfig / renew
2. Edit DNS settings to fix DNS_PROBE_FINISHED_BAD_CONFIG error in Windows 10
The DNS is responsible for converting the IP address to domain names and vice versa and when we acquire a new Internet service the DNS is provided by the ISP (Internet Service Provider) but in some situations the DNS_PROBE_FINISHED_BAD_CONFIG error occurs when the DNS server presents some type of error either for maintenance or for some service.
Step 1
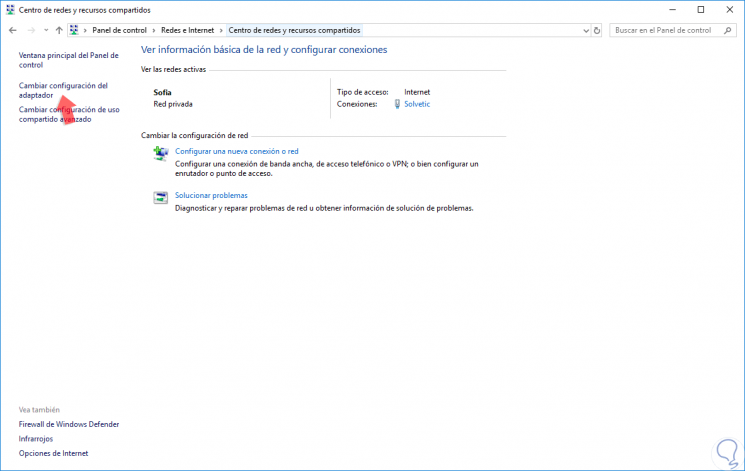
In this case we must edit the DNS configuration and for this we will go to the following link:
- Center network and sharing
Step 2
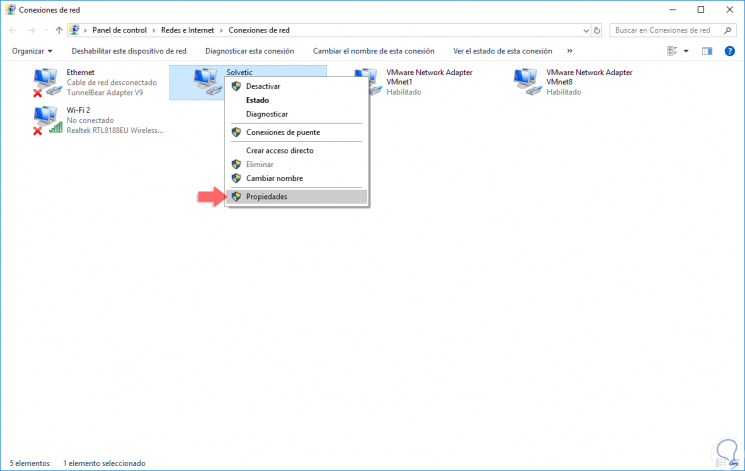
There we will click on the option “Change adapter settings†located on the left side and in the new window we will right click on our network adapter and select the option “Propertiesâ€:
Step 3
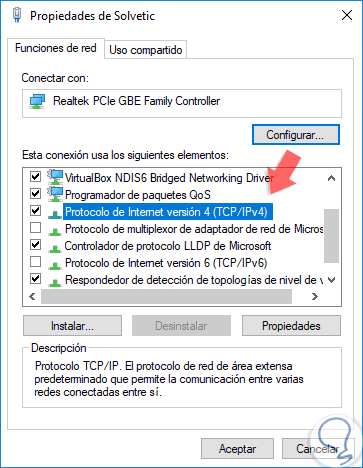
In the open window we go to the "Internet Protocol version 4" line and click on "Properties":
Step 4
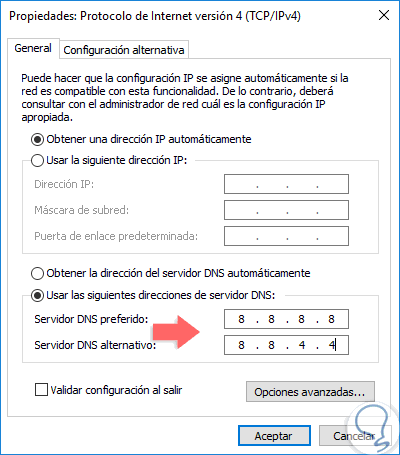
Now, in the new window we will activate the “Use the following DNS server addresses†box and set the following. These are the IP addresses of Google's public DNS servers, but we can add some others that we want and that are free. Click on Accept and this will use these servers, which are a guarantee of reliability, for the entire DNS process.
- Preferred DNS server: 8.8.8.8
- Alternative DNS server: 8.8.4.4
3. Restart the router to fix DNS_PROBE_FINISHED_BAD_CONFIG error in Windows 10
On many occasions when the modem or router has been turned on for long periods of time it is possible that some type of failures due to overheating, services, etc. may be present. For this, just disconnect or turn off for a moment, between 2 to 4 minutes, and then turn it on again and wait for everything to load in the correct way.

4. Reset the IP catalog fix DNS_PROBE_FINISHED_BAD_CONFIG error in Windows 10
The Windows IP catalog is the medium where all the IP addressing carried out in the system is registered and a good practice is to reset it to refresh it and create new redirects since an excess of these can result in the mentioned error.
Step 1
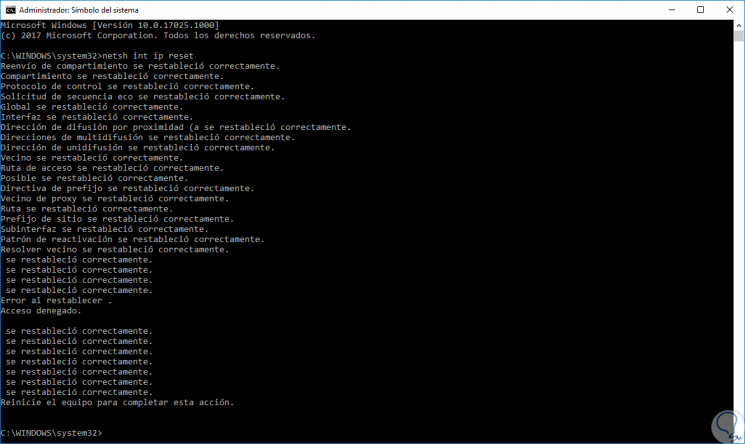
To perform this task, we will access the command prompt as administrators and there we will execute the following:
netsh int ip reset (This option resets the IP address)
Step 2
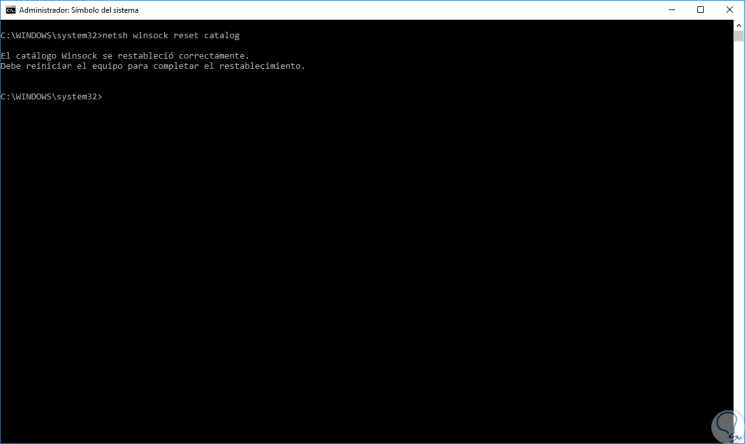
Now we will execute the following:
netsh winsock reset catalog (This option resets the entire catalog)
5. Disable antivirus to fix DNS_PROBE_FINISHED_BAD_CONFIG error in Windows 10
Although the purpose of the antivirus is to offer an extra layer of security to the system, at times it can cause various errors, among which we have DNS_PROBE_FINISHED_BAD_CONFIG.
Step 1
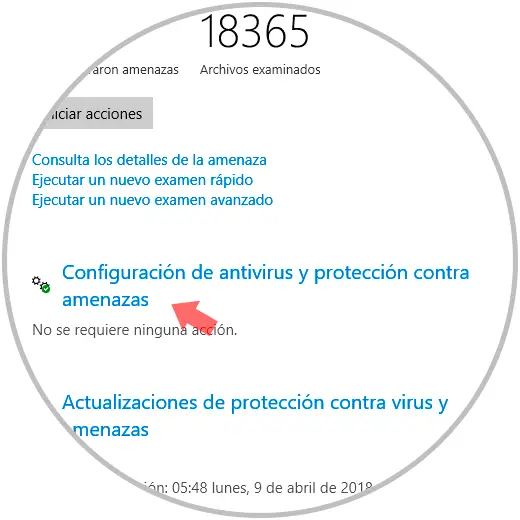
To validate if our antivirus causes this, we go to the Windows Defender Security Center and there we go to the "Anti-virus and threat protection" section:
Step 2
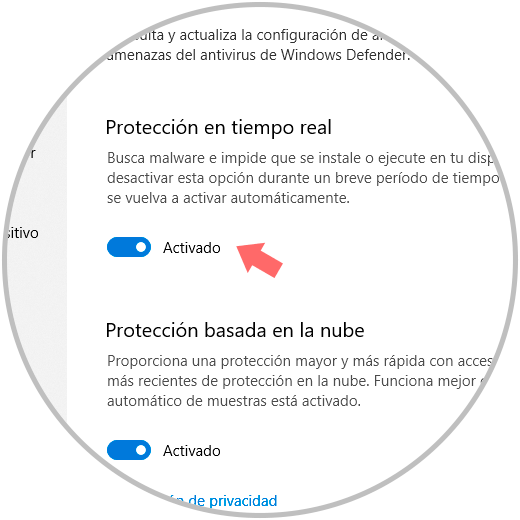
There, click on the "Antivirus and threat protection settings" line and deactivate the "Real-time protection" switch:
Step 3
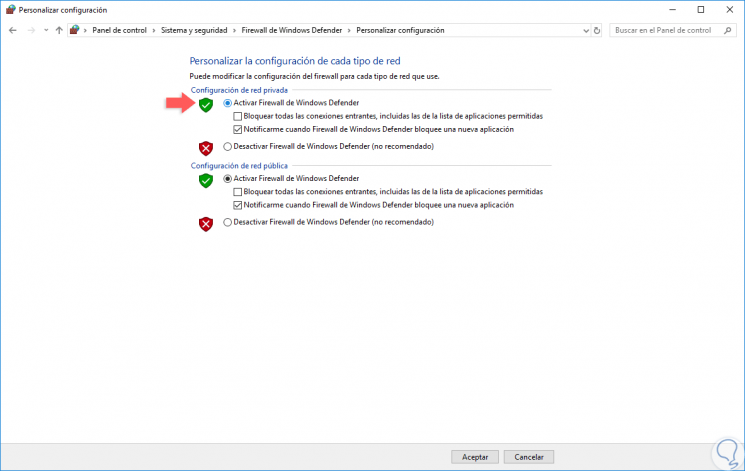
Once the antivirus has been disabled, we go to the next route. There we must confirm that the “Activate Firewall†cells are active.
- Windows Defender Firewall
Disable website blockers
We currently have numerous add-ons developed to block websites, but this can be a cause of the error mentioned. For this it is enough to go to the complements section of our browser and there disable these utilities and validate if the access is correct.
6. Update the network drivers to fix DNS_PROBE_FINISHED_BAD_CONFIG error in Windows 10
As the operating systems launch new editions, better functionalities or characteristics of the controllers are required so that they respond to these expectations as expected.
Step 1
To update the network drivers in Windows 10, we must access the Device Manager using one of the following options:
Device administrator
Step 2
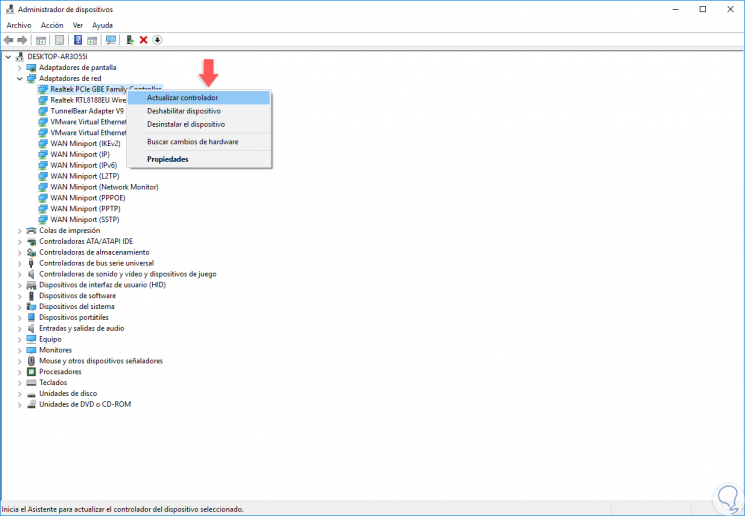
In the window that appears, we will go to the "Network adapters" section and right click on our network adapter and select the "Update driver" option:
Step 3
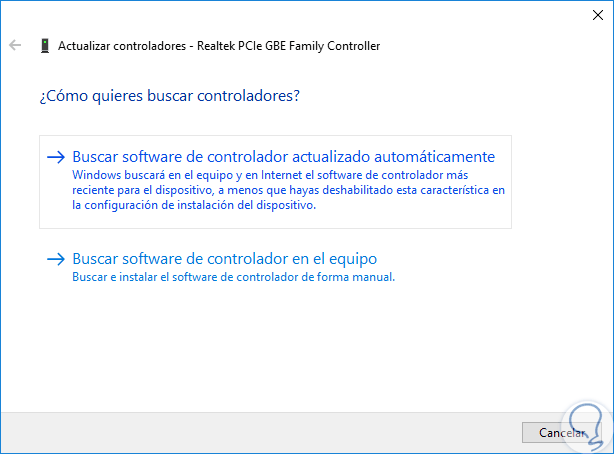
The following will be displayed:
Step 4
There we have two options. This will search for the latest versions of the drivers and, if found, will proceed to download and install.
- Search for the controller locally and for this we must go to the manufacturer's website and download the latest version available.
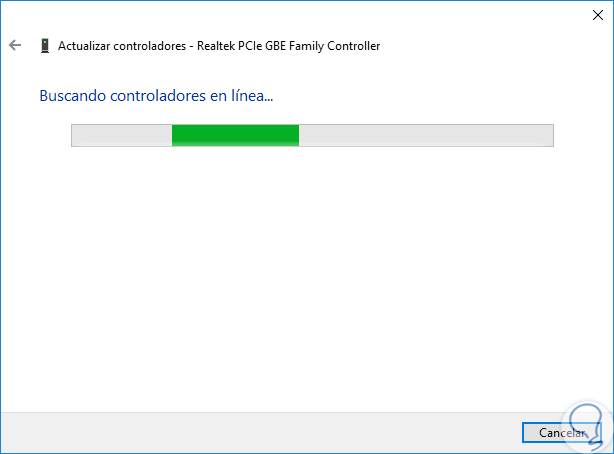
With any of these practical alternatives it will be possible to give a total solution to the DNS_PROBE_FINISHED_BAD_CONFIG error..