Windows 10 is one of the best operating systems developed by Microsoft, but like any task performed by man is exposed to errors and more when it comes to a new operating system that involves immense development and configuration work ..
Some of the frequent errors , which we will analyze today, are errors 0XC190010 - 0x20017, which occur when, despite the fact that the installation of Windows 10 manages to reach 100%, the computer restarts without warning and results in two errors indicating that the installation failed.
It is a delicate error since keeping the system updated is a guarantee of sustainability, reliability and safety..
Some other errors associated with the theme of the update in Windows 10 are:
0xc1900101 - 0x20017: Creators Update
Error that is generated when trying to install the Creators Update.
0xc1900101 - 0x20017 Windows 10 Anniversary
It is an error that occurs when trying to install Windows 10 Anniversary Update.
Windows 10 installation error 0xc1900101 - 0x30018
The previous errors are cataloged as a variation.
The installation failed in the safe_os Windows 10 phase
In an error associated with the installation of Windows.
0xc1900101 - 0x20017 1709
Like all of the above, this error may arise when installing Windows 170 build 1709.
This is why today we are going to see some tips to correct these errors on your Windows 10 computer.
1. Disable the Wireless from the BIOS to fix error 0XC1900101 - 0X20017 in Windows 10 installation
Disabling the Wi-Fi network from the BIOS may be one of the solutions to these errors because it allows the job to run exclusively from Ethernet..
To access the BIOS, we must turn on or restart the system and during the loading process press keys such as Delete, Esc, F2, etc., to access the BIOS.
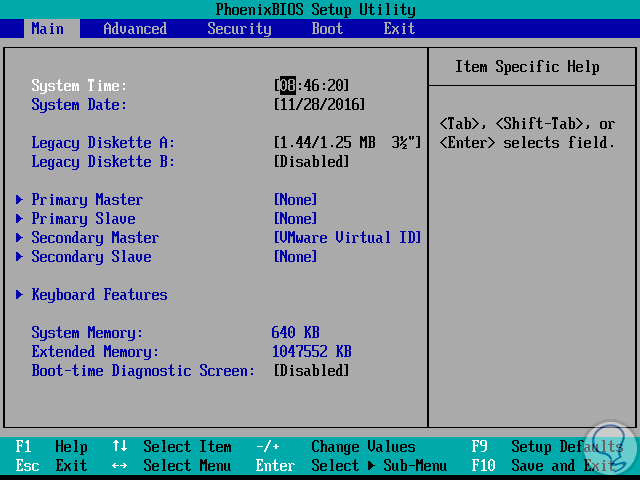
Once there we will go to the "Advanced" tab we will go to the "Wireless" section and press "Enter" to enter it. There, we will see the options "Internal Bluetooth" and "Internal WLAN", which will be disabled and save the changes using the F10 key.
2. Disable the Bluetooth Broadcom and Wi-Fi network drivers to fix error 0XC1900101 - 0X20017 in Windows 10 installation
One of the problems that have arisen is that the same manufacturer Broadcom has declared that some of its products are not compatible with Windows 10, so if we have these types of devices, it is as possible that a communication conflict is being created towards the network that results in the download and installation of updates failing generating the indicated errors.
To disable them, we must access the device manager using one of the following options:
Option 1
Using the following keys:
+ R
And executing the command:
devmgmt.msc
And press "Enter" or "Accept"
Option 2
Use the following keys:
+ X
Or right click on the "Start" menu, and in the drop-down list select "Device Manager"
In the displayed window:
- We will go to the "Network adapters" section
- We will right click on the Wi-Fi network adapter
- Select the option "Disable" device
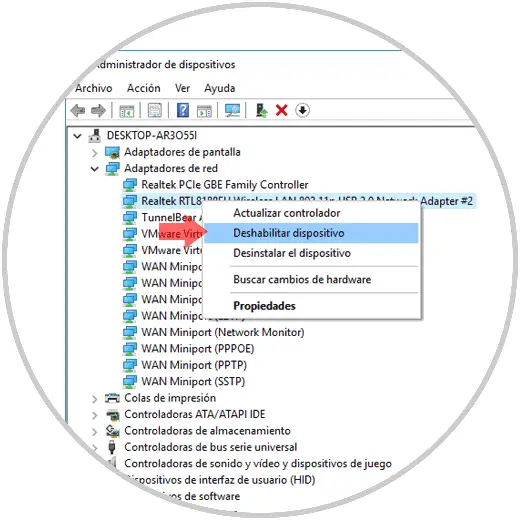
We will do this same process with Bluetooth. After this, we can check if the updates are downloaded and installed correctly.
3. Update the computer BIOS to fix error 0XC1900101 - 0X20017 in Windows 10 installation
One of the most delicate and important components of any operating system is the BIOS since it is responsible for allowing the optimal system startup, but, like the programs and the operating system itself, the BIOS reaches a certain point at which It needs to be updated. This is a task of responsibility and care since a bad process can affect it and in the way prevent us from having access to the system which increases the problem instead of solving it.
Step 1
To determine the BIOS model on our computer we can use the key combination:
+ X
Execute the command:
msinfo32
In the "Motherboard manufacturer" line we will find the developer of this:

Step 2
Now, on the manufacturer's website we will find the latest updates available for the BIOS:
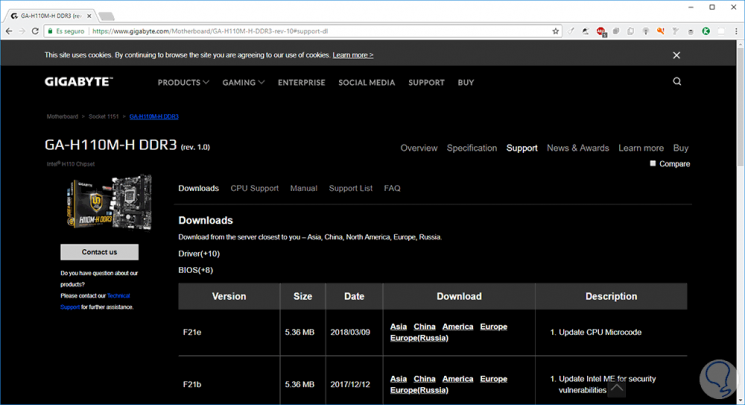
We must select the correct operating system and architecture to download the correct file and then proceed with its execution following in detail the steps of the wizard.
In specific cases, it was possible to correct the error 0XC190010 or 0x20017 when changing the AHCI mode to IDE mode, for this we must access the BIOS and make the respective change and then save this change with the F10 key.
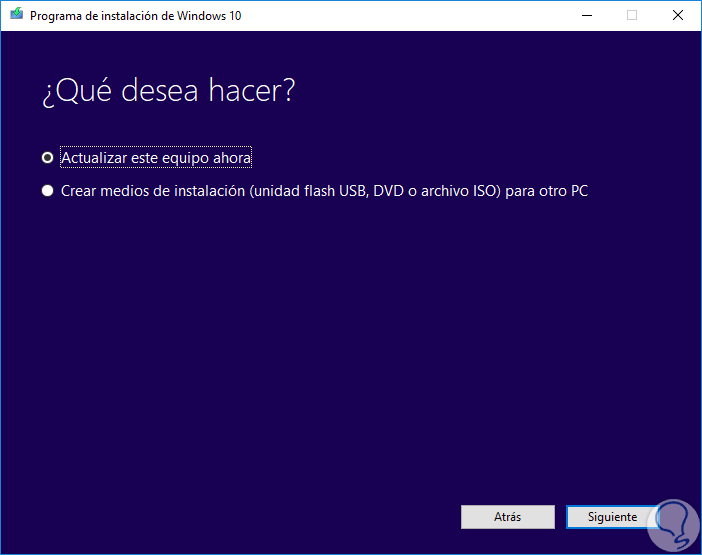
4. Make use of the Media Creation Tool utility to fix error 0XC1900101 - 0X20017 in Windows 10 installation
The Media Creation Tool has been created to allow us to update the operating system to the new editions available or to create a bootable media, ISO, to take it to new equipment.
This tool is available at the following link:
Media Creation Tool
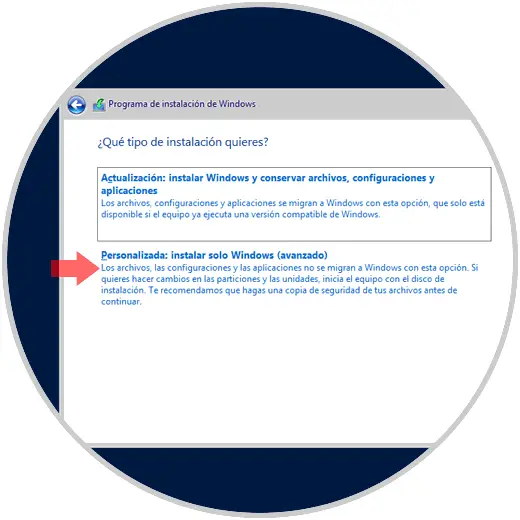
The purpose of this method is to install Windows through it again:
Now, the problem is that when we have 2 partitions on the hard disk and each of them has a Windows installation, the ideal is to follow the entire process of Windows installation and at the time of reaching the Custom section select the Second partition and install Windows 10 there:
5. Edit the Windows 10 registry to fix error 0XC1900101 - 0X20017 in Windows 10 installation
This is another task that we must carry out with great care due to the risks that it has in the system, this because some badly configured registry can directly affect the behavior of the system at a general level.
Step 1
To access the registry editor, we will use the following key combination:
+ R
Now we execute the command:
regedit
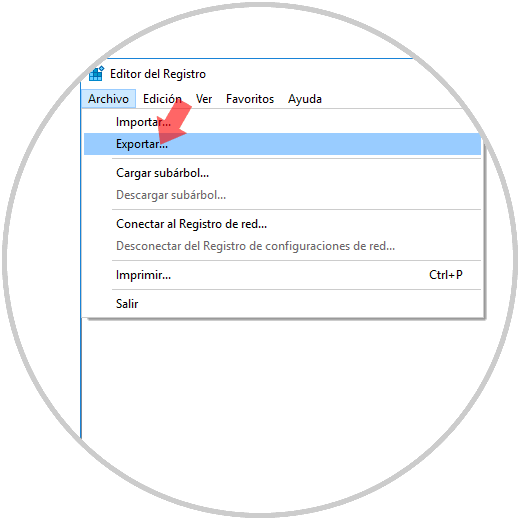
To create a backup, we will go to the "File / Export" menu:
Step 2
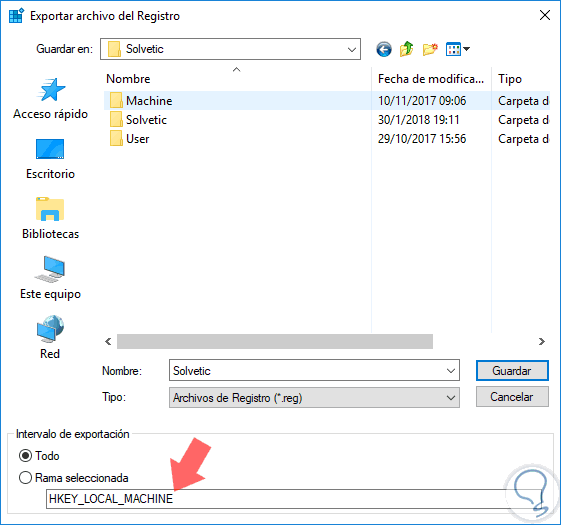
We will define a path and name to save the backup copy of the selected records. Now, we will go to the following route:
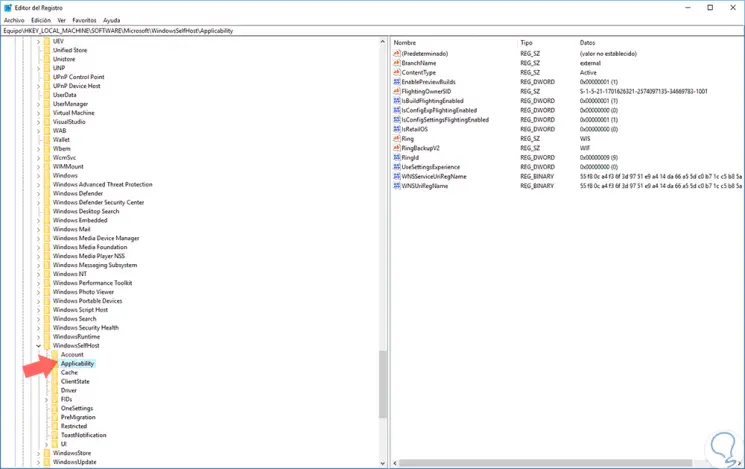
HKEY_LOCAL_MACHINE \ SOFTWARE \ Microsoft \ WindowsSelfHost \ Applicability
Step 3
There we must modify the following values ​​like this:
Modify values
- RingBackup = WIS or Enabled
- UserPreferredBranchName = TH1
Once this is done we can exit the registry editor.
6. Other options to solve error 0XC1900101 - 0X20017 in Windows 10 installation
Connect the hard drive to a SATA port to solve error 0XC1900101 - 0X20017 in Windows 10 installation
Another error that may be the cause of the mentioned errors are the SATA II ports and this is already a matter of compatibility directly. Although the SATA II ports are faster, it is likely that the hard disk or SSD may not work properly or may not be fully functional with a SATA II port.
Change BIOS settings to fix error 0XC1900101 - 0X20017
As we have indicated previously, the role of the BIOS is fundamental in Windows 10 since it is responsible for validating that all the necessary elements and processes in the system are ready for operation and thus allow the system to start.
Change the number of active cores to solve error 0XC1900101 - 0X20017 in Windows 10 installation
Although it is a very rare solution, changing the number of active cores can be the solution for this error and to do this task we must enter the BIOS and change the number of active cores to 1.
For a smooth execution, we must consult the motherboard manual to access detailed instructions or go to its website and consult them there. It is important to remember that currently all processors and motherboards support this feature.
To verify if this is the root of the problem, we are going to connect our HDD or SSD hard drive to a SATA port and then validate that everything works as expected.
With any of these solutions we will correct the error 0XC190010 or 0x20017.