Google Chrome is one of the most used modern browsers worldwide thanks to its modern interface, ease of use and multiple configuration options. In some situations, when the server takes too long to respond to the requests sent, the error message ERR_CONNECTION_TIMED_OUT is generated , which affects us the optimal web browsing:
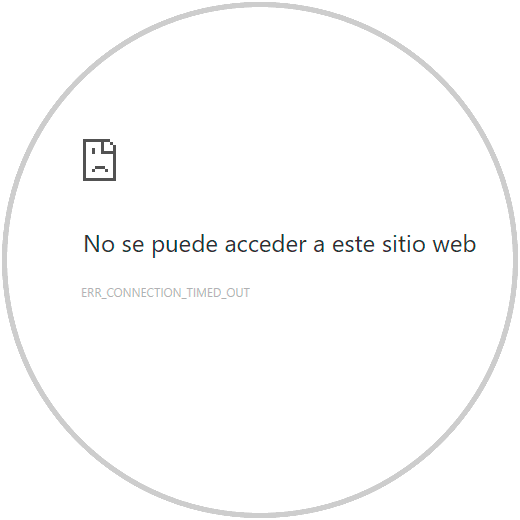
There are some causes that generate this error and today in TechnoWikis we will give some series of tips for its optimal correction..
1. Check the Windows 10 hosts file
The hosts file is basically a computer file that is used by the operating system to assign host names to IP addresses. The hosts file performs the function of directing the network nodes in a network of the equipment, but when it is incorrectly configured or an IP address is added as blocking, the mentioned error is generated.
Step 1
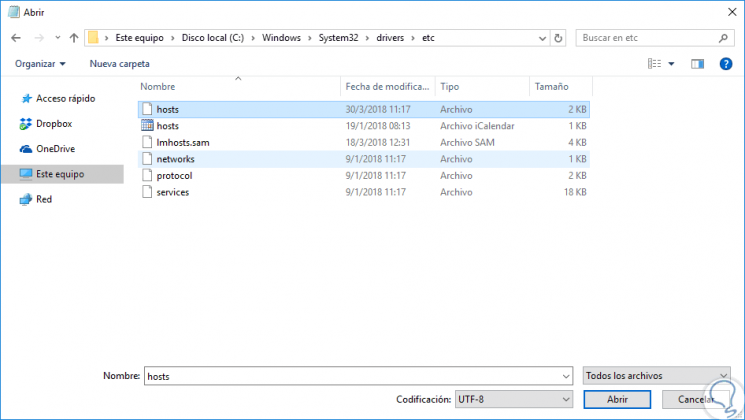
To validate and check this file, we will access the notebook as administrators and then go to the “File / Open†menu and go to the following path:
C: \ Windows \ System32 \ drivers \ etc
Step 2
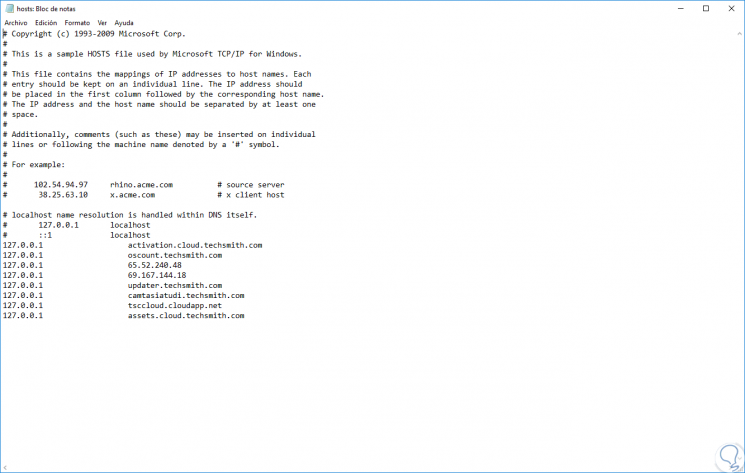
There we select the hosts file and click on "Open". The following information will be displayed. There we must validate that at the bottom none of the known URLs is added without the # sign (when # appears in front, that does not affect, since it is a comment). If there is any known address there without # in front, we proceed to delete it since this prevents that site from being opened, or has been redirected to some IP address. Just save the changes to "File / Save."
2. Delete browsing history from Google Chrome
Another frequent cause for the Err_Connection_Timed_Out error to be generated is the accumulation of information that Google Chrome stores, such as cookies, thumbnails, etc., which can gradually cause a negative impact on the behavior of the browser.
Step 1
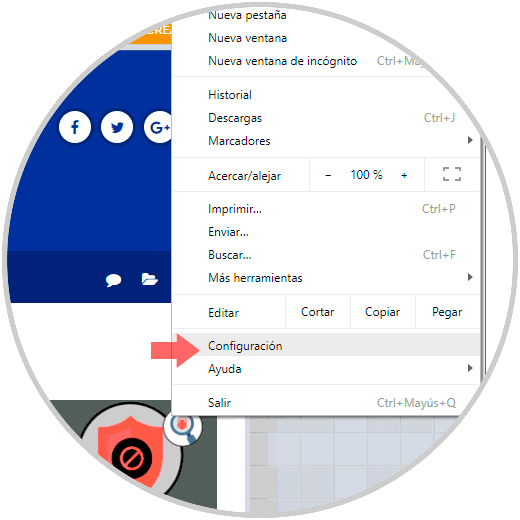
In this case the most practical solution is to clear this browsing history and for this we will go to Google Chrome and click on the “Customize and control Google Chrome†icon and in the options displayed select “Settingsâ€:
Step 2
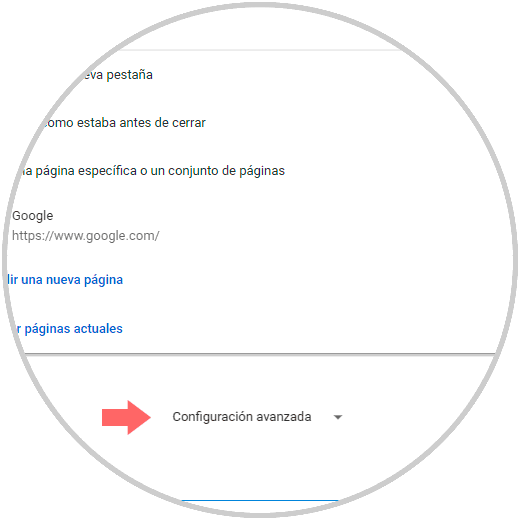
In the displayed window we go to the bottom and there we will click on the “Advanced configuration†line:
Step 3
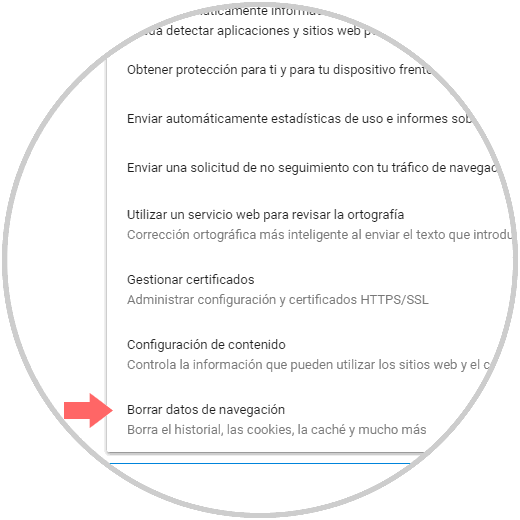
In the new window, we will go to the "Privacy and security" section and click on the "Clear browsing data" section:
Step 4
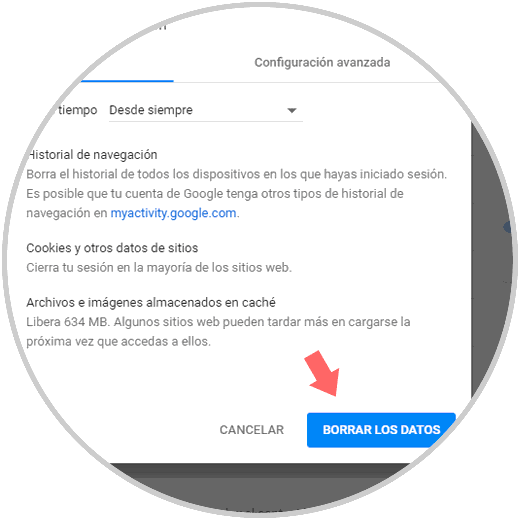
By clicking there, we activate the available boxes and select the "Always" option located in the "Time interval" section. Click on the "Delete data" button to confirm the action.
3. Adjust LAN settings in Windows 10
A bad adjustment or configuration in the parameters of the Ethernet or Wi-Fi network can be a cause of the mentioned error because there is no optimal response when sending network requests or because the IP address does not Respond appropriately.
Step 1
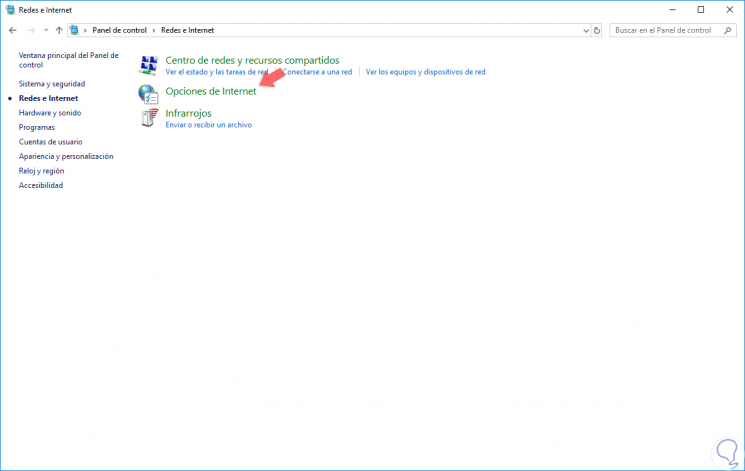
To check this configuration, we will go to the next route.
Step 2
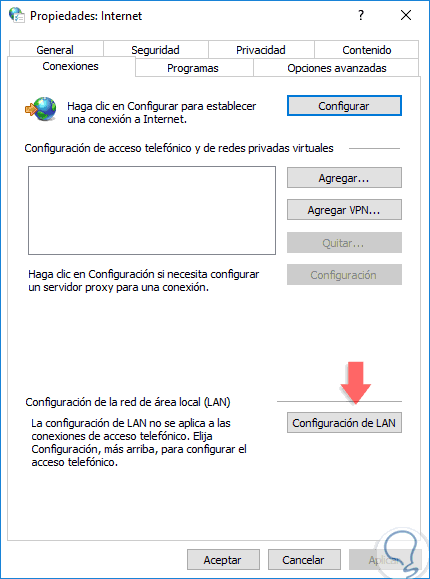
There we click on the "Internet Options" section and in the window we will go to the "Connections" tab where we will see the following:
Step 3
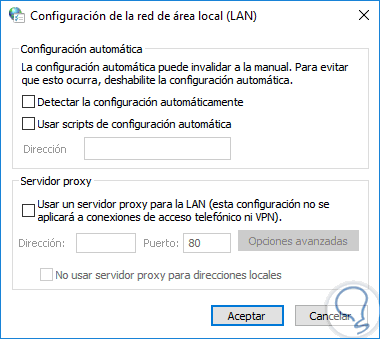
There we click on the "LAN Configuration" button and in the new window we will deactivate all the available boxes. Click on OK to apply the changes.
4. Update the network drivers in Windows 10
A detonator of multiple network errors is an outdated or outdated driver, this because it does not fully comply with the minimum network requirements that are especially required when the operating system is updated.
Step 1
To update the drivers we have two basic options that are:
- The first is to go directly to the website of the network card manufacturer, for this we must know what type of card we have installed, and there go to the driver download section and look for the latest version and proceed to download and installation .
- The second option we have is to go to the Windows device manager using one of the following methods:
Device Manager
Step 2
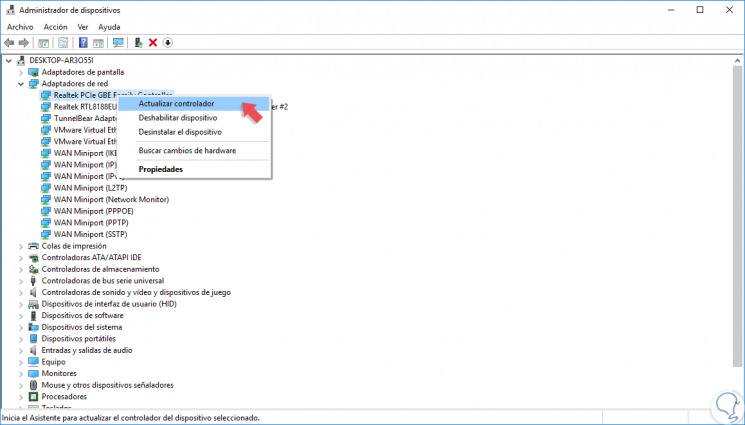
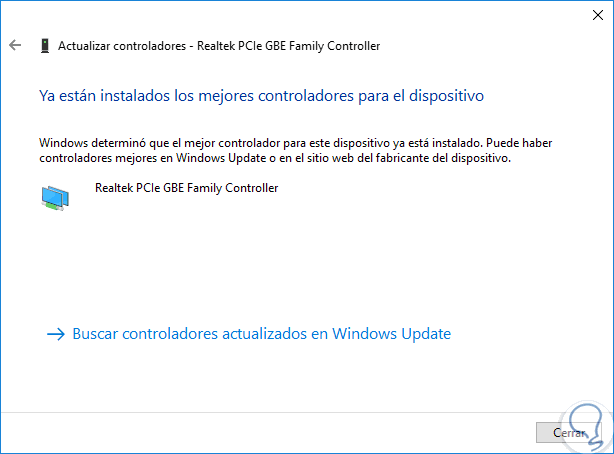
In the window that will be displayed, we will locate the “Network adapters†section and right click on the current adapter and select the “Update driver†option:
Step 3
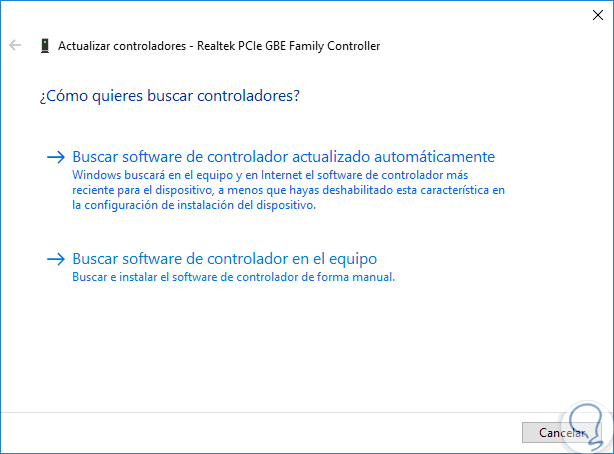
By clicking there we will see the following:
Step 4
We can search for the latest driver online or locally once it has been downloaded from the manufacturer's website.
This option will give us the possibility of having the latest update of the network controller and thus avoid being victims of this error.
5. Empty the DNS and renew the IP address in Windows 10
As we navigate the network, cache memory is stored which allows access to frequent websites to be much faster, but this cache memory can gradually create a conflict in access to these generating the connection error.
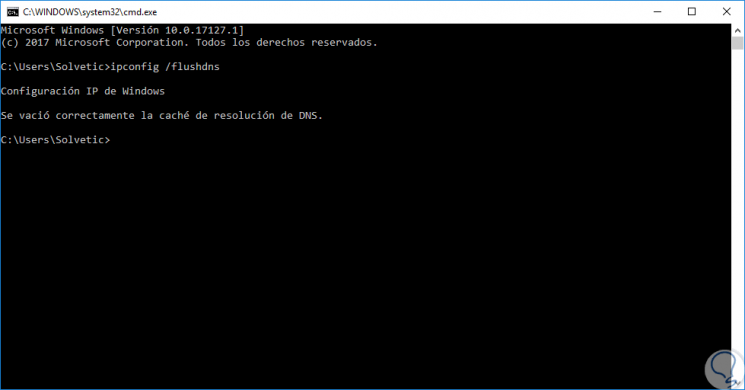
To solve this, we will access the command prompt as administrators and there we will execute the following commands:
ipconfig / flushdns (Free DNS) ipconfig / registerdns (Register the DNS again) ipconfig / release (Free IP address) ipconfig / renew (Renew the IP address) netsh winsock reset (Reset the winsock parameter)
Thus, we have multiple options to solve this error and connect as expected to any website.