Windows 10 has been developed by Microsoft in order to be in line with the forefront of today's world and that is why we find numerous features focused on 3D design, virtual reality, games and many more.
Now, regardless of the use or purpose of Windows 10, there is something that will be essential to have a stable, secure and dynamic system and are updates , these are available periodically and although there are some special, such as cumulative or security The goal is always the same: Protect and improve the entire operating system..
One of the problems that some users may present is that when updating the system, error 0x80070490 is presented.
The error 0x80070490 usually occurs in the tasks of updating Windows through Windows Update, and occurs when trying to update any of the Windows 10 versions, we can even see it in Windows 8.1, Windows 8 or Windows 7; Its root is due to a failure in the storage of system components or because the Component Based Service (CBS) is damaged within the system itself..
Today TechnoWikis will give a series of practical tips to correct this error and thus be able to update Windows 10 in the correct way.
1. Run the Troubleshooter in Windows 10
Windows 10 has an integrated function called Troubleshooting which, as the name implies, it performs a complete analysis of the fault in question and is responsible for seeking repair or providing advice on how to repair it.
Step 1
To access this utility, we go to the "Start / Settings" menu and there we will see the following:
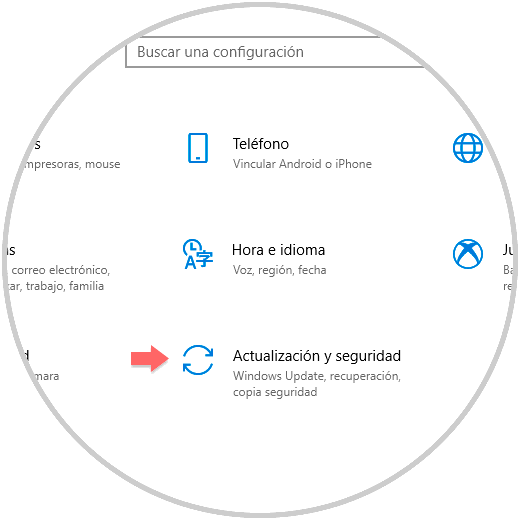
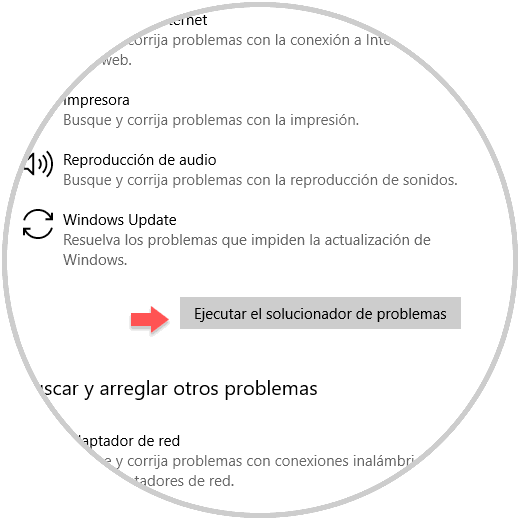
Step 2
There we go to the "Update and security" section and in the new window we go to the "Troubleshoot" category where we will place the "Windows Update" option and clicking on it will display the "Run the troubleshooter" button:
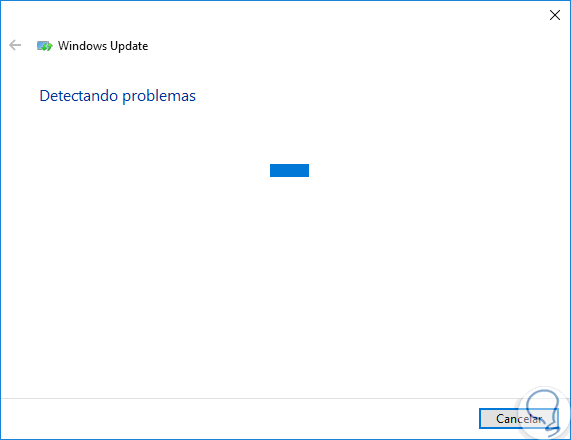
Step 3
By clicking on it, we will see that the analysis process begins:
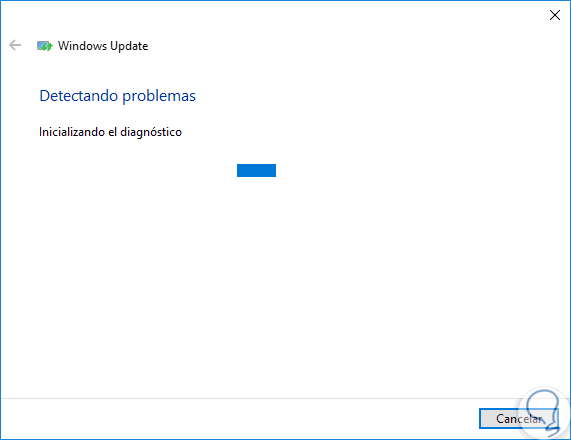
Step 4
Once the diagnosis is executed, we can see the possible solutions associated with Windows Update and from there we can execute its correction:
2. Create a new local user account in Windows 10
In some cases, the error 0x80070490 is due to problems related to the current user account, be it a profile, parameter or service issue, these may generate the error display with its respective failure when performing the process Download and install updates.
Step 1
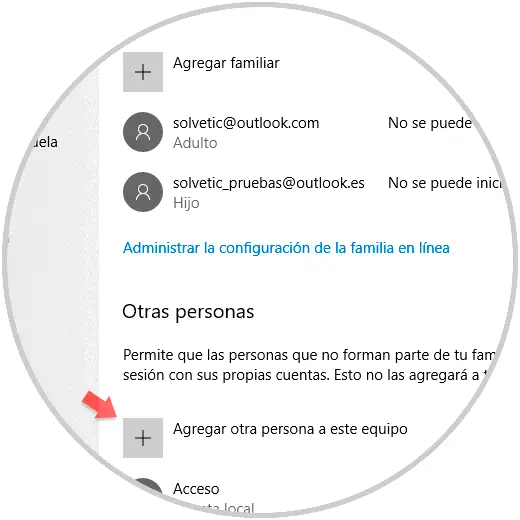
To create a new user account in Windows 10, we go to the Start / Settings / Accounts path, and there we go to the "Family and other people" section where we will see the following:
Step 2
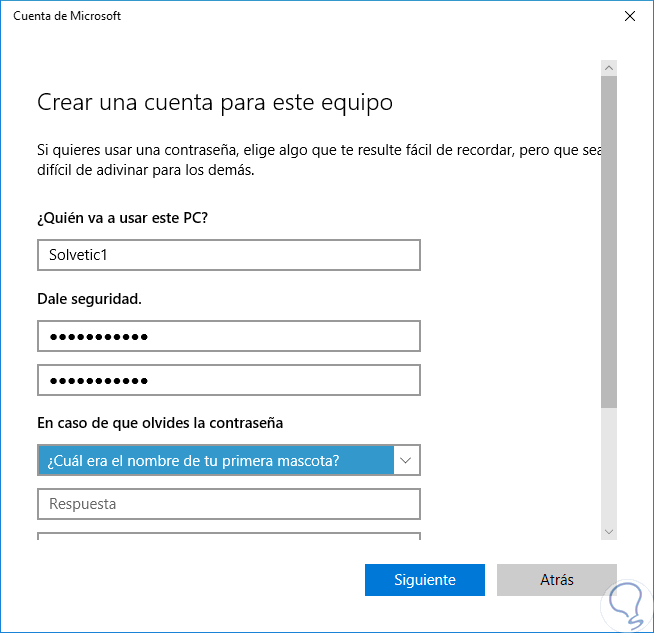
There we click on the “Add another person to this computer†button and we will create a local account, not a Microsoft account, for Windows 10:
Note
Recall that from the build 1704 of Windows 10 you must establish security questions for new users.
Step 3
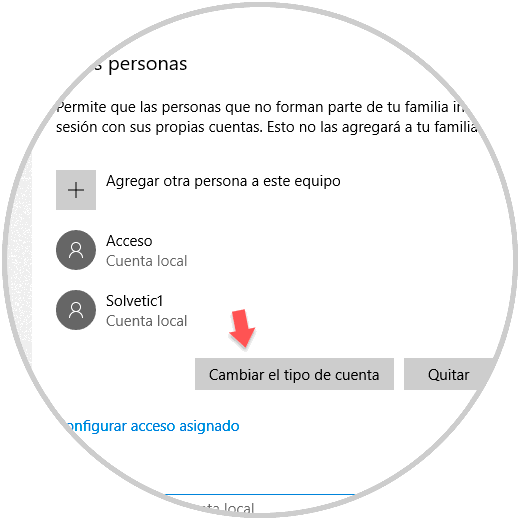
Once the account is created, we click on it and select the “Change account type†button:
Step 4
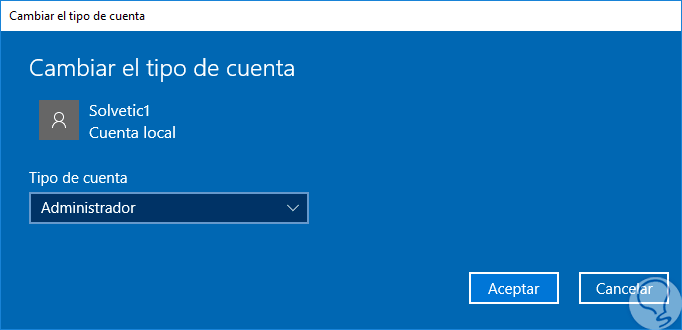
In the displayed window we select the "Administrator" option. Click on Accept and in this way the account will be left with administrative permissions. Now, we must move all the files from the previous account to this new one, delete the account and then, if we wish, associate this new account with Microsoft's own.
3. Run DISM on Windows 10
DISM (Deployment Image & Servicing Management) is a Windows utility thanks to which a detailed analysis of the system image is performed for errors and thus correct them and prevent this type of error messages from being displayed.
Step 1
To do this, we will access the command prompt as administrators and execute the following:
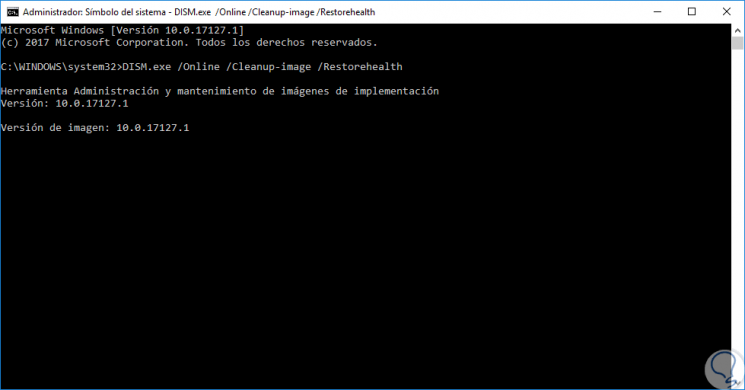
Step 2
There we will wait for the DISM utility to execute its task. In case the DISM tool cannot obtain files online, we must use the installation of the USB or DVD media, to do this, we will insert the media and execute the following command:
DISM.exe / Online / Cleanup-Image / RestoreHealth / Source: C: RepairSourceWindows / LimitAccess
Note
In the line C: RepairSourceWindows we must indicate the correct path of the CD, DVD or USB where the medium of Windows 10 is.
4. Scan virus in Windows 10
As in any operatic system, the presence of some type of virus, called malware, Trojan, etc., can be the root of multiple problems both at the level of programs and services of the operating system itself. We are exposed to these types of threats due to the constant online browsing, insertion of USB media, downloading files and more, in which some type of malicious code can be included.
It is highly recommended to have antivirus software or use the Windows Defender Security Center utility which has new features designed to improve the overall security of the system. To do this, we will go to the Windows Defender Security Center and in the Anti-Virus and Threat Protection section we run a full system scan to rule out the presence of any threat there:
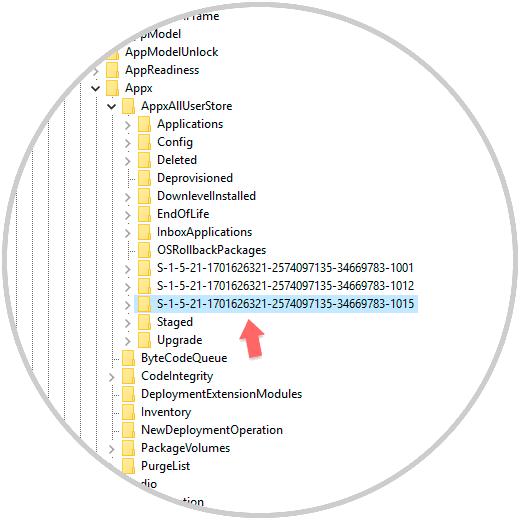
5. Clear user cache from Windows 10 logs
The accumulation of cache can become a factor that directly influences the generation of error 0x80070490 and therefore it is recommended to proceed with its deletion and thus discard this option.
Step 1
To carry out this action, we will use the following key combination and execute the regedit command, press Enter or Accept.
+ R
regedit
Step 2
In the displayed window we will go to the following route:
HKEY_LOCAL_MACHINESOFTWARE / Microsoft / Windows / CurrentVersion / Appx / AppxAllUserStore
Step 3
There we must delete the keys that have the following scheme. We will right click on each of them and select the option “Deleteâ€
. S-1-5-21-1701626321-2574097135-34669783-1015
6. Delete the SoftwareDistribution folder in Windows 10
This folder is responsible for storing all system update data, so that some type of error in it can directly impact system updates.
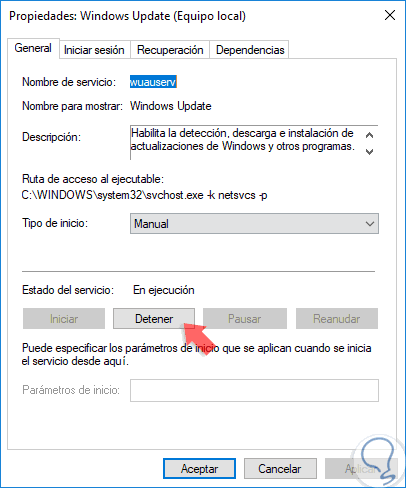
Step 1
To delete this folder, first we will use the following keys and execute the command services.msc then, in the new sale, we will locate the service called "Windows Update", there we will right click on it and select the option "Properties":
+ R
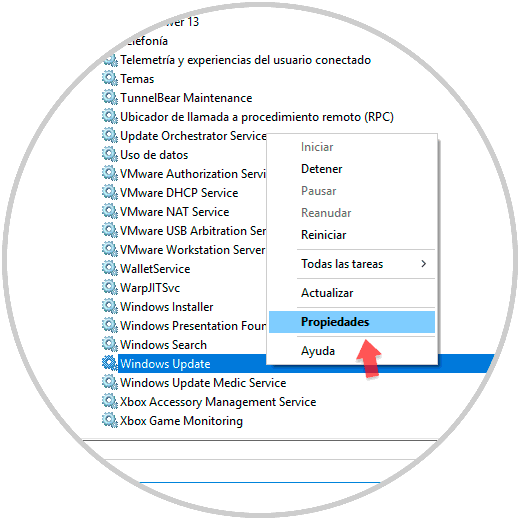
Step 2
In the new window click on the "Stop" button:
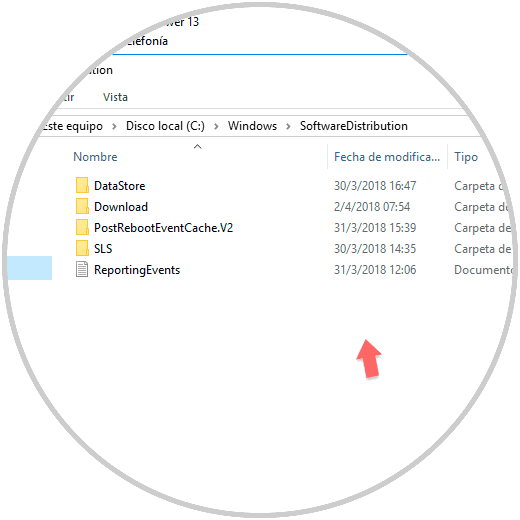
Step 3
Once the service is stopped, we will go to the next route. Once we delete these files, we proceed to restart the computer and once it is restarted, we go back to the properties of the “Windows Update†service and set its value to manual.
C: \ Windows \ SoftwareDistribution
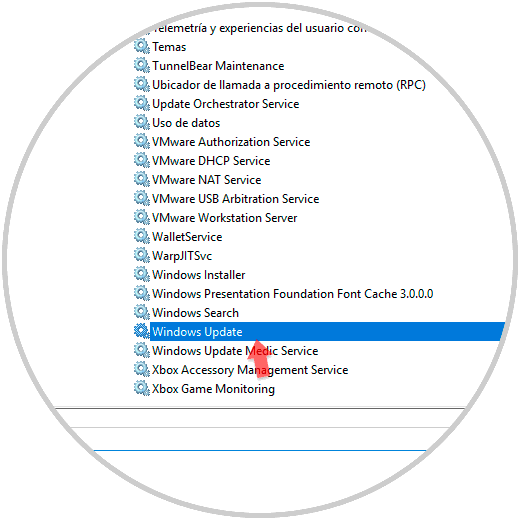
7. Check the BITS, Cryptographic, MSI Installer and Windows Update services in Windows 10
Each of these services is responsible for optimizing the process of updating Windows 10 and in case any of them is stopped it can directly affect this update process resulting in the mentioned error.
Step 1
To check the status of these services, we use the following keys and execute the services.msc command and in the new window we will locate each one of them
+ R
services.msc
Step 2
In the "Status" column we must confirm that it is running. If not, we will right click on each of them and select the Start option
. 
8. Use the SFC utility in Windows 10
SFC (System File Checker) is a utility built into Windows which gives us the possibility to perform a detailed analysis of the operating system's file system since some corrupt point in it can generate the update error. For its execution and analysis, we will access the command prompt as administrators and execute the following line:
sfc / scannow
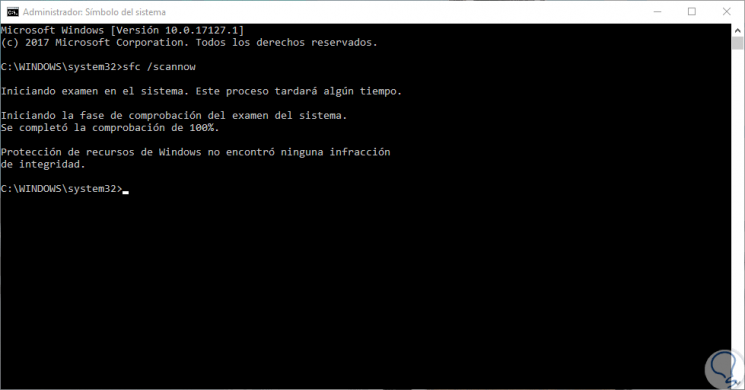
Once this process is finished, if there is an error, we will restart the system to apply the necessary corrections.
We have seen the various options we have to give a definitive solution to this error and thus keep Windows 10 updated..