One of the most secure and traditional connection methods in any organization is FTP (File Transfer Protocol) which allows the transfer of files between two computers in a TCP network.
Its design is based on the client-server architecture , with which it is possible to use a client computer from where we can connect to a server to download files from it or to send files independently of the operating system used in each of the computers, from there the wide reception of this protocol..
One of the utilities that we have available to add even more security in the FTP connection is ProFTPD which we will analyze today in CentOS 7 .
What is ProFTPD?
ProFTPD is basically a highly configurable GPL licensed FTP server software to meet connection expectations on any site. ProFTPD is designed from scratch so it does not use another copy and this gives us the possibility to configure numerous options in its execution.
ProFTPD
ProFTPD can be executed in the following platforms in an integral way:
- Linux for IBM S / 390, zSeries
ProFTPD features
Among its characteristics we find:
- It has a single main configuration file, with directives and policy groups that are intuitive for any user who has used Apache.
- It has a ".ftpaccess" directory whose configuration is similar to Apache ".htaccess"
- Ability to configure multiple virtual FTP servers and anonymous FTP services
- Designed to run as a stand-alone server or from inetd / xinetd, depending on the system load
- Anonymous FTP root directories do not require any specific directory structure, system binaries or other system files facilitating their administration
- Without SITE EXEC command. In modern Internet environments, these commands are a security nightmare
- The source code is available for administrators and developers to audit the system
- It has hidden directories and files, based on Unix style permissions or property of users / groups
- It runs as a user configurable without privileges in independent mode to decrease the chances of attacks that could exploit the capabilities of "root". Note: This function depends on the capabilities of the Unix host system
- Registration support and utmp / wtmp. The registry is compatible with the wu-ftpd standard, with an extended registry available
- Compatibility with the Shadow password set, including expired account support
- It is based on a modular design, which allows us to easily expand the server with modules. The modules have been written for SQL databases, LDAP servers, SSL / TLS encryption, RADIUS support, etc.
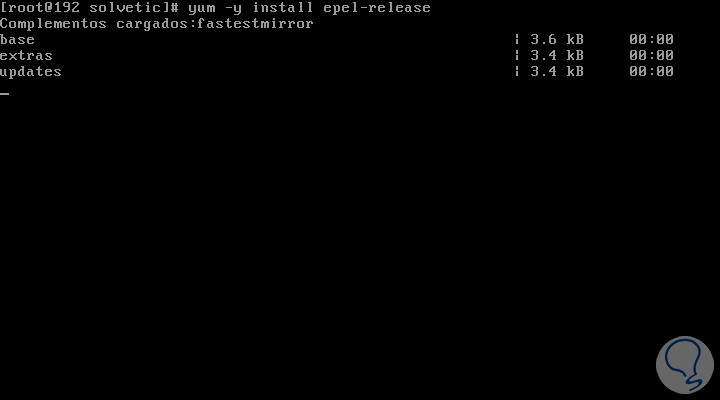
1. How to install EPEL on CentOS 7
Step 1
The first step to take is to install the EPEL repository for later from obtaining ProFTPD, for this we execute the following:
yum -y install epel-release
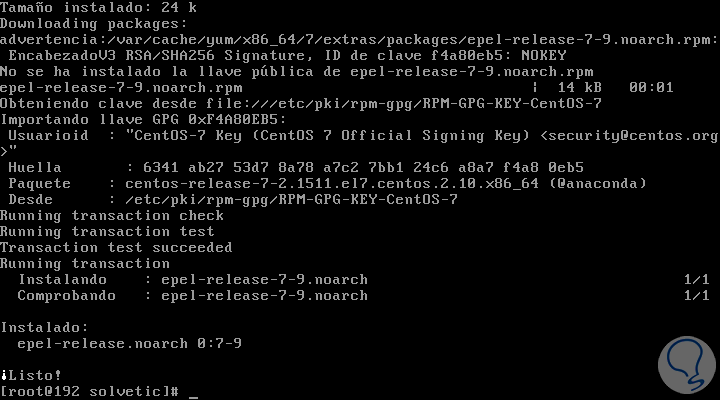
Step 2
Once this process is finished we will see this:
Step 3
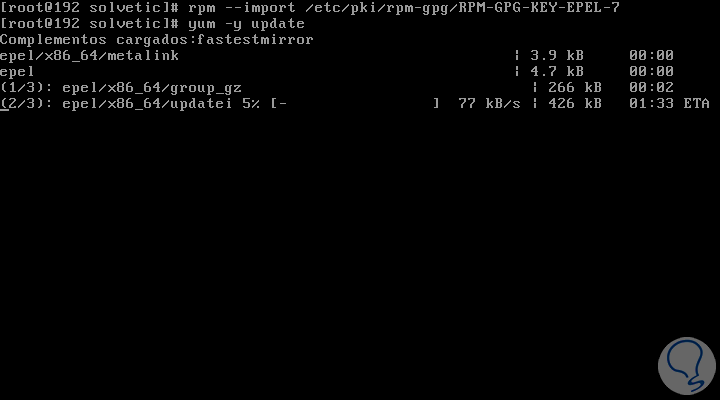
Now, we are going to import the EPEL GPG key using the following line:
rpm --import / etc / pki / rpm-gpg / RPM-GPG-KEY-EPEL-7
We proceed to update the system packages:
yum -y update
2. How to install ProFTPD on How to install EPEL on CentOS 7
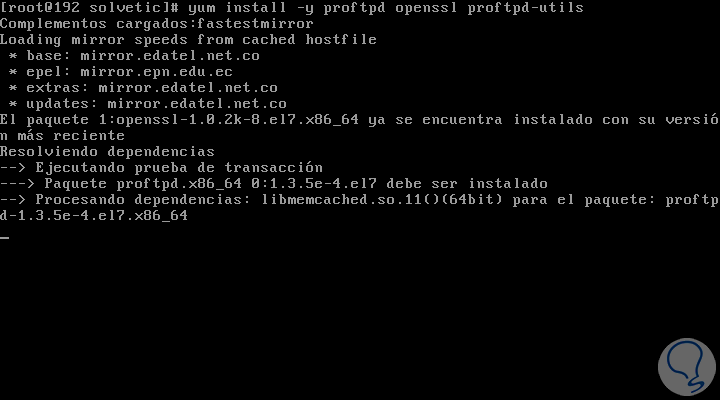
The next step will be to install the ProFTPD and OpenSSL utility by running the following:
yum install -y proftpd openssl proftpd-utils
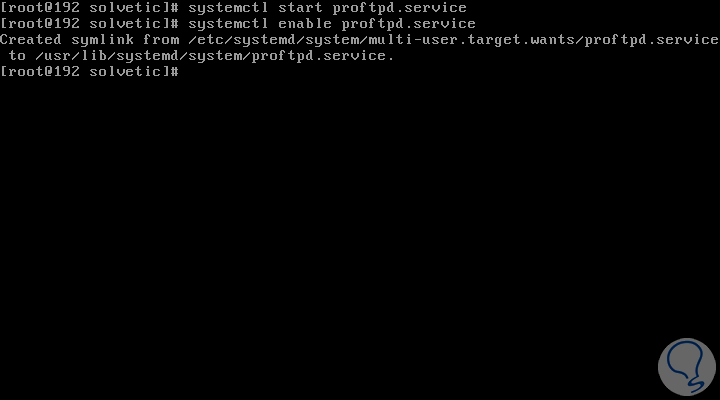
Once this process is finished, we will execute the following lines:
systemctl start proftpd.service (Start the ProFTPD service) systemctl enable proftpd.service (Enable the ProFTPD service next to CentOS startup)
3. How to configure Firewall
If Firewalld is installed on CentOS 7, we must configure it with firewall-cmd to open the FTP port as follows:
firewall-cmd --add-service = ftp --permanent firewall-cmd –reload

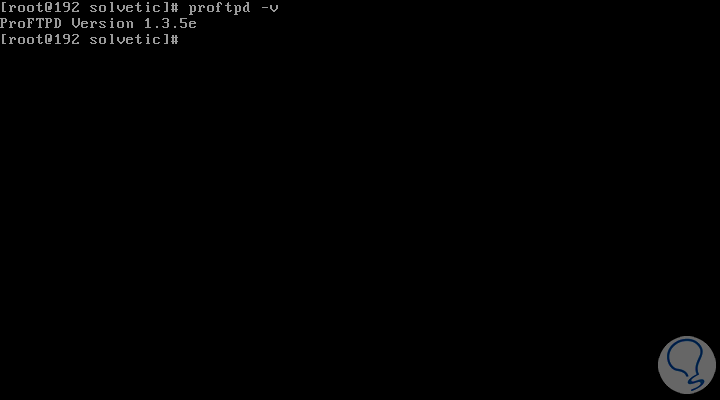
We proceed to verify the installed version of ProFTPD:
proftpd -v
4. How to create users and group for ProFTPD in CentOS 7
Once ProFTPD is installed in CentOS 7, it is to create the group and user for access, in this case we will create an ftpgroup group and a solvetic1 user for ProFTPD, and we will define / ftpshare as the home directory for the created user:
groupadd ftpgroup useradd -G ftpgroup solvetic1 -s / sbin / nologin -d / ftpshare passwd solvetic1
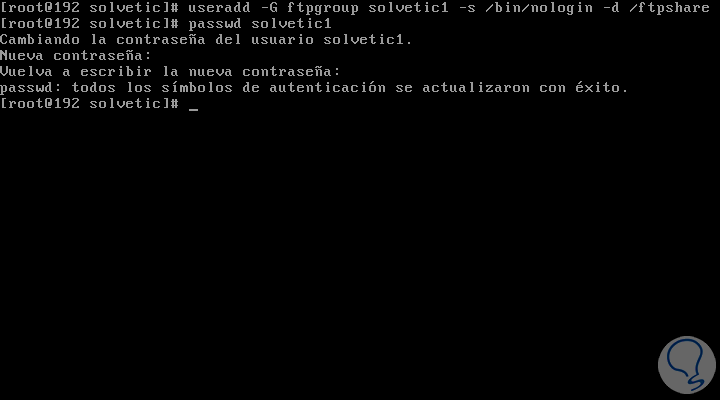
There we must enter and confirm the respective password for the new user. Once this is done, we will grant the permissions to ftpshare by running:
chmod -R 1750 / ftpshare /
5. How to enable TLS in ProFTPD
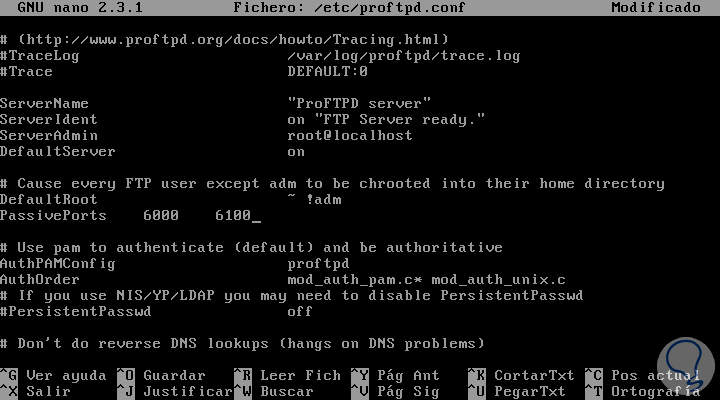
Now it will be necessary for us to secure the FTP connections using TLS and for this, we must open the file /etc/proftpd/proftpd.conf but it is ideal before editing the file, creating a backup copy of the original file and then editing the file with nano .
Step 1
To create the copy we execute:
cp -pf /etc/proftpd.conf /etc/proftpd.conf.bak
To access the file we will use nano and execute:
nano /etc/proftpd.conf
In the deployed file we will enter the following under the DefaultRoot ~! Adm line:
PassivePorts 6000 6100
Step 2
In addition to this, we will comment on the following lines:
# <IfDefine TLS> TLSEngine on TLSRequired on TLSRSACertificateFile /etc/pki/tls/certs/proftpd.pem TLSRSACertificateKeyFile /etc/pki/tls/certs/proftpd.pem TLSCipherSuite ALL:! ADH:! DES TLSOptions NoCertRequest TLSVerifyClient off TLSRenegotiate ctrl 3600 data 512000 required off timeout 300 TLSLog /var/log/proftpd/tls.log # <IfModule mod_tls_shmcache.c> # TLSSessionCache shm: / file = / var / run / proftpd / sesscache # </IfModule> # </IfDefine>
Step 3
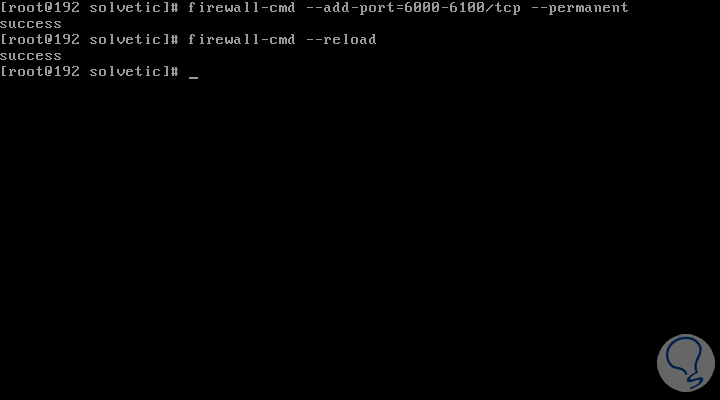
We save the changes using the Ctrl + O keys and exit the editor using the Ctrl + X keys. As we can see, ports 6000 and 6100 have been added to allow the passive ftp mode, to allow this access we will execute the following:
firewall-cmd --add-port = 6000-6100 / tcp --permanent firewall-cmd --reload
Step 4
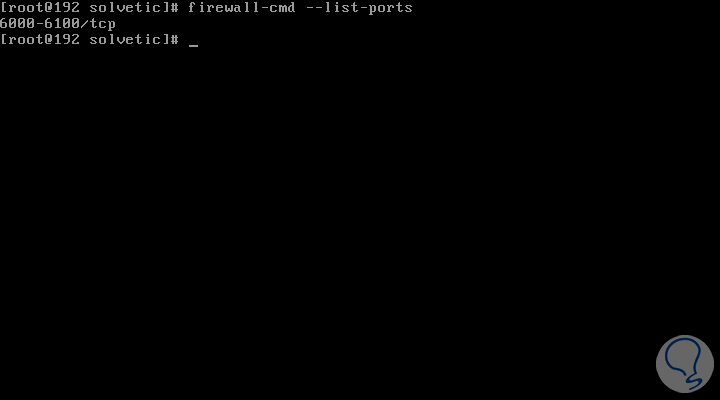
If we want to see the status of the ports we can execute the following:
firewall-cmd --list-ports
Step 5
Now, it will be necessary to configure SELINUX in order to allow the reading and writing of the files, we execute the following:
setsebool -P allow_ftpd_full_access = 1

Step 6
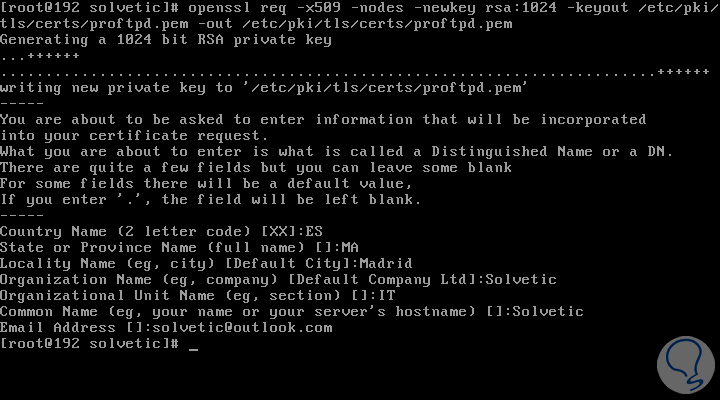
To use TLS, it will be necessary to create an SSL certificate, we will create it in the path / etc / pki / tls / certs, as follows:
openssl req -x509 -nodes -newkey rsa: 1024 -keyout /etc/pki/tls/certs/proftpd.pem -out /etc/pki/tls/certs/proftpd.pem
The following questions will be displayed where we will enter answers such as:
Step 7
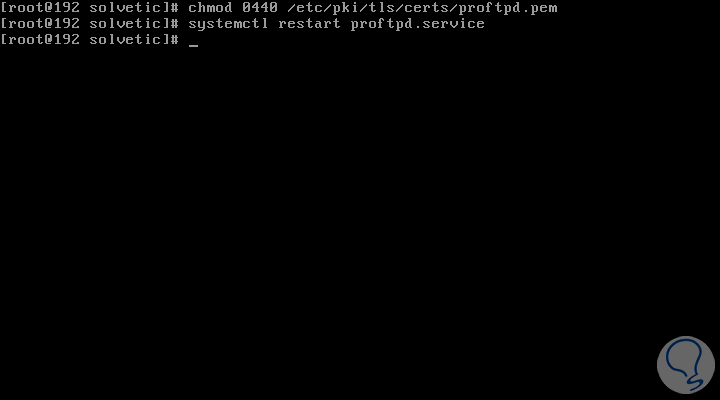
Now, for security reasons, we will configure the certificates to be readable only like this:
chmod 0440 /etc/pki/tls/certs/proftpd.pem
Finally, we restart the ProFTPD service by running the following:
systemctl restart proftpd.service
6. How to access CentOS using FTP
Step 1
To access CentOS using FTP we can use an FTP client and for this case we will use Filezilla which can be downloaded at the following link:
Filezilla
When accessing Filezilla we go to the File menu and there we select the option Site Manager to create the configuration of our access, we will enter the following:
Server
192.168.0.9 (CentOS 7 IP)
Encryption
Requires explicit FTP over TLS
Username
solvetic1 (Created during configuration)
Port
This may be blank if no port other than 21 has been customized which is default.
Password
Created during user configuration
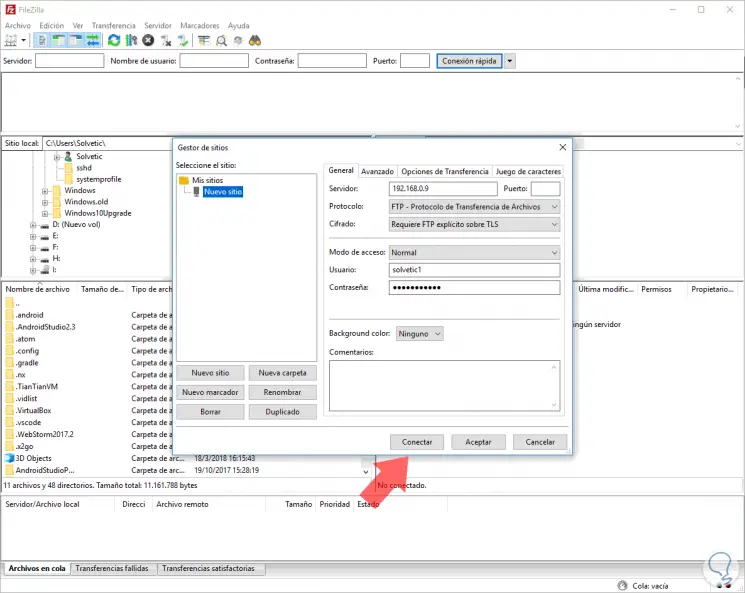
Step 2
Once this is defined, click on Connect to access our CentOS server and from here start the connection, this process can be done from Windows, macOS or Linux, when we click there, the following message will be displayed:
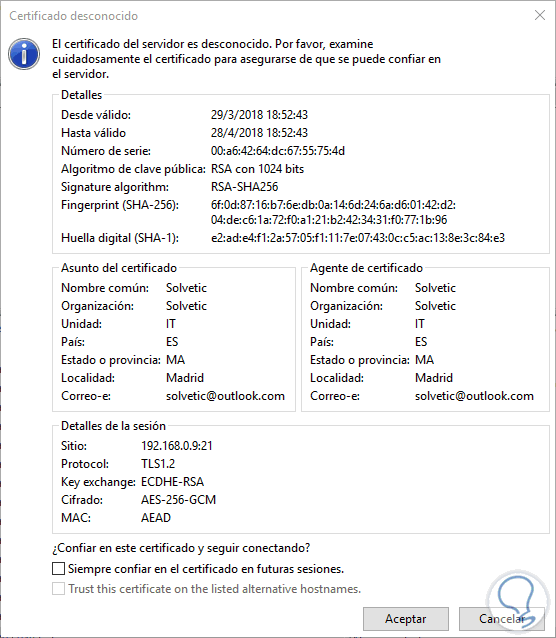
Message Details
There we can see details such as:
- Algorithms, validity date and certificate footprints
- Certificate data as configured at the time of creation
- Session data with IP address, user, keys and encryption type
Step 3
We can check the Always trust the certificate in future sessions box to prevent this message from continuing to be displayed on each connection with CentOS 7.
If this is correct, click on the Accept button and in this way we will be connected to CentOS 7 using ProFTPD:
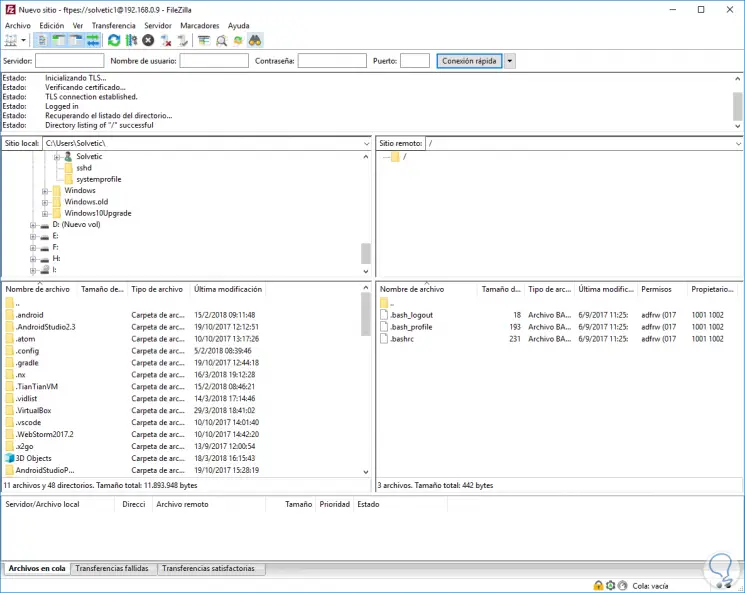
There we can start the navigation process without problem..
Step 4
If you wish to configure the anonymous user for FTP access, we will create the following file:
nano /etc/proftpd.conf
There we will paste the following:
[...] ### Anonymous share ##### <Anonymous ~ ftp> User ftp Ftp group UserAlias ​​anonymous ftp DirFakeUser on ftp DirFakeGroup on ftp MaxClients 10 <Directory *> <Limit WRITE> Denyall </Limit> </Directory> </Anonymous>
We save the changes using the Ctrl + O keys and exit using Ctrl + X.
Step 5
Finally we restart the service:
systemctl restart proftpd.service
We have seen how ProFTPD is a useful tool to establish an integral connection to our servers, thus ensuring an integrated and completely agile communication of the files.
Recall that ProFTPD is available for various systems so its use is wide.