Perhaps on some occasion you have seen GIFs that have a more exaggerated duration than those that are usually seen. This is because video has been recorded and then through it a GIF has been generated directly by publishing graphics as text..
In this tutorial we will see how to obtain a GIF from a previous video and thus be able to attach it more easily in networks such as WhatsApp using Photoshop CC 2017 .
What is a GIF?
A GIF is an image that contains animation and is composed of consecutive frames. It is based on a graphics exchange format, that is, GIF, which uses a compression algorithm called LZW that does not deteriorate the image too much. It is a file in which we find a series of images that repeatedly placed give a sensation of movement. It can be configured with infinite movement so that the images are repeated without limit.
Some of its advantages are that they are quick to view and can weigh very little without degrading the image too much..
To keep up, remember to subscribe to our YouTube channel! SUBSCRIBE
1. Convert a video to another format with HandBrake and VLC
Step 1
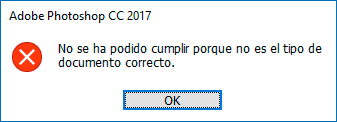
Before we start working the video with Photoshop, we may have to convert our video to be compatible. And messages like this appear:
Step 2
To solve these types of problems we recommend using a conversion program like HandBrake:
Handbrake
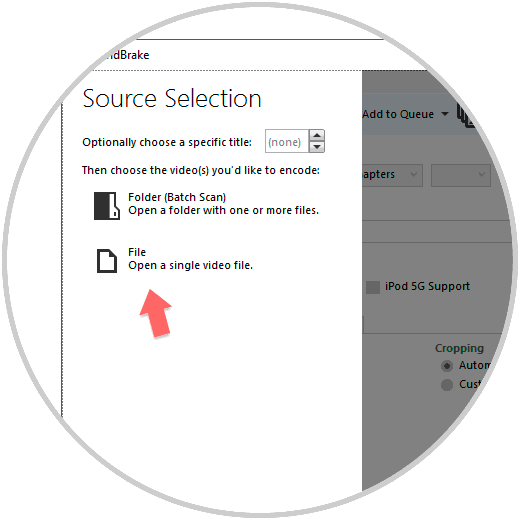
Step 3
Once downloaded we execute it and we will see this interface. We can select to open a file or a folder with several files.
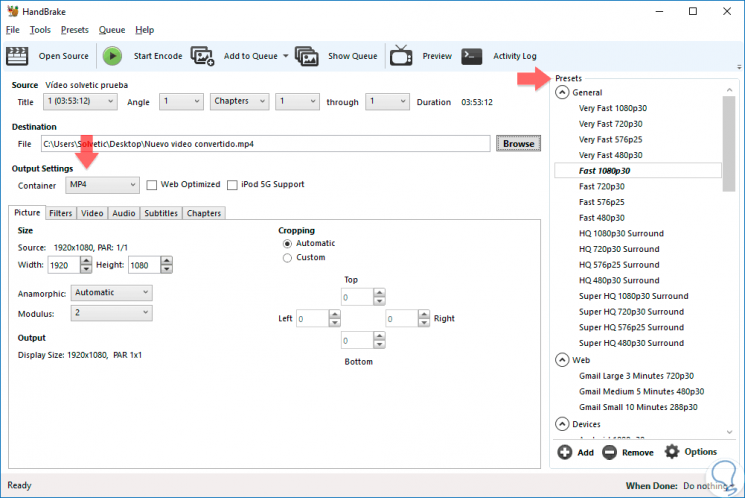
Step 4
Once the video is loaded, we select the conversion options such as the format or the quality preset and the output path of the new file.
Step 5
You can also use VLC that with its multiple features make it quite complete and easy to use.
2. Create GIF from video using Photoshop CC
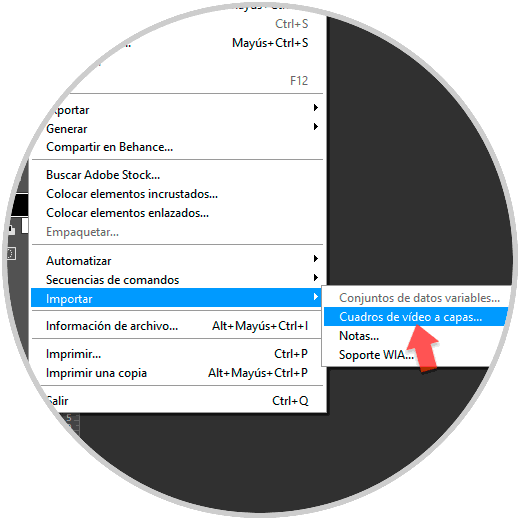
Step 1
Open Photoshop and go to the "File" menu - "Import" - "Layered video frames".
Step 2
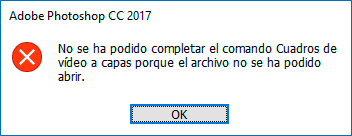
Remember that if the following message appears, you must convert the video to another compatible format.
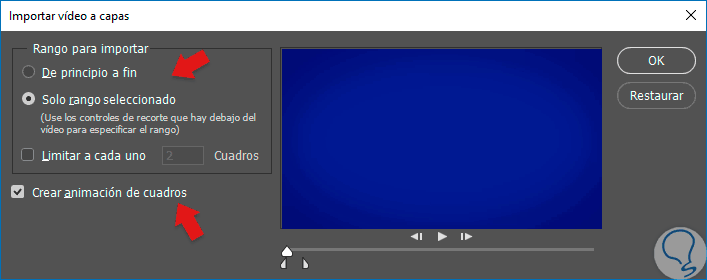
Step 3
We select the configuration. We can choose to generate the GIF in the entire video or in the range we prefer. To compress the size as much as possible you can limit the number of frames, for example, if we choose two one frame will be deleted every two frames.
Note
Verify that the option “create animation of frames†is activated.
Step 4
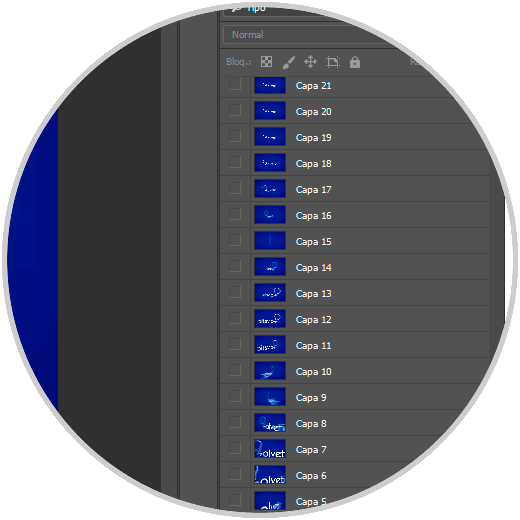
We see that the set of frames that form the time range we have selected have been imported.
Note
If we see that Photoshop fails us we should import the video again with a lower quality.
Step 5
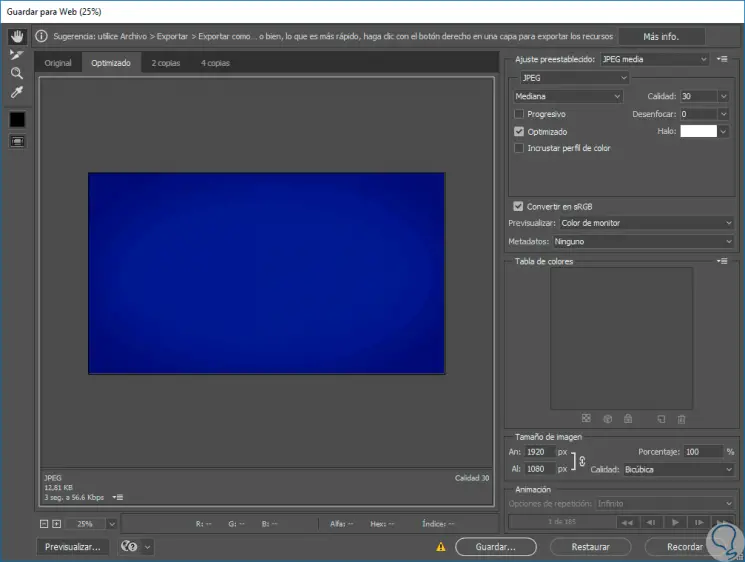
Now we will save those frames or frames as a GIF. For this we go to "File" - "Export" - "Save for Web".

Step 6
In this screen we will have the different configuration options of our GIF. In the left window we have the preview and in the right the settings.
Step 7
To create our GIF we select the category of “Preset†and choose the GIF format. Also choose a particular preset.
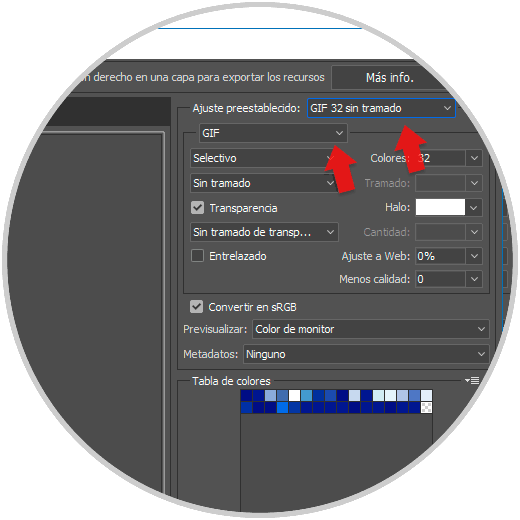
Step 8
At the bottom you can select the measurements of your GIF and the export quality. You can also select the repeat options.
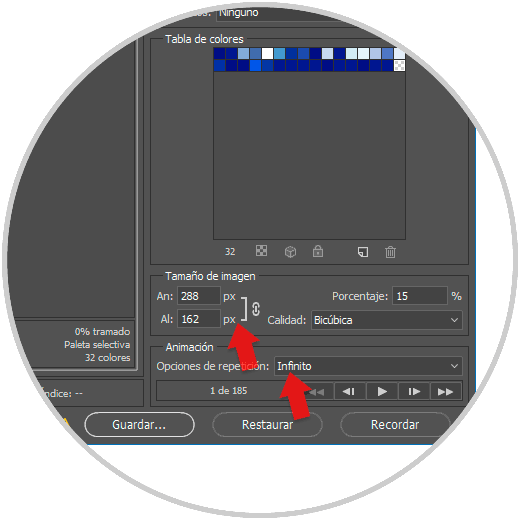
Step 9
Then we click on Save and we will have created our GIF from a video.

In this way we will have created our GIF from a previous video from Photoshop CC 2017.