In the time in which we live the mobile phone becomes one of our inseparable companions of our day to day, and this implies that it works as a warehouse where we accumulate much of the information we exchange and need.
Files such as photos, videos or audio, passwords, accounts and even contacts are part of the information we store on our phones, and that due to its large volume it can be difficult to manage from the same terminal.
In these cases, connecting our terminal to the PC and managing the information from here seems the best option, but failures may occur when we perform this action. For this reason, in this TechnoWikis tutorial we will explain the possible solutions you can make if you have a Realme and it does not connect correctly to your Windows 10 , 8, 7 PC.
For this you will have to try the options that we will indicate in the following video tutorial.
To keep up, remember to subscribe to our YouTube channel! SUBSCRIBE
1. Enable USB debugging to connect Realme 5 Pro, Realme X2 or Realme X2 Pro to PC with USB
The first thing we have to test is if the terminal has the developer mode and USB debugging activated, since on the contrary it will be impossible for us to exchange information between terminal and PC even if we connect them through the cable. For this you will have to follow the steps that we will indicate below:
Step 1
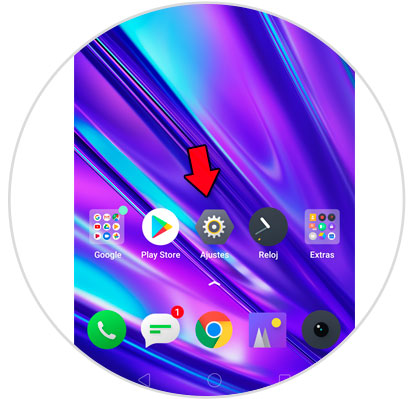
Click on the gear icon to access the "Settings" of the terminal.
Step 2
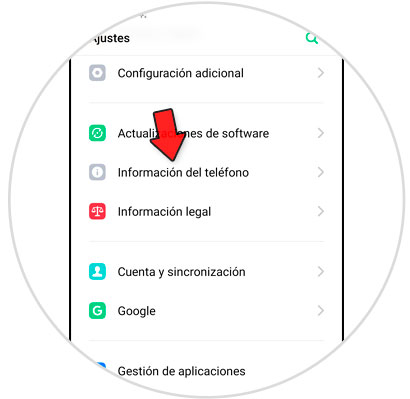
Among the available options, select “Phone information†by clicking on this option.
Step 3
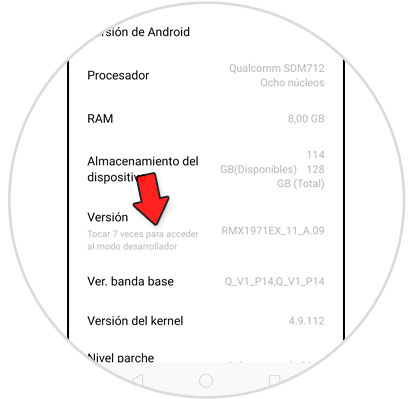
Now, in the "Version" section, you must press 7 times in a row to activate the developer mode on the terminal, which is essential to enable USB debugging on it.
Step 4
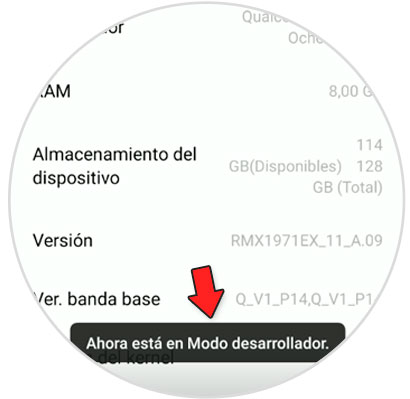
Once you have pressed 7 times in a row, you will see the following on the screen and this will indicate that the developer mode has been activated in your Realme.
Step 5
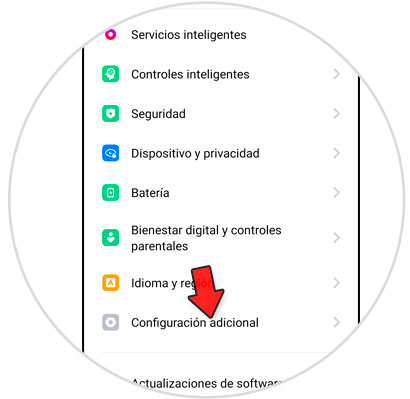
Now, you will have to return to the "Settings", and among the available options click on "Additional Settings" to continue.
Step 6
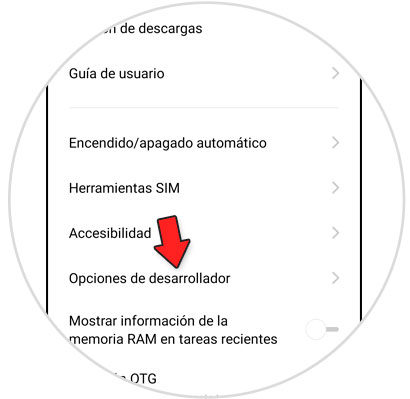
Now, the "Developer Options" will appear, which we have activated with the previous steps. Press here.
Step 7
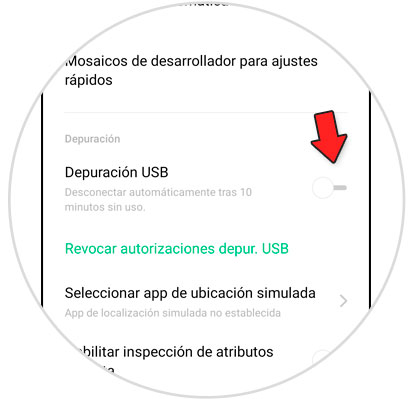
Swipe to the “USB Debugging†option and activate the tab to the right of it.
Step 8
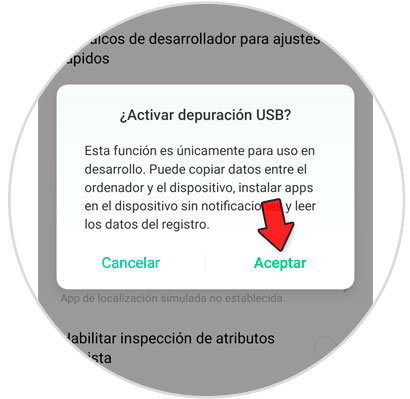
The following window will appear, where you must press "Activate" to confirm the action. With this you will be done.
2. Enable USB data sharing to connect Realme 5 Pro, Realme X2 or Realme X2 Pro to PC with USB
In the case of Realme terminals, there is another option to connect your terminal to the PC that we will explain below:
Note
To carry out this action, your Realme must be connected to the PC via the USB cable.
Step 1
Access the "Settings" of the terminal by clicking on the gear icon on it.

Step 2
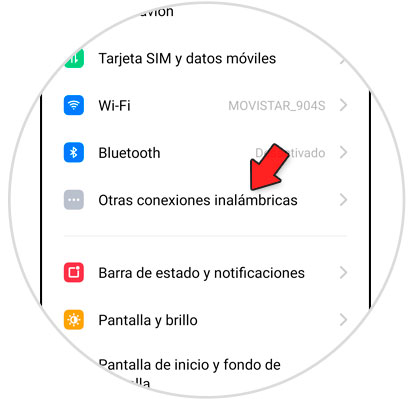
Now, click on the “Other wireless connections†option to continue.
Step 3
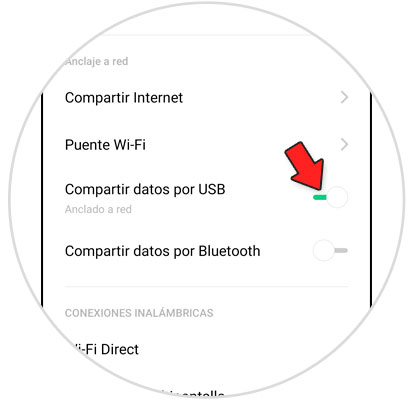
Among the available options, you will see the option of "Sharing data via USB". Activate the tab by sliding to the right and you're done.
3. How to connect Realme 5 Pro, Realme X2 or Realme X2 Pro to PC with USB
Once we have done one of the two previous actions, we can connect our Realme to the PC and manage the information from it as follows.
Note
The first thing you should do is connect your Realme to the PC using a USB cable
Step 1
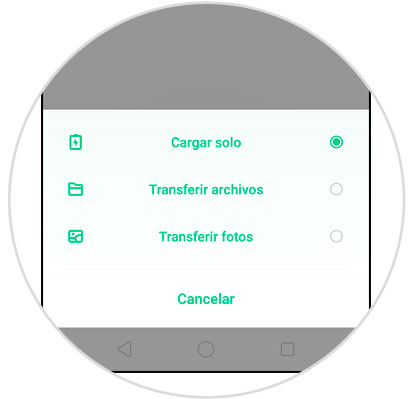
When connecting, on the terminal screen you will see the following. Click on the type of file you want to transfer from mobile to PC.
Step 2
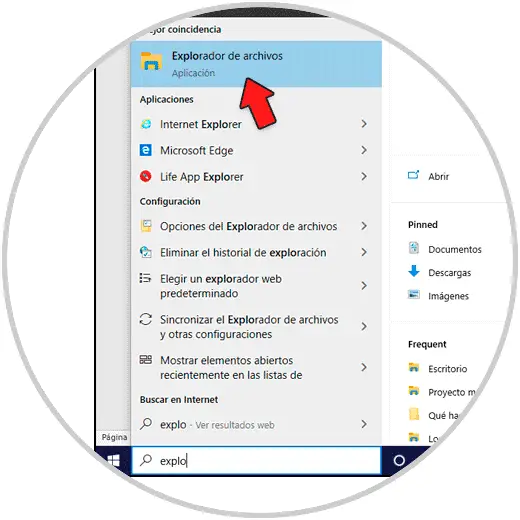
Now, in the search bar type the word "File Explorer" and click on it to access.
Step 3
Here, in the left column, select “This device†and the different options will appear on the right. Click on "Realme".
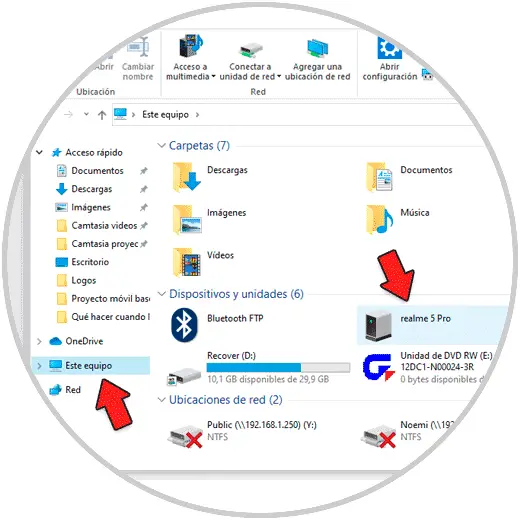
Step 4
Here, click on “Internal shared storage†to access.
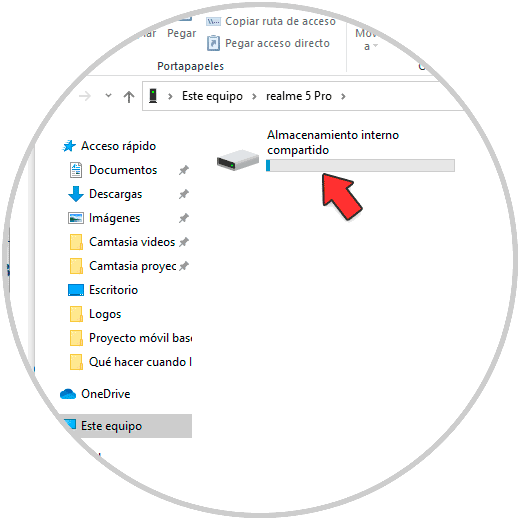
Step 5
That way you will have access to the folders inside the phone and you will be able to manage the information from your PC.
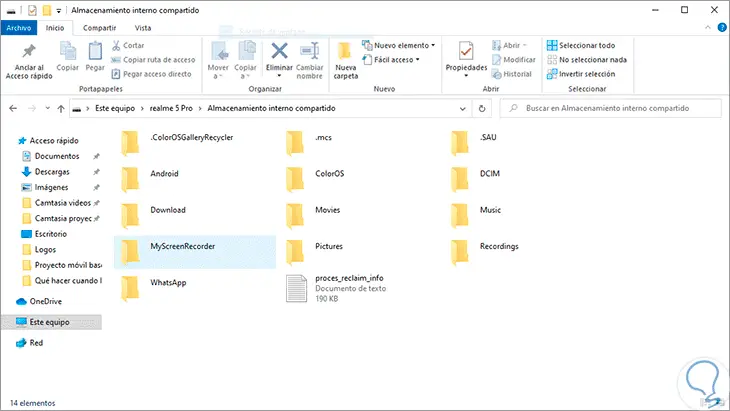
So you can solve the problem when your Realme does not connect to the Windows 10, 8, 7 PC.