With the rise of modern browsers, which integrate improvements in security and compatibility, little by little the browsers integrated into the operating systems are relegated, as is the case of Internet Explorer which is in its version 11 but has been replaced by Microsoft Edge because without a doubt that browsers like Google Chrome or Firefox Quantum are much more used than this..
Even so, Internet Explorer is still integrated in Windows 10 but a good security advice is to uninstall it from the system for security reasons and today TechnoWikis will explain how to block it or uninstall it in Windows 10. You can see these two options along with others such as managing the browser through computer settings or use parental control to prohibit access to this application.
We also leave you the video tutorial with which to follow the steps of this Internet Explorer block in Windows 10..
To keep up, remember to subscribe to our YouTube channel! SUBSCRIBE
1. Block Internet Explorer from the Windows 10 Firewall
The purpose of Firewall in Windows 10 is to allow or not access services and applications to the network in order to increase the security capabilities of the system
Step 1
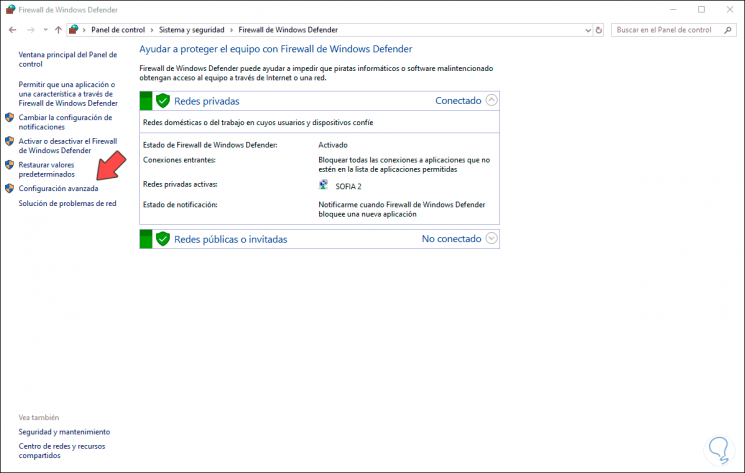
To block Internet Explorer from there we must go to the following route:
- Windows Defender Firewall
Step 2
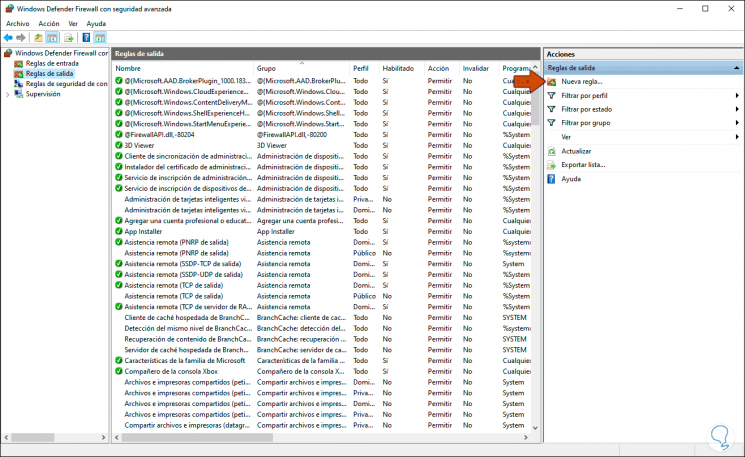
There we click on the “Advanced configuration†line and in the next window we select the “Outbound rules†section:
Step 3
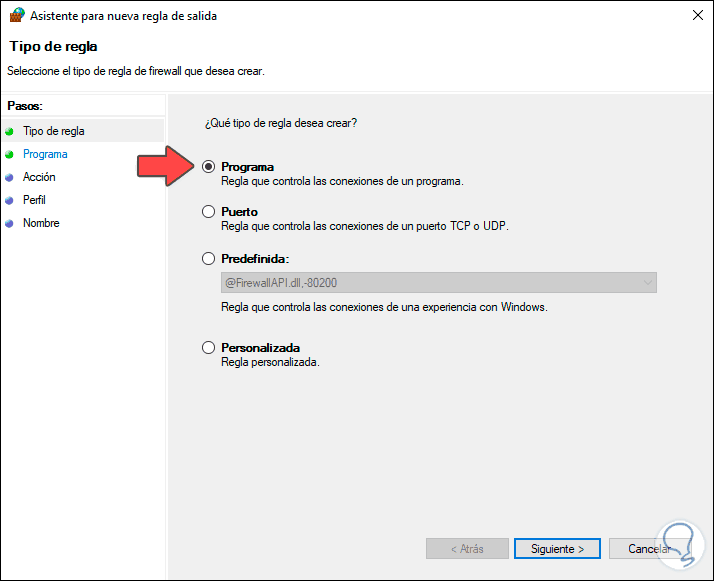
We click on the “New rule†line located in the right panel and in the deployed wizard we will select “Programâ€:
Step 4
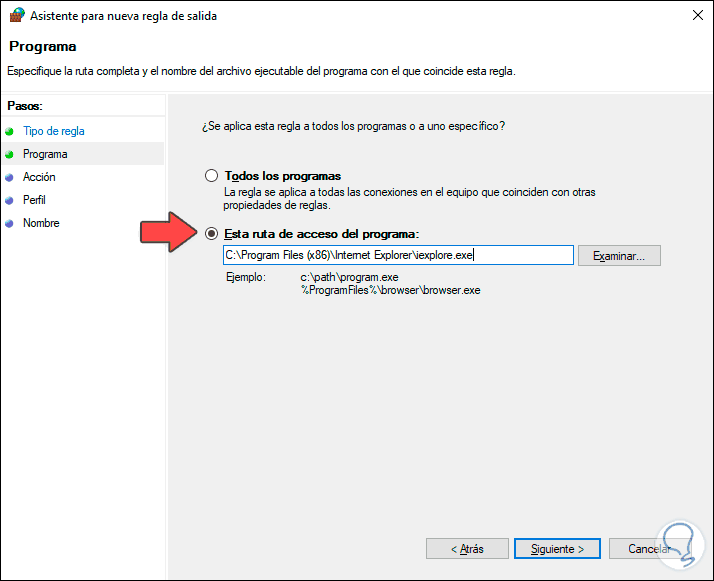
We click Next and in the field “This path to the program†we enter the following:
C: \ Program Files (x86) \ Internet Explorer \ iexplore.exe (If the system is 64 bits) C: \ Program Files \ Internet Explorer \ iexplore.exe (If the system is 32 bits)
Step 5
We click on Next and in the next window we define the action which will be “Block the connectionâ€:
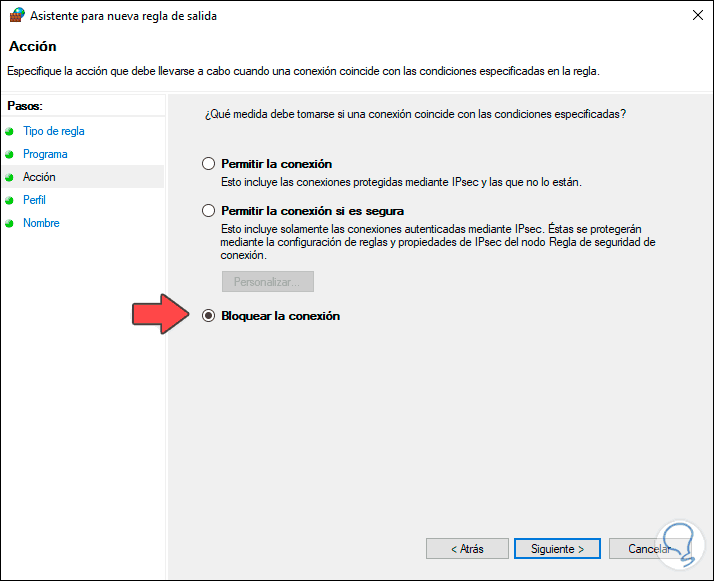
Step 6
After that we define in which environments the rule will apply:
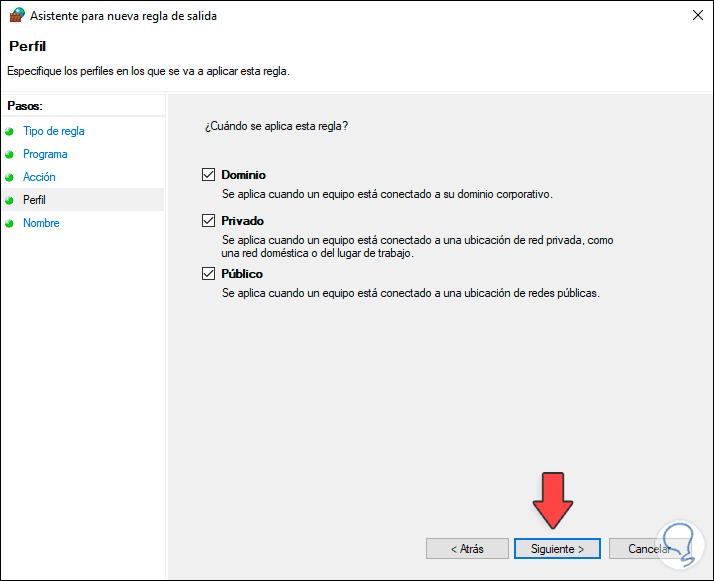
Step 7
We click Next and we will name the created rule:
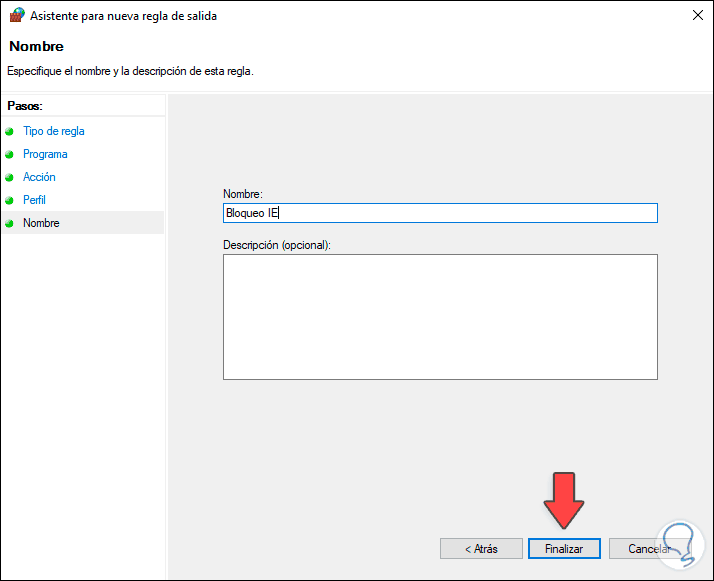
Step 8
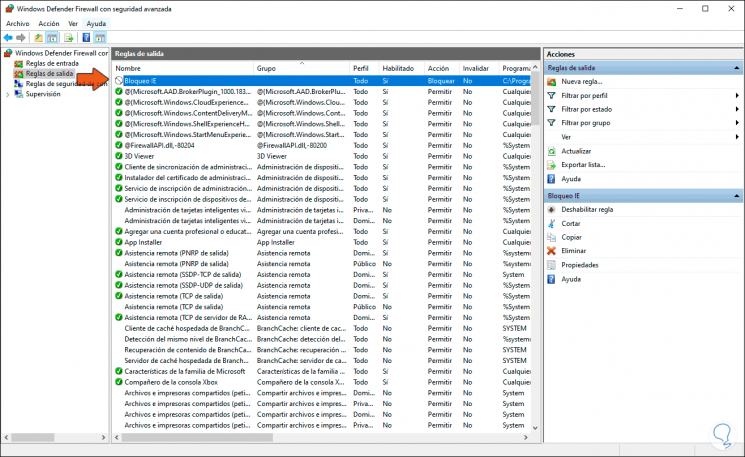
We click Finish to conclude the process and we will see our rule created. From there, Internet Explorer access has been blocked in Windows 10.
2. Block Internet Explorer using a false proxy in Windows 10
The Windows 10 operating system allows the use of a proxy server for Internet connection, remember that a proxy is a server that acts as an intermediary between the connections of a client computer and the destination server and in this process the packets will be filtered which are sent and received so that this process can apply in Windows 10 but it is possible that the connection of the other browsers is affected since these will take the same Internet Explorer connectivity rules.
Step 1
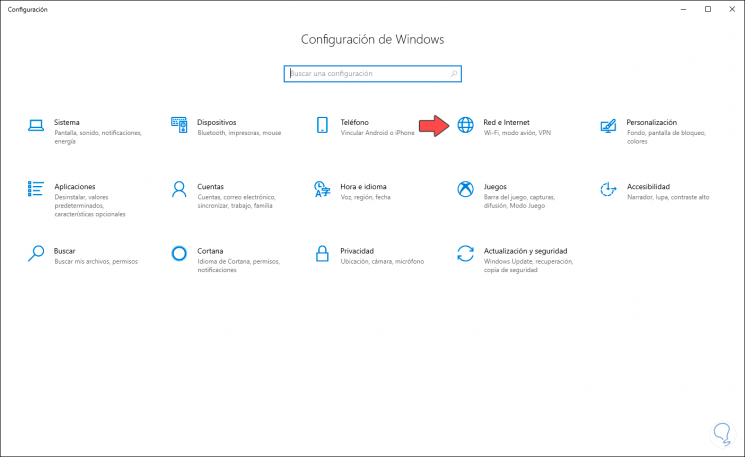
If you still choose this option, we must go to the Start / Settings menu:
Step 2
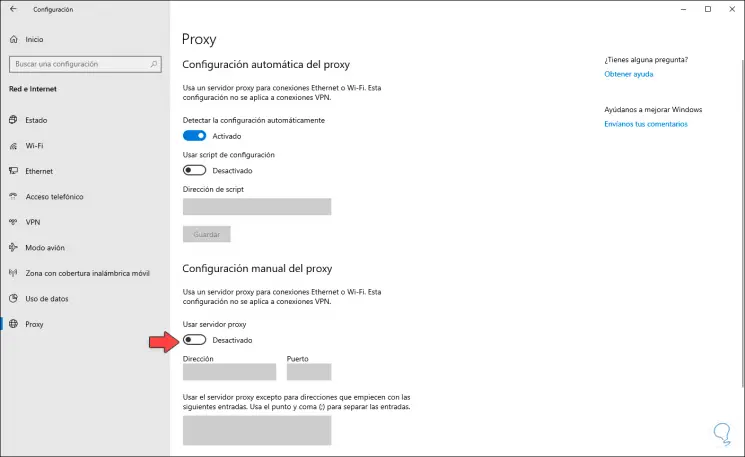
There we go to the “Network and Internet†category and in the new window we go to Proxy and the default values ​​will be as follows:
Step 3
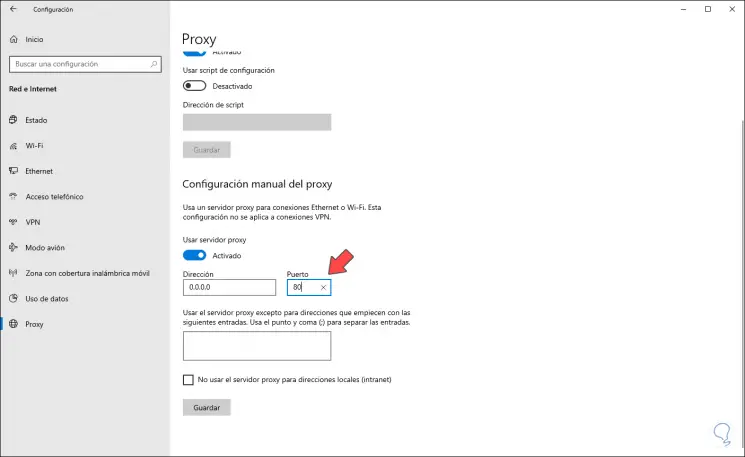
For your configuration, we activate the “Use proxy server†switch and enter the following. We click on Save to apply the changes.
- In the Address field we enter 0.0.0.0.
- In the Port field we will enter port 80
Step 4
To prevent other users from modifying this proxy rule we must edit the associated policy, for this we will combine the following keys and execute the “regedit†command
+ R
regedit
Step 5
In the displayed window we will go to the following route:
Step 6
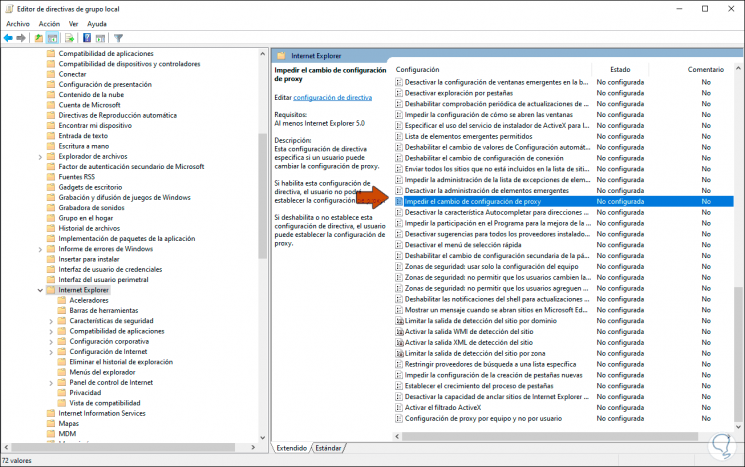
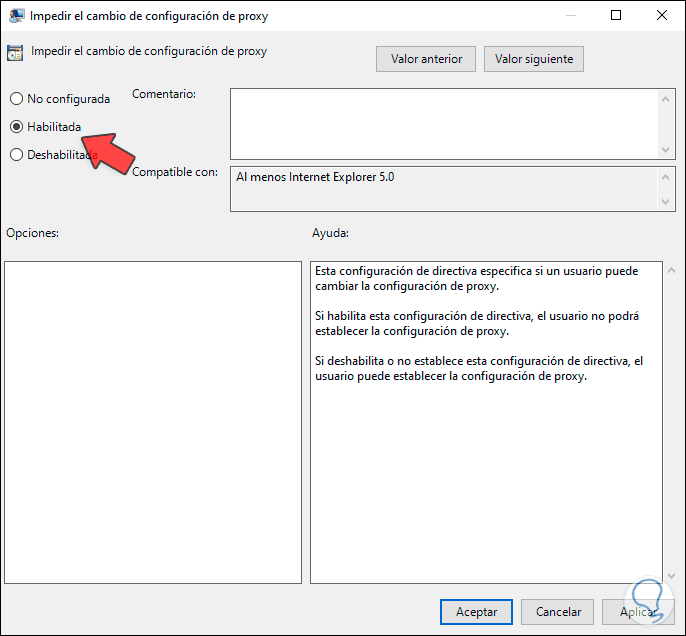
In the policies in the central panel we locate the policy called “Prevent the change of proxy settingsâ€:
Step 7
Double click on it and activate the “Enabled†box. We click Apply and Accept to save the changes.
Step 8
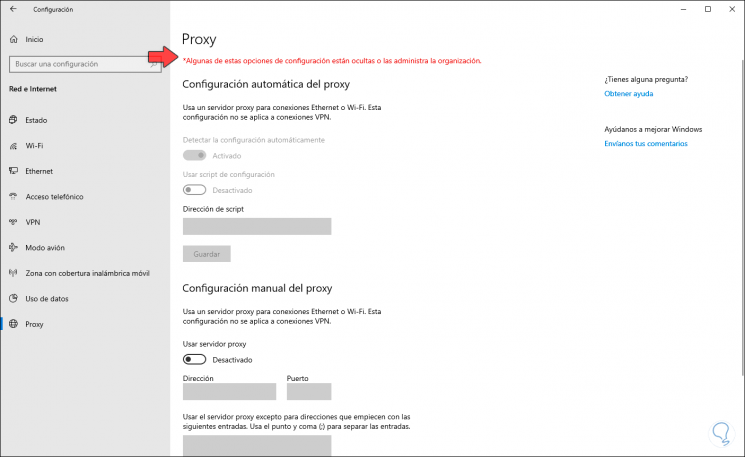
Thanks to this we will see the following message when accessing the proxy settings. This will avoid configuration changes.
3. How to use parental control in Windows 10
Windows 10 integrates parental control options which allow to significantly increase the security of the users of the system and through this we can add in the white and black list some websites through Internet Explorer and Edge.
Step 1
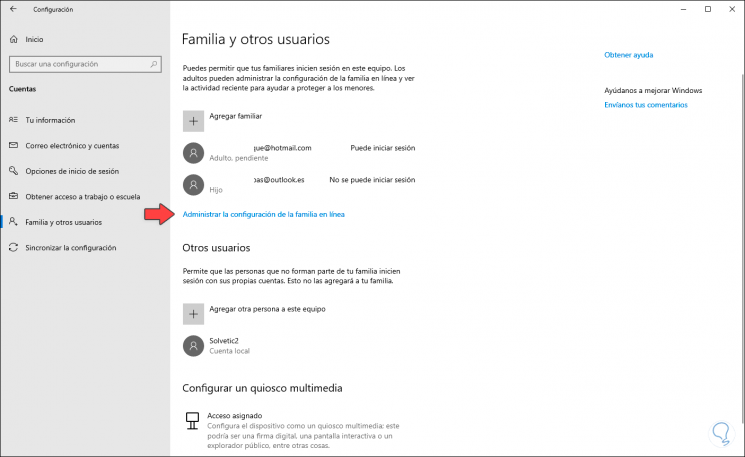
For this configuration we will go to the Start menu / Settings / Accounts and in the section "Family and other users" we will click on the link "Manage family settings online":
Step 2
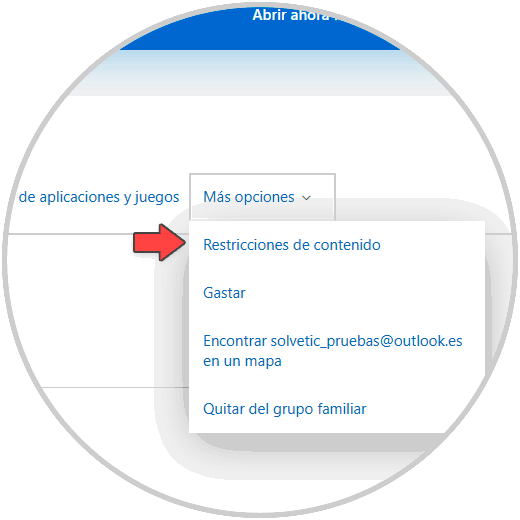
This will open a web link where we will click on “More options†and there we select “Content restrictionsâ€:
Step 3
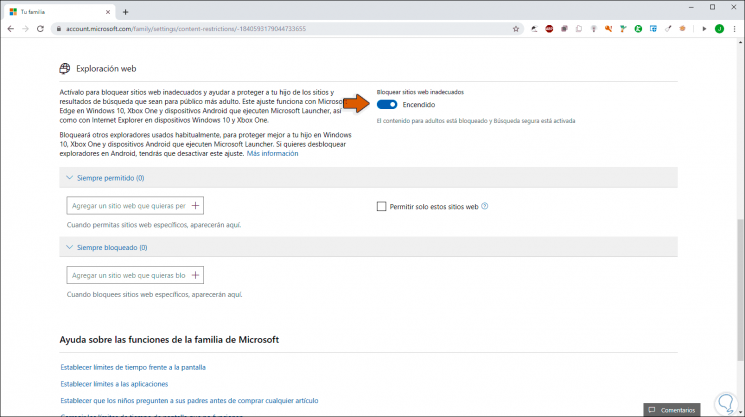
When redirected, we activate the “Block inappropriate websites†switch and then configure it as appropriate:
4. Disable Internet Explorer completely from the system in Windows 10
Step 1
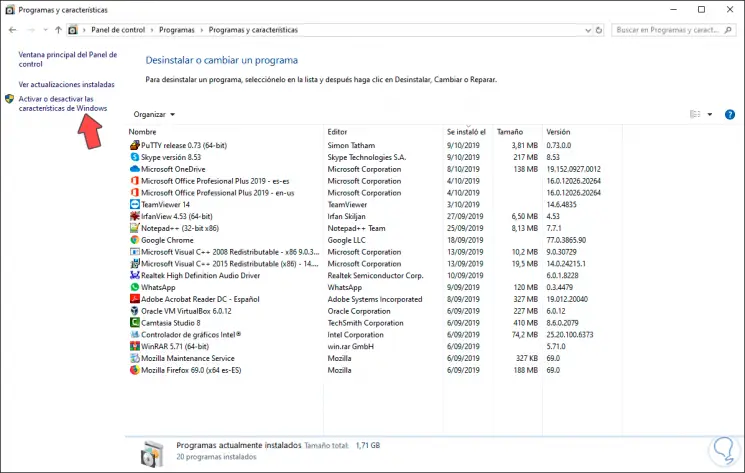
Finally we have the option to disable the Internet Explorer browser since this is integrated as a feature of the system, for this we will go to the following route:
- Programs and characteristics
Step 2
We click on "Activate or deactivate Windows features" and in the popup window we locate Internet Explorer 11 and deactivate its box, but first we will receive the following warning:
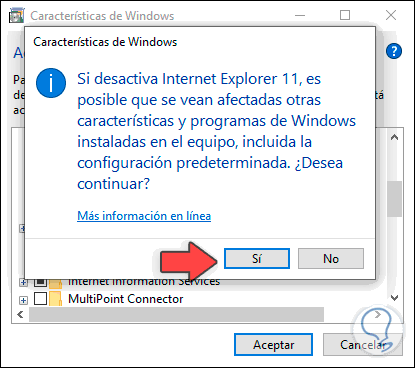
Step 3
We click Yes to confirm and we will see that the box is cleared:
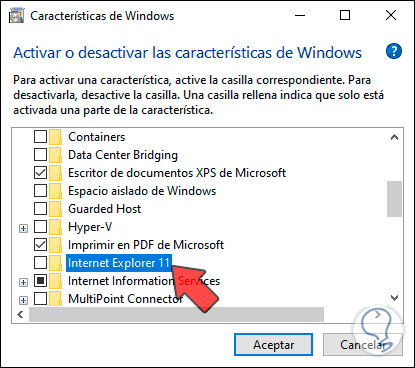
Step 4
We click on Accept to proceed with the process:
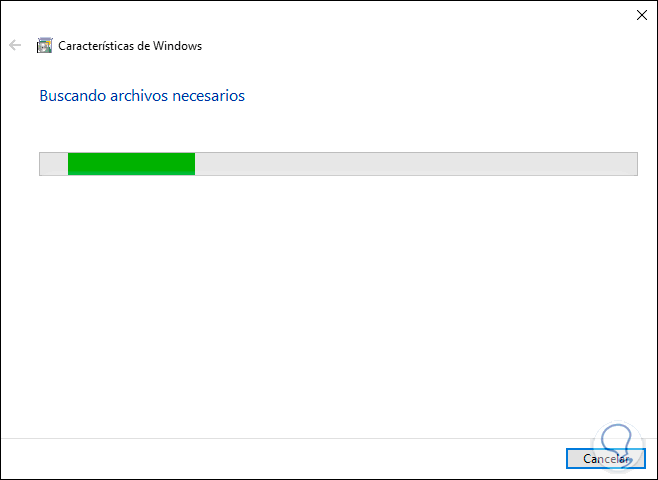
Step 5
The changes will apply:

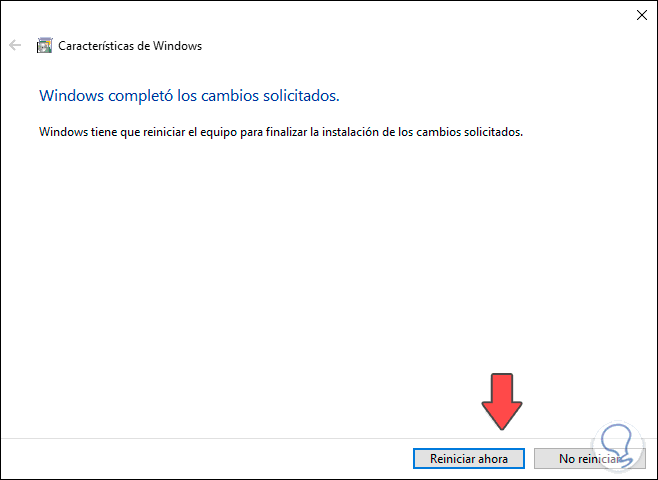
Step 6
Once this is over we must restart the system so that Internet Explorer is completely disabled:
We have seen the different ways to block Internet Explorer in Windows 10 in a fully functional and simple way.