Windows 10 is a system compatible with various types of devices and what was once just something for desktops or laptops, today we have it for a variety of devices such as tablets or convertible devices, where the Windows 10 operating system has the ability to Control the motion sensor to rotate the desktop to landscape mode or portrait mode automatically depending on the orientation of the screen we use..
Like any system or application, at times this type of rotation may behave unexpectedly or simply may not work and that is why today at TechnoWikis we will analyze some solutions to recover this functionality.
1. Disconnect peripherals to solve error auto rotate Windows 10 screen
This option applies when we use a 2-in-1 device such as the already known Surface Pro, which has accessories such as a removable keyboard or a dock, which can cause screen rotation problems.
We can check if any of these accessories cause rotation problems, by performing the following process:
Disconnect the keyboard, dock or external display of the equipment..
Change the orientation of the device to see if it rotates automatically and if so, we will confirm that indeed one of these accessories influences the problem.
2. Run the Sensor troubleshooter to fix error auto rotate Windows 10 screen
Microsoft offers us a free tool to solve the problems associated with the sensors which we can download for free in the following link:
Sensor
Once we download it we proceed with its execution and we will see the following:
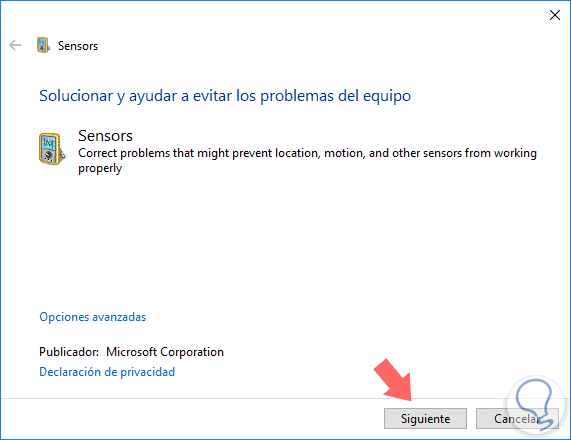
There we click on Next and we will wait for the utility to scan, detect and solve common problems with Windows 10 sensors, including the motion sensor. Once the process is finished, we can close the wizard and check the rotation of the screen..
3. Correction of automatic screen rotation to solve error auto rotate Windows 10 screen
This option applies using the Windows registry editor so we must create a backup in case of any error that may be generated.
Step 1
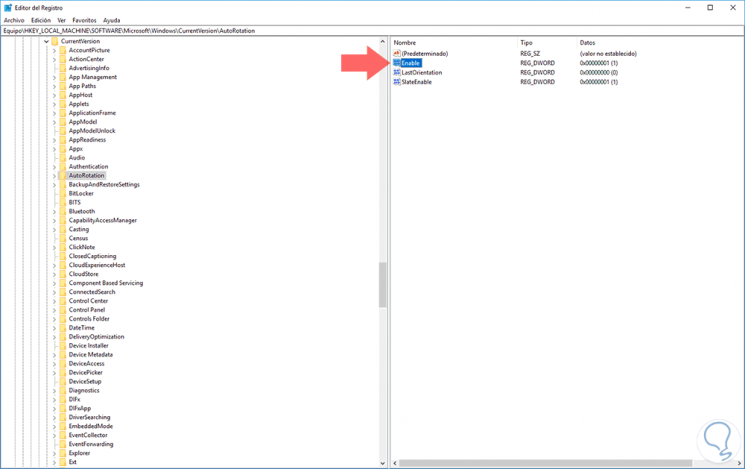
To access the registry editor of Windows 10 we will use the key combination
+ R and execute the regedit command and press Enter or OK. In the displayed window we will go to the following route:
HKEY_LOCAL_MACHINE \ SOFTWARE \ Microsoft \ Windows \ CurrentVersion \ AutoRotation
Step 2
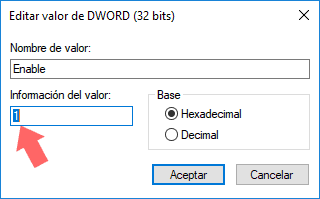
We will double click on the Enabled register and we must ensure that the value is 1:
Step 3
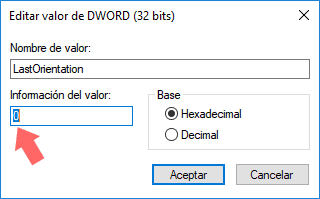
Now, we will double click on the LastOrientation record and make sure that the value is 0:
Step 4
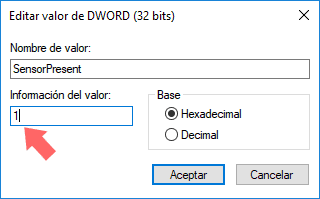
Now, we validate that the SensorPresent registry value is 1:
Step 5
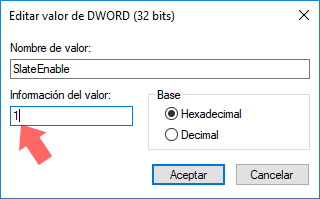
Finally, we confirm that the value of SlateEnable is 1:
Step 6
With these confirmed values ​​we can restart the system and verify that the screen rotates correctly.
Note
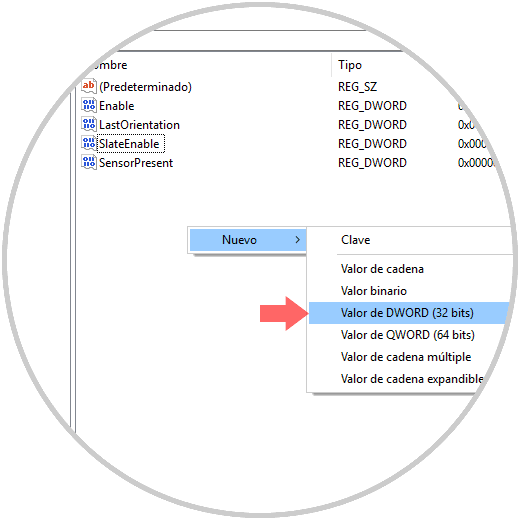
If any of the mentioned records is not available in the registry editor, we can create it by right clicking and selecting the option New / DWORD Value (32 bits)
4. Check screen settings to fix error auto rotate Windows 10 screen
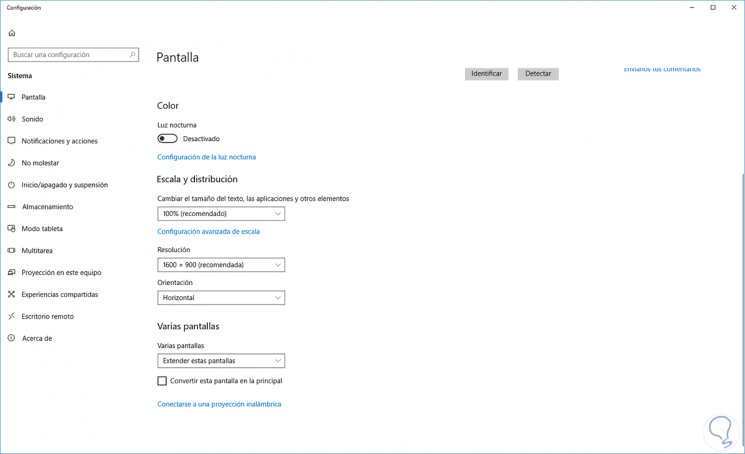
Another alternative is to validate the current configuration of the screen, for this, we go to the Start / Configuration / System menu and there we select Screen, in the new window we locate the scale and distribution section:
Note
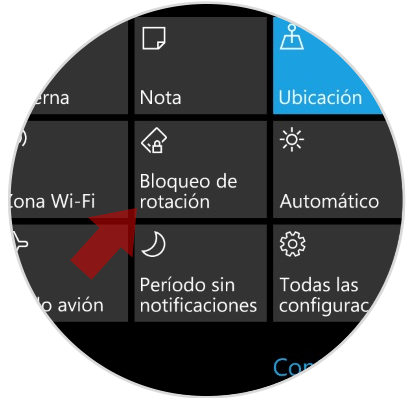
On some computers, we can check the authorization from the Windows 10 action center, just go there and validate that it is enabled or not.
There we can check the values ​​of the screen orientation.
We have seen practical solutions to allow the authorization of the screen in Windows 10 to run without problem.