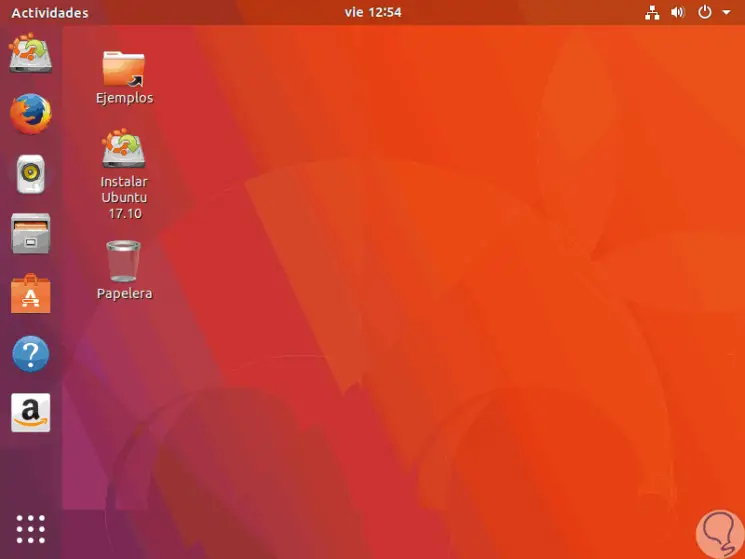
One of the tasks that as IT personnel we must constantly execute is the installation of operating systems either in new equipment or reinstallations in old equipment, we have seen how this process has evolved proportionally to the IT boom to such an extent that what previously involved loading with several CDs or DVDs, it is now possible to use a small USB stick to install any operating system from there which helps reduce space and sometimes time..
Today at TechnoWikis we will analyze how we can create a bootable USB media with one of the most popular Linux distributions for its versatility and functionality: Ubuntu.
Previous requirements
For this the following will be necessary:
- Ubuntu 17 ISO image which we can download at the following link:
Ubuntu
- Now, we are going to download UNetbootin which is a free utility that will allow us to create the bootable USB with Ubuntu , this can be downloaded in the following link:
UNetbootin
- Finally, we must have a USB memory of at least 4 GB capacity.
1. Use UNetbootin in Windows 10, 8, 7
Step 1
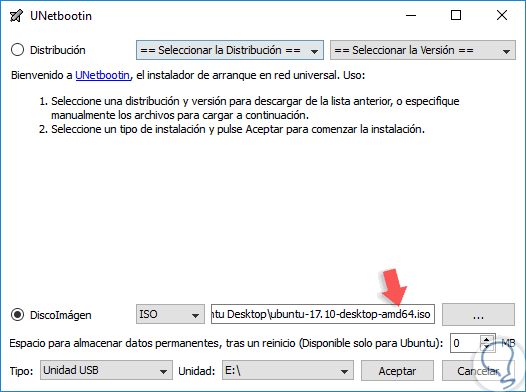
This tool is portable, so no installation on the hard disk is required, once we run it, this will be your environment:
Step 2
There we have two options:
Distribution
Through this action, it will be possible to select the desired distribution, from more than 15 options, and define the version to be used (32 or 64 bits).
Disk Image
By activating this box we can use the Ubuntu ISO image that we have previously downloaded.
Step 3
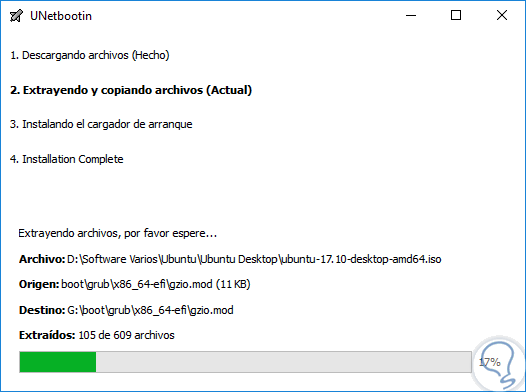
At the bottom we will select the USB media connected to the device and click on OK to start the process of creating the bootable media:
Step 4
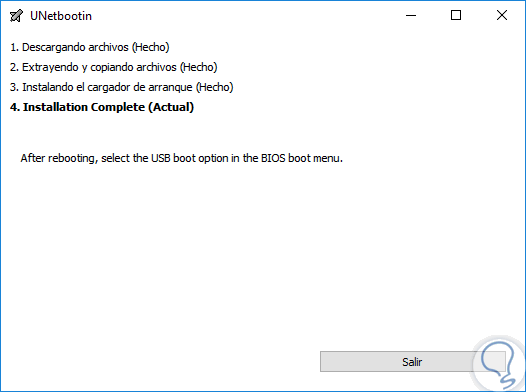
Once the process is finished we will see the following. At this point we have configured our USB to run Ubuntu 17.10. There we click on Exit to close the wizard.
2. Add persistence to bootable USB in Windows 10, 8, 7
It is already possible to run the boot from the USB to install Ubuntu 17 but first it will be necessary to create a "casper-rw" file, which allows the portable version of Ubuntu 17 that we have created previously, has the ability to store files and keep them.
To achieve this, we will download a tool called PDL Casper-RW Creator for Windows systems, which is responsible for creating a persistence file that works completely with the USB media..
Step 1
This application can be downloaded for free at the following link.
PDL Casper-RW Creator
Step 2
This utility is portable and when we execute it we will configure the following:
- Drive letter associated with the USB media.
- Unfold the sliding button to the maximum, this option represents the amount of storage space that we will use for the persistence file.
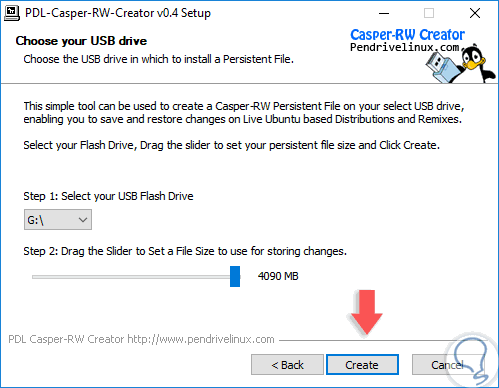
Step 3
Click on the "Create" button and the persistence file creation process will begin:
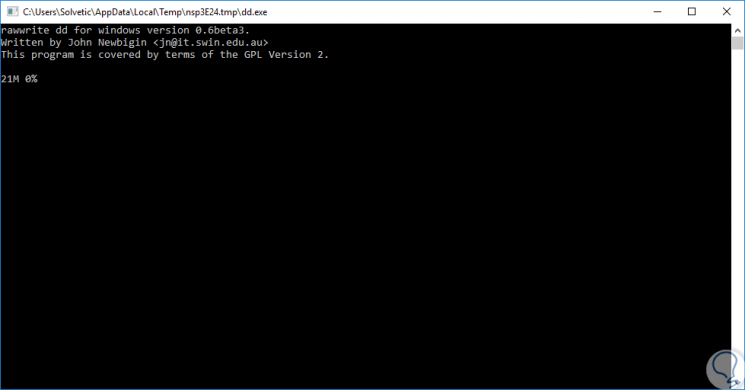
Step 4
Then we will see that the persistent file creation process continues:
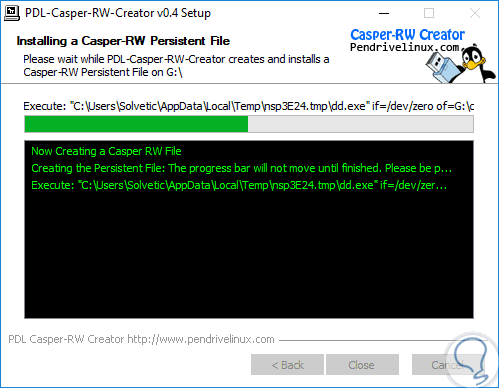
Step 5
Once this process is finished we will see the following:
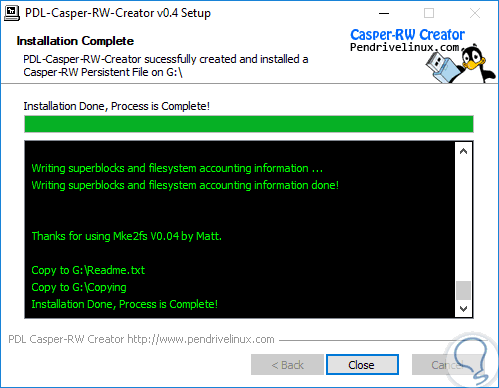
Step 6
Click on Close to exit the assistant.
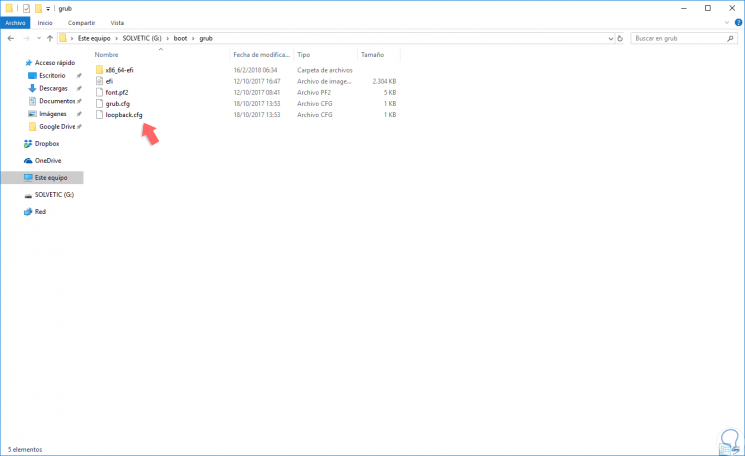
Now, we will access the unit where the Ubuntu 17 bootable was created and go to the “boot / grub†directory:
Step 7
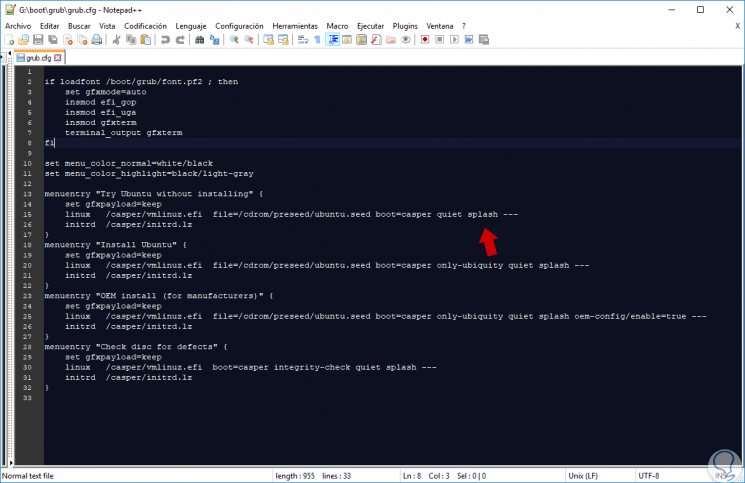
We will open this .cfg file with any text editor and see the following:
Step 8
There we must locate the following line:
linux /casper/vmlinuz.efi file = / cdrom / preseed / ubuntu.seed boot = casper quiet splash
Step 9
We will modify the term splash by persistent:
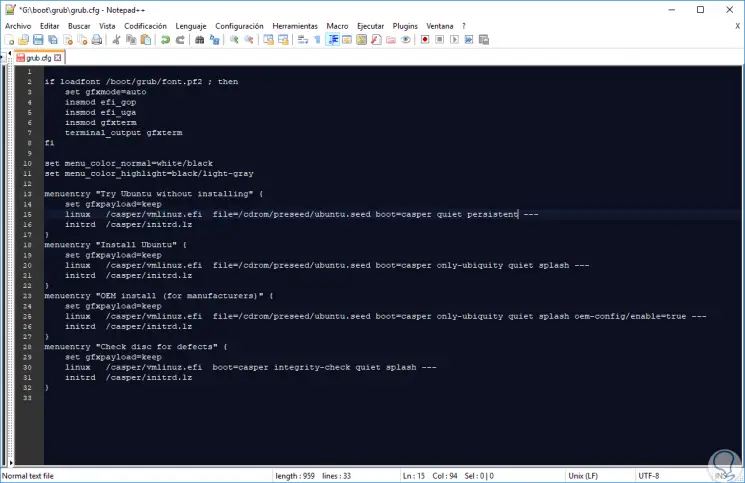
Step 10
We save the changes and in this way we have created a persistent bootable USB medium for Ubuntu 17.10.
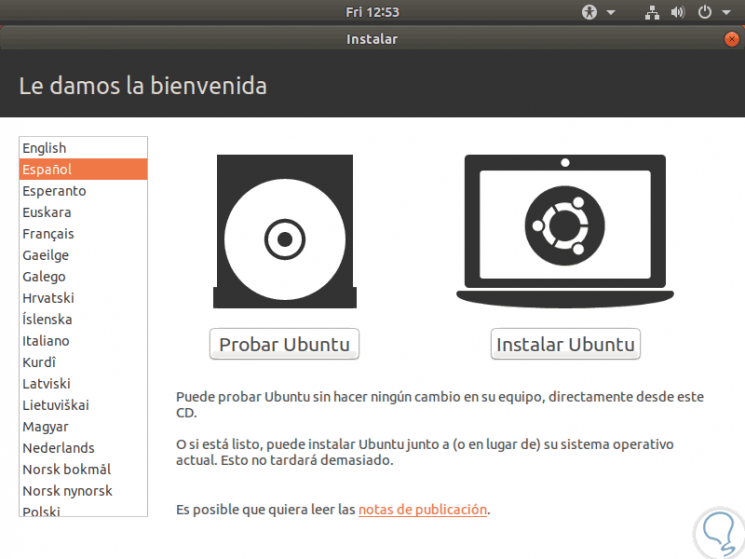
Finally, when we configure the device to boot from USB through BIOS or UEFI, we can see the following:
Step 11
There we can install Ubuntu on the local disk or simply test it to see its performance before installing it.
