The constant threat we find on the network makes us vulnerable to all our sensitive information being in danger of being stolen or edited without authorization..
We have seen news, almost, daily, where the ransomware is covering any type of system seriously affecting the integrity of the users.
What many do not know, is that Windows 10, in its build 1709, has an integrated tool that will help us to be one step ahead of this type of threats and thus be calm when we use Windows 10 for the management of our information ..
Today in TechnoWikis we will analyze this integrated option of Windows 10, and for this we will use the function “Access to the controlled folder†which has been designed to monitor the applications and take charge of reviewing the applications that have the power to make changes to the saved files there.
To keep up, remember to subscribe to our YouTube channel! SUBSCRIBE
1. Activate Ransomware protection with the Windows 10 controlled folder
Step 1
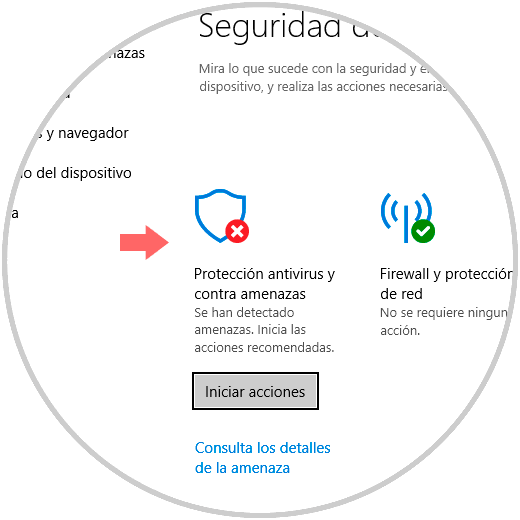
For this, we will go to the Windows Defender security center and see the following:
Step 2
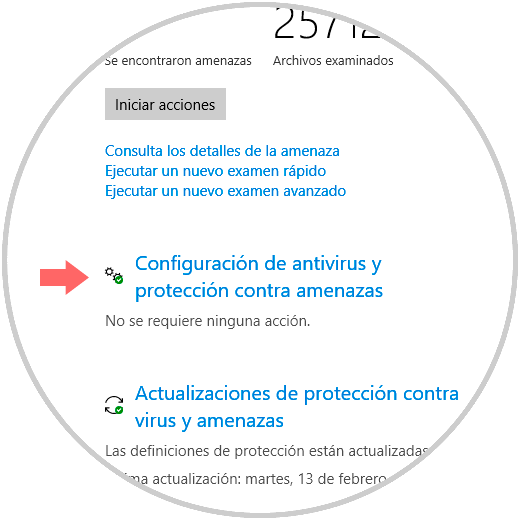
There we click on the "Anti-virus and threat protection" section and there we will see the following:
Step 3
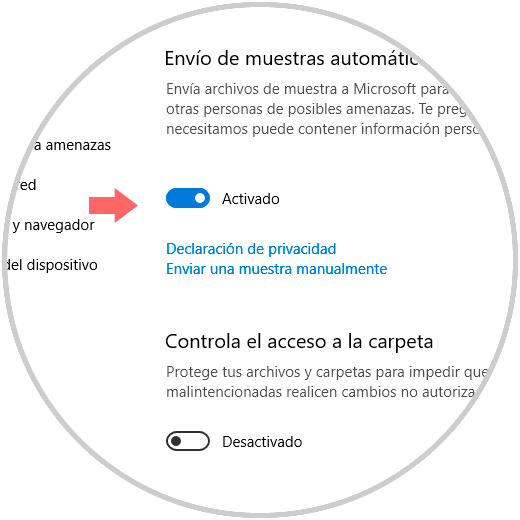
Click on the "Antivirus and threat protection settings" line and the following will be displayed:
Step 4
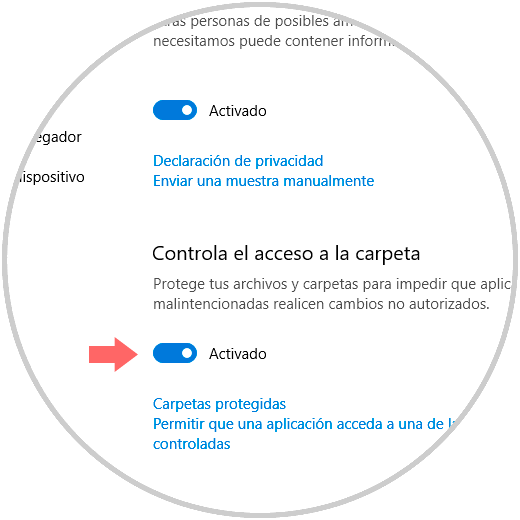
We must press on the switch to activate this option and once we do we will see the following:
Step 5
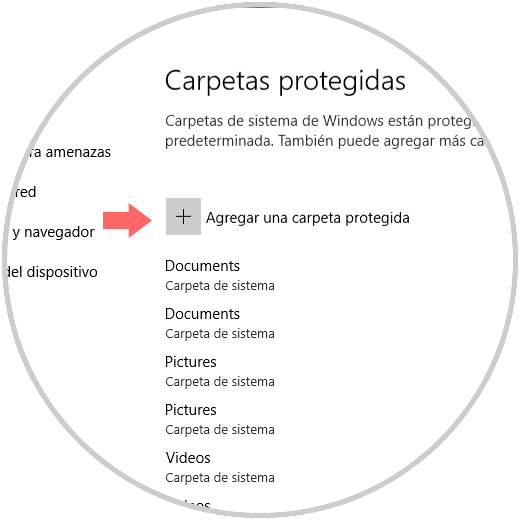
Click on the “Protected folders†line and we will see the following:
Step 6
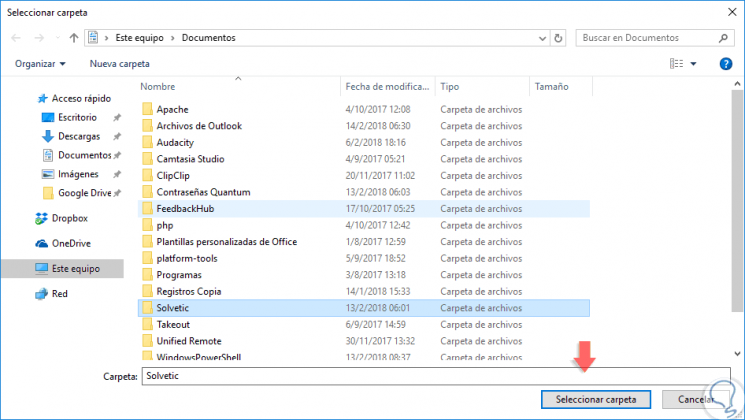
There we click on the “Add a protected folder†button and in the window we will select the folder to be protected:
Step 7
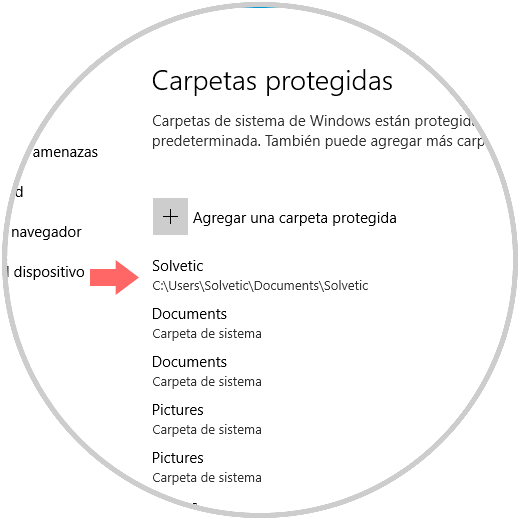
Click on "Select folder" and we will see that it is added correctly:
Step 8
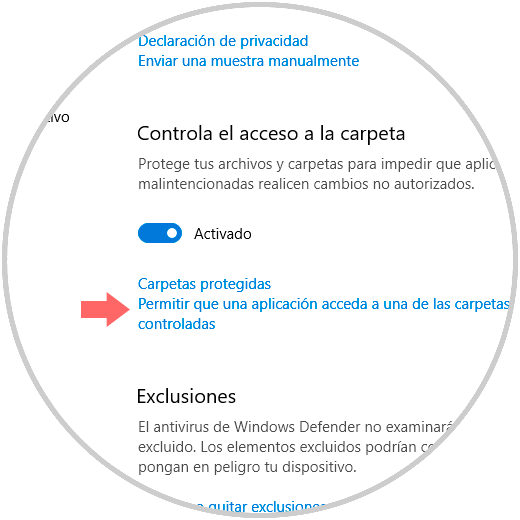
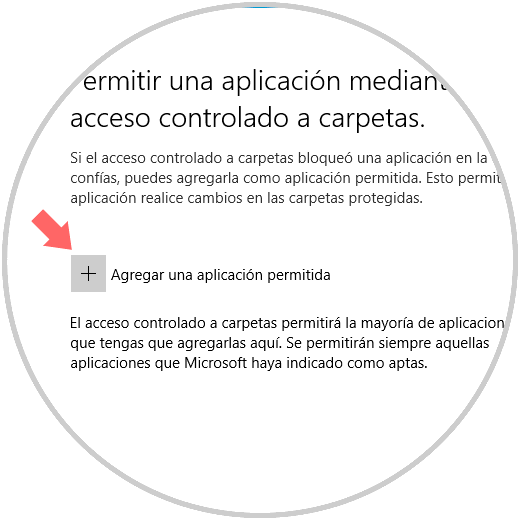
Now, most of the applications have access to the files in the protected folders, but it is possible to allow an unknown program to access these folders, to do this we go back and click on the line “Allow an application to access one of the protected folders â€:
Step 9
There we will see the following. Click on "Add an allowed application" and define which application will have that permission. In this way we will prevent any type of ransomware from affecting our data.
Step 10
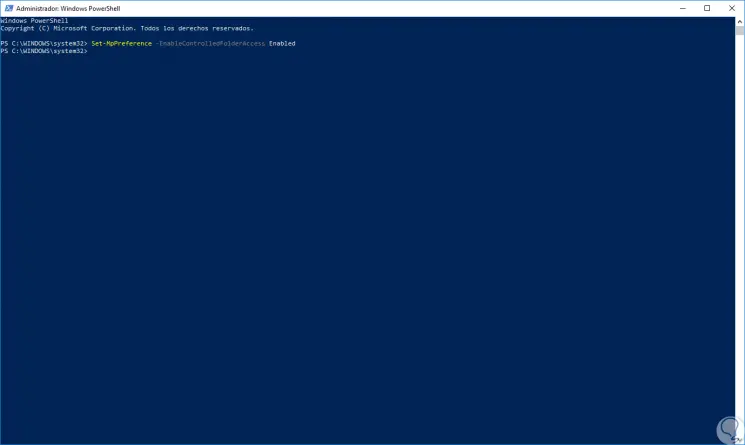
As an alternative method we can activate these controlled folders from Windows PowerShell, for this, we must access as administrators and run the following line:
Set-MpPreference -EnableControlledFolderAccess Enabled
Step 11
Then, to add folders to be controlled, we will execute the following syntax. In this way we can make use of the integrated Windows 10 tools to increase the level of protection.
Add-MpPreference -ControlledFolderAccessProtectedFolders “<folder>â€
2. Activate Ransomware protection with Acronis in Windows 10
Step 1
As another option to add protection against Ransomware is to use the free Acronis application which can be downloaded at the following link:
Acronis
Step 2
Some of its functions are:
- Block both known and new Ransomware attacks that arise daily.
- It has the ability to access the local cache to restore data that has been affected.
- We can create backup copies in the cloud by updating the files automatically every 15 minutes.
- We have 5 GB of free storage.
- Compatible with 32 and 64 bit architectures.
Step 3
Once downloaded, we proceed to its installation by double clicking on the executable and the following will be displayed:

Step 4
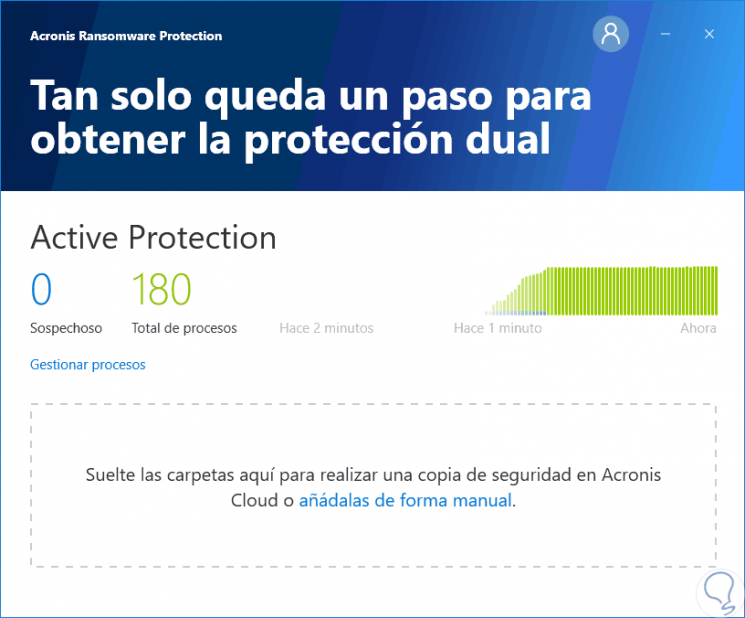
There we click on “Install†to start the respective process. Once installed we proceed to its execution and we will see the following, but it will be necessary to create an account before use:
Step 5
There we can add the desired folders:
Step 6
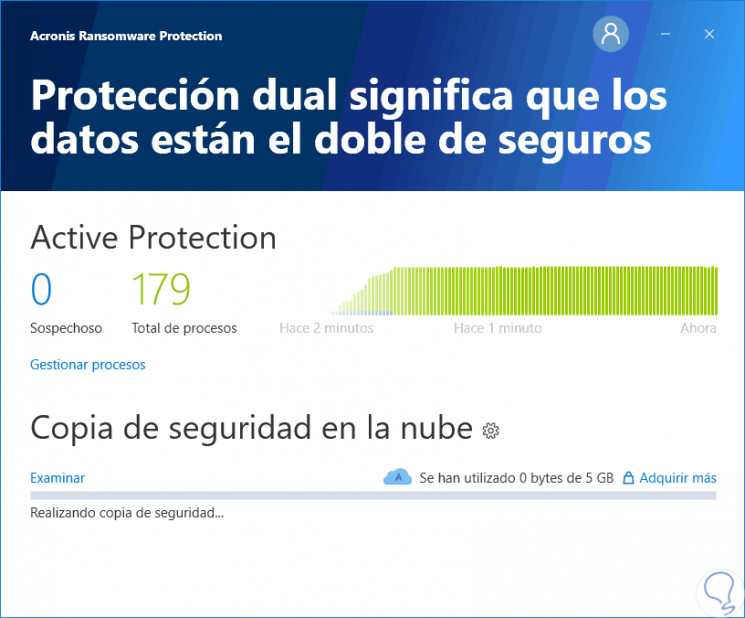
If we click on the "Manage processes" button we can add new applications as we do in the Windows 10 controlled folders:
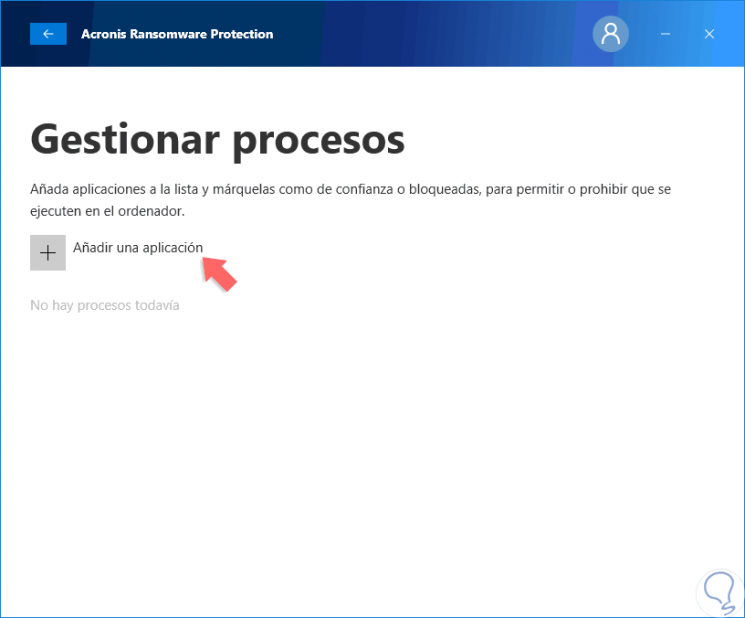
Thus, Acronis is an additional utility with which we will have more levels of security against Ransomware..